Eduard 1/48 scale
Supermarine Spitfire Mk.VIII
Part One - Construction
by Brett Green
 |
Supermarine Spitfire Mk.VIII |

Eduard's 1/48 scale Spitfire Mk.VIII is available online from Squadron
S
u m m a r y |
| Catalogue Number: |
Eduard Kit No. 8284 - Spitfire Mk.VIII |
| Scale: |
1/48 |
| Contents and Media: |
207 parts in grey coloured plastic; 17 parts in clear; colour photo-etched fret; self-adhesive die-cut masking sheet; markings for six aircraft |
| Price: |
USD$42.46 plus shipping,
available online from Eduard
USD$39.96 plus shipping available online from Squadron |
| Review Type: |
FirstLook |
| Advantages: |
Accurate fuselage and wing dimensions; very high level of detail; outstanding surface
features including crisply recessed panels and subtle rivet lines where
appropriate; brand new fuselage and wings depicting subtle changes to the Mk.VIII; optional HF pointed wing tips; separate parts for closed and open canopy. |
| Disadvantages: |
|
| Conclusion: |
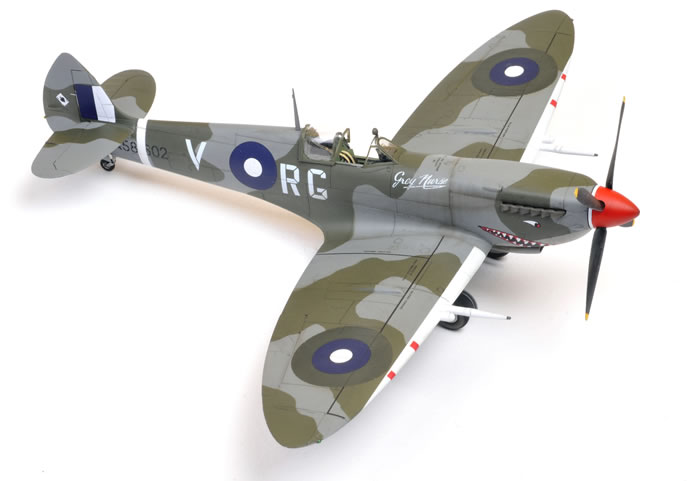
Eduard's Mk.IX kits were the best Spitfires in 1/48 scale upon their release, and they still are today. This new Spitfire Mk.VIII is equally good. Eduard has gone the whole nine yards with their brand new fuselage and wings depicting the unique attributes of this later variant.
Highly Recommended. |
The Kit
 Eduard released their 1/48 scale Spitfire Mk.VIII in its ProfiPACK series during March 2015. Eduard released their 1/48 scale Spitfire Mk.VIII in its ProfiPACK series during March 2015.
The ProfiPACK series offers an affordable price for one complete kit plus photo-etched parts and die-cut masks.
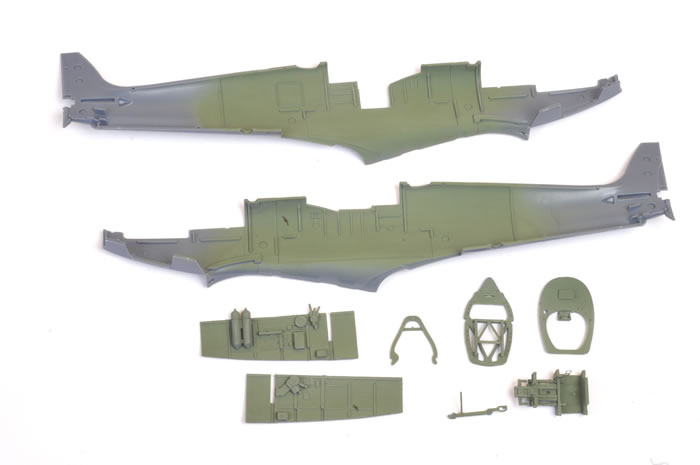
Eduard's 1/48 scale Spitfire Mk.VIII comprises 207 parts in grey coloured plastic, 17 parts in clear, colour photo-etched fret, self-adhesive die-cut masking sheet and markings for six aircraft.
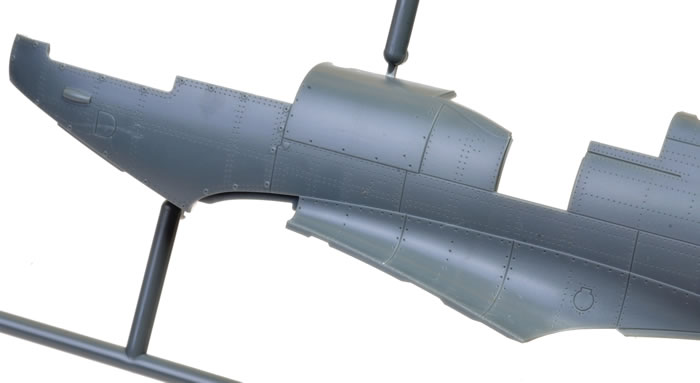
Compared to the earlier Mk.IX releases, this kit features an all-new wing and fuselage. No jigsaw inserts and hard-to-fill joins here! The new fuselage has the tail wheel opening and well moulded in place.
It is also important to note that the wing is not the same as Eduard's previous Mk.IX wings. This all-new wing accurately depicts the short span ailerons, the filler ports and the leading-edge wet wing panel lines that were specific to the Mk.VIII. This is really nice attention to detail by Eduard.

The late-style narrow gun bulges are moulded direct to the top wing halves, and the appropriate shell ejector ports are similarly moulded in place on the bottom of the wings.
HF pointed wing tips are also supplied for the first time.
Getting Started
Before you start working on the kit, I strongly recommend that you thoroughly acquaint yourself with the instructions. If you are using any of the resin or photo-etched updates, check those instructions carefully before you start too.
As with any modelling project, taking your time and constantly test-fitting are good policies. Make sure that you are confident about the orientation of parts well before you start applying glue.
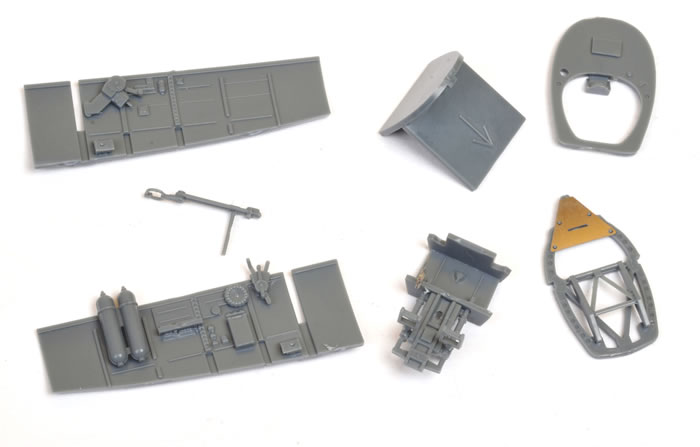
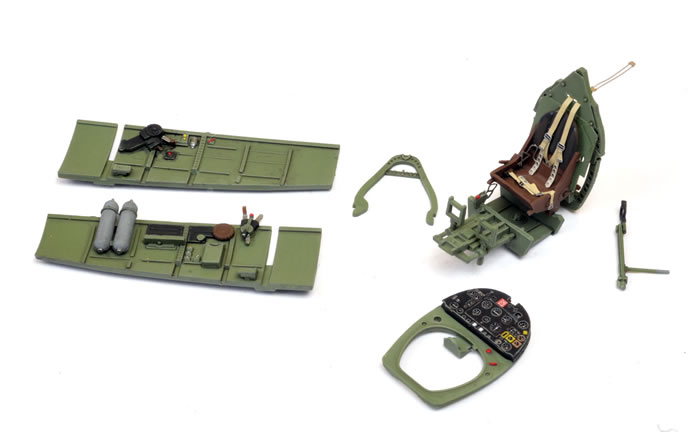
When I built Eduard’s debut Spitfire Mk.IXc Late Version two years ago, I used some of the excellent Brassin accessories including the beautifully detailed cockpit. For a bit of contrast, I therefore decided to build this one straight from the box.
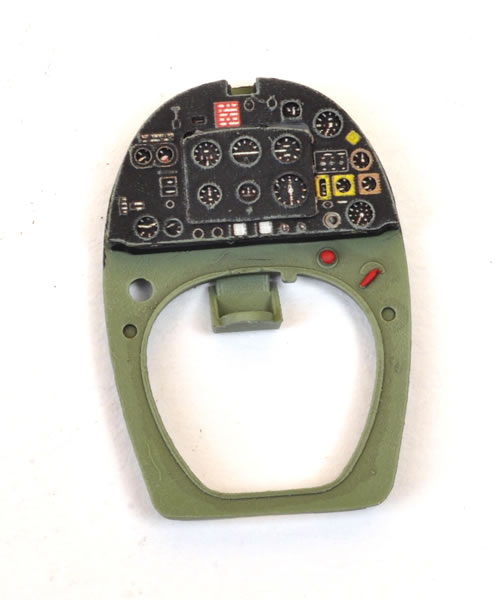
Fortunately, this is a pretty impressive box, including colour photo-etched harness and instrument panel plus Cartograf decals.
Painting the Cockpit
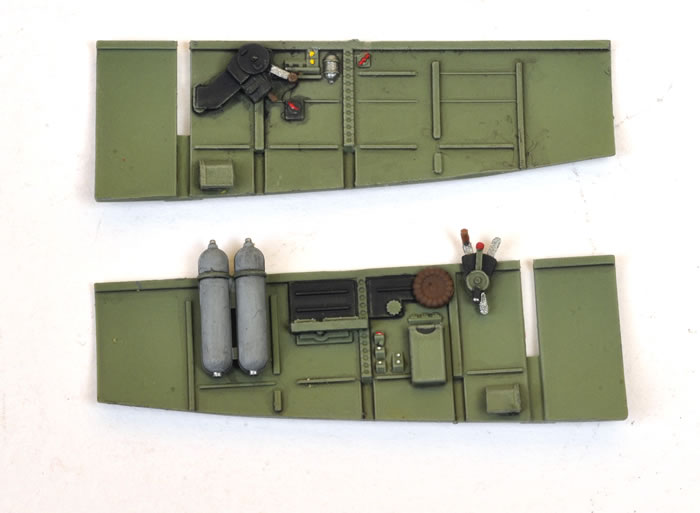
Detail parts were attached to the sidewalls and the floor - including the various bulkheads but not the seat – before each sub-assembly was painted using my Testor's Aztek A470 airbrush.
The cockpit sub-assemblies were airbrushed with Tamiya acrylic XF-71 Cockpit Green.
I dry-brushed a mix of Tamiya Cockpit Green and White onto the cockpit parts.. The paint was laid off the stiff brush by wiping it on paper, then the almost dry bristles were brushed along the high points of the cockpit sub-assemblies.
I applied a wash consisting of Future Floor Polish, water and a few drops each of Tamiya XF-1 Flat Black and XF-64 Red Brown to all the cockpit components. This dries to a subtle darkening of recesses and natural shadow areas.
Details on the sidewalls and floor were now picked out with Vallejo acrylic paints and a fine brush - nothing fancy.
My Optivisor was very helpful for seeing all the detail parts close-up during painting.
Getting It Together
The three layers of the colour photo-etched instrument panel were dry-brushed lightly with a medium grey colour while the parts were still on the fret to highlight the bezels and add a bit of depth.
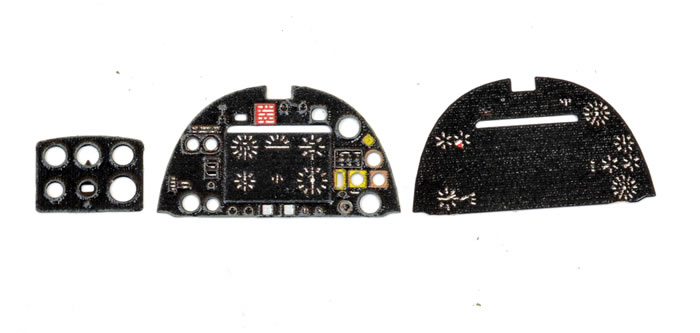
The panel was then assembled using Gator’s Grip Acrylic Glue and coated with Testor’s Model Master Flat Lacquer.
When everything had set, the instrument panel was glued to the bulkhead.
The resin seat was painted Tamiya XF-64 Red Brown to represent the synthetic Bakelite, then the leather backrest brush-painted with Vallejo acrylics. The lap harness straps were glued in place now. Next, the photo-etched top seat mounts were pushed through the pilot’s armour and the seat was glued to the bulkhead (which had already been glued to the cockpit floor).
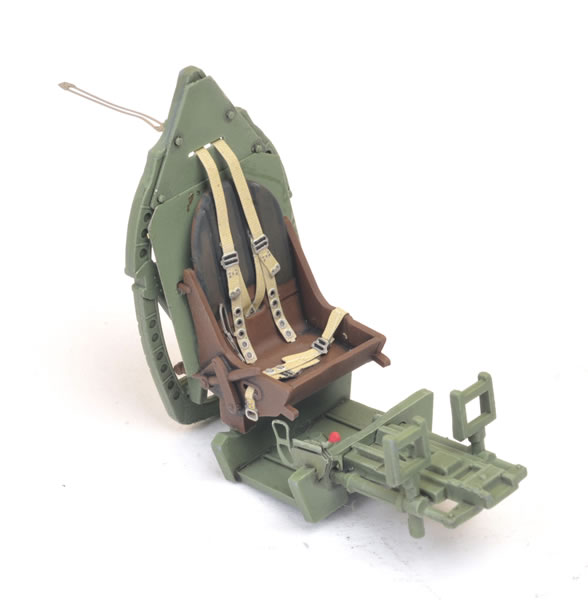
The shoulder harness was now carefully threaded through the hole near the bottom of the backrest and the slot in the top of the bulkhead, then secured to the seat with a few spots of super glue.
I flat-coated the rest of the cockpit parts at this stage.
Not So Squeezy
The fit of all the parts so far was extraordinarily good.
The bottom of the sidewalls and the floor are keyed together precisely. The join between the sidewalls and both sides of the floor is a press fit.
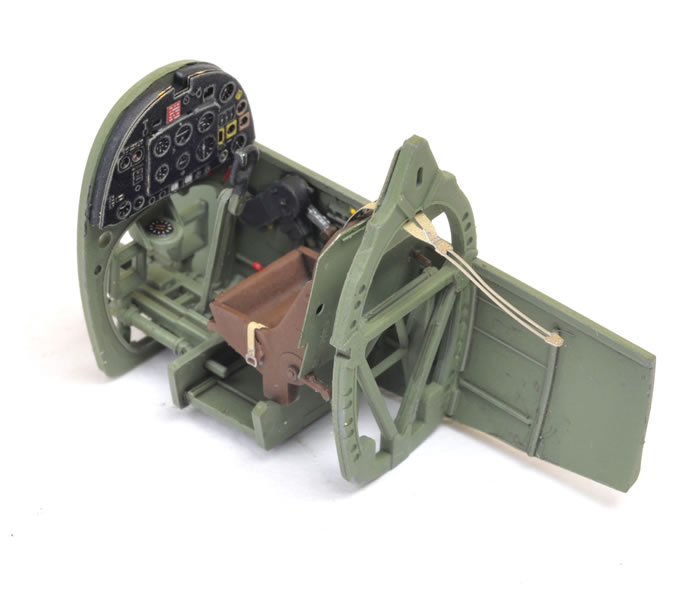
With the sidewalls pressed in place without glue, I test-fitted the entire tub between the fuselage halves. The fuselage came together without a problem.
When I glued the sidewalls to the floor and the bulkheads, the edges of the instrument panel slid neatly into the slots on both sidewalls.
Balance of Assembly
Basic construction of the airframe was complete less than four hours after sealing the fuselage halves.
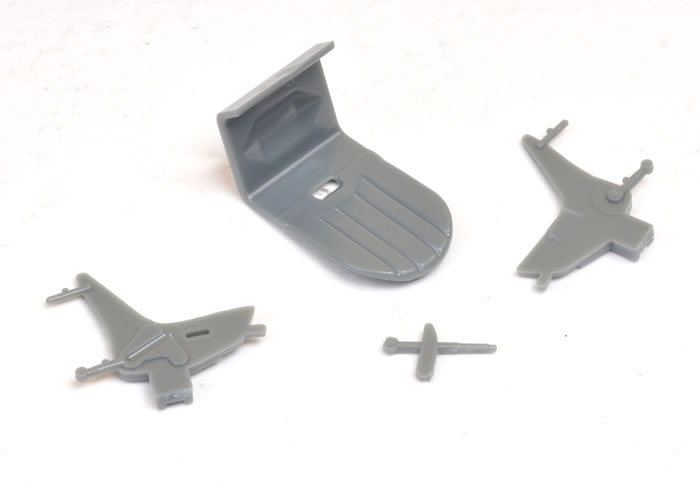
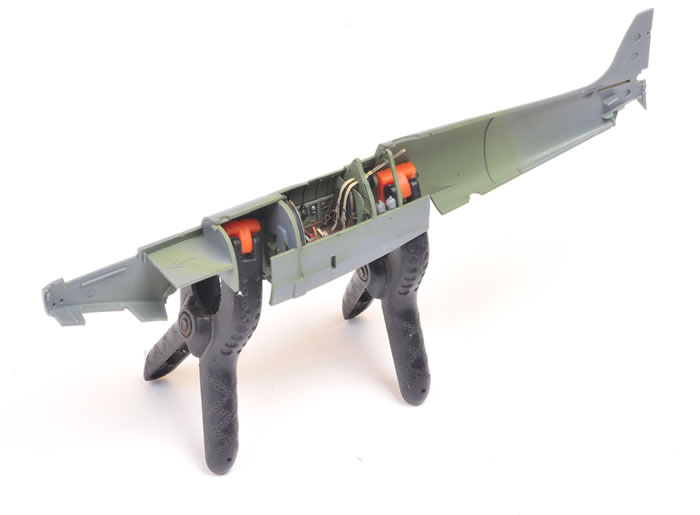
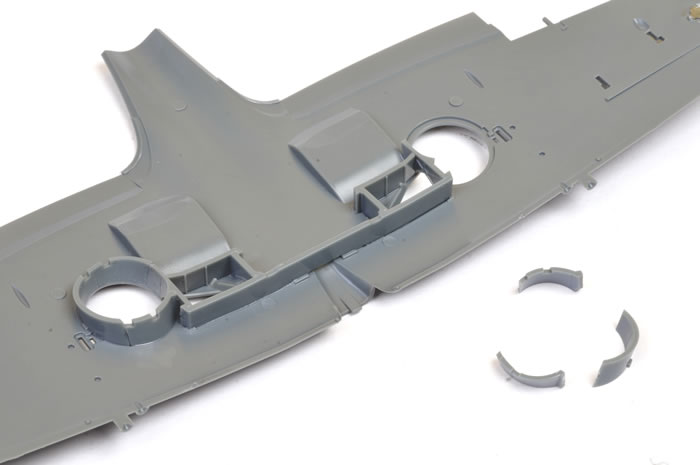
A few of the sub-assemblies look a little daunting, such as the 13-piece wing spar and wheel well sidewalls. You do need to keep careful track of the part numbers and their alignment, but everything fits perfectly.
The same may be said of the slightly baffling but ultimately very impressive exhausts and their mounts. Test fit these several times, refer to the instructions as often as you need to, and you will eventually figure it out. Note that this is not the BRASSIN resin upgrade, but the plastic kit parts – lovely stuff.
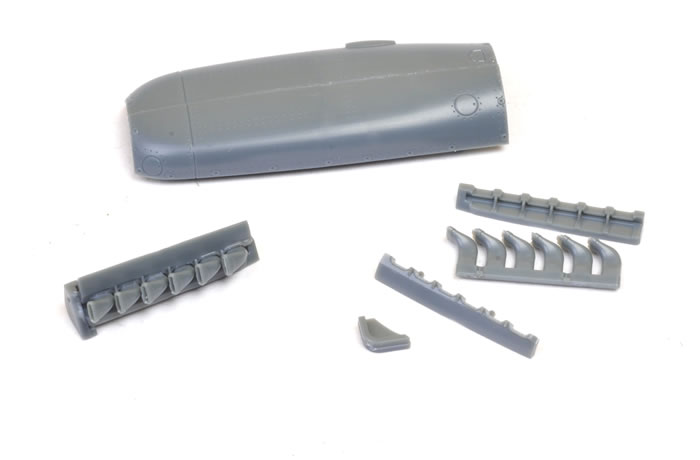
All other elements of construction – the two-piece upper cowl, the lower nose cowl, the radiators and control surfaces – flew together.
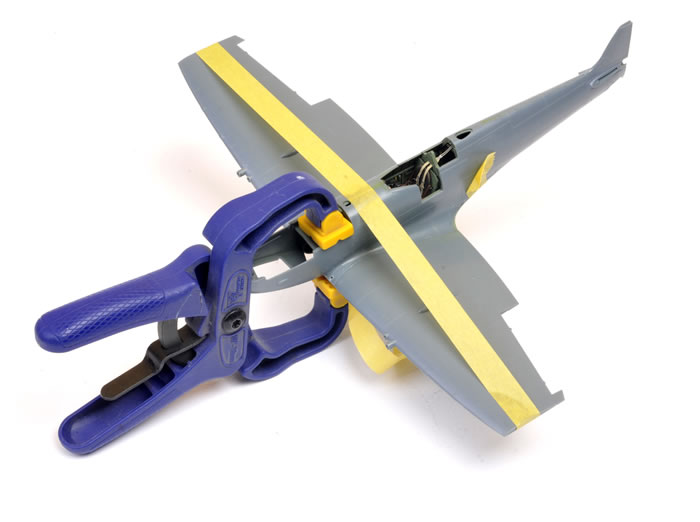
It actually looked as if there might be a gap between the bottom nose and one side of the engine cowling when test-fitting, but when the glue was applied and clamped it closed up nicely.

CLICK HERE FOR PART TWO
Thanks to Eduard for the sample
Model, Images and Text
Copyright ©
2015 by Brett Green
Page Created 11 May, 2015
Last Updated
13 May, 2015
Back to HyperScale Main Page
|
 Home
| What's New | Features | Gallery | Reviews | Reference | Resource Guides | Forum |
Home
| What's New | Features | Gallery | Reviews | Reference | Resource Guides | Forum |