Mitsubishi J2M2 Raiden Model 11 (Late Version)
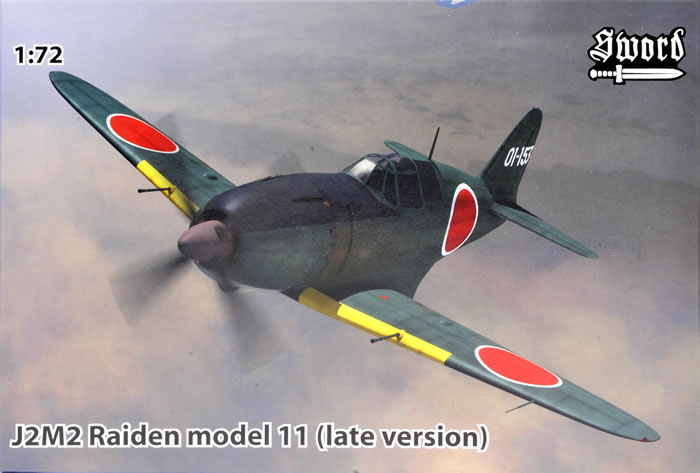
Sword, 1/72 scale
S u m m a r y : |
Catalogue Number: |
Sword Kit No. SW72091 - Mitsubishi J2M2 Raiden Model 11 (Late Version) |
Scale: |
1/72 |
Contents & Media |
58 grey and four clear plastic parts, four resin parts and decals for two subjects. |
Price: |
On-line stockists:
Click here for currency conversion. |
Review Type: |
First Look. |
Advantages: |
The first J2M2 in the scale, fine and crisp detail. |
Disadvantages: |
Very poor representation of nose gun troughs. |
Conclusions: |
It is good to finally have a kit of the initial Raiden production variant.
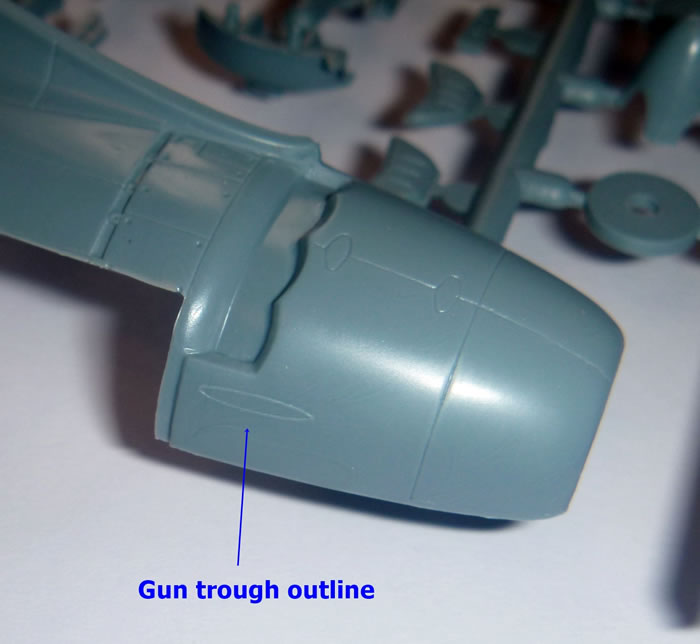
Sadly, Sword chose to modify their J2M3 tooling in preference to tooling a completely new fuselage. The result is the complete failure to represent a key J2M2 feature; namely, the two nose-gun blast troughs. All that is provided are faint raised ovals to guide the modeller in delicately gouging out their own; which is no easy task to do well when they are so small, shallow and elongated.
Gun troughs aside, Sword’s J2M2 is a nicely engineered kit produced to high standards, and otherwise looks to be a nice straightforward build. It has a better quality feel to it than some other limited run brands, with crisp moulding and fine detail, and has the potential to produce a very attractive model.
I still recommend this kit, especially as it’s the only J2M2 we have in “The One True Scale”. |
Reviewed by
Mark Davies

Sword's 1/72 scale Raiden J2M2 is available online from
Squadron.com
The J2M Raiden (allied code-name Jack) was conceived as a point defence interceptor. It was to enable the Imperial Japanese Navy to provide land-based fighter protection to strategic locations within conquered territories. The design emphasis was on rapid climb and powerful armament, rather than the more traditional Japanese naval fighter characteristics of exceptional manoeuvrability and good range. The prototype first flew in May 1942, with Mitsubishi producing eight development aircraft in total. A significantly changed first production model, known as the J2M2, started to roll out of the factory in October of the same year.
The main changes for the J2M2 from the development aircraft were a different engine offering more power, different exhaust arrangement, a shorter cowl resulting from a shortened propeller shaft that reduced vibration problems, and redesigned cockpit glazing with a flat windscreen. Several problems led to the introduction of more modifications during production, including engine vibration dampers, an oil cooler scoop under the nose, changes to fuel tanks and a different propeller with blades that were wider at their base. J2M2 production totalled about 130.
The next version, manufactured concurrently with the J2M2, was the J2M3. It introduced heavier armament by deleting the fuselage machine guns and doubling the wing 20-mm cannons to four, although each pair consisted of different model cannon with differing ballistic characteristics. The J2M3 introduced a better canopy during its production run based on that of the two J2M6 development models. These preceded the both the J2M4 & 5, which is why the J2M6 was the Type 31, whilst the J2M4 and J2M5 were known as Types 32 and 33 respectively. The J2M3 was the most produced version with 435 completed.
Mitsubishi conceived various other development models and tested some of these. One that was the J2M4 based on the J2M6 with a turbocharger added to overcome the type’s poor high altitude performance. They built only two, each with a different make of turbocharger. Consideration of various armament configurations also included oblique upward-firing cannon.
Far more significant than either the J2M4 or J2M6 was the J2M5 with its mechanically driven supercharger. It was about 30% less powerful than the turbocharged J2M4, but it did at least make it into production, although the total built was only 43. Designed to use four wing cannon with the same ballistic trajectory, there is a photograph of one J2M5 fitted with two 30-mm wing cannon in place of the usual four 20-mm weapons. The J2M5 used the J2M6’s canopy with a deeper windscreen and a more bulged sliding portion when compared to the earlier J2M3’s.
The Raiden’s combat debut occurred in June 1944 in the battle of the Philippine Sea, and US forces were to encounter them in Guam and Saipan as well. They found some utility defending the home islands against B-29’s although their weak altitude performance was a hindrance. They were outclassed by US fighters and suffered at the hands of the B-29 escorts. Once the B-29’s switched to night raids they were of little use as interceptors despite the B-29’s flying at lower altitudes for these missions. Some Raidens also confronted the Soviet invasion of Manchuria in the last days of WW2.
Small numbers saw brief service post-WW2 with the Indonesian Peoples’ Independence Force and the South Korean Air Force, but the Raiden is probably best remembered for it defence of mainland Japan against B-29 raids.
Previous 1/72 Scale Raiden Kits
Tamiya released what I think was actually a 1/75-scale kit in the early 1970’s. I have since seen it boxed as 1/72-scale, but it looks very dated now. The far better and more readily available kit for the past 36 years has been by Hasegawa. Although one of their earlier efforts, it is still good a good kit. It has fine engraved panel lines, a low parts count, and is simple to assemble; but it has basic interior detail. Hasegawa has re-boxed it repeatedly with different marking options.
Overall, the Raiden was a rather overlooked subject in the “One True Scale” until Sword’s recent J2M3 and J2M5/6 kits, released in early and mid-2012 respectively (click on the links to see my “First Look” at these here on HyperScale). So has it been worth the wait for Sword to tackle the earlier J2M2?
Contents
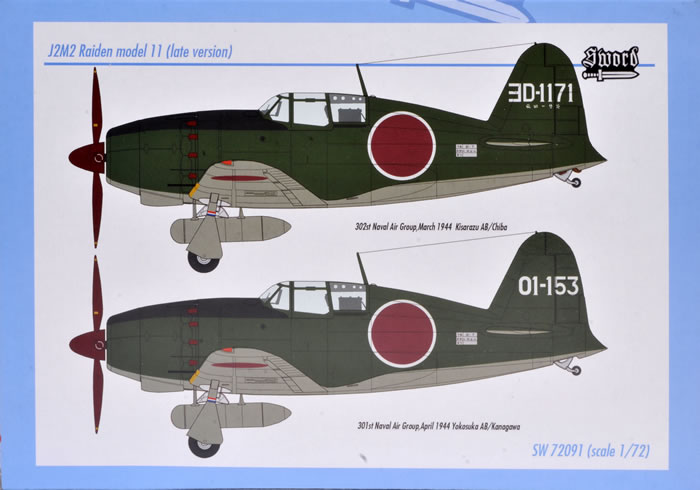
This kit comes in an end-opening box with computer generated artwork on the front and two colour profiles on the rear. The instructions have a parts map (which does not cross out unneeded parts) and a generally easy to follow diagrammatic assembly format. The diagrams are well drawn and better than some long-run brands. There is also a brief history of the aircraft.
Paint colours are in Czech and English, with all other text in English. The painting and decal guide uses quite adequate black & white shaded 4-view drawings with colour profiles on the rear of the box. Sword has only generic colour call outs for detail parts and the painting and markings guide. I would have thought they could have at least managed to call the main colours IJN Green and Grey. The parts come enclosed in a zip-lock bag, with the clear, resin and PE parts each in small bags of their own.
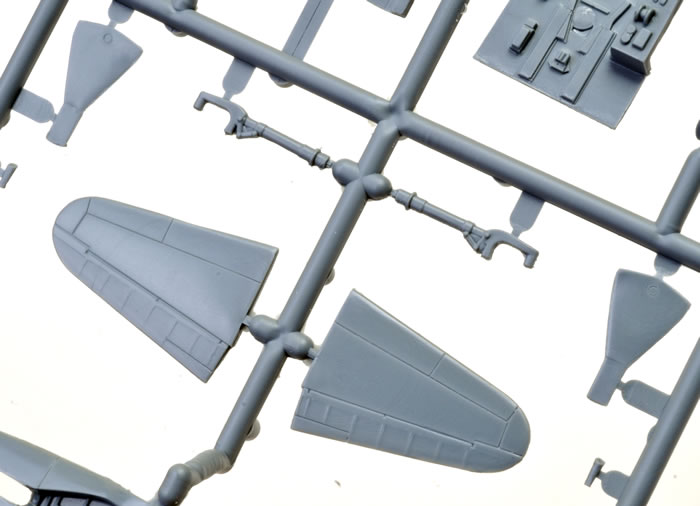
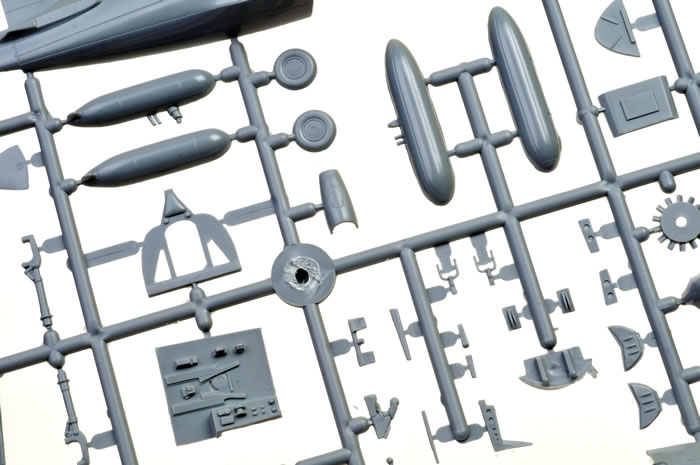
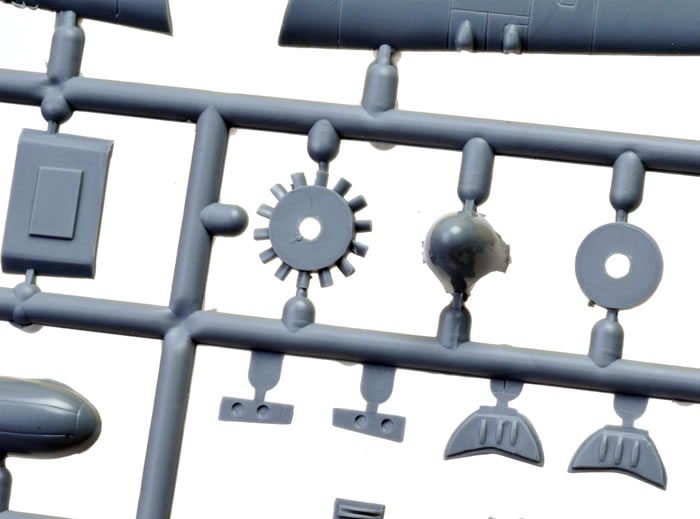
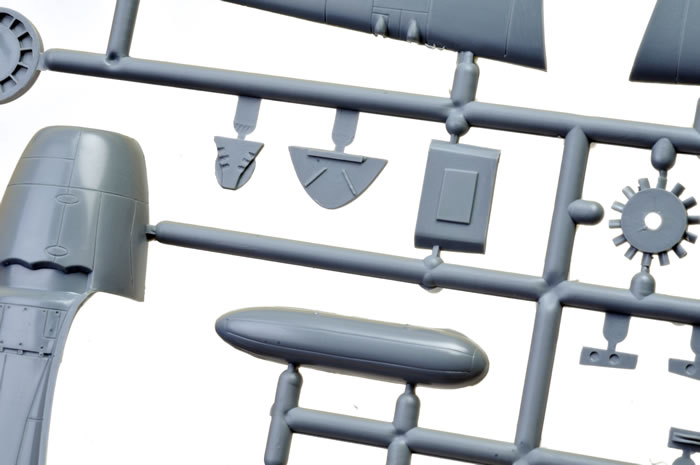
This is a typical Sword kit in that the plastic has a more shiny finish than many other limited run brands. It has cleanly moulded parts with very fine recessed surface detail. Parts break down is conventional for the type, and the sprue gates are narrow. High production standards apply to the resin and clear parts too. The grey sprues and decals are contained in the main resealable bag, with the clear and resin parts further protected by small bags of their own.
The Airframe
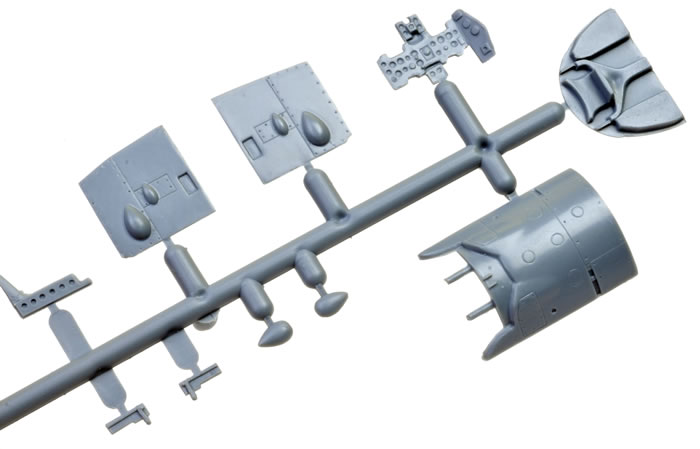
The kit’s main sprue is shared in common with Sword’s J2M3 kit. However, a plug has been put in the mould to remove the J2M3’s gun-less decking just forward of the windscreen.
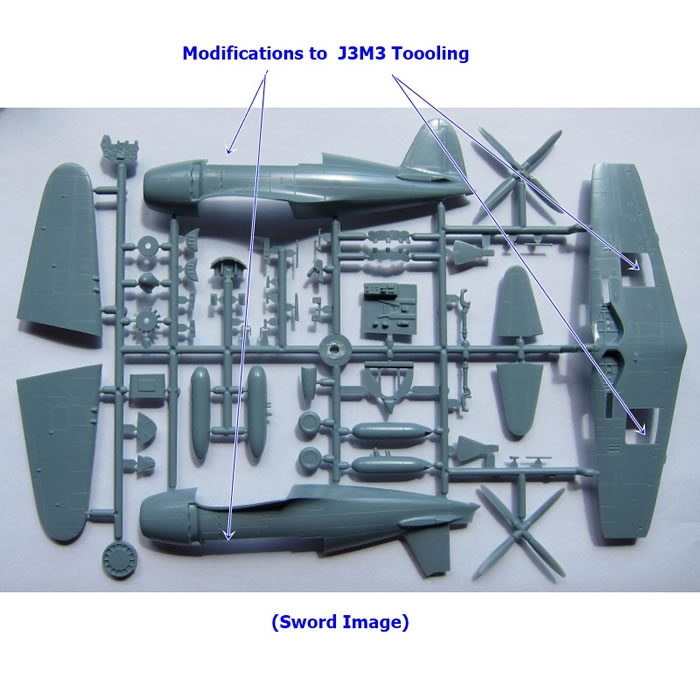
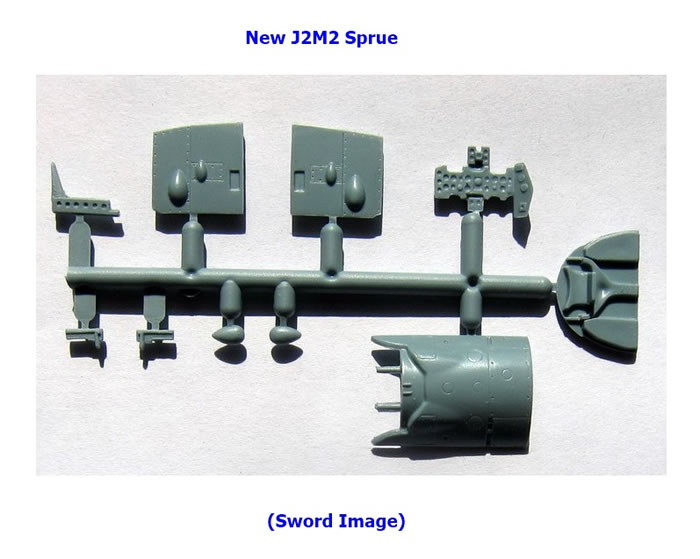
In its place, on an additional small sprue, is a new top decking section with bulges for the gun breeches.
The other change to the J2M3 tooling is two faintly engraved elongated ovals that result in two equally faint raised ovals moulded into the top of these engine cowling. These are supposed to represent the two nose-gun blast-troughs, and are frankly hopeless.
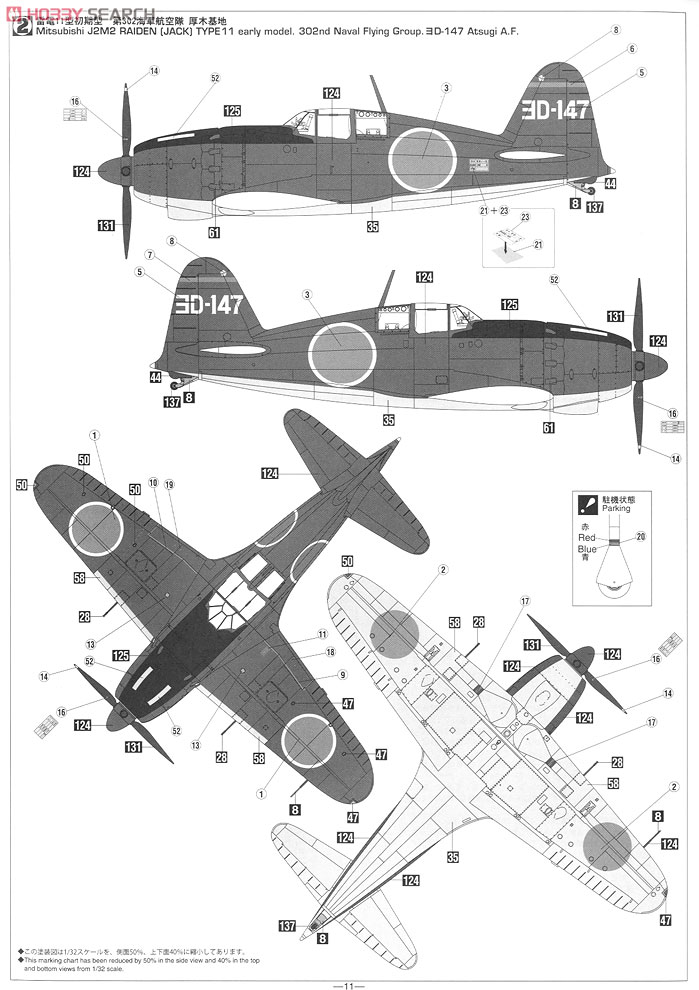
Click here to see an example of Hasegawa’s 1/32 scale J2M2 that illustrates how the gun troughs should look.*
* Sword is not alone in this type of compromise; I recall Special Hobby’s Seahawk having the same affliction. To be fair, it may be a tooling limitation with two-part moulds used. However, kits like Special Hobby’s DH Hornet used a resin insert to provide excellent gun troughs; so it can be done.
Sword tooled a full separate fuselage for their J2M5/6 kit, and they really needed to do so for the J2M2 as well. As things stand, the modeller will have to improve the appearance of things, and this will be no easy task given the very shallow angle of drilling involved. The best result will be to cut out rectangular slots and inset suitable plastic tubing to form fine and realistic troughs, but this sort of surgery is fraught with difficulty because the gun troughs are so delicate, elongated and shallow.
Now let’s cover some of the kit’s more positive aspects...
The cockpit sidewalls are resin as is the seat, although regrettably, the seat doses not have a harness cast in place.
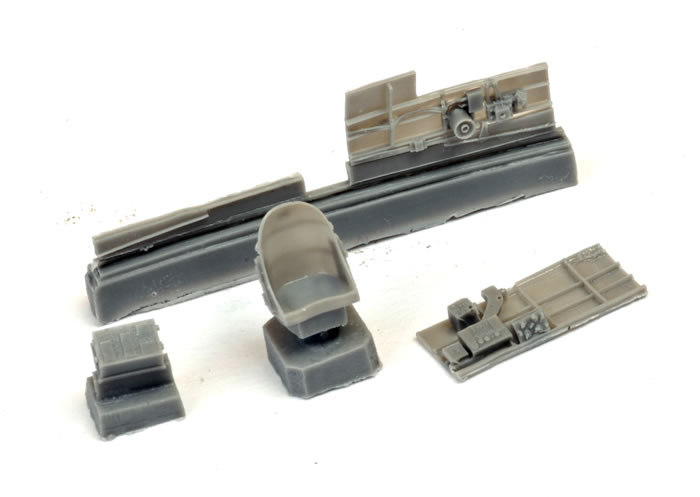
Other cockpit detail is in styrene features floor, rear bulkhead with headrest and separate armour, rudder pedals, control column, and an instrument panel plus a pair of gun-butts that all fit into a partial front bulkhead. The gun butts and need for an instrument panel that fits round them is a key feature of the J2M2’s cockpit. The new front decking mentioned earlier has a mounting frame for the prominent plate of bulletproof glass, and provides the coaming for a resin gun-sight to fit onto. The cockpit detail is rounded out by a structural member that links the headrest to the fuselage spine, and a resin radio that sits under it.
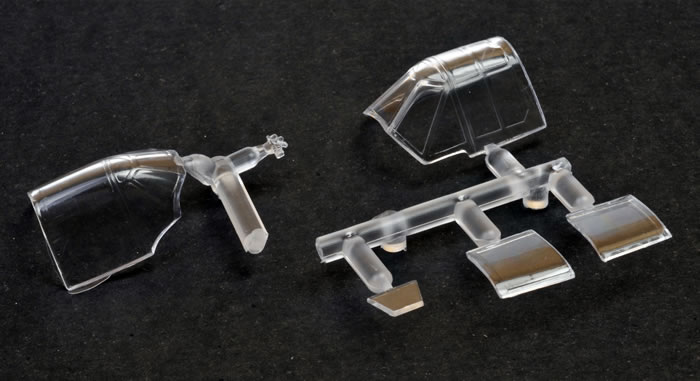
The Raiden had a large cockpit for a Japanese fighter meaning there is room to see more than usual in this scale. The level of detail provided is very good for a closed canopy model, although it is certainly worthwhile fitting the missing lap belts and the diagonal shoulder strap to improve its appearance. The canopy is thin, clear and nicely moulded. But here again Sword’s attention to detail has failed again – The combined windscreen and sliding canopy are identified in the instructions as clear-part #1. However, two styles of windscreen and canopy are provided. The one identified in the parts map as #1 is on the J2M3 clear sprue with the rear side windows and armoured glass, whilst the correct J2M2 windscreen on its own sprue is not shown at all. Most builders will easily figure out which of the two very similar parts fits the J2M2’s coaming, but this sort of oversight is just sloppy.
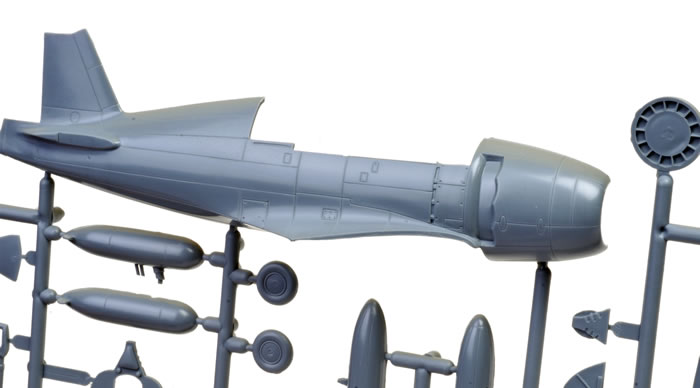
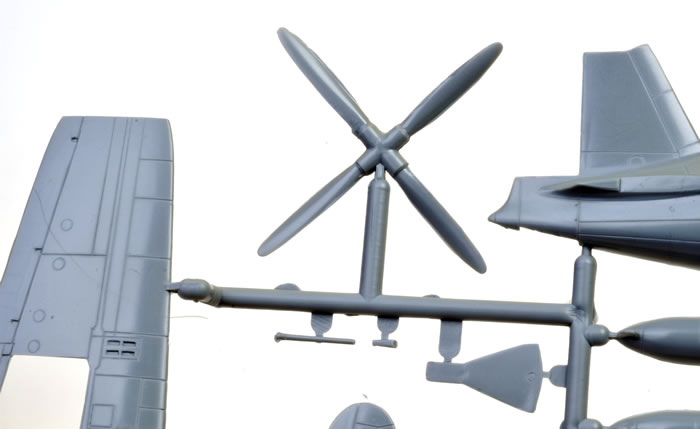
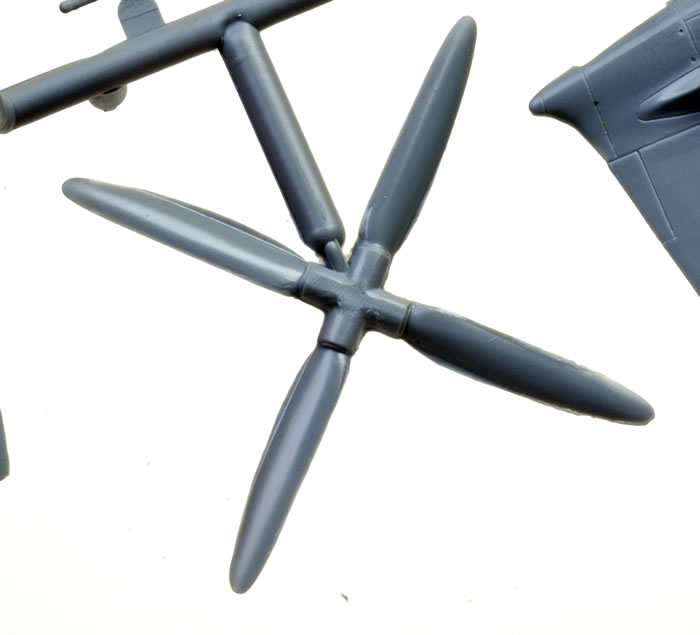
The kit only provides the engine cooling-fan and the grill behind it, but you would not be able to see an engine even if it were present. There is a choice of propeller styles, but no guidance as to which one goes with which colour scheme. The prop with a wider chord at the base reflects the type introduced later in the production run to help cure engine vibration problems (along with shock-absorbing engine mounts). The kit also provides oil-cooler intake under the cowl, which was a key feature of the late production J2M2’s. The engine cowl is completed with two separate rows of cowl flaps and integral exhaust stubs, the former being moulded in the closed position. I think this ensures that the exhaust stubs project separately from the fuselage, unlike the Hasegawa kit’s that come moulded with the fuselage halves.
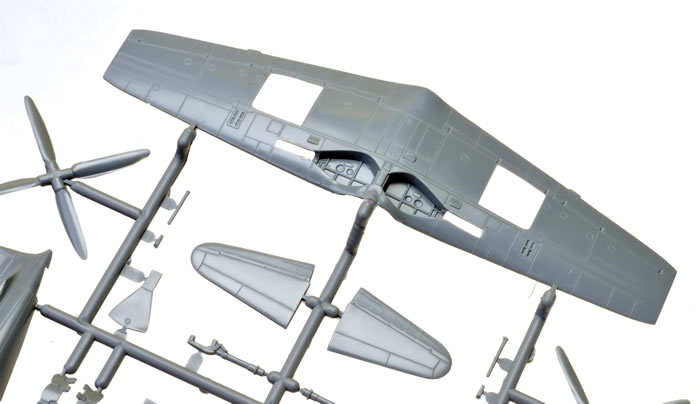
Because they are based on the J2M3 kit tooling, the wings each have two prominent cannon fairings in the upper wing leading edge. However, The J2M2 only had one cannon per wing. The instructions illustrate the single mounting, but fail to mention the need to remove the outboard cannon fairing and fill the hole its barrel would have fitted into. A small blister fits to the upper wing over the cannon’s breech area, but the precise position within the indicated panel area is not given. Sword should really have included a plan view of the wing to indicate the blister’s exact position; especially since the small colours & markings drawings do not provide this information. I did find an example of Hasegawa’s 1/32 J2M2 kit instructions which do show the location of the bulge to be central within the cannon bay access panel (see here).
Each wing underside has an almost square hole as the result if another insert in the J2M3’s tooling. This eliminates the twin ejection chutes and bulges associated with the J2M3s’ paired cannon. The small extra J2M2 sprue includes two panels, each with a single ejection chute and two gun blisters moulded in place. Each panel fits flush into the wing underside, and will benefit from some thin scrap to provide support from behind.
The wings include nicely detailed main wheel-wells; and the wheels and undercarriage legs look nicely done too. There are also some delicate retraction links for the small inner undercarriage doors. A drop tank with plumbing and commendably fine separate sway braces completes the underside.
Not much remains to mention regarding the parts, other than that I think this should be a simple and enjoyable kit to build, aside from addressing the nose gun troughs which are potentially a pain to remedy.
Marking Options
The kit offers two decal options, both being painted IJN Green over IJN Grey:
-
302nd Naval Air Group, March 1944, Kisarazu Air Base, Chiba.
-
301st Naval Air Group, April 1944, Yokosuka Air Base, Kanagawa.
The decals are printed by Techmod, a brand I have found to perform well in the past.
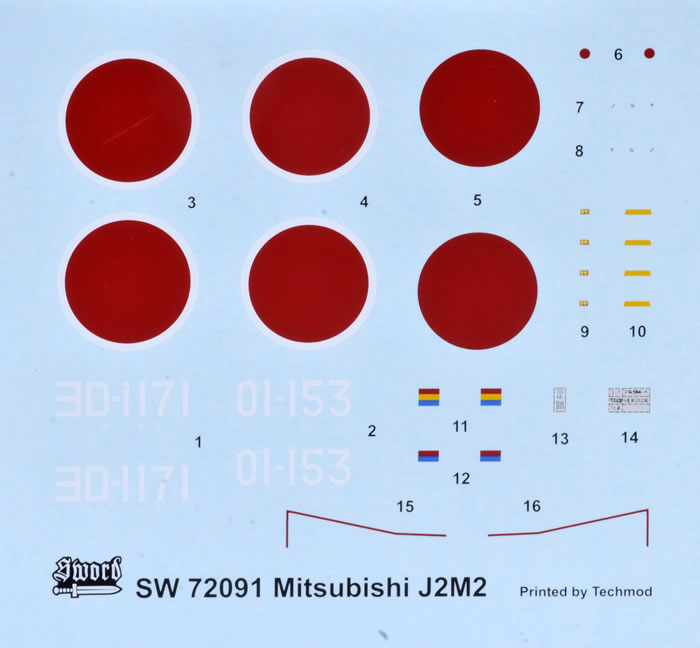
These have good registration and some fine stencilling. I am never too sure about the correct red for Japanese national insignia, the review kit’s are thankfully not as bright as some decals, but are perhaps not quite dark or dull enough either. I am not qualified to say for sure.
It is good to finally have a kit of the initial Raiden production variant. Sadly, Sword chose to modify their J2M3 tooling in preference to tooling a completely new fuselage. The result is the complete failure to represent a key J2M2 feature; namely, the two nose-gun blast troughs. All that is provided are faint raised ovals to guide the modeller in delicately gouging out their own; which is no easy task to do well when they are so small, shallow and elongated.
On a less significant but still negative note, Sword’s instructions fail to identify the correct canopy and the need to remove a cannon aperture from each wing. This sloppiness discredits what are otherwise very well produced instructional drawings.
Gun troughs aside, Sword’s J2M2 is a nicely engineered kit produced to high standards, and otherwise looks to be a nice straightforward build. It has a better quality feel to it than some other limited run brands, with crisp moulding and fine detail, and has the potential to produce a very attractive model.
I still recommend this kit, especially as it’s the only J2M2 we have in “The One True Scale”.
Thanks to Sword Models for this review sample.
Review Text & Blue Background Images Copyright © 2015 by Mark Davies
Page Created 6 October, 2015
Last updated
6 October, 2015
Back to HyperScale Main Page

|
 Home
| What's New | Features | Gallery | Reviews | Reference | Resource Guides | Forum |
Home
| What's New | Features | Gallery | Reviews | Reference | Resource Guides | Forum | 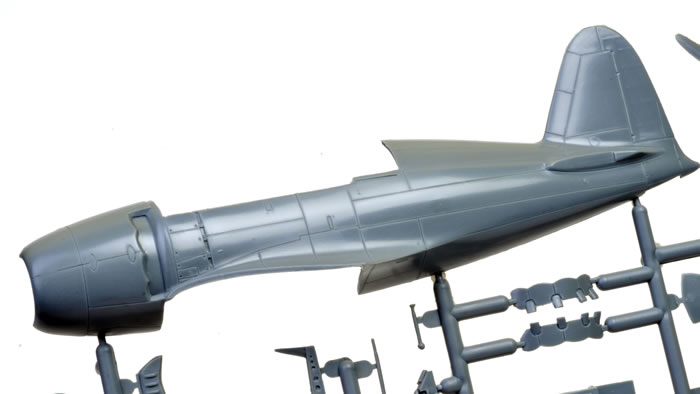