Welsh Models' 1/144 scale
DeHavilland Dash-7 Geophysics Survey Aircraft
by John Chung
|
|
DeHavilland Dash-7 Geophysics Survey Aircraft |

Airfix's 1/48 scale Spitfire Mk.Vb is available online from Squadron.com
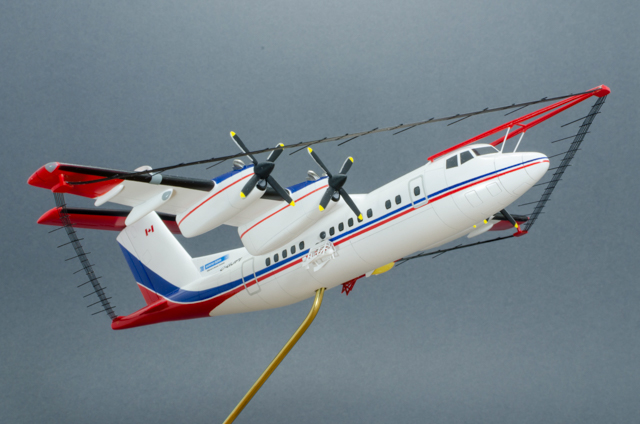
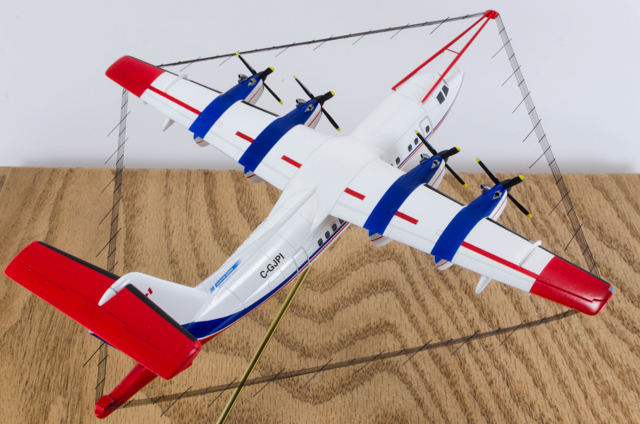
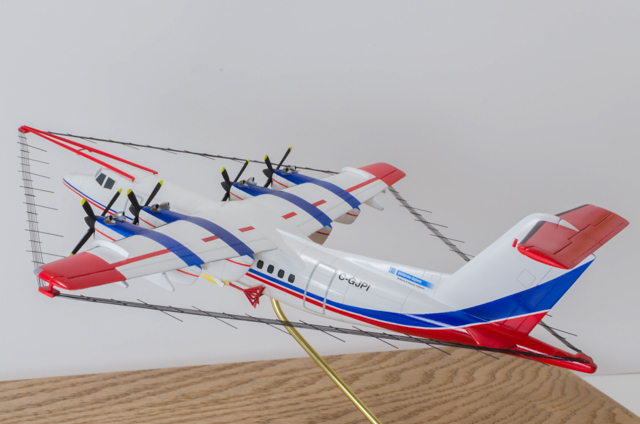
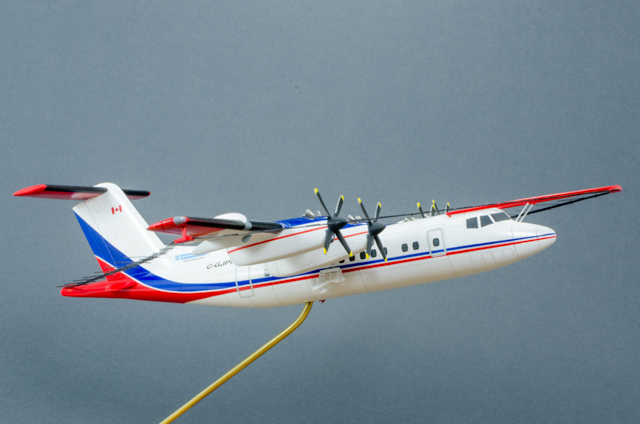
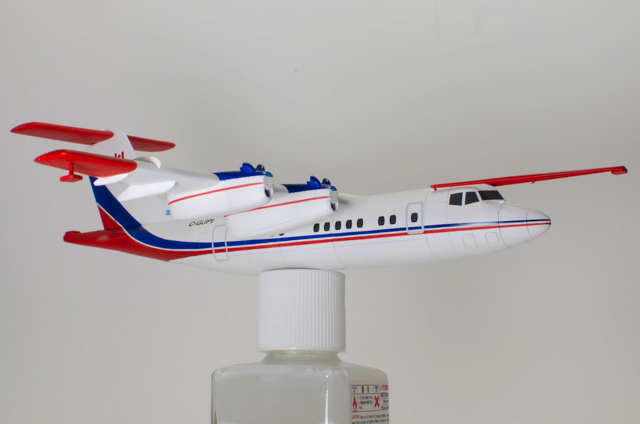
Some years ago I came across an interesting photo in our engineering office. The subject therein is a DeHavilland Dash-7, a four-engine commercial turboprop designed in the 70s.
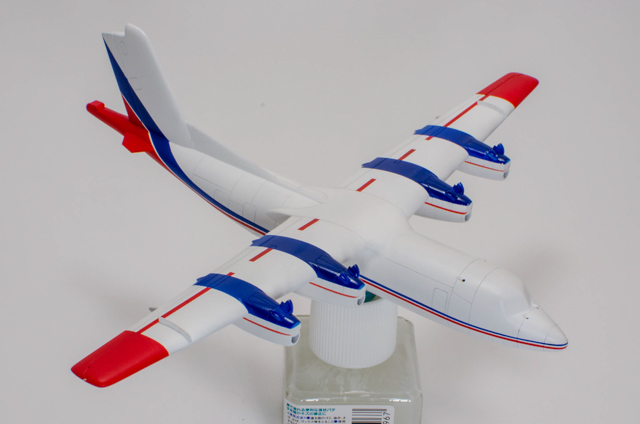
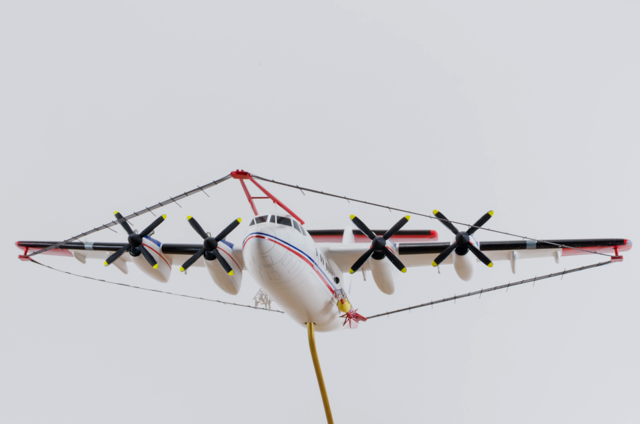
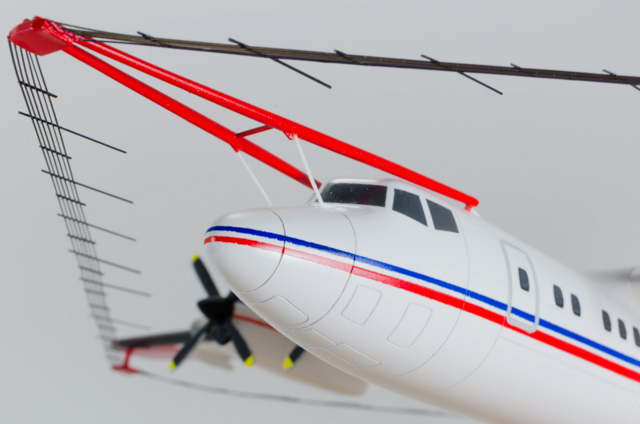
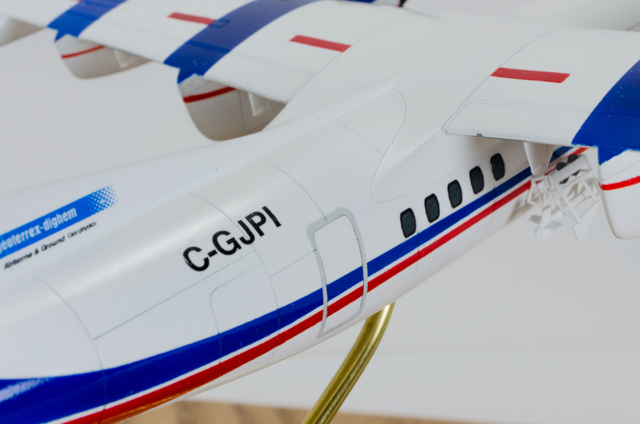
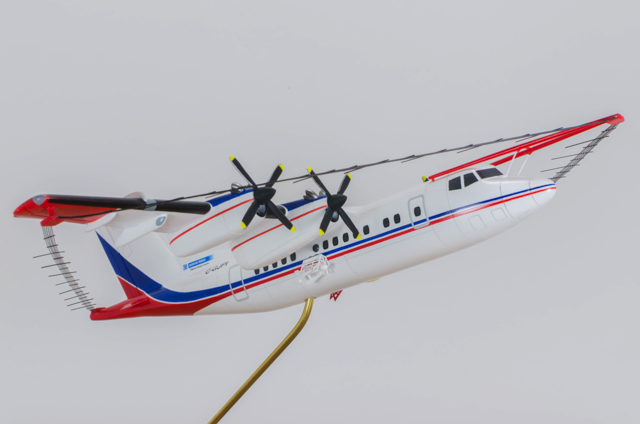
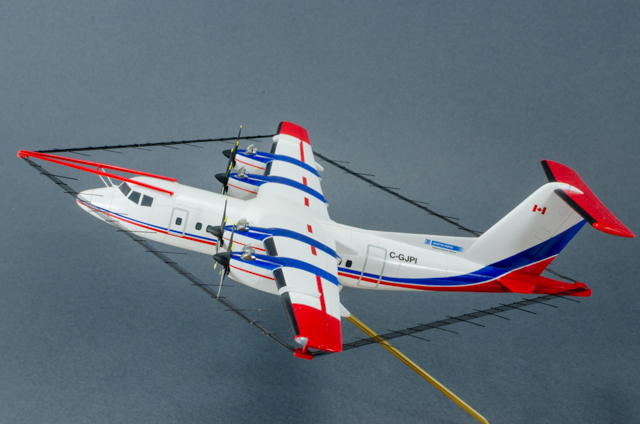
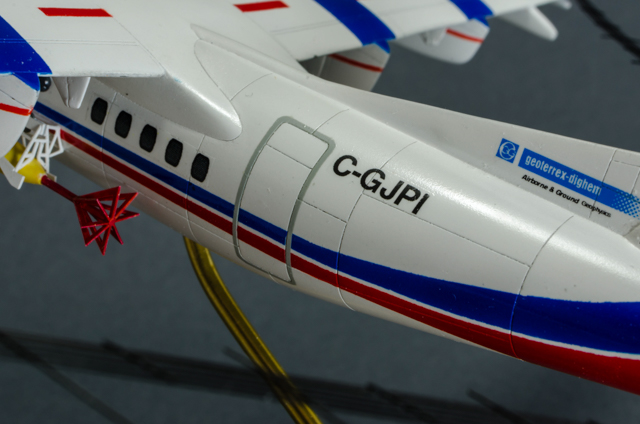
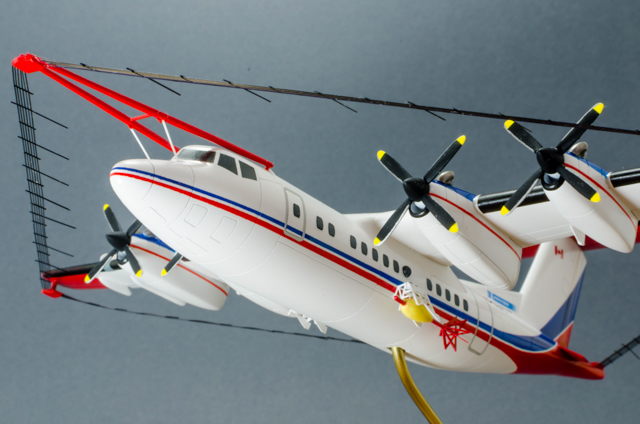
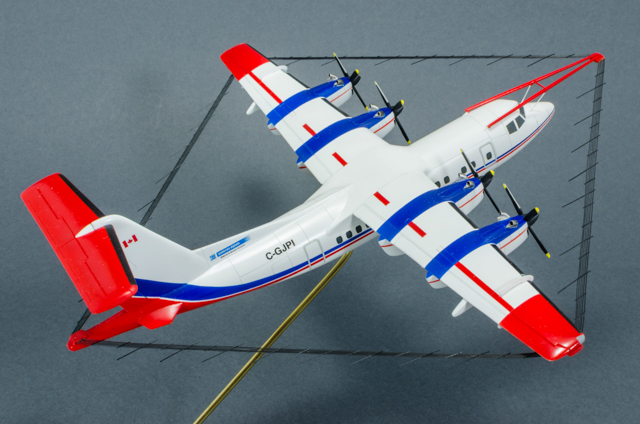
This particular aircraft was heavily modified with plenty of thing hanging on and out of it, including a giant set of wires wrapping around the airframe which made it look like a kite. The aircraft, registered C-GJPI, was modified for geophysics survey in search of underground mineral deposits. The large wire loop emit EMP pulses into the ground and a deployable tow-receivers are released to capture the returns.
Our company had done the engineering and certification for the mod and our president was the chief engineer on the program.
As a modeller, I naturally thought it would be a neat subject to model, but was put off by the complexity and the lack of an existing kit.
Last year our president was retiring, and the idea surfaced to build him a suitable model as a retirement gift. Naturally, the said Dash-7 was floated as the subject of choice. It was a daunting prospect, but also a most worthy cause if there ever was one. The decision was made.
Welsh Models' 1/144 Dash-7
As with most civil subjects, the Dash-7 was never garnered attention from the major model manufacturers. Thanks to Google, I was able to locate Welsh Models of the UK, from which a 1/144 scale multimedia is available.
The kit contains a vac-formed sheet containing the primary fuselage halves. A set of main wings, horizontal stab, and four engine nacelles come in grey-silver resin. Finally the props, flap hinges, and under carriages are of white metal.
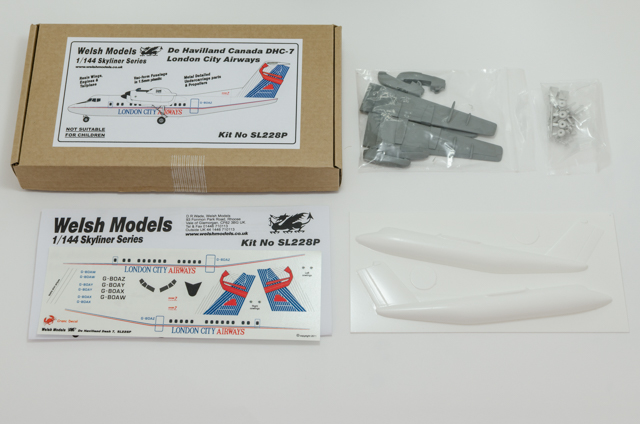
The quality of the kit is typical of the small-run, cottage industry variety. The major outline was fairly reasonable albeit a bit larger than 1/144. The details are sparse and the fidelity can be a bit rough, particularly on the resin and white metal pieces. But it's also the only game in town.
A quick correspondance to Densil Wade, owner of Welsh, and a couple copies were expedited via snail mail.
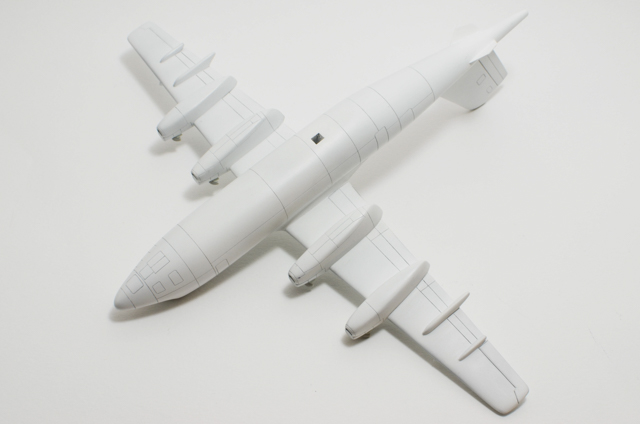
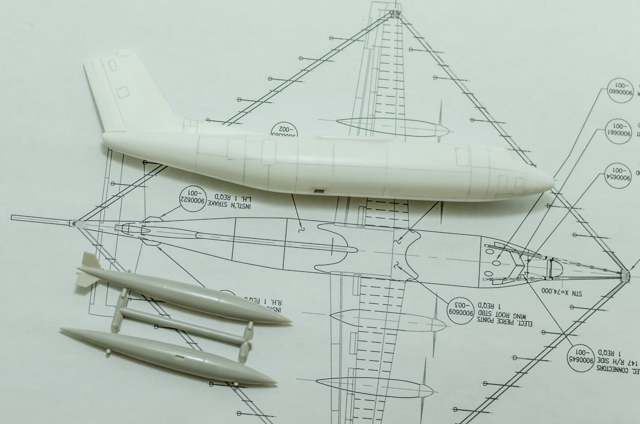
First order or business is to liberate the vac-formed pieces, which were generally well formed and clean.
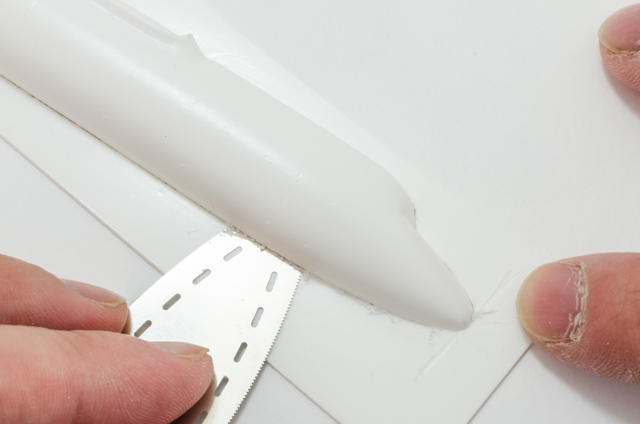
These were judiciously sawed out using Hasegawa's tri-tool minisaw and, once removed, were reinforced internally with bulkheads and styrene strips before being glued together.
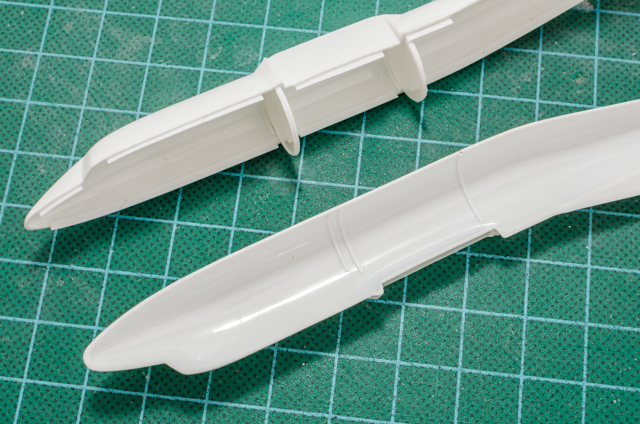
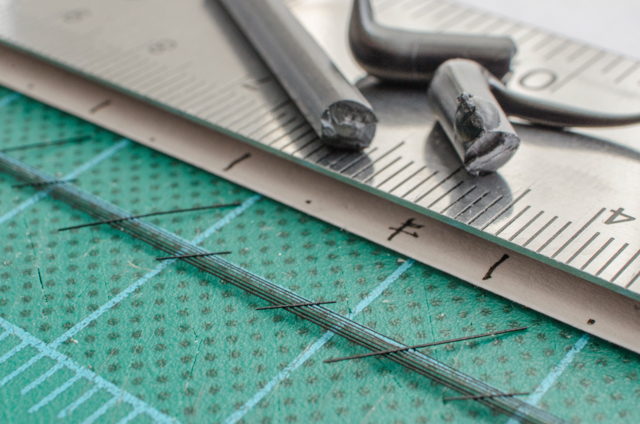
At the point the kit's windscreen was rebuilt and re-contoured with plastic card as it was too blunt. Typical to vac-formed models, surface details were fine albeit somewhat faint at places. These were cleaned up and made consistent first by defining existing and new surface details with a pencil, and then scribed over using a needle in a pin vice.
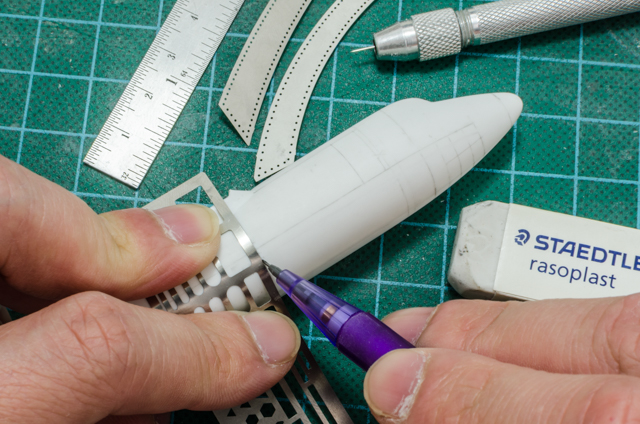
A good set of scribing template was indespensible for this effort.
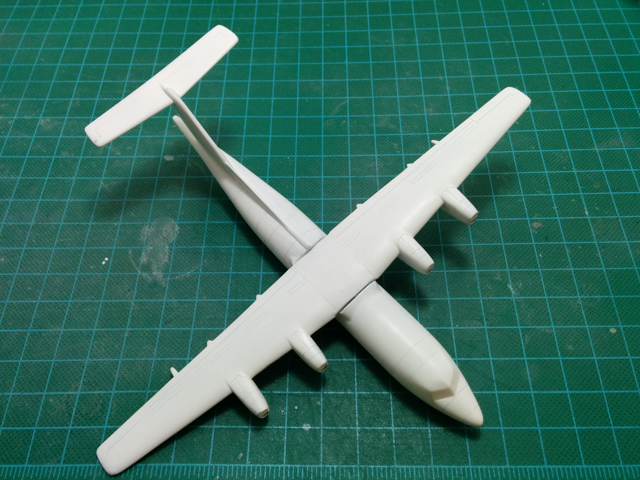
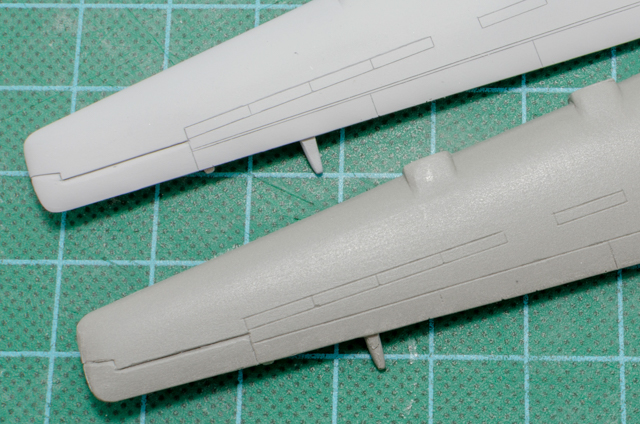
The main wings came in left and right halves and their preparation required a bit more work. These come in a grey-green resin I'm unfamiliar with, which seem a bit grainy and porus. The existing scribings were rough and lacked consistency between the wing halves. The length of the flight control surfaces differed down the span of the wing, as was the locations of the engine mount blocks.
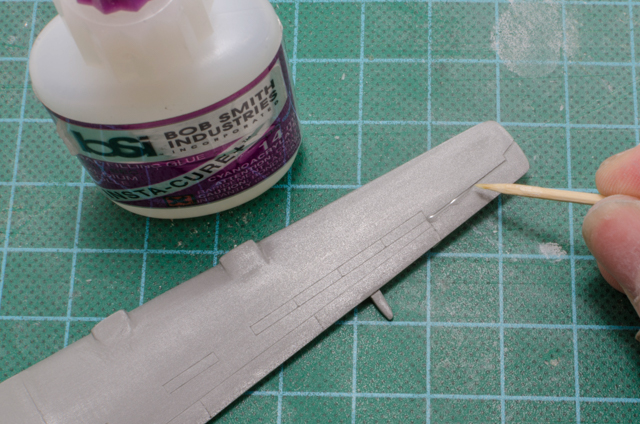
The wings were filled sanded smooth, primed, and with new surface details scribed in. New wing fences were added using sheet plastic, but my laziness got the best of me and I left the missing outboard leading edge extensions unaddressed.
Prior to installation, the wings were first jigged and joined together. Once attached to the fuselage, large gaps between the wings and fuselage were filled with epoxy putty, which was also useful in adding in the missing/undersized wing root fairings.
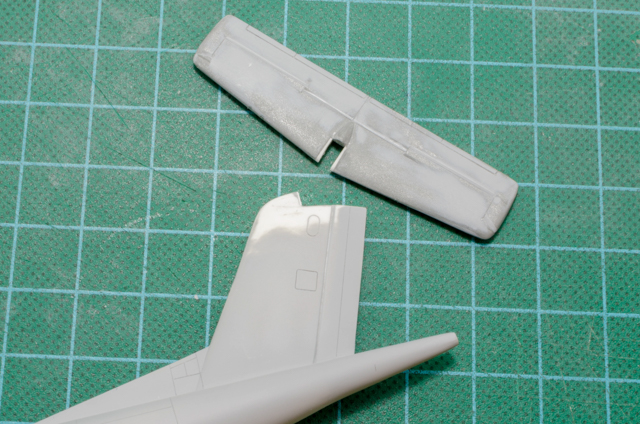
As with the wings, the recessed details on the horizontal tail were wholly reworked. In this case, where the actual aircraft hinge line varies forward and aft along the span, the kit strangely had it backwards, and so were corrected.

To achieve a clean joint between the horizontal and vertical tails, the joint was cleaned up and sheet plastic used to shim up for new mating surfaces.
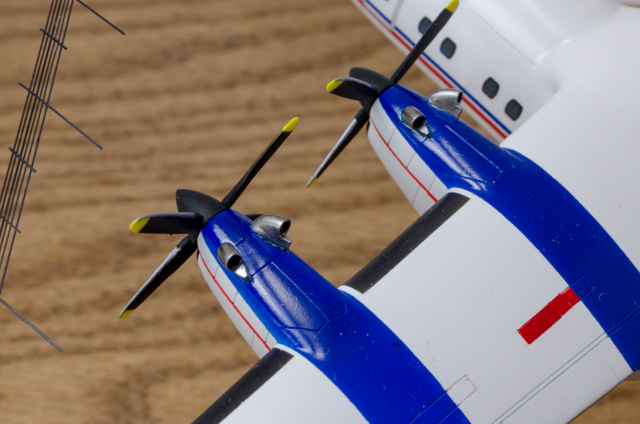
The engine nacelles and sponsons were moulded as separate pieces. These commanded, by far, the most efforts to clean up. There were no details of any kind, the moulded-on exhausts were crude, the surfaces were rough, and the mould lines and release gates needed good cleaning-up.
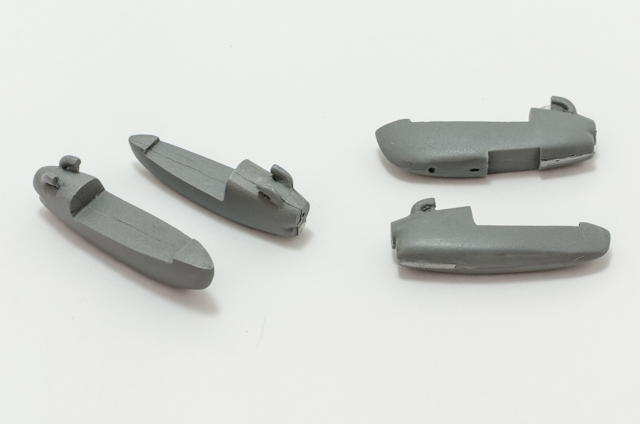
The exhausts were therefore removed and the nacelles completely filled and re-contoured.
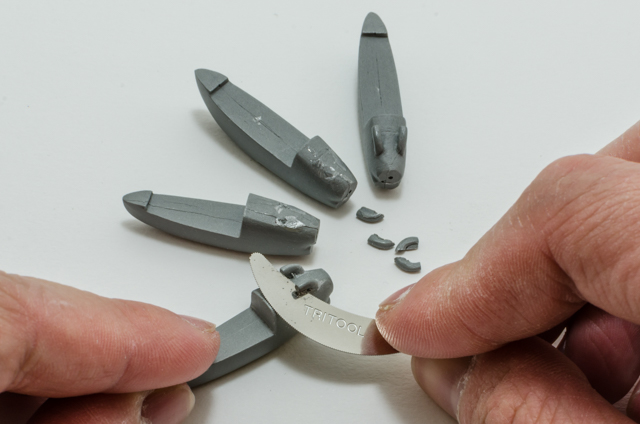
The propeller hub interfaces were not circular and discs were attached to restore the this geometry.
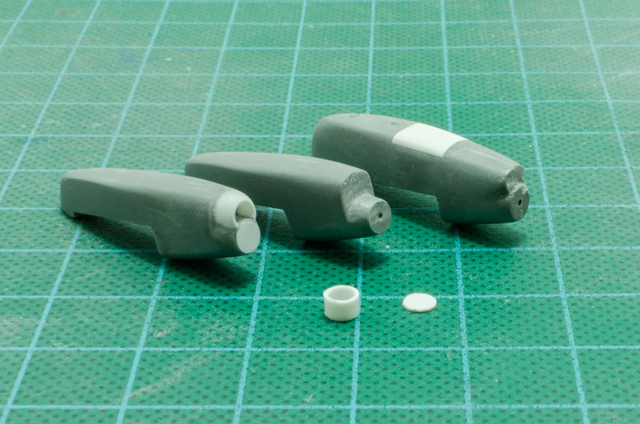
The missing intakes were made by removing existing material where the intakes should have been and rebuilding the area with plastic tubing which were attached and blended in. When ready, the nacelles were primed and scribed for surface details.
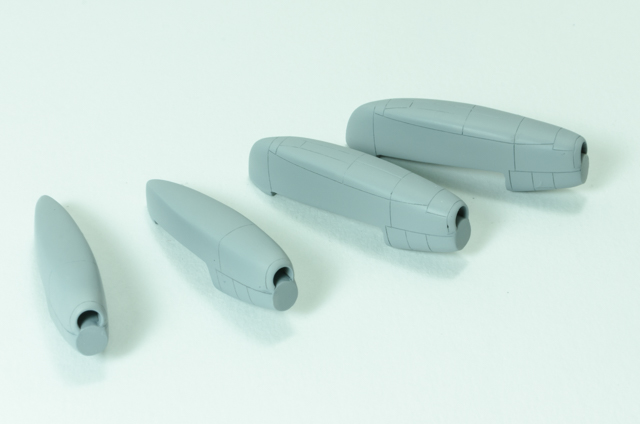
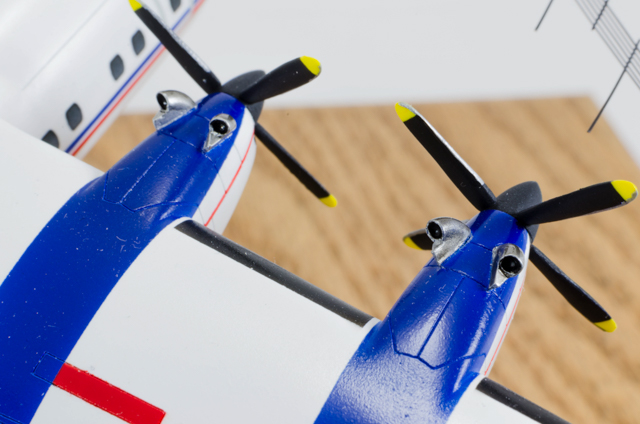
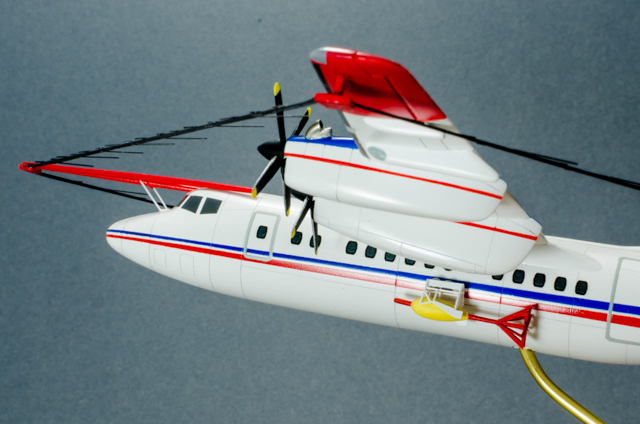
Finally, new scratch built exhausts and fairings were added. When installing the nacelles to the wings, the large triangular fairing between the nacelles and the wing trailing edges were absent, which were built up. As well, the outboard propellers should be staggared back from the inboard propellers, whereas the kit has them in-line. This was remedied by sawing and shortening the outboad engines.
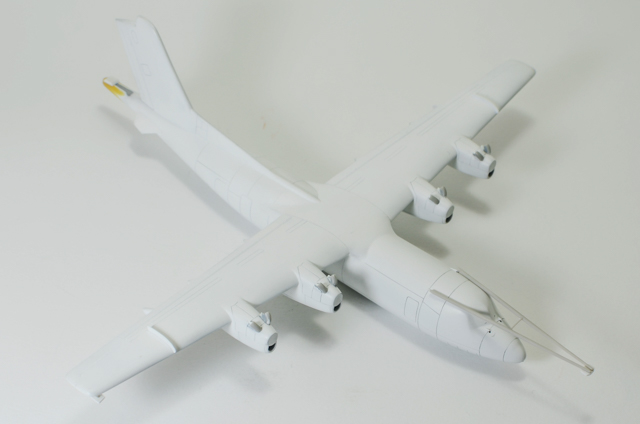
Once the model was ready for paint, it was first primed with Tamiya white liquid surface primer and polished down to 2400 grit using micromesh.
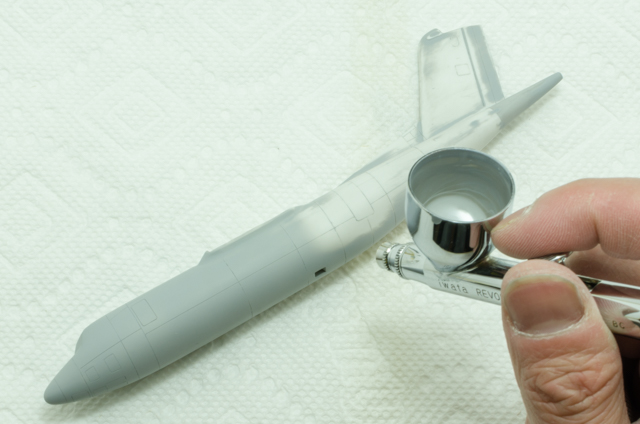
For most of my models that are white, I prefer to use white primers as a base to achieve good coverage and durability. As a side note, for some reason Tamiya's white primer isn't as hard and durable as Gunze's Mr. Surfacer White. It could very well be a user issue (i.e. wrong thinner type and mix). For now, I will stick with the Gunze.
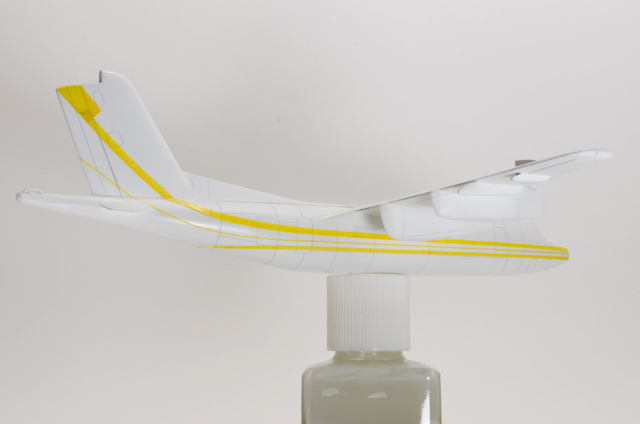
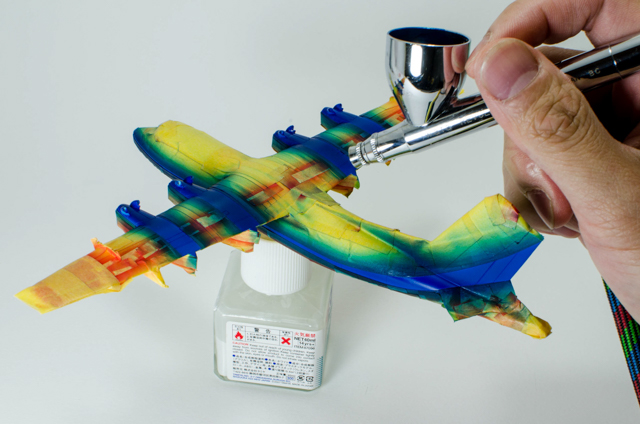
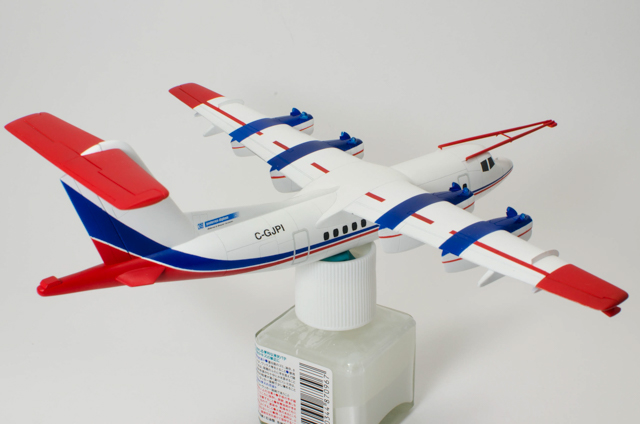
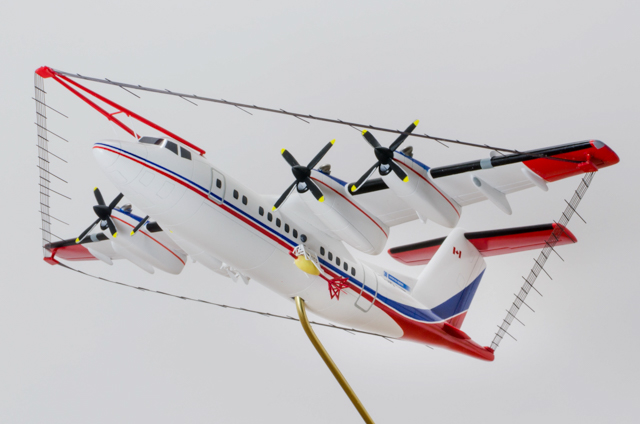
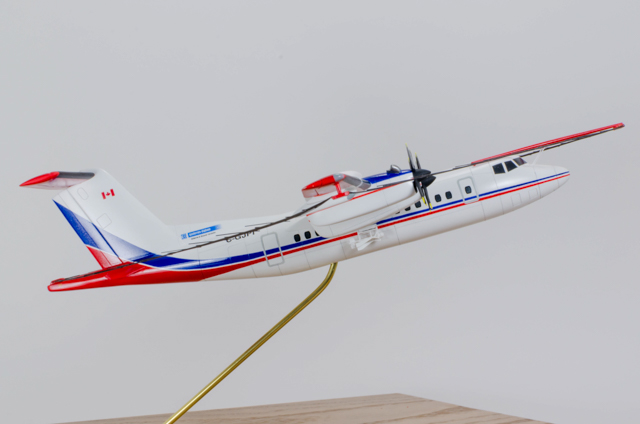
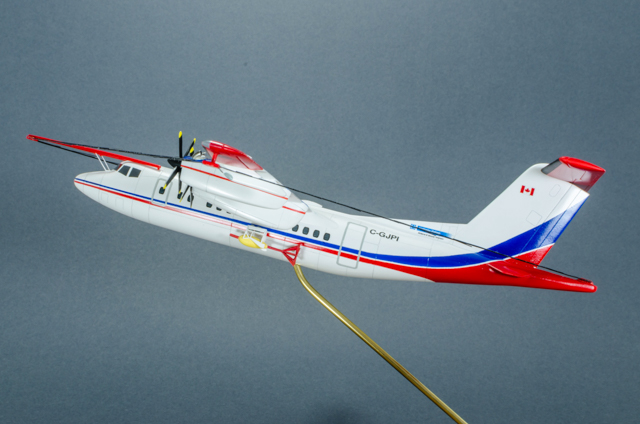
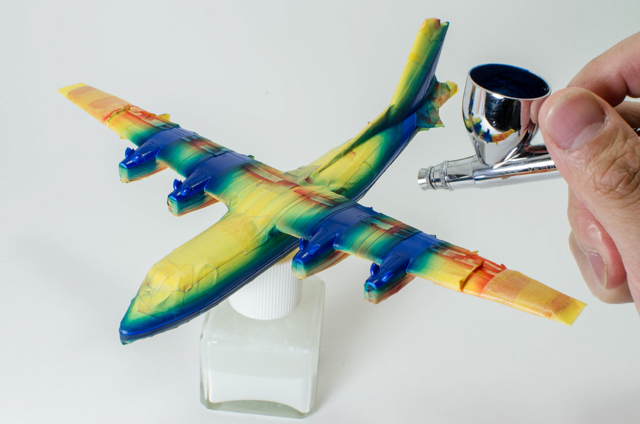
Once the primer had properly cured, many hours were spent masking and spraying the red and blue onto the fuselage and wings, in that order.
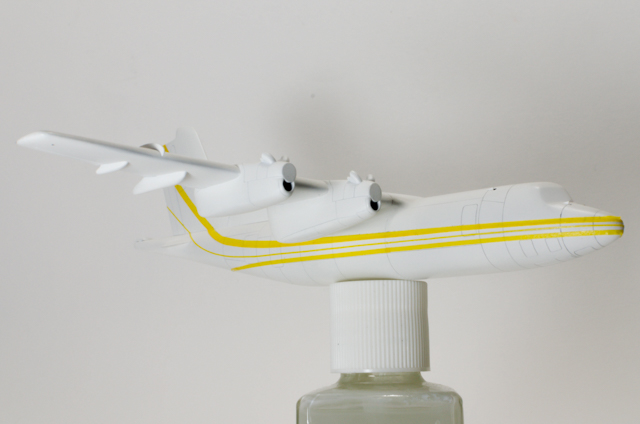
Tamiya acrylics X-4 blue and X-7 red were used for these, and XF-1 was used for the black de-icing boots on the wing and horizontal leading edges.
Tamiya masking tape was used throughout which remains my favourite masking medium.
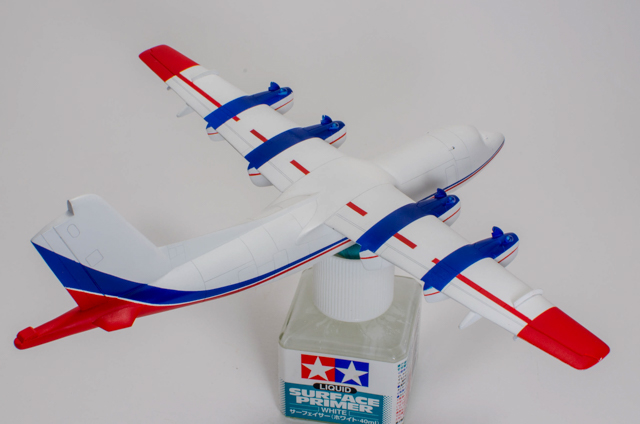
The light grey demarcation around the doors and the cockpit windows were also masked and painted. For the doors, I punched masking tapes through a punch and die set which were used to mask the corners. A neat trick that comes in very handy. Alclad II was used for the exhausts.
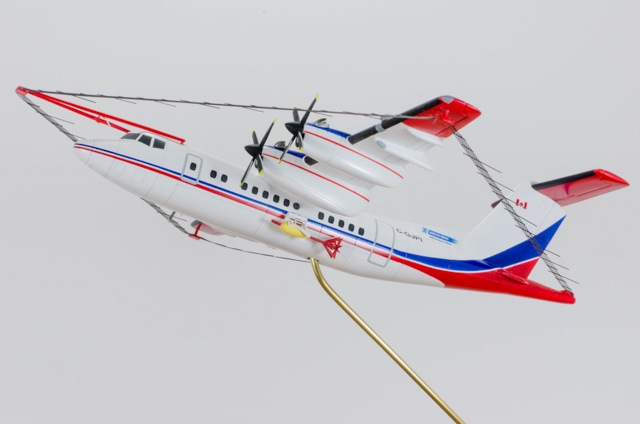
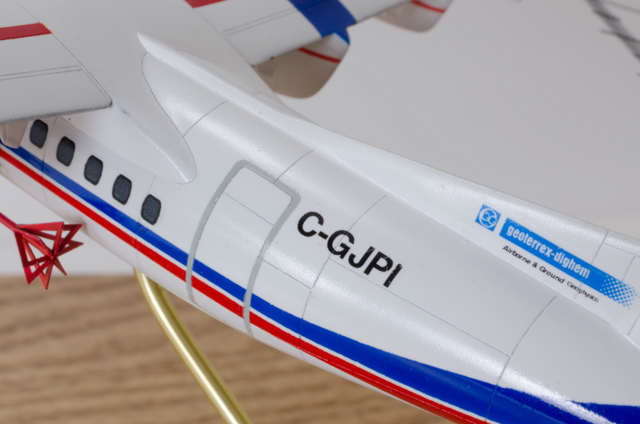
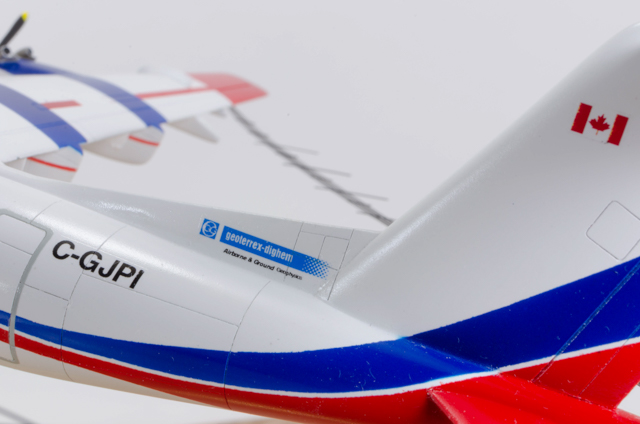
Once the primarily painting was complete, custom made decals were applied including the aircraft registration, the company logo on the vertical tail fillet, and the Canadian flag on the vertical tail. Kit decals were used for the passenger windows. A final few coats of Mr. Color GX100 Super Clear gloss finished off the painting process.
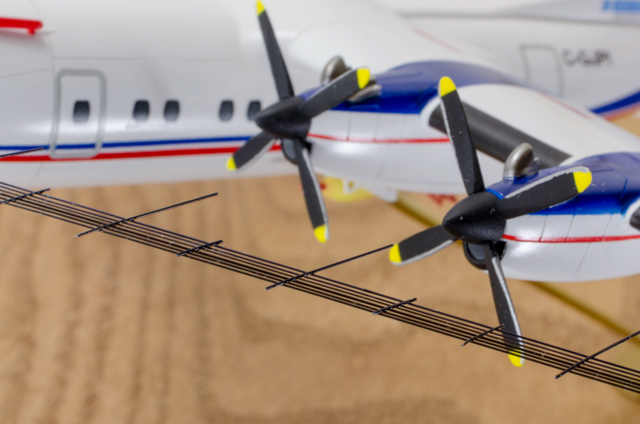
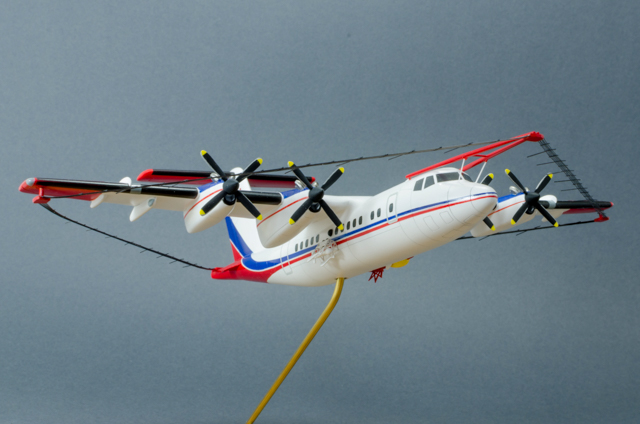
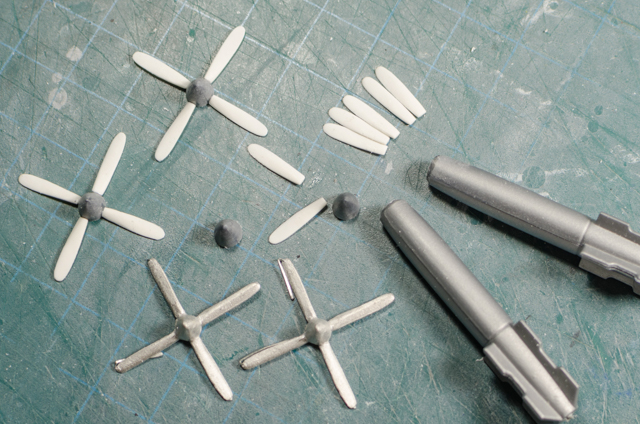
After painting was complete, it was time to install all the fiddly bits. New propellers were scratch build to replace the kit's white metal parts, the blades of which weren't quite all the same size and the hub not exactly circular in section. New hubs were made using spare 1/48 dumb bombs, and the new blades carved from sheet plastic.
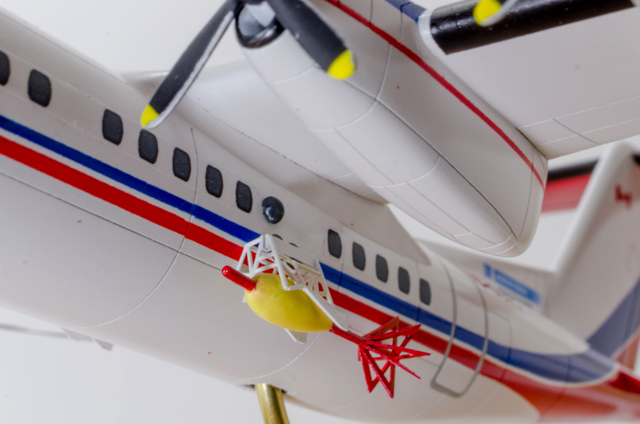
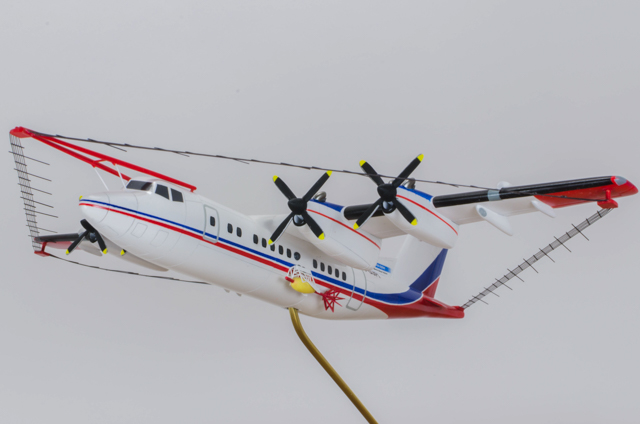
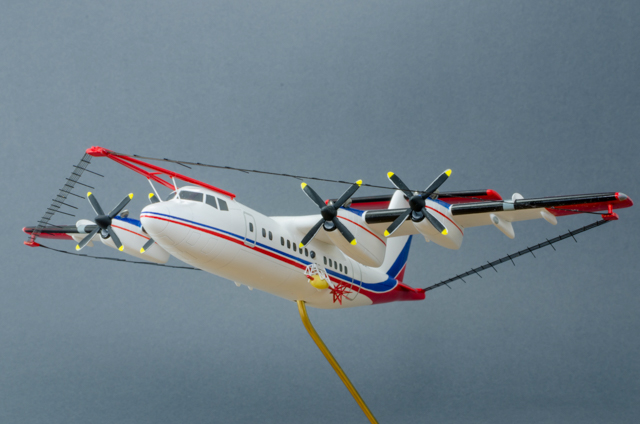
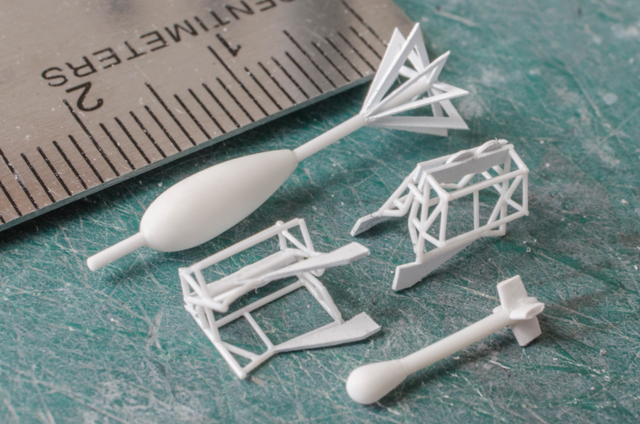
The large and small deployable, signal-sensing 'birds' were fabricated from raw plastic stock, as were their respective 'cages'.
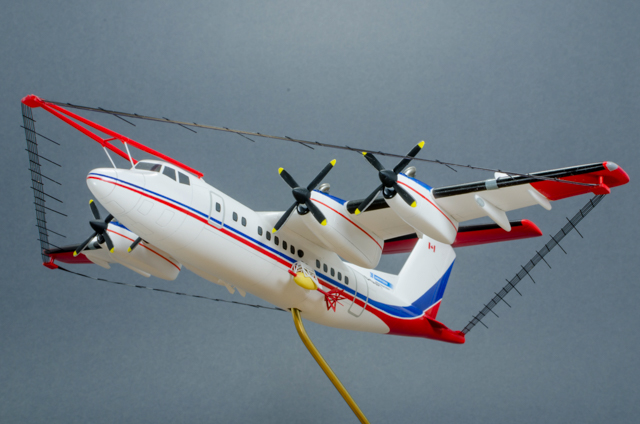
Survey Coil and Survey Loop |
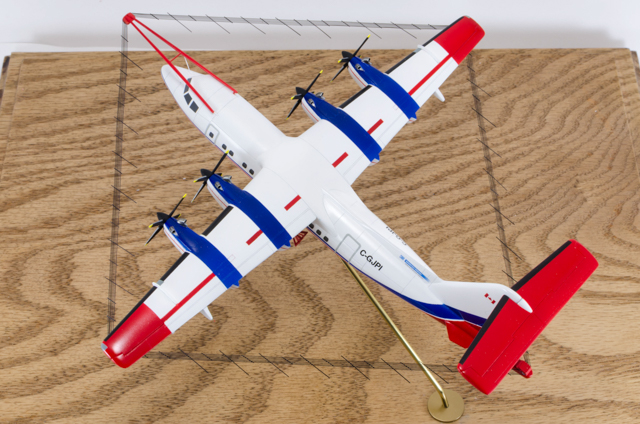
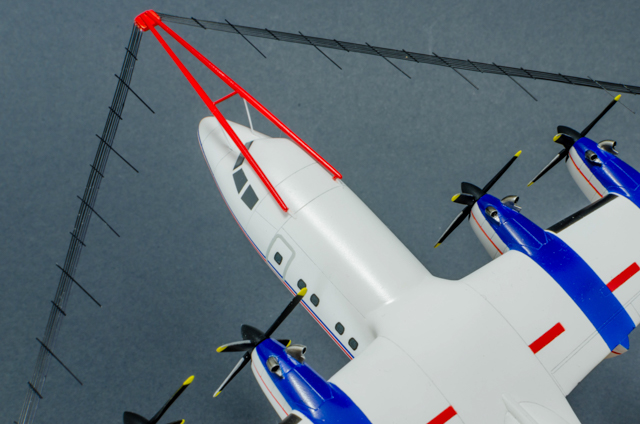
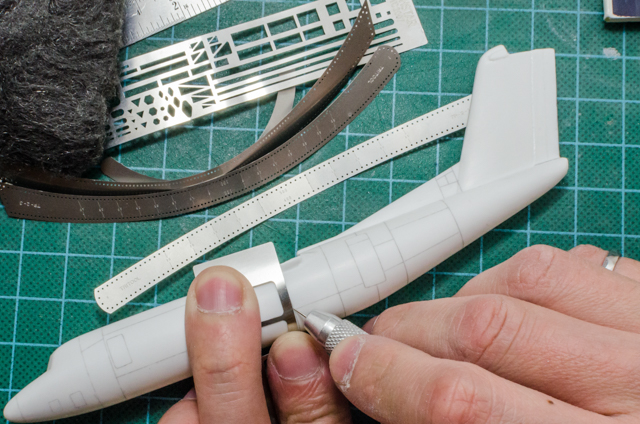
The most prominent aspect to this model is the large survey coil around the airplane. For this, a tail extension was adapted from a 1/72 external fuel tank of some type, sanded to shape, and affixed before the painting process.
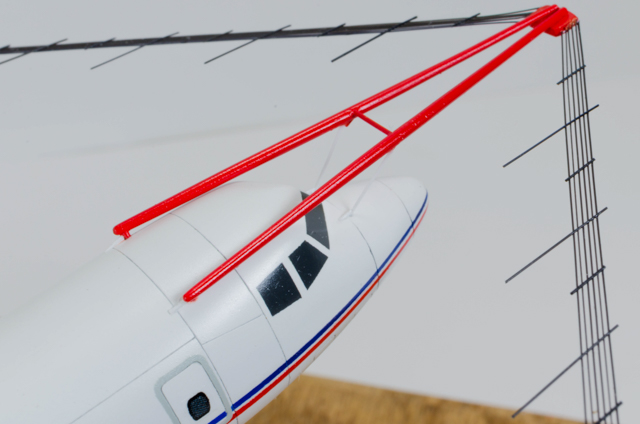
New tail strakes were also fabricated using sheet plastic, and attached onto the rear fuselage before paint. The nose booms and wing tip pods were made from stretched sprue and sheet plastics, painted and attached after the painting process.
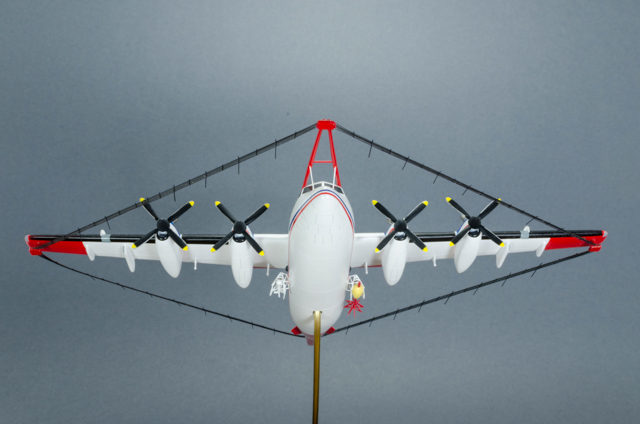
Finally, the survey loop. On the real aircraft this consist a set of six individual loops, spaced with short spacers along the lengths to keep their relative positions. Longer arrows with fins on the ends are also installed to assist with dynamic stability in the air stream. The survey wire assembly were made from finely stretched black sprue glued together *very carefully* with Tamiya's liquid cement.
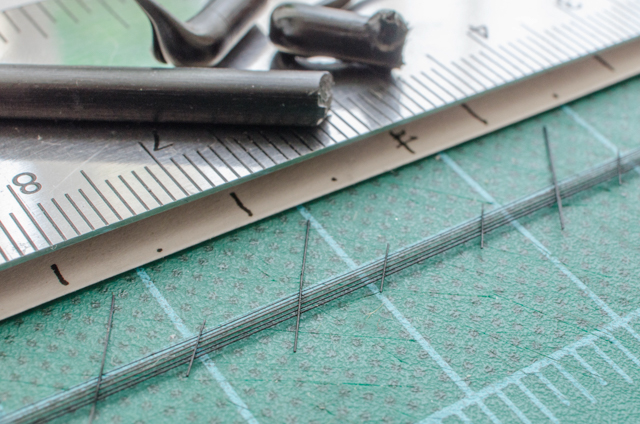
It took a few tries, some broken assemblies, and maybe a few choice words, before I was able to nail down the process and punch them out section by section.
After almost five months on the bench and countless hours of late nights, I was glad to have finally finished this model and present it to its new owner. I'm glad to have finished it, particularly because it's a subject I never thought I'd actually build and one that challenged me to be a better modeler.
I have mixed feelings regarding the Welsh Model's kit as well. It's a lot of work, some of which is due to its cottage country, multi-media nature. Others are more perplexing, such as inconsistencies between the left and right wing halves. In the end, the kit is a starting point that, with some love, does result in a good model. It is also the only option, as is with many of Walsh's subjects, that otherwise would have never been produced.
Well, it was definitely fun while it lasted. Now, onto the next challenge.
Images and Text Copyright ©
2016 by John Chung
Page Created 24 March, 2016
Last Updated
25 March, 2016
Back to
HyperScale Main Page

|
 Home
| What's New |
Features |
Gallery |
Reviews |
Reference |
Forum |
Search
Home
| What's New |
Features |
Gallery |
Reviews |
Reference |
Forum |
Search