AMK's 1/48 scale
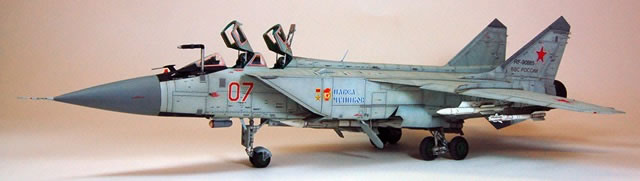
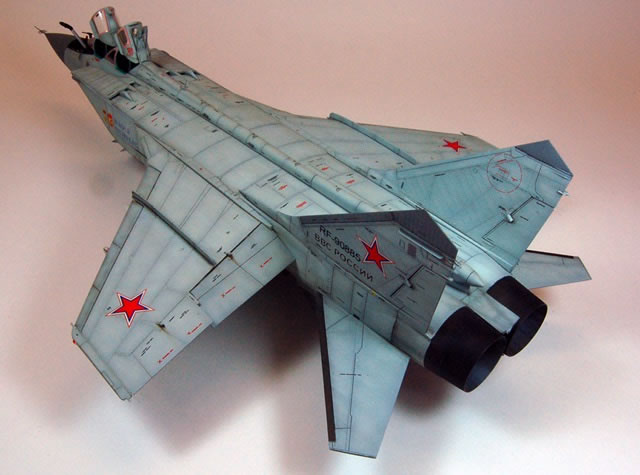
MiG-31 BM/MSM
by Ron Petrosky
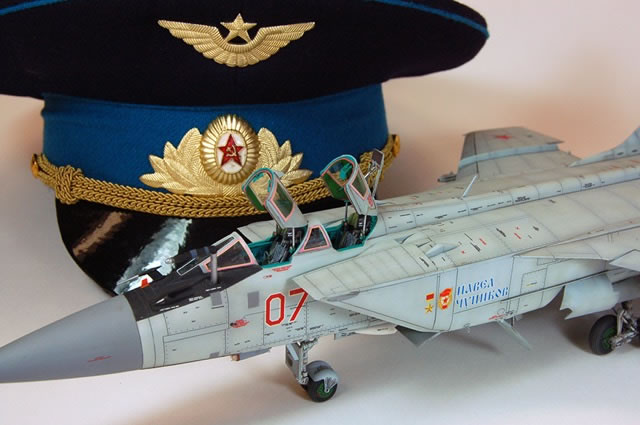 |
Mikoyan Gureyvich MiG-31 |

Eduard's 1/48 scale Bf 109 G-6 is available online from Squadron for only $39.99!
AMK (AvantGardeModelKits) was founded in 2012 with their headquarters and factory located in Macau. Mr. SeHoi Sio is AMK’s global headquarters and factory manager in Macau. Martin Wilson is head of AMK’s global marketing and distribution and lives and works in the United Kingdom. You’ll see Martin’s announcements about new releases and general comments on the AMK Facebook page. AMK was pretty much off my radar screen as their first three kits, the 1/48th IAI Kfir C2/C7, Aero L-29 Delfin and Fouga CM. 170 Magister didn’t hold much interest for me. That all changed when the announcement of the MiG 31 was made and CAD drawings were released. I had read two books about the MiG 31 previously and was impressed with the system. To me, it’s kind of an F14 on steroids, designed to defend the vast areas of the former Soviet Union and today’s Russian Federation. Super fast, heavily armed with impressive electronics… large and in charge!
Being a big fan of modern Russian aircraft and armor, this new kit was full of promise and going on top of my build list! (I suspended work on a Revell 1/32 Me109G6 and that’s quite an accomplishment if you know my fascination with WWII Luftwaffe subjects, particularly the ‘109) I waited a bit before starting the MiG and collected some of the after-market accessories that had been released for the kit. Eduard’s paint masks, photo-etched and wheel set, Begemot MiG31 decals from Russia, Master’s static dischargers (insane machining for something so tiny!), G-Factor MiG-31 Foxhound Pitot Tubes and Antennas in brass (‘didn’t use these on this build) and Furball’s decals for the canopy sealants. One thing I wish I had ordered was G-factor’s brass landing gear but more about that later.
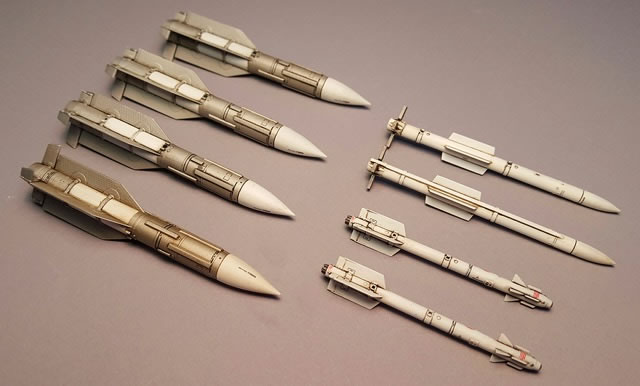
When I received the model from Red Star models after pre-ordering it and inspected the contents I was immediately impressed with the packaging. The missile armament, single piece nose cone, nose-fuselage, and lower fuselage were packaged each in a box of their own within the main top-opening box. These parts are a tour de force of slide-molding technology in keeping with AMK’s stated motto, “Easy to build”.
The missiles are molded as a single piece and are beautifully rendered. A full load of parts sprues, glossy instructions with full-color marking alternatives, photo-etch for ejection handles and the mirror part for the rear canopy, excellent comprehensive decals including a ton of stencils, clear parts for the canopies, refueling fairing light and landing lights are also in the box.
Lastly, there are weights to attach to the nose section interior so the model doesn’t become a tail-sitter. What many have found missing were etched seatbelts, the canopy sealant decals and instrument panel decals which are now included in the follow-up kit of the earlier MiG 31B/BS along with some other “tweeks”. AMK listens!
I had read many reviews and followed the in-progress builds on AMK’s Facebook page and one thing rang clear and consistent throughout, the excellent fit of the parts. Having built mine I can confirm this aspect of the kit most heartily. As an example, you complete the front fuselage and the rear fuselage separately and then slide them together. I thought this was going to be a bear as usually a step appears somewhere at the joint and some sanding and filling would be required. They slide together “on rails” and the way the two assemblies are arranged I have trouble finding the joints now. No sanding, no filler. I did use a little filler at the under-wing/fuse joints and the vertical stabilizers to fuse joint but I think a bit more care when aligning and gluing on my part would have avoided that necessity. As another example, molding of the vertical stabilizer integral with the rear fuselage panels automatically sets the vertical stabilizers at the right angle. There are many other examples of the thoughtful engineering that went into this kit to enable the modeler to build this kit without excessive difficulty in aligning and joining parts.
One aspect I did find annoying was that many of the fragile sections of the landing gear and door actuators had to be added early and stick out from the fuselage and the instructions would have you attach the gear doors early as well. We all know that isn’t going to happen! As a result, you can expect to be repairing these actuators as the build and resulting handling progresses. To get the gear to be as accurate and complex as they are, not simplified, I can’t see how this could be avoided.
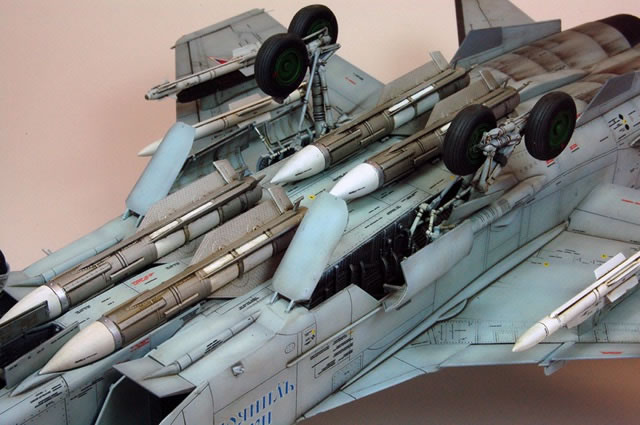
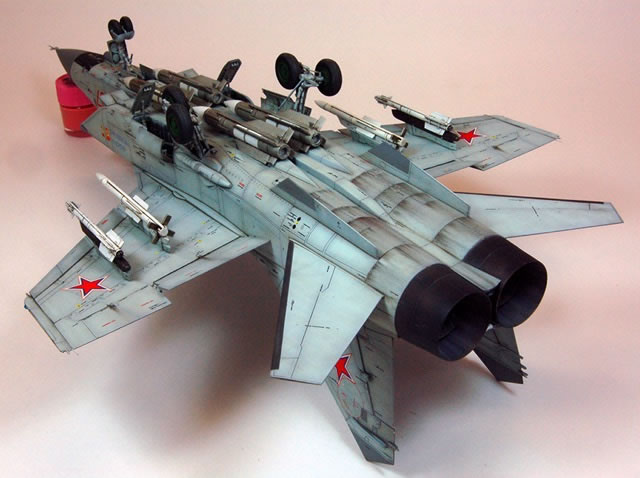
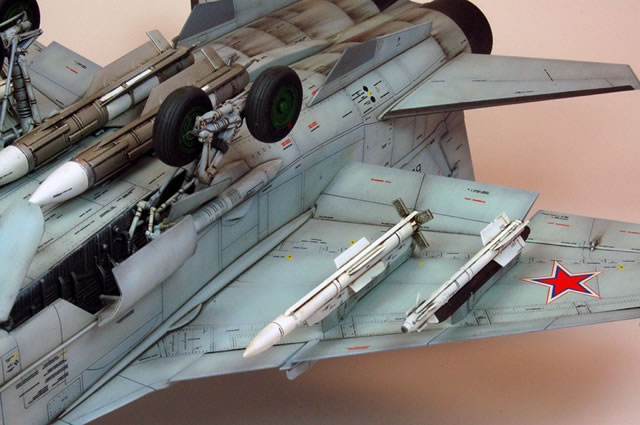
Options abound! Trailing edge and leading edge flaps up or down, elevators level or at an angle (parked), canopies open or closed, Intake lower lip doors level or down, Refueling probe retracted or extended, (IRST) infra-red search and track pod retracted or extended. Missiles include the under fuselage R33s, which are a default, but you can mix and match the R73s and R77s on the wing pylons.
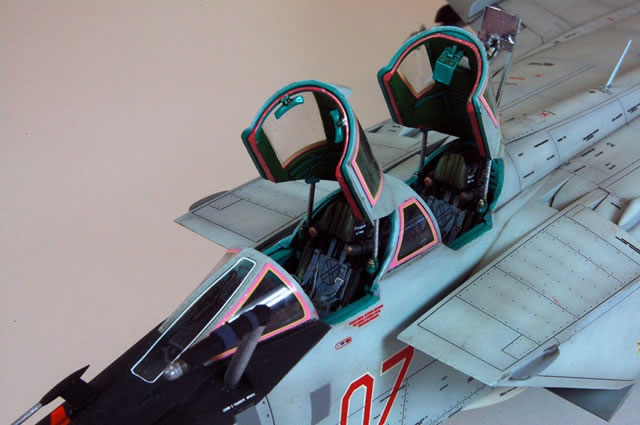
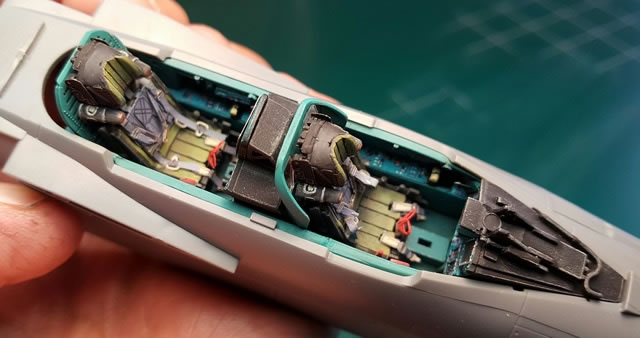
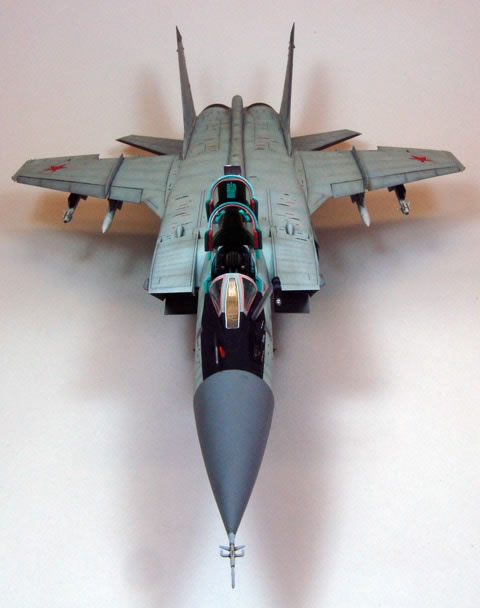
I used Eduard’s etched-metal, pre-painted set for the cockpit. Here I had a bit of difficulty matching the Eduard “turquoise” cockpit parts with the Mr. Paint Turquoise I used on the interior.
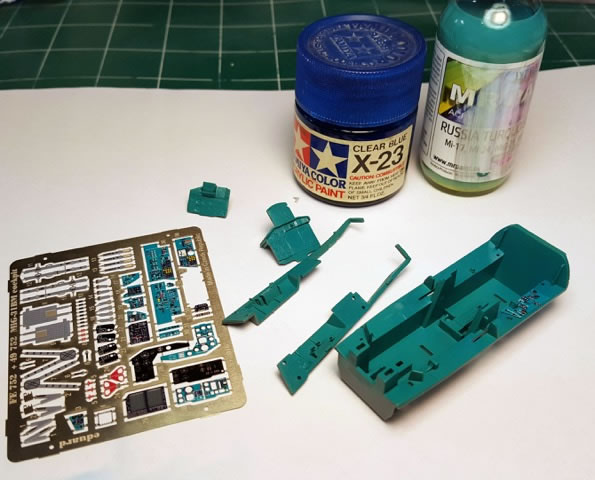
I sprayed the Mr. Paint color with a thin layer of Tamiya transparent blue and that helped.
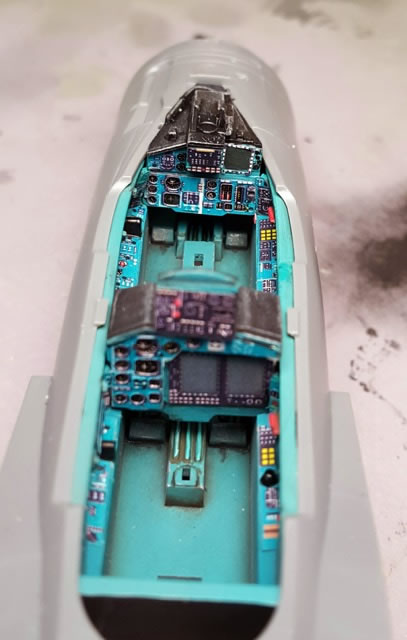
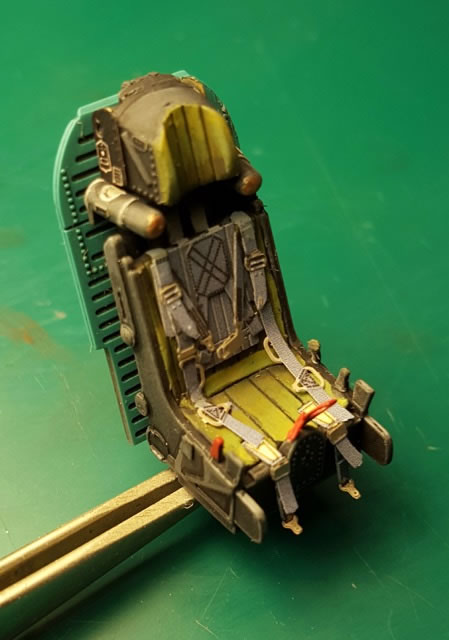
The Eduard K36 ejection seat and cockpit parts are amazing when assembled and worth “cheating” by using them. (Can you believe that DaVinci didn’t like to use color pigments because he thought they were someone else’s artistic creation, not his!).
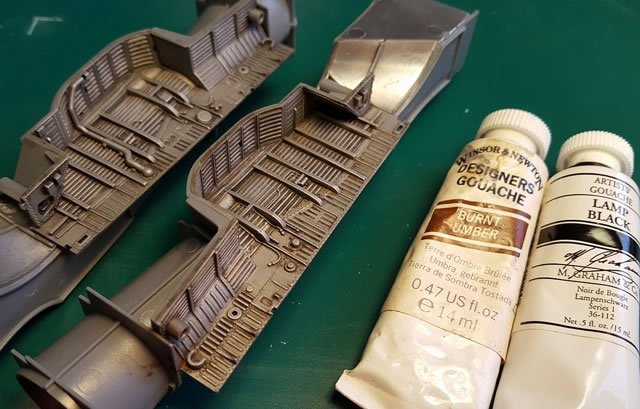
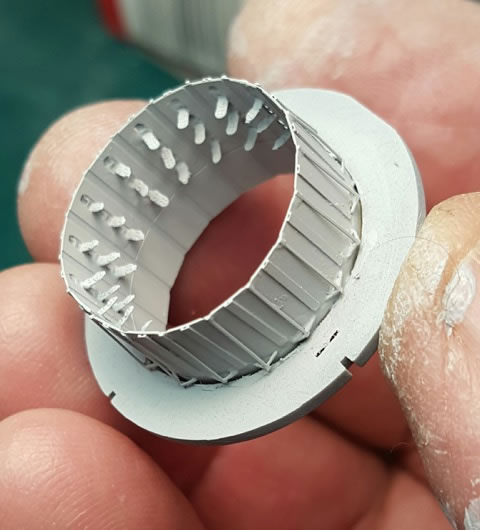
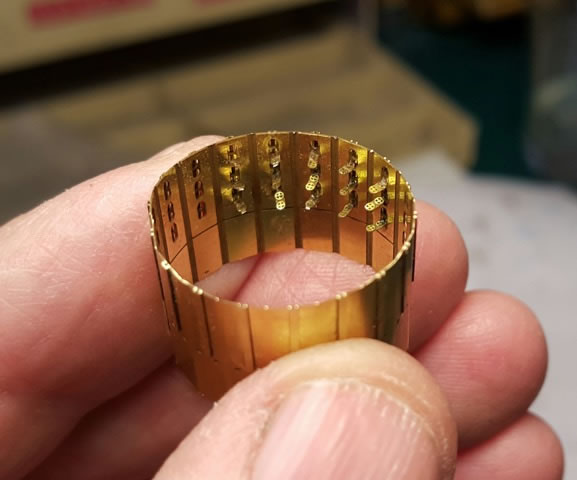
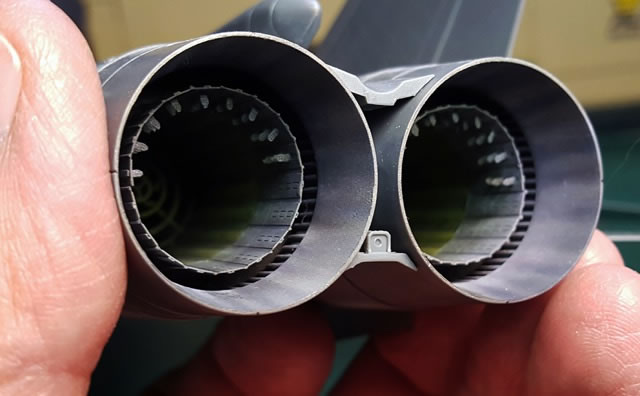
I was, initially, not going to use the exhaust parts but the challenge was too much to resist! I will say this, looks great, very proud, but I will never do that again! The 54 individual little drop-down coolant petals drove me crazy attaching them one-at-a-time, on the curved surface of a rolled brass tube, then hitting them with the tweezers and having to reattach. Someone at Eduard is a sadist!
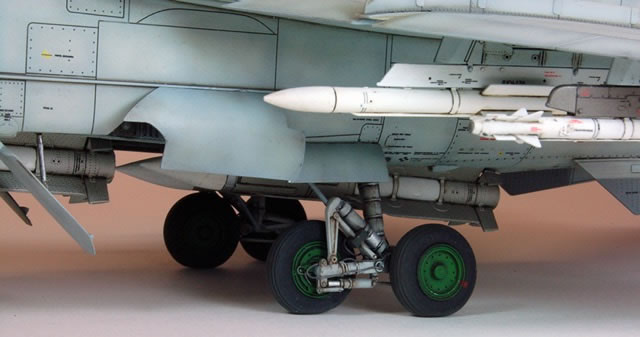
The Eduard wheels are very detailed resin substitutes for the less detailed plastic kit parts. They each (Inside brake discs) belong on a specific axle so mark the backs of the four with a scratched-in number matching the number of the casting matrix after removing the brake disc.
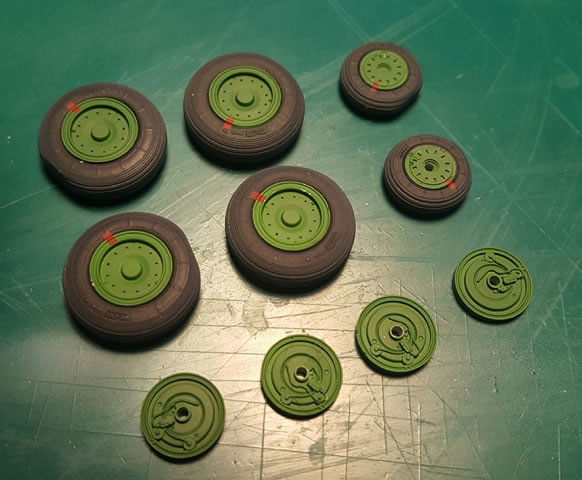
Glue the disc to the proper axle noting the notch is at the top and then attach the wheel. The front gear debris guard has the strengthening ribs molded in and fits great.
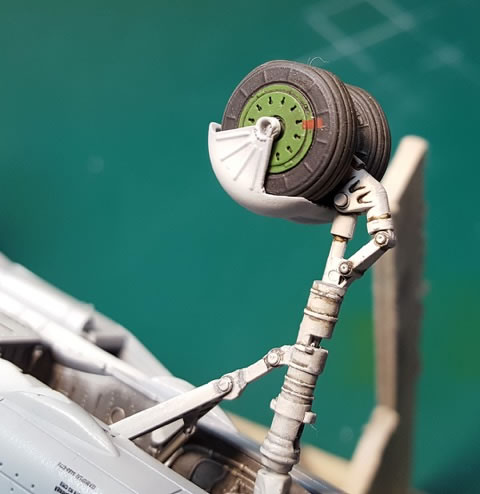
Regarding the kit landing gear. The MiG 31 in 1/48th is a large model and has some heft. First, drill the front gear leg sections all the way through so you can insert a cut-off thin steel needle through the two sections. The front leg sections are very delicate and need the reinforcement.

Watch the orientation of parts L36 and L37 on the nose landing gear. I reversed them and the nose gear door sits too low! Went merrily on my way attaching parts without looking at full size photos and this was the result. I don’t dare try to cut these off and rearrange the door on this fragile assembly!
In addition to the kit’s provided weights, I found it necessary to add two larger squashed fishing split shot sinkers through the IRST opening to compensate for the added Eduard brass parts at the very rear of the exhausts and the extra weight stresses the front and main legs even more.
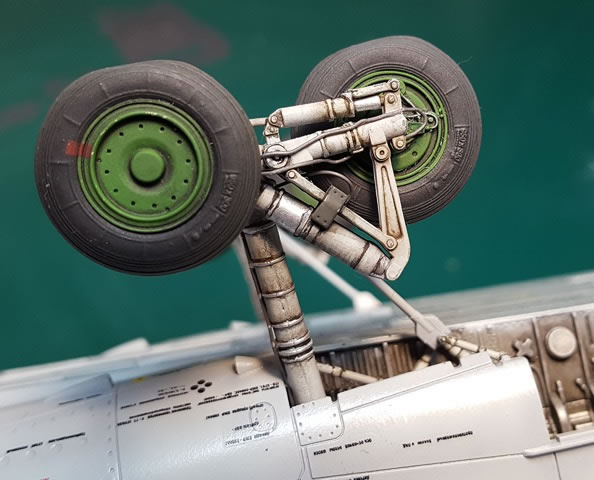
On the main gear, epoxy glue what parts you can, especially the main gear joint to the fuselage. Welding type glue weakens the plastic even when dry and you need the strength of every interconnected molecule of styrene to hold the weight of the model. The gear works, but don’t push the model sideways on the gear. I added some “sort of nearly accurate looking” hydraulic lines on the gear using thin solder. If I were to build this again I’d substitute the G-factor brass gear for the kit parts.
To make my rendition of this model a bit different (grey is the only exterior paint scheme allowed!) I used Begemot’s decals fro Russia. I am a big fan now. The applications of the stencils are an Odyssey so patience is a requirement and breaking sessions up a necessity. These decals are thin but tough and stand some moving around using some water to slide them on the model. Color and register are excellent.
I am also now a fan of Mr. Paint from Slovakia as well. They make paints to match modern Soviet and Russian aircraft as well as aircraft of other nationalities and time periods. The paint sprays terrific and dries even with great coverage. I get mine from Red Star Models here in the US and directly from Slovakia with fast delivery. AKAN’s new solvent-based acrylics from Russia would also work well from my experience with them.
Spare Parts Support!
Okay, now for the really amazing feature of the kits from AMK. You won’t find this in the box! Spare parts support! No kidding, really, it’s unheard of! What’s this world coming to? You won’t have to buy another whole kit to replace a part because the manufacturer will never answer your requests for replacements. (“Parts! What parts? We don’t make parts, we make kits, go away”, LOL) I somehow threw away a whole “F” sprue and mentioned this on the FaceBook page and Martin took care of it sending me a duplicate “F” sprue from Victory Models here in the ‘States which I think is AMK’s rep in the US. Mine is not an isolated instance either. Many other AMK customers have taken advantage of this modern miracle of service.
Well, I guess you get the picture that I am really looking forward to AMKs 1/48th F-14 and MiG 25 kits. If they get any better we’ll see the r
eally mystical “perfect kit” where no one will complain about any aspect of the kit. Don’t laugh…. It’s possible!
We now have another manufacturer in the top tier of the model kit manufacturingdom making kits we want…. Not just kits that they want to make (AMK just did a survey on FaceBook of subjects modelers are most interested in. How about a 1/48th Buccaneer?).
Model, Images and Text
Copyright ©
2016 by Ron Petrosky
Page Created 9 August, 2016
Last Updated
10 August, 2016
Back to HyperScale Main Page
|
 Home
| What's New | Features | Gallery | Reviews | Reference | Resource Guides | Forum |
Home
| What's New | Features | Gallery | Reviews | Reference | Resource Guides | Forum |