Tamiya's 1/32 scale
P-51D Mustang
Plated Version
by Roger Hardy
 |
North American P-51D Mustang |

Tamiya's 1/32 scale P-51D Mustang is available online from Squadron
S
u m m a r y |
| Catalogue Number: |
Tamiya Kit No. 25151 – North American P-51D Mustang Plated Version |
| Scale: |
1/32 |
| Contents and Media: |
389 parts in grey plastic; 26 parts in clear; five black plastic pieces; two frets of photo-etched metal; two self-adhesive metallic name plates; a self-adhesive masking sheet; 16 metal rods; 17 mini-magnets; various screws and bolts; eight poly caps; two decal sheets with markings for three varied schemes. |
| Price: |
£113.37 (£94.98 Export Price) reduced from £169.99 at time of writing (June 2016) plus shipping from Hannants and other stockists worldwide |
| Review Type: |
Build Review |
| Advantages: |
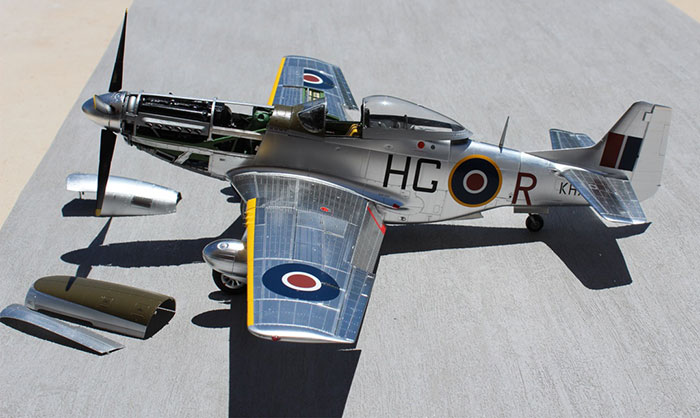
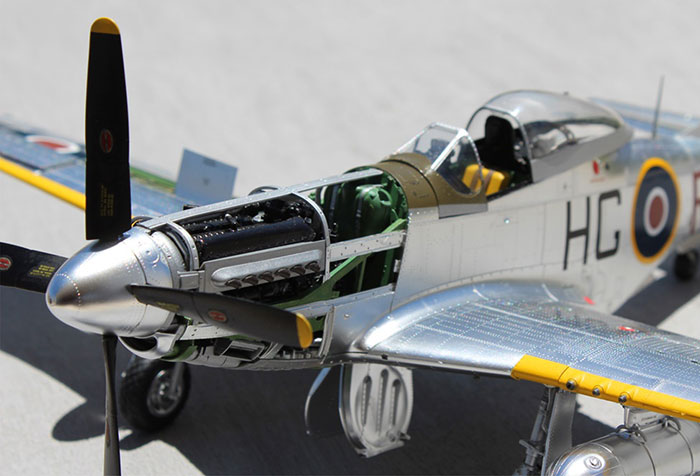
Perfectly moulded; accurate; astoundingly detailed with full engine, cockpit, gun bays and wheel wells; vast array of options; positionable undercarriage; includes display stand. |
| Disadvantages: |
Canopy doesn’t slide – see text. The magnets needed a little help from blu-tak. |
| Conclusion: |
Probably the most perfect aircraft kit ever produced (but then I haven’t started the Tamiya Mosquito yet…). |
Background
Sometime in 2011 in Shizuoka City, Mr Tamiya gathered together his workforce and announced that they were going to create the world’s most perfect aircraft kit. This is the result.
This model has been comprehensively reviewed by Brett Green here so there is no point me repeating it:
http://www.hyperscale.com/2011/reviews/kits/tamiya60322reviewbg_1.htm
...except to say that I agree with pretty well all the adulations showered on this kit. I made it straight from the box but added the Hannant’s decal sheet http://www.hannants.co.uk/product/X32043 which provides markings for RAF, RAAF and RCAF and RAF aircraft.
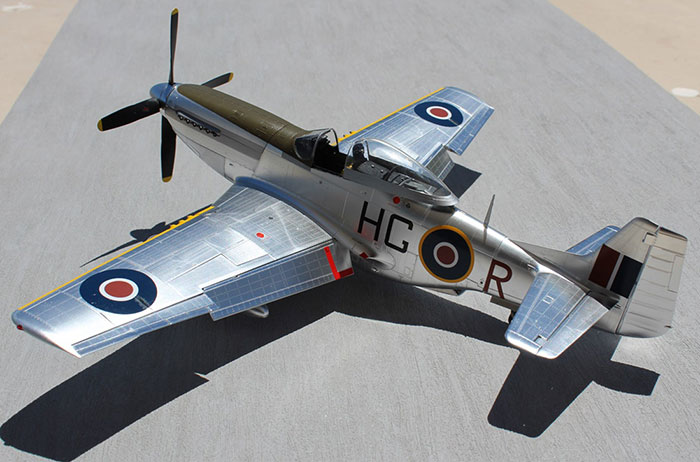
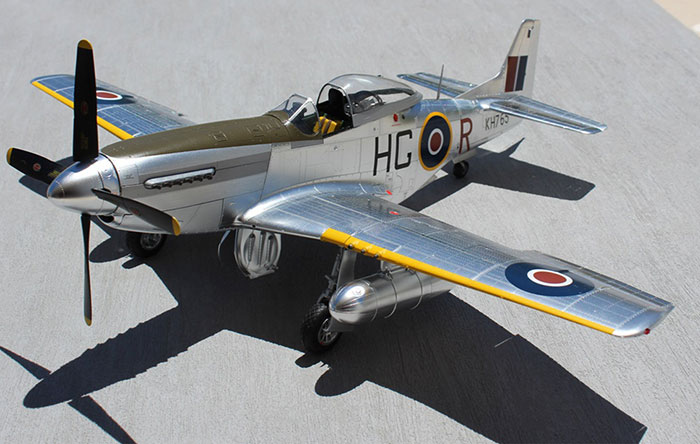
I wanted a Mustang with roundels; aircraft always look better in roundels!
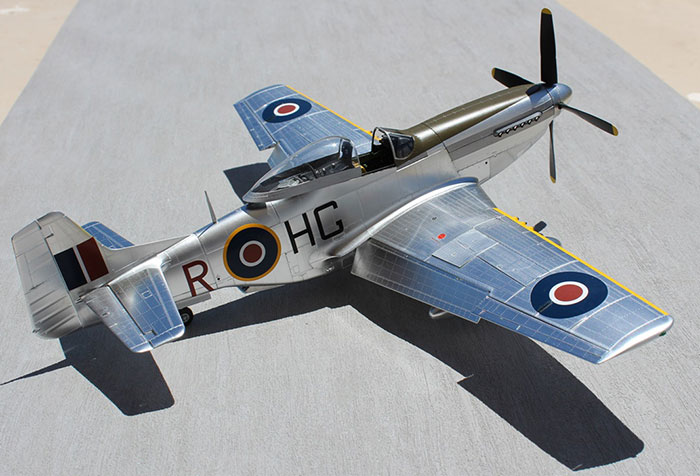
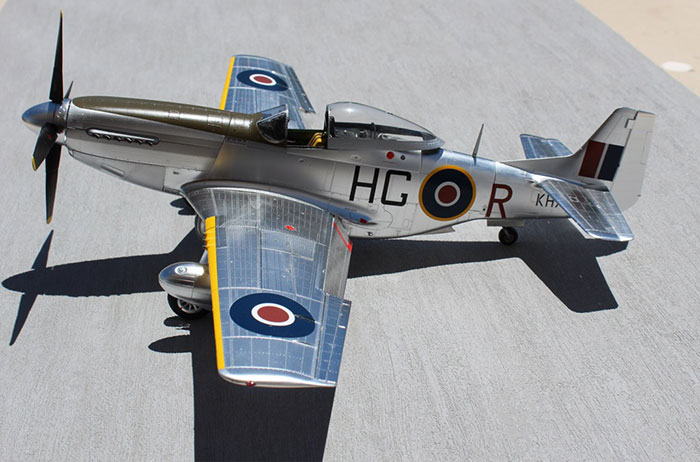
This model is the plated version and I thought that, if the worst came to the worst, I could always paint it. You might have expected a high-chrome effect if you’ve ever built any of the old Hawk plated kits but I was in for a surprise; the plating is deliciously restrained and looks very realistic; really just like polished aluminium. So, the main mission is to make sure that the surfaces remained blemish-free because touching up a damaged surface with paint is just not possible; it’s too obvious. To this end, Tamiya have made sure that all the sprue attachments are on the inside or on invisible surfaces. What I mean is that the bits that you have to trim away when separating the parts from the sprues are on mating surfaces, not on the surfaces you see, so you never have to damage the plating. Of course, you need to scrape the plating away from those surfaces where you intend to use liquid poly which, incidentally, does not mark the plated surface. I also used superglue here and there for small items where I couldn’t be bothered to scrape the plating away but don’t get this on the plating as it does mark it.
If you’re worried about the joints that normally need a little work, such as between fuselage sides, don’t worry. In this case, those joints don’t exist on the upper surface (there are seam-free parts over the engine and aft of the cockpit) but do exist underneath, near the radiator inlet; I can live with that. Frankly, if you want to find a kit where the joints need minimal attention; go for Tamiya. I wouldn’t want to try anyone else’s plated kit.
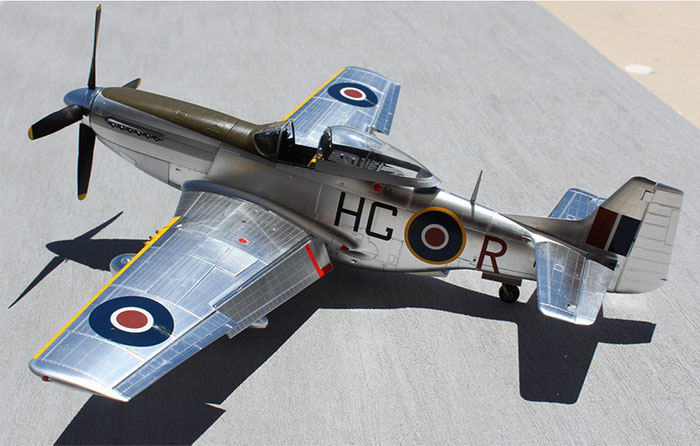
There are some parts that need to be sprayed silver; the canopy and windscreen, for example. I found that Alclad2 ‘white aluminium’ was the best match but is still not right; however it looks fine on the finished model. Surprisingly, it is a good match for the engine cowling parts, which have a different plating sheen. The only metallic pats that need additional spraying are the engine panels around the exhausts (check your photos) and I used Alclad’s ‘dark aluminium’ which looked just right. During the construction, I protected the model from accidental scratches with kitchen roll taped into place.
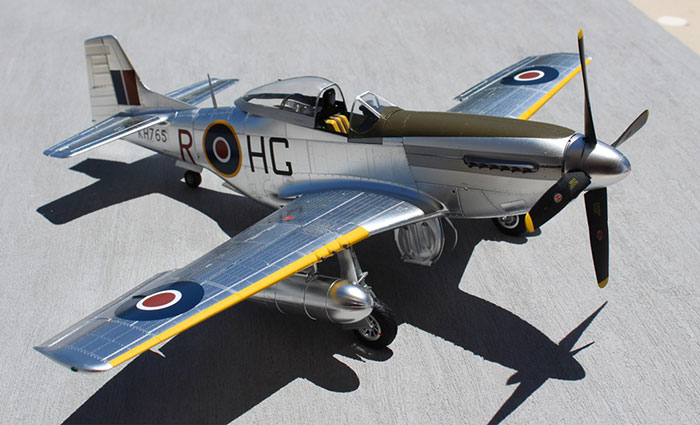
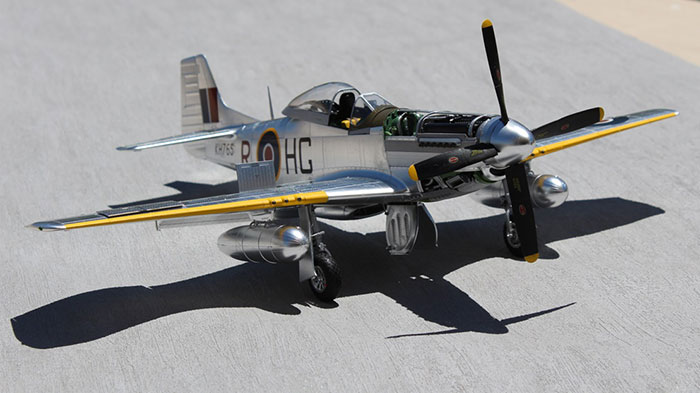
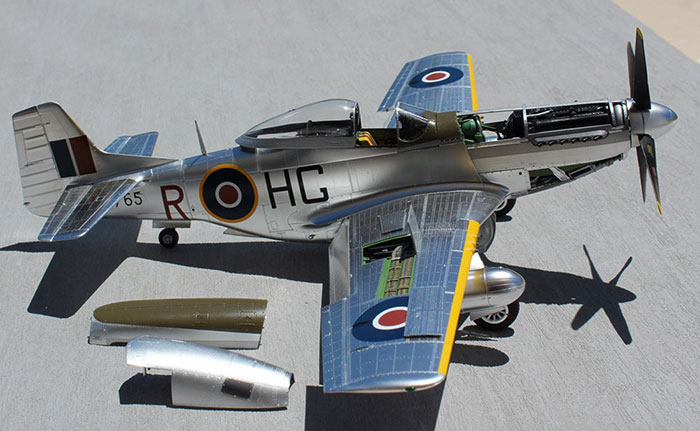
I should, at this point, explain that I didn’t intend my model to necessarily be entirely realistic or accurate. What I wanted was for it to be an attractive display model so was prepared to overlook certain aspects of accuracy in order to achieve this. For example, my model retains the plated wing. Real Mustangs had laminar flow wings and the factory filled all surface blemishes and painted the wings silver, so they were never natural metal. However, mine are, and they look damned good, the way the lines of subtle flush rivets catch the light just looks superb! The other issue is that I wanted to do a Mustang IVA in roundels (RCAF in UK, 1945) but these aircraft were essentially the P-51K not the P-51D of the model and should have the Aeroproducts propeller not the Hamilton Standard of the kit. Now that the model is finished, I think the incorrect prop is a bit too prominent. Red Roo models do replacement blades and I may get some to retrofit: (http://www.bnamodelworld.com/model-planes-exterior-detail-sets-red-roo-models-rrr32009). Quickboost also do some for the Trumpeter kit but these are square-tipped so not correct either. In fact, Tamiya also do a 1/32 P-51K model with the correct propeller but it’s not plated! There is a correct Dallas hood with the kit which I used. Another confession is that I used the yellow and rather prominent US Army parachute provided with the kit; I’m pretty sure that the RCAF would have used dowdy RAF parachutes instead. However, in my case, my pilot wanted to use a US army parachute, so there.
The Hannants decal sheet http://www.hannants.co.uk/product/X32043 was intended for some other model, probably the old Hasegawa 1/32 kit, and it includes stencils but limited information as to where they should go so I used the kit stencil decals but the Hannants sheet for the national markings. These are beautifully thin and need a little care in handling as they are quite big. Keep ‘em wet, be careful and you’ll be fine. I noted that some tiny decals did not stick well to the plated surface so I then used Micro Set to make sure there was good adhesion. Decals don’t adhere well to bare plastic; I’m not sure how well they adhere to plated plastic – only time will tell.
The instructions in this kit are wonderful and you really cannot go wrong…but if you do not follow them you WILL get things wrong, everything is handed and everything has its proper place. Take your time and it’ll be fine. The fit of the parts is outstanding and if something doesn’t fit, believe me, the problem is with you, not the kit. Not one single part (out of almost 400!) needs fettling. The removable panels (engine cowlings and gun bays) are amazingly thin and fit perfectly. All control surfaces, radiator flaps and wing flaps move. Another thoughtful feature is that so much of the model can be dismantled for transport (to competitions…?) so you can remove the entire undercarriage, doors included as they all slot or screw back into place. Very nice. The undercarriage legs are reinforced with metal rods and the tyres are rubber. Whatever next? At every point in this kit, you are impressed by the thought that has gone into it. Expensive? Hmm….No. You pay for the best and, honestly, this is really the best. What price perfection?
Tamiya provide masking materials for the canopy and windscreen but you have to cut them out, unlike the Eduard canopy masks. The material is like Kabuki tape but stickier and they worked very well with no seepage at all.
Criticisms? They are a couple of niggles. The little magnets didn’t work as well as I had expected so I ended up helping them with tiny bits of blu-tak. However, my main bone of contention would be that the canopy cannot be made to slide; it has to be glued where you want it as it won’t sit properly either side of the canopy rails; it pops off in any position. Maybe I did something wrong but three canopies are provided but the ‘attachments’ are the same. I had to remove the inside edge to get it to fit over the rails. This is inexplicable because it would have been so easy to make it slide but it’s not a problem for me as I normally cement my canopies open. It’s just that everything that moves on the aircraft moves on the model, except the canopy! My finger trouble? Answers on a postcard.
So, in summary, this is undoubtedly the finest kit I have ever made in over 50 years of modelling. The thought and care that has gone into its design and production is staggering and, in my mind, make it outstanding value for money. My congratulations and thanks to Tamiya. Get one while you can! Note that Hannants currently have it reduced by 30% but I’m not sure how long this offer will last.
Model, Images and Text
Copyright ©
2016 by Roger Hardy
Page Created 22 June, 2016
Last Updated
22 June, 2016
Back to HyperScale Main Page
|
 Home
| What's New | Features | Gallery | Reviews | Reference | Resource Guides | Forum |
Home
| What's New | Features | Gallery | Reviews | Reference | Resource Guides | Forum |