Revell's 1/48 scale
Panavia Tornado GR.1B
by Jon Bryon
|
|
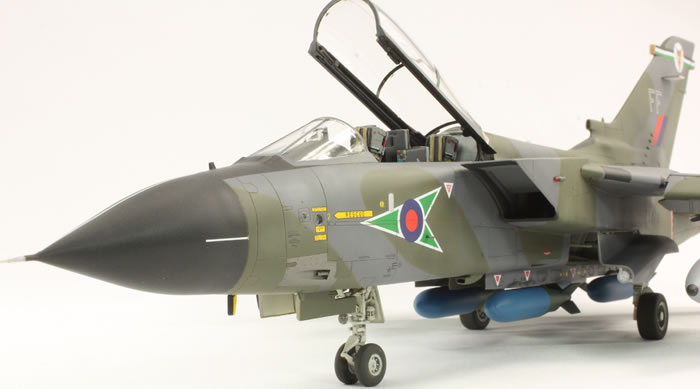
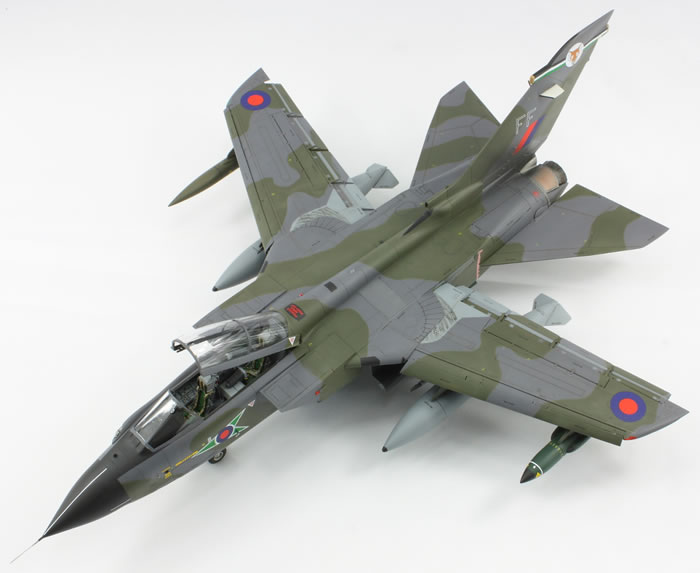
Revell 1/48 Panavia Tornado GR.1B
with Xtraparts resin pylons, Aries resin ejection seats, Eduard photo-etch interior and Xtradecals decals
Royal Air Force, 12 Squadron, Scotland 1995 |

Revell's 1/48 scale Tornado GR.4 is available online from Squadron.com
Occasionally one finds oneself hugely out of step with the broader modelling community. This is one of those times.
My friend Simon was an RAF Navigator on Buccaneers and Tornadoes in the 1980s and 90s. He's been bugging me for a long time to build him one of his aircraft, but when the only options are Airfix's Buccaneer and Italeri's Tornado, and you've already built two of each, it's not exactly an inviting prospect.
Lucky for him, however, Revell recently saw fit to release a new-mould Tornado which received many rave reviews. I duly agreed to build it.
Unhappily for me, this is a pig of a kit.
I hated it.
It's moulded in a nasty soft plastic that breaks easily. There are small amounts of flash everywhere. The surface detail ranges from the quite nice fading to the non-existent (like on one side of the fin). The quality of the surface finish is also highly variable, with the tailplanes being particularly 'gritty' and the main undercarriage doors being extremely lumpy. Beyond the plastic, the engineering is massively over-complicated with probably more seams to sort out than any other kit I've ever made. Fit is average at best; particularly poor areas are the fit of the airbrakes, the flaps (with an enormous longitudinal seam to remove) and the intakes.
The above might be forgiveable if this kit was the last word in 1/48 Tornado accuracy, but it isn't. I'm no expert, but from my own observations and that of others, the following seem to be issues:
-
The top of the fin is a weird trapezoidal shape. I thinned it a bit, but it's still wrong.
-
The wings don't appear to sweep forward enough. I abandoned the wing-sweep mechanism and forced them forwards a bit more. This means the wing slat recesses are now not quite in the right place.
-
I'm pretty sure there's something wrong with the overall shape of the wing gloves.
-
The kink where the nose transitions to the fuselage is over-pronounced.
-
The gun ports don't look quite right.
-
The ECS exhaust (under the left intake in the fuselage side) is not the right shape.
-
Others have questioned the shape of the fin around the heat exchanger, but I didn't look too hard...
I had the German IDS boxing of the kit, which needed some modification to better represent an RAF GR.1B from 1995:
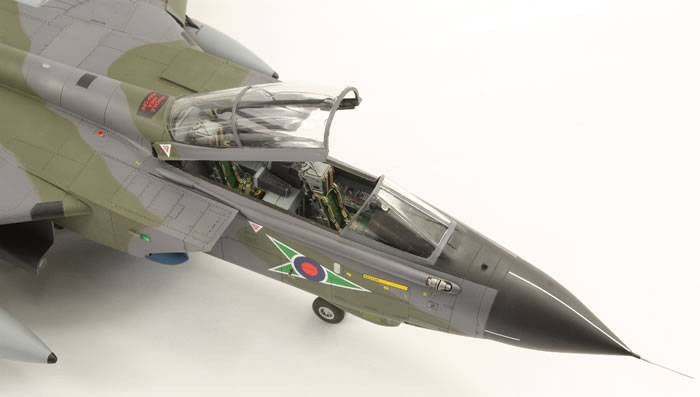
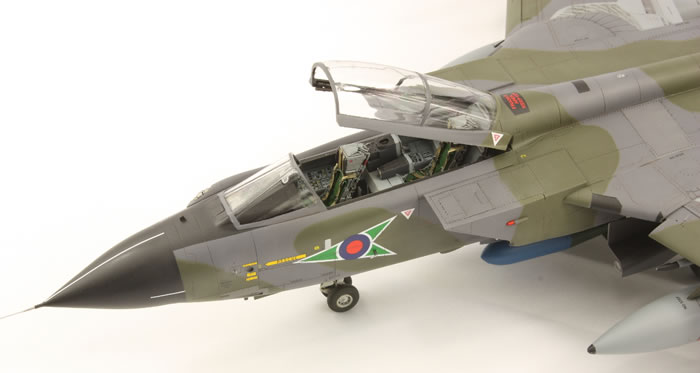
I used an Eduard colour photo-etch set for the interior. This was okay, but the final result is less accurate than it could be. The kit-supplied navigator consoles, which I used, are not right in size or shape and I'm hoping Simon won't look to closely at his former office.
-
I had an old set of Xtraparts (Paragon) resin pylons for the fuselage and wings that better represent those used on RAF Tornadoes.
-
Aires resin seats were used for improved detail.
-
The kit does come with the housing for the LRMTS under the nose but no clear part. I nicked the housing and clear part from an Italeri Tornado ECR in the stash which fitted okay.
-
Several antennae or protrusions need to be added from the spares box: one above the air intake at the front of the fin (mine is the wrong shape, but it gives the right impression) and a small one to the left of the nose gear bay. The other antenna under the nose is in the kit, although it doesn't quite match the shape from photographs. The antenna in front of the windscreen is in the wrong place and was removed and replaced.
-
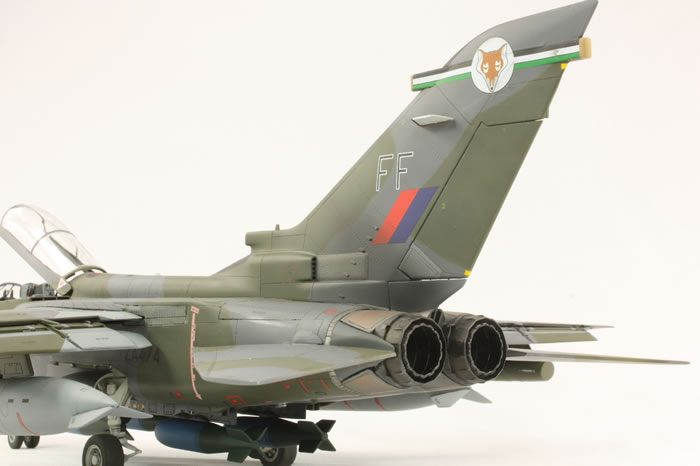
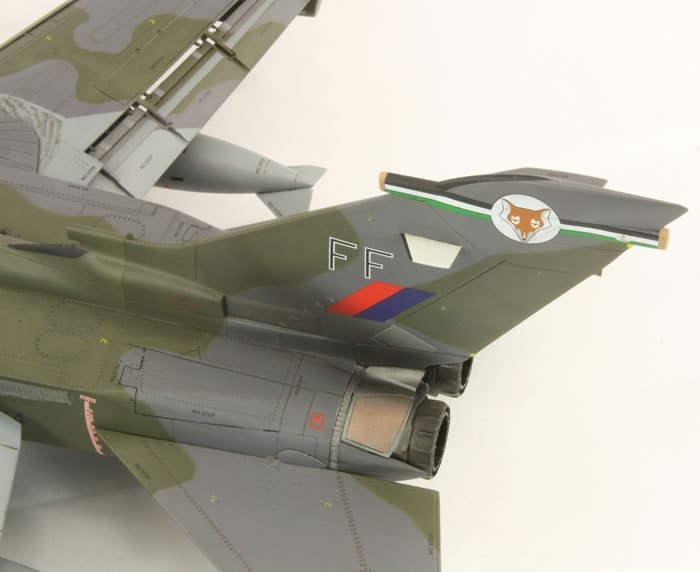
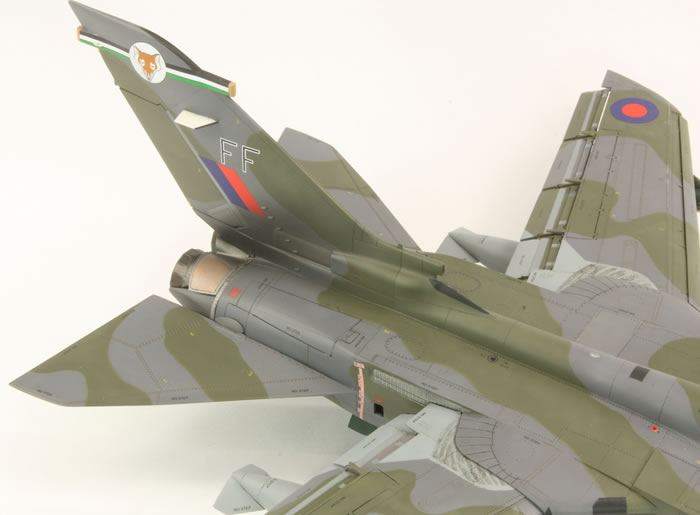
The ECM housing at the top of the tail needs to be swapped for the RAF version; this is provided in the kit.
-
The ILS aerials (the little white fins on the tail) are also provided in the kit.
-
My life was made slightly easier since the aircraft I was modelling didn't have the UHF aerials on the spine
A very useful source of information on this kit and the GR.1 is a build thread on Britmodeller by General Melchett.
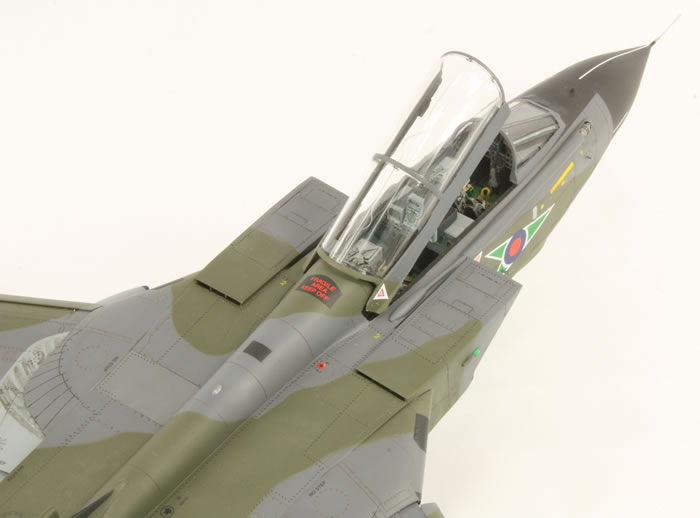
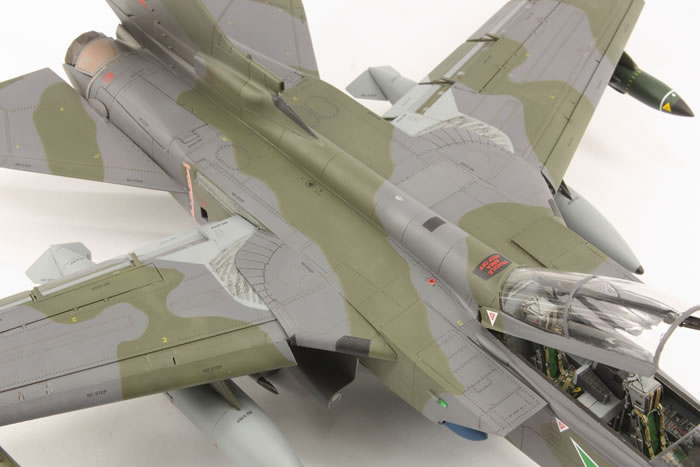
The cockpit went together relatively smoothly with the Eduard photo-etch added. The Aires seats are nicely moulded but come with photo-etched belts; I much prefer seats that come with belts moulded in. I kept it all rather clean and Mr Color Medium Sea Grey matched the Eduard colour quite well.
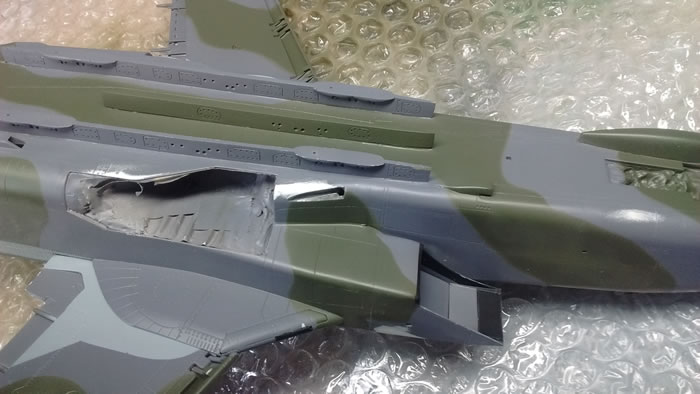
The intake trunkings were built up and then many a 'happy' hour spent removing the seams. A waste of time in all honesty as very little is visible on the final model, but I can't abide intakes with seams! Parts 19 and 20 were added afterwards into their respective holes.
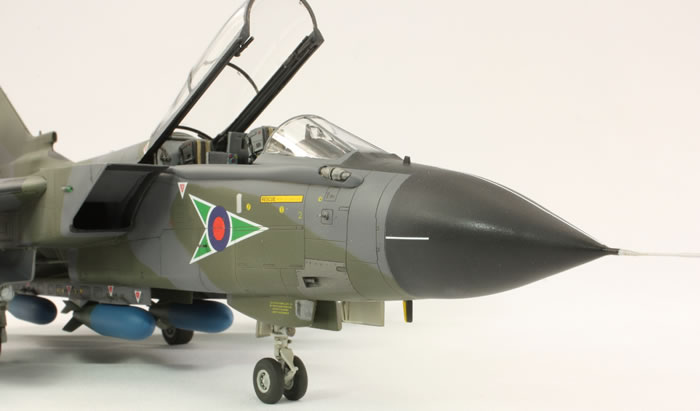
The fuselage goes together bit by bit. Alignment is crucial here and I made life difficult for myself by fitting the nose fuselage sides fractionally too far forward relative to the plate which makes up the lower fuselage. This then throws everything aft out of whack. The nose cone needs filling with weight and then the seam between it and the fuselage must be removed completely.
Before the fuselage top is put on the wings need to be sorted out. I didn't use any of the parts to make the pylons move. The instructions on how to put the flaps together are a nightmare and by far the best way to do it is to find pictures of this model that have been successfully built. The tabs at the end of the flaps which are meant to help locate them on the wing broke off at various points along the way; don't worry about it as they are unnecessary anyway. The flaps weren't attached to the wing until after painting and decalling. The spoilers were glued in the closed position (not a great fit). The slat actuators were attached to the slats first, rather than the wing. It's very fiddly, but did work in the end.
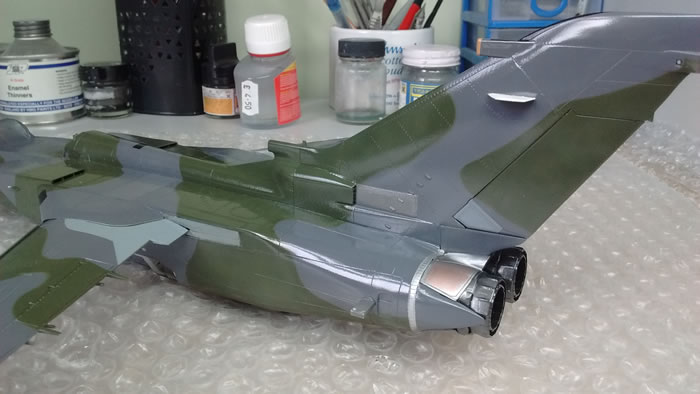
The top of the fuselage and the tail could then be tackled. This involved a lot of CA, plastic card, sanding, polishing and rescribing. I left the tailerons off until the very end to ease painting and handling. The airbrakes took forever to fit in the closed position, and doing so involved fitting their respective bays and then hacking the plastic to make it all fit. The very rear fuselage was a bit clunky and the fit of the thrust reversers in the closed position very poor. More CA and plastic card to the rescue.
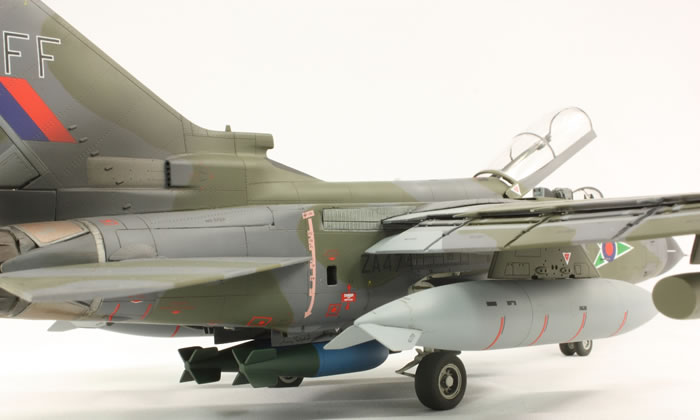
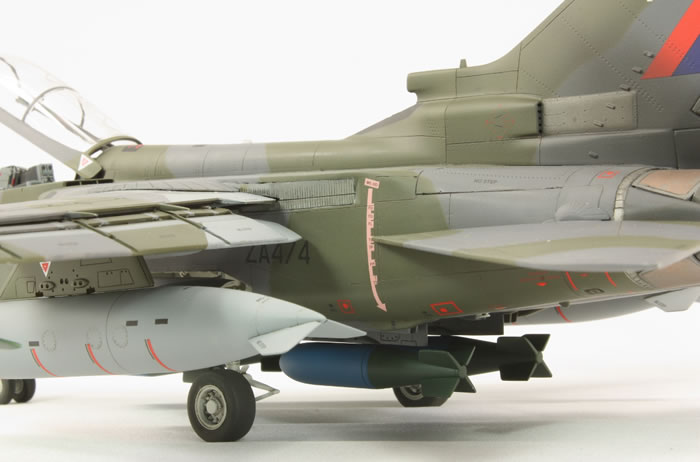
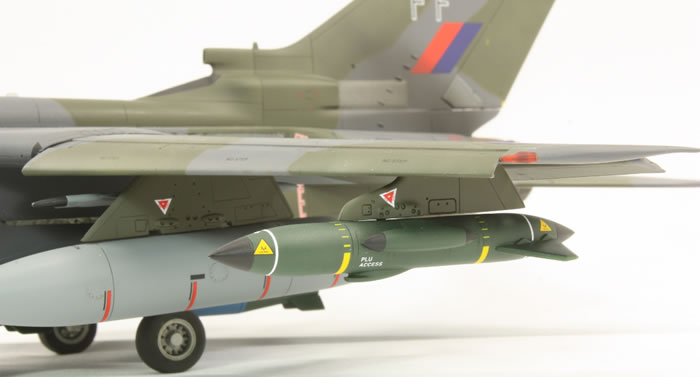
The under-fuselage pylons were replaced by the Xtraparts parts. They were designed for the Italeri kit so did not fit well; the fuselage had a curve which the very long pylons didn't match. I just used brute force and CA glue to overcome this, but they popped loose several times had to be reattached. It's not pretty under there! The wing pylons were much easier and were pinned in place with Albion Alloys brass tubing before being removed for painting and attached at the end. This makes life a lot easier in the long run. The Sidewinder pylons are from the kit and fit the resin pylons surprisingly well. I couldn't get the tail hook to fit at all and ended up butchering the hinge end and scraping down the hook to get it to seat properly.
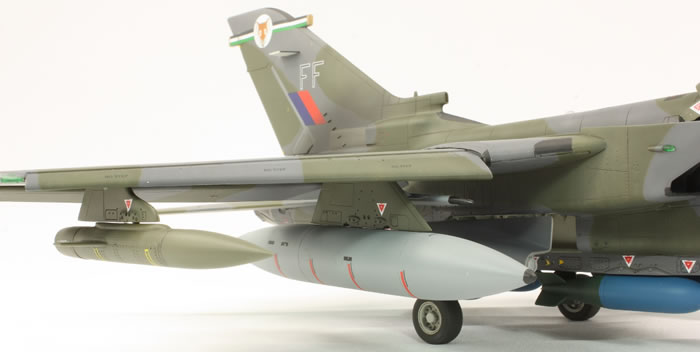
The build was further slowed by Simon's desire for the weapons load. The BOZ pod and Sky Shadow come in the kit; the latter has an intake in the wrong place, but I didn't alter it. The end of the BOZ pod was just filled with Milliput and sanded smooth; I've seen it looking like this in various photos. The fuel tanks are also from the kit and might not quite be right for an RAF Tornado (I don't know) but looked close enough for me. As for offensive weaponry, my spares box is sadly lacking in RAF ordnance and so the first choice of Paveway guided bombs, and the second choice of Sea Eagles, had to be abandoned in favour of 1000lb bombs from an old Buccaneer kit. All stores were pinned with brass tube to their respective pylons.
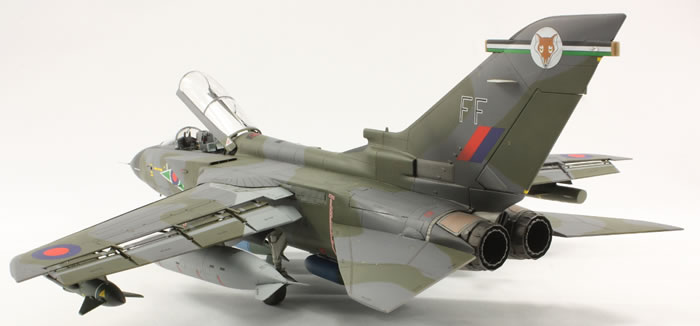
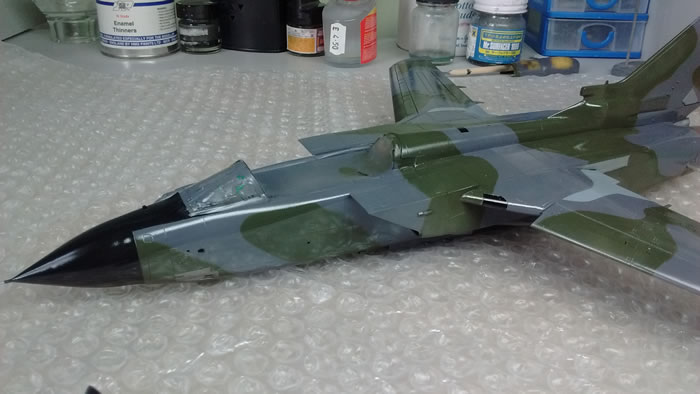
After many months, painting became a possibility. Simon wanted 'FF' from 12 Squadron, circa 1995, which fortuitously is available on an Xtradecals sheet. No stencils are provided, however, so the companion Xtradecals stencils were also purchased. I found a good number of photos of ZA474 'FF' from 1995 and 1996 on the internet and used them extensively to modify the painting instructions from Xtradecals and make some other additions (see here, here, here, here and here amongst those that I found).
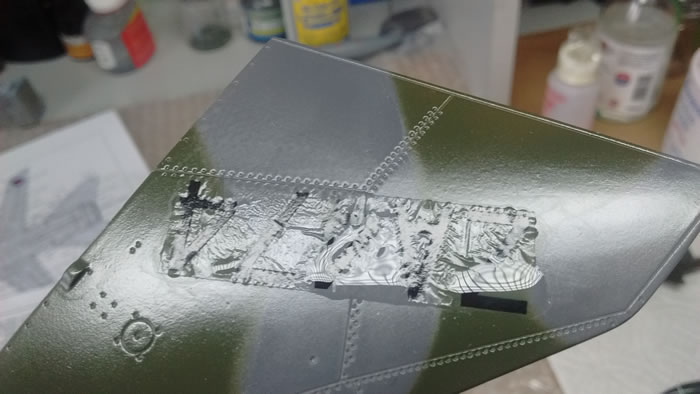
After cleaning with 70% IPA (i.e. rubbing alcohol), I sprayed a nice coat of Mr Surfacer 1000 with my Iwata RG-3. This goes down very smooth and no further sanding was necessary. Then painting could start. The nosecone and anti-glare panel are Mr Color 92 black. After masking, the Dark Sea Grey (Mr Color 331) was sprayed on with the RG-3. I masked the DSG with cheap white tack from the pound shop (top tip: don't do this; pay the extra for blu-tac!) and then again used the RG-3 to spray the Dark Green (Mr Color 330). Then began the fun part of masking for all the little bits that needed doing: black fin tip and panels on the spine and on the wing gloves; a brownish-tan for the ECM housing on the fin; Alclad Steel and Aluminium for the engines; off white for the ILS aerials; Medium Sea Grey for the tanks, Sidewinder pylons and the part of the wings that retract into the fuselage as the wings sweep back. I also lightened the Dark Sea Grey and Dark Green with the Mr Color WWII versions of these colours and sprayed some panels in the lighter mixes to break up the camouflage colours a little bit. All this went pretty well.
Except that I snapped off a flap track from the left wing. These are very exposed and the plastic is very soft and prone to breaking. Be warned! The first time I managed to reattach the snapped off part, but the second time I lost it and had to scratch build a replacement from plastic card.
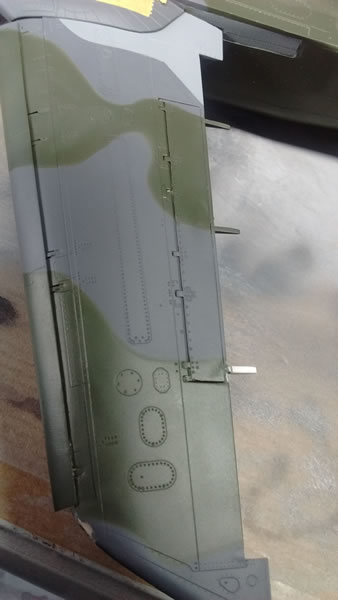
Upon removal of the masking, the paint lifted all the way down to the bare plastic in a few places. Infuriating! Clearly 70% IPA is not strong enough, so I've managed to get hold of some 99.9% laboratory grade alcohol for the future. Fortunately the affected areas sanded out quite nicely with Micromesh sanding pads and Flexi-file sanding sticks and the paint was touched up.
The stores were painted at the same time. I used Intermediate Blue for the bomb fronts and Mr Color IJN Green (#15) for the fins and the Sky Shadow pod.
Finally it was ready for gloss. I mixed up some Tamiya X-22 with Mr Leveling Thinner and sprayed it generously through the RG-3. The results are shown below and I was very satisfied. A good gloss was achieved without polishing or multiple coats.
This paved the way for decalling. For this I used my non-intuitive method outlined here. Some pictures are below, but essentially I float the decal in a pool of Mr Setter and leave it alone. It leaves horrible glue marks, but these disappear under the subsequent matt coat. The decals performed beautifully and the film disappears completely under matt varnish.
Unfortunately the decals were not perfect. Some stencils were out of register (the white peeking out from under the red, and the yellow and black not being perfect), but most problematic were the hopeless stencil instructions. Items were misnumbered, many missing, and some called for that were not present. Often I only discovered this whilst trying to position the decal. A real quality product let down by sloppy instructions. Black decals were also used for some of the trickier black areas, like the leading edge of the ILS aerials, the front of the fin ahead of the air intake, and the black patches just inboard of the wing slats.
Decal floating in Mr Setter. This is then left untouched, to produce...

...this. The film is still quite visible, but don't worry, it disappears...

...when the matt coat is applied.
Once decalling was out of the way (which took several days), the wash could be applied. For this I used Ammo Neutral Brown and Deep Grey panel line washes. In some areas, like the airbrakes and wing gloves, I wanted a much darker delineation and used Tamiya's black panel line wash. In still some other areas, like the top of the intakes and around the front fuselage, I found the Ammo washes didn't stick well enough and reverted to dark grey oil paint.After several iterations I was essentially happy.The Ammo washes take forever to dry and on the gloss varnish don't look like much, but under the matt coat they look beautiful. The characteristic staining on the fin is Mr Hobby Smoke heavily thinned with Mr Levelling Thinner and sprayed with the RG-3. Photos show it wasn't nearly as heavily stained as some other airframes so I kept it fairly subtle.
I was on the home straight now. The matt coat is actually Ammo's Satin Varnish, airbrushed through my H&S Evolution in a very small pattern. I like this finish very much, although it is quite fragile and can scratch off. Some streaking was applied under the rear fuselage, but I doubt this model will ever be turned upside down; it's very fragile.
Then began the laborious and frightening process of attaching everything. The tailerons went on first, followed by the flaps. These are terribly fragile and one had to be reattached twice. The undercarriage went on next. These click securely into place but left the main wheels toed out and canted inwards. Fortunately I hadn't attached the wheels to the legs yet and the fit is very sloppy, so I used Tamiya Extra Thin Cement and 'bent' the wheels gently so they looked alright. The nose leg was fine. Next followed the doors and the bombs. The wing pylons fitted very nicely (much tighter than on the real thing!) and finally she could be set on her wheels.A little touch up with Ammo satin varnish was necessary to hide some glue spots.
The final steps were to make pitots out of Albion Alloys brass tubing for the nose pitot and the two little pitots under the windscreen (I'd lost one of the kit provided ones). The two pitots set slightly further back were from the kit. The canopy was then added in the open position and, voila!, it was done.
I was going to say 'Good riddance!' but that would be unfair.
It does actually look pretty good (better in the flesh than in the pictures I think) and is an imposing model. I hope Simon is pleased with it.
I am glad I don't particularly care for Tornadoes as I certainly have no desire to build another one.
I'll also dedicate this model to my dad, who unexpectedly died as this model was being finished. He was a great supporter of my hobby and I shall miss showing him this one.
To see more model build articles like this, please visit my website: www.jonbryon.com/model_index.html
Text and Images Copyright ©
2016 by Jon Bryon
Page Created 27 April, 2016
Last Updated
27 April, 2016
Back to
HyperScale Main Page

|
 Home
| What's New |
Features |
Gallery |
Reviews |
Reference |
Forum |
Search
Home
| What's New |
Features |
Gallery |
Reviews |
Reference |
Forum |
Search