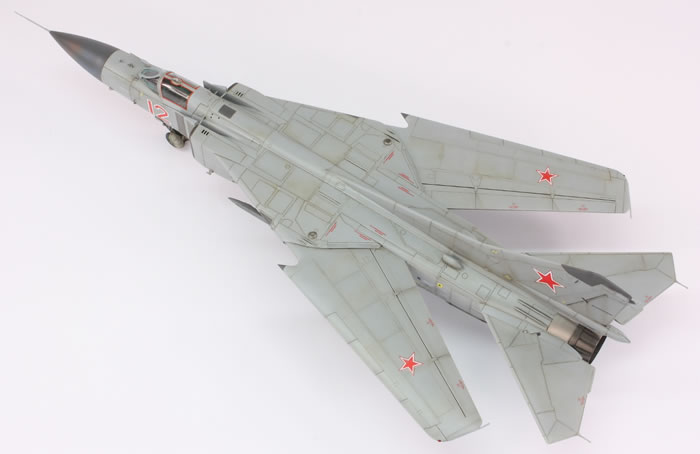
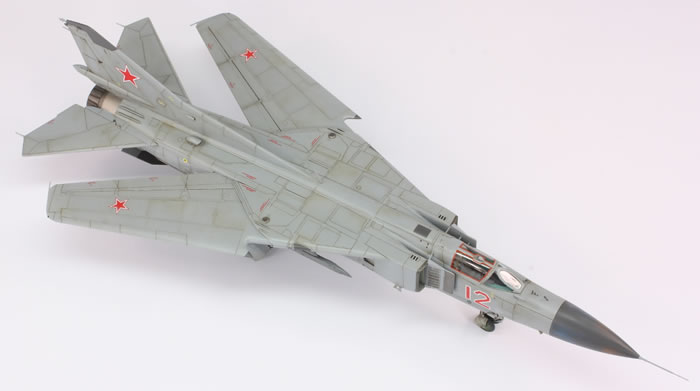
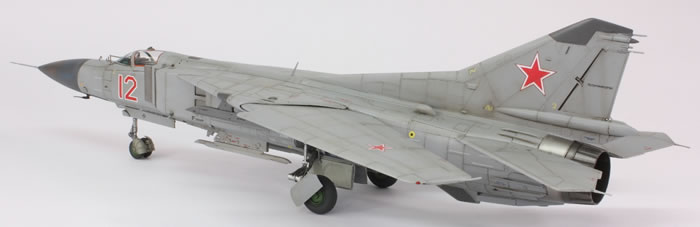
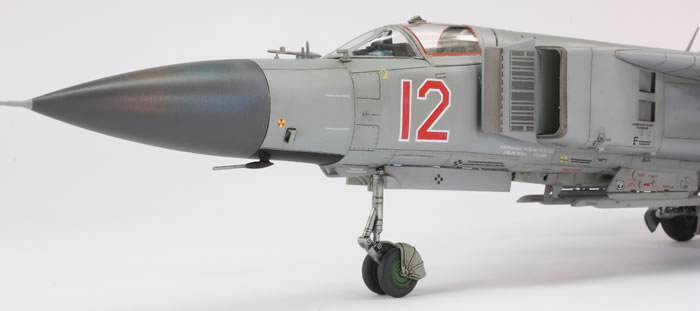
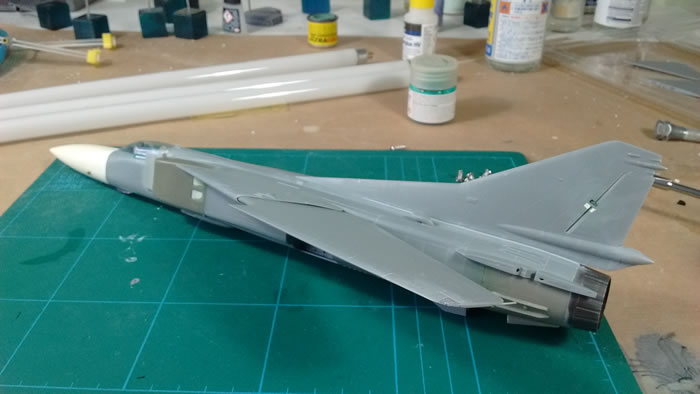
Trumpeter's 1/48 scale
Mikoyan MiG-23M
‘Flogger-B’
by Jon Bryon
|
|
Mikoyan MiG-23M ‘Flogger-B’
with Ciro Models resin intakes, parachute cone, rear fuselage and vacform canopy, Eduard Brassin resin wheels, Metallic Details resin nose and Master turned brass nose pitot. |

Trumpeter's 1/48 scale MiG-23M Flogger B
is available online from Squadron.com for only $44.99!
With Ciro Models resin intakes, parachute cone, rear fuselage and vacform canopy, Eduard Brassin resin wheels, Metallic Details resin nose and Master turned brass nose pitot.
The MiG-23 has been sadly neglected for *far* too long in the modelling world, especially in 1/48 scale. After all, it is the iconic Soviet 3rd generation jet and wonderfully idiosyncratic, with its swing wing, enormous engine, whopping ventral fin, complex undercarriage, rocket-like stance and appalling reputation. Add to all this the fact it was made in loads of different variants (leading to the duck-ugly MiG-27) and has seen extensive use around the world and one wonders why it has been so poorly served in plastic.
Trumpeter released this around 2012 and I was badgering my LHS owner for ages until he managed to get a copy; as usual, Trumpeter kits were released in China last of all. It was ridiculously cheap and looked very nice in the box, but it was a cautious purchase. I was building Trumpeter’s 1/48 Su-15TM at the time and was less than enamoured with their effort. Would things be better ten years on?
Yes and no. On the ‘yes’ side, the kit is quite nicely moulded and comes with some PE. The quality of the surface detail was much improved over the Su-15 and the parts far more finely reproduced. There were still some parting lines from the multi-part moulds that needed sanding away, but on the whole it’s a good effort.
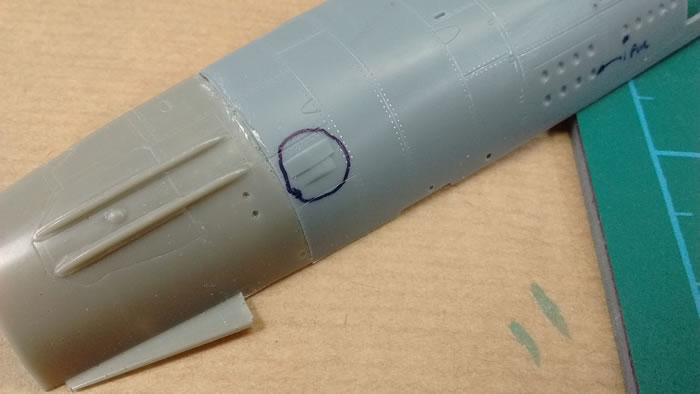
Strangely, the circled ‘lump’ should be a single uniform shape. A moulding flaw runs through the middle.
On the ‘no’ side we have the usual list of errors:
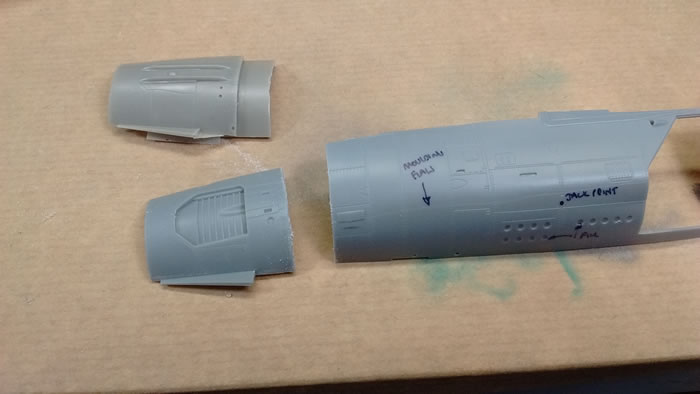
The rear airbrakes are the wrong shape. Trumpeter consistently fail to translate the shape of airbrakes on plans correctly into 3D in plastic, and this MiG is no exception to that. I purchased a Ciro Models resin correction set.
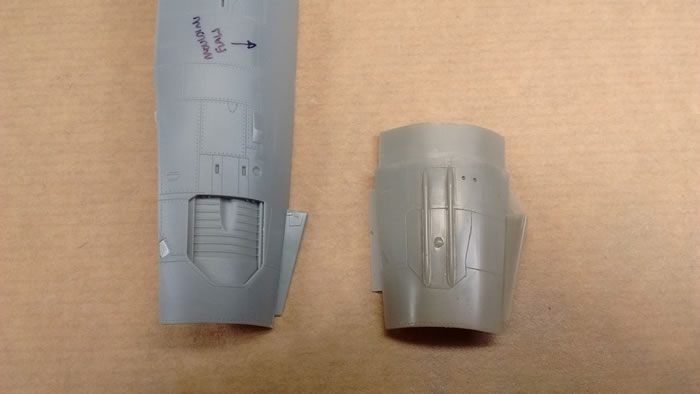
The difference between the kit part and reality.
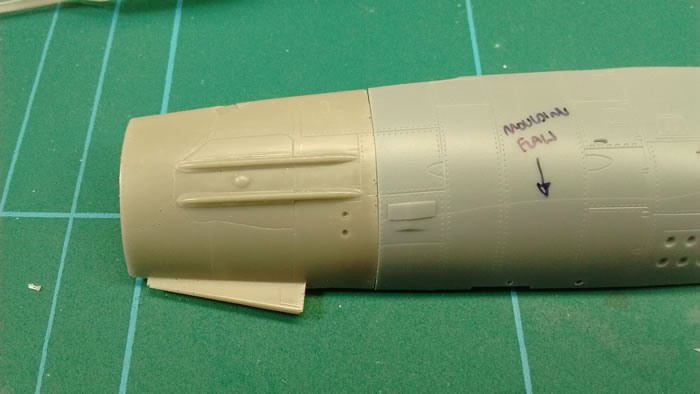
The intakes are not quite the right shape. To be fair, this is pretty hard to spot, but I am a sucker for resin correction sets, so bought the Ciro Models resin for this too.
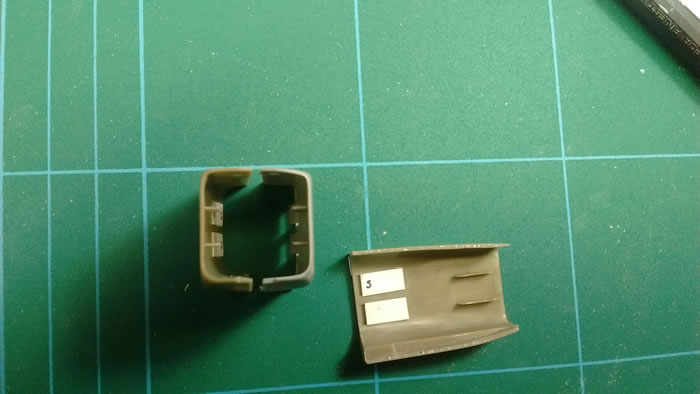
Comparison between kit and aftermarket parts. Spot the difference? Not really… Note also the new doors made from plastic card. These are not provided in resin.
The canopy is apparently the wrong shape, and also was missing the central frame necessary for this variant. A replacement vac-formed example came with the Ciro Models set.
The kit is missing the bracing struts between the intake splitters and the fuselage, as well as the intakes in between the splitters and the fuselage. I scratchbuilt these from plastic strip.
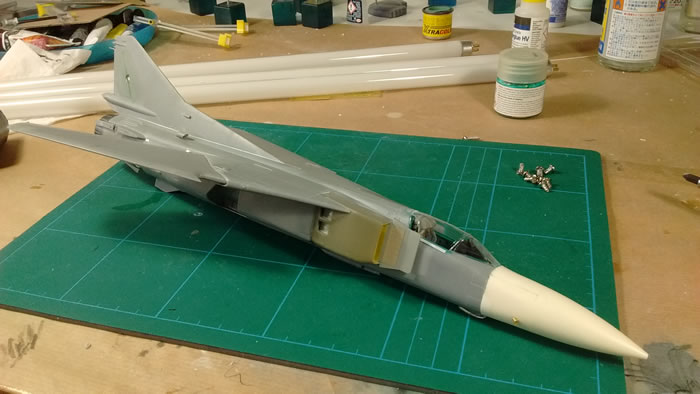
The nose is apparently not right. I can’t say I really noticed this, but following my love of grafting resin noses onto Soviet MiGs, I bought the Metallic Details corrected nose. This is significantly longer than the kit nose.
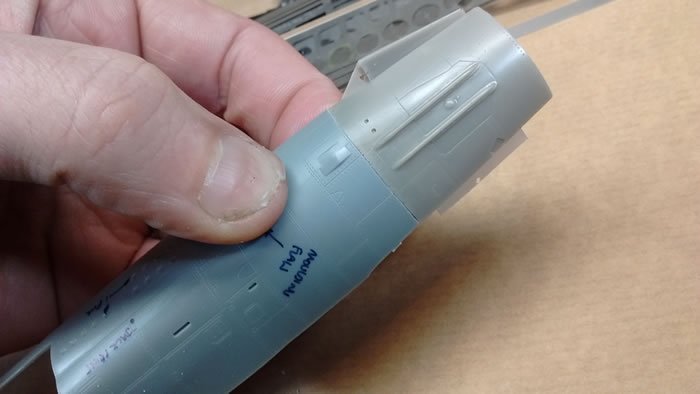
The fuselage has all kind of minor mistakes over it if one is making a Flogger-B. These were helpfully listed on ARC Forums but unfortunately the thread was a casualty of software problems there. Most of these I did not correct, but some, like the canopy release handle and filling the circular depressions on the rear underfuselage I did fix. If anyone wants the full list feel free to contact me; I saved it from the original post and still have the text and images.
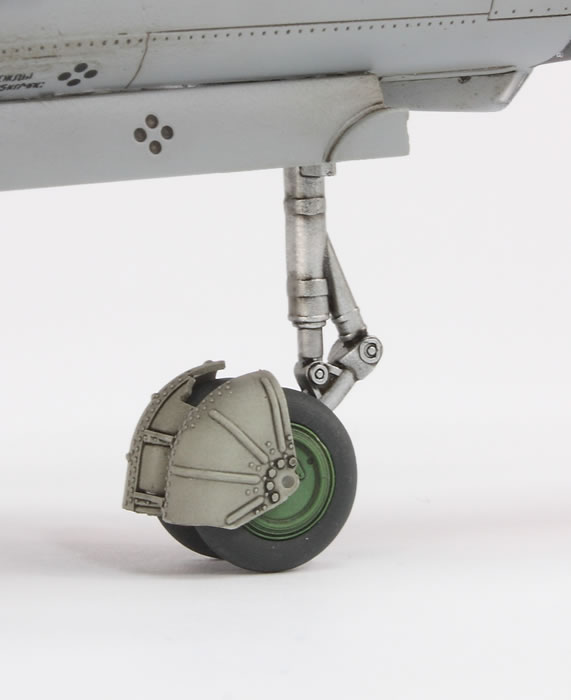
The nose gear is not right for a Flogger-B, nor are the wheel hubs. I purchased Eduard’s resin wheels for the MiG-23, which helpfully included several styles of hub as well as replacement undercarriage doors in resin which are better shaped than those in the kit.
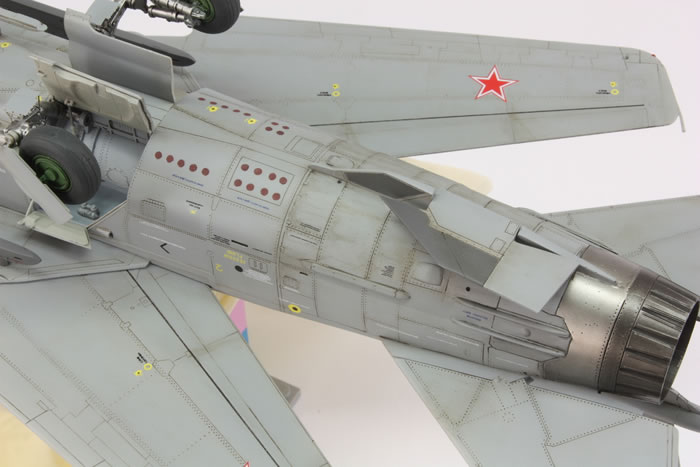
The ventral fin is completely wrong for a Flogger-B, because it lacks the leading edge extension necessary for the MiG-23M and because the engraving is wrong (as are the painting instructions). There is no resin replacement on the market for this, so I scratchbuilt it.
The rudder hinges are wrong for a Flogger-B, quite noticeably so once you see it. I bodged this by filling one of them in and reshaping. This is still not accurate as the single hinge should be a different shape, but it is a reasonable fudge.

Without a doubt there are other errors – I think there is a problem with the shape of the intake splitters, for example – but the above are what I considered for possible replacement or correction.
With all my resin purchases completed, construction could commence.

Aftermarket goodies from Ciro Models, Metallic Details, Eduard Brassin and Master.
The resin rear fuselage parts require the kit fuselage to be cut. The fit of these to the fuselage sides is pretty good. The parts themselves are quite nicely cast, but I would later discover during priming that the resin pieces had a lot of pinholes. The parts were added with superglue and the recessed detail reinstated following sanding.
Making the cut…
…dry fitting the part…
…and glued in place. Not bad at all.
The resin intakes seem to not suffer from pinholes, but the vent detail was a little clogged up and needed cleaning with a motor tool. When it came to fitting them to the plastic inner intake parts and then to the forward fuselage there were quite a few gaps that were filled with super glue and then the panel lines rescribed. One further improvement the Ciro intakes make over the kit pieces is that the recesses for the lights on the underside are drilled out.
Unfortunately there are no clear parts to install here, so I gently softened some clear sprue with a lighter and plunged it into the recess. I then cut that off the sprue and superglued it in place, sanded it flush and restored the clarity with Tamiya polishing compounds. This seemed to work quite well.
Photo: proxxon.jpg Caption: Cleaning up some some of the mis-moulded detail with my new super-duper foot-operated Proxxon hand tool with flexible shaft!
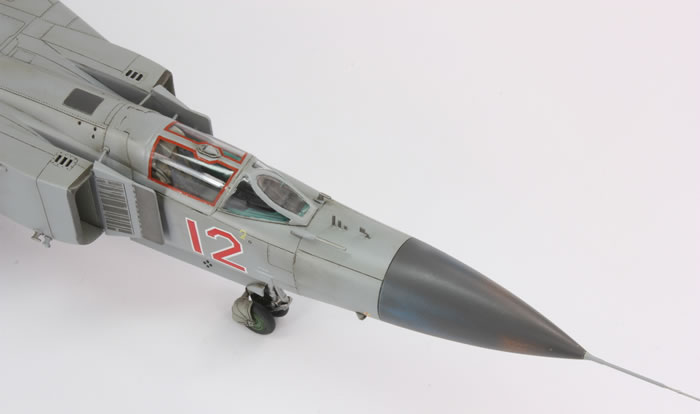
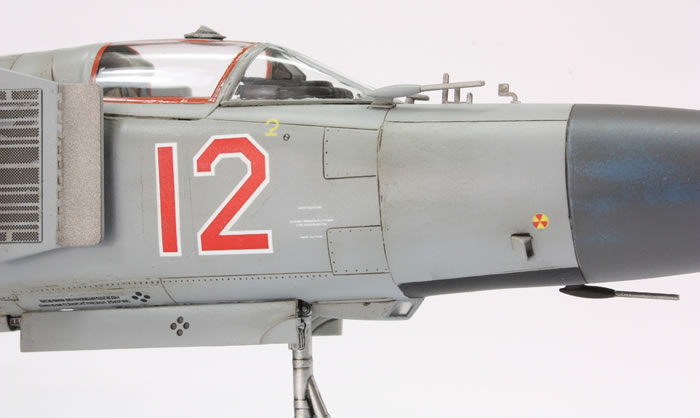
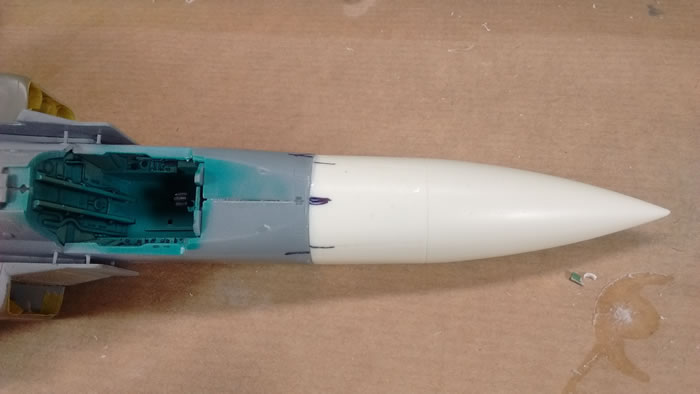
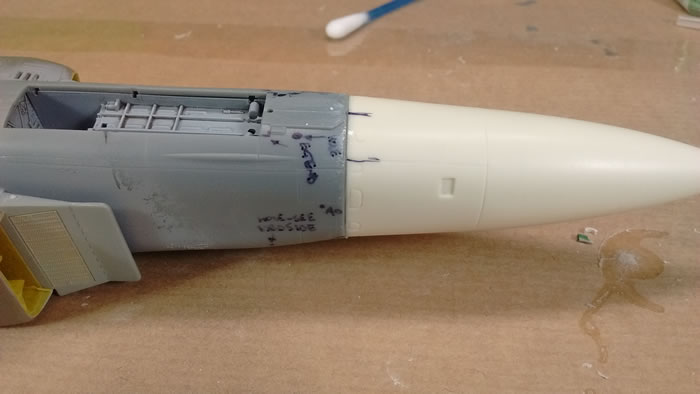
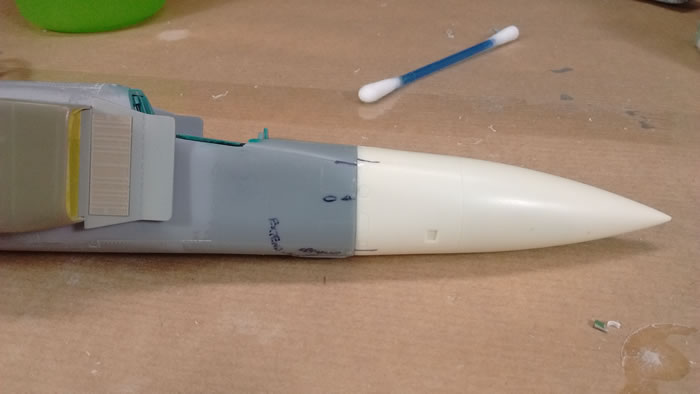
The resin nose similarly required a part of the fuselage to be chopped off. This was relatively straightforward. Unfortunately the resin nose itself was of fairly poor quality. The scribed detail is very shallow and indistinct, and the whole nose itself is asymmetrical about the vertical axis. Whilst it might improve the shape of the nose, this is a poor quality product. I’ve no idea if it’s necessary, but I placed a fair amount of weight inside the nose. Once attached to the plastic forward fuselage it was faired in with Milliput White Superfine and the panel line gently reinstated using a needle in a pin vise and HiQ’s scribing tape. This was a pain as the joint falls on a prominent panel line, and I didn’t make the best job of it. Two further issues with the nose are that Metallic Details do not recreate the recess at the point for the pitot; you have to do this yourself. Since I was using a Master turned brass pitot, I gently sanded the point of the nose square and drilled a hole. By a complete fluke I got it pretty much perfect; the pitot you see in the photos is simply pushed in and held by friction. The other issue is the small PE intakes that Trumpeter provide. Having finished the model they look too large. There are some smaller PE parts that are unused on the fret that actually look they would have been better to use rather than those indicated in the instructions.
Photo: nose1.jpg Caption: Cutting off the front of the fuselage ready for the new nose.
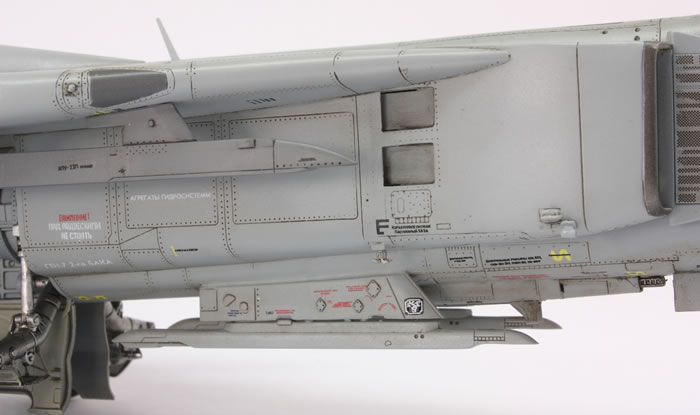
In between the splitter plate and the forward fuselage there should be lots of bracing struts, six on each side. Zactomodels makes a correction set for Trumpeter’s 1/32 MiG-23 and generously he has put the templates to locate these struts up on his website. I resized them for 1/48 and worked out where they should be. I then drilled holes into the fuselage sides and inserted lengths of Evergreen strip styrene that were cut to length. This was done by trial and error and didn’t quite work, but in reality you can’t see the problems. The highest strut, located behind the canopy, was too exposed for this and I added it right at the end of construction, prior to painting.
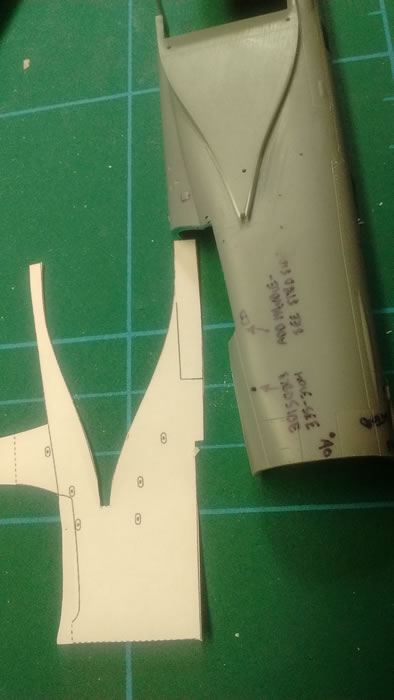
Figuring out the intake brace locations using Zactomodels’ template. Also note the attempt to reproduce a small intake at the front of the intake spacer with strip styrene.
Adding the braces using strip styrene.
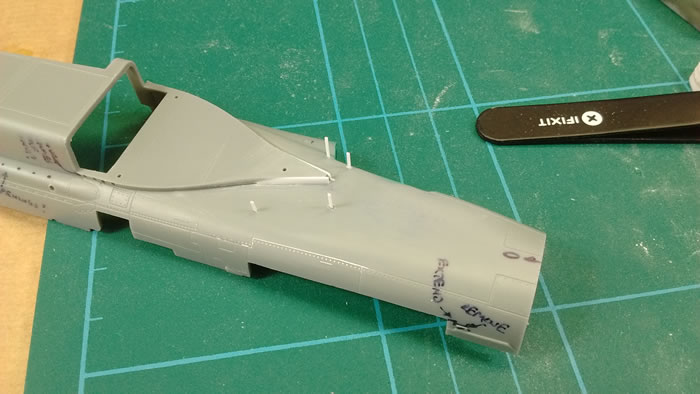
Eventually the time came to start putting the airframe together. It was not pretty. There was an enormous gap at the rear between the resin rear fuselage sections. Because this ran between the rear part of the ventral fin, the easiest thing to do was cut the fin away with a scriber, fill the gap with sheet styrene and super glue, sand it all down and then reattach the fin. This was surprisingly painless.
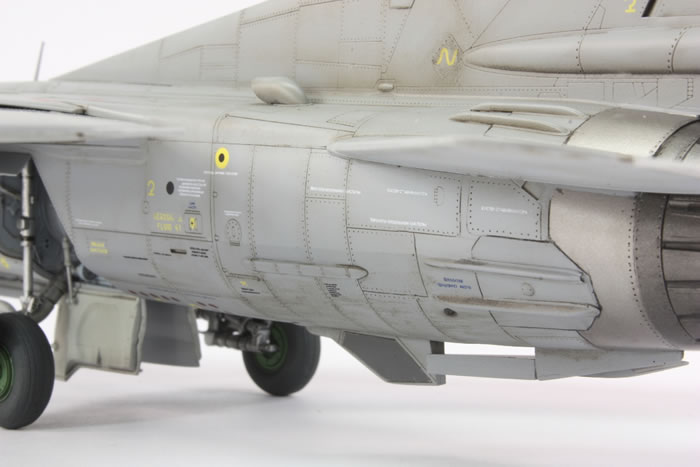
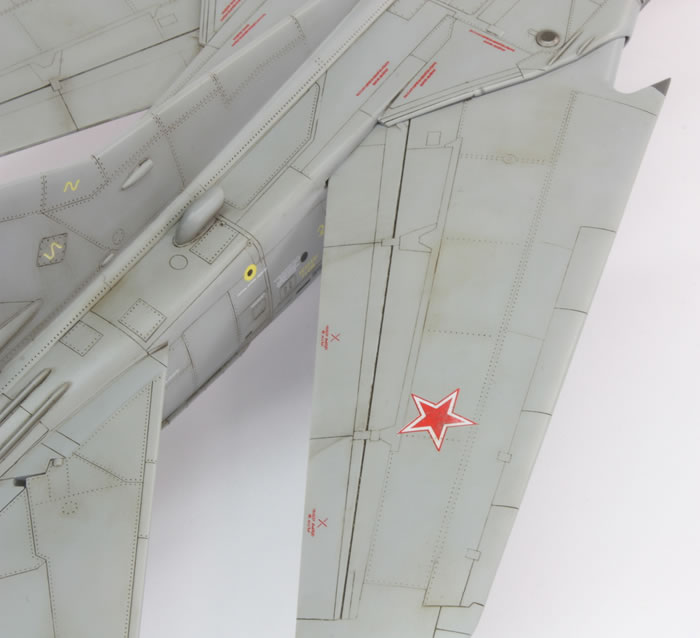
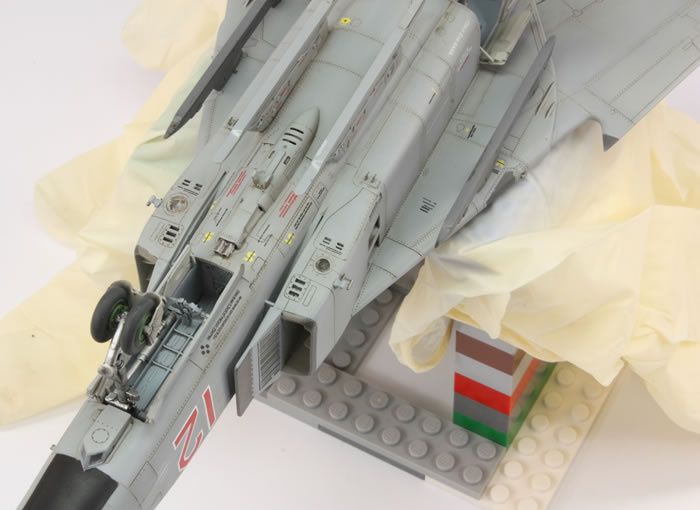
As you can see from the photo, a fairly sizeable gap was also apparent behind the canopy opening. Also visible are the circular depressions on the lower rear fuselage. These should be flat, not recessed as Trumpeter have moulded them. I filled the holes with Milliput Superfine White and smoothed it away with a damp cotton bud whilst still wet. This did not completely remove the circles but made them far less prominent, which was the effect I was after.
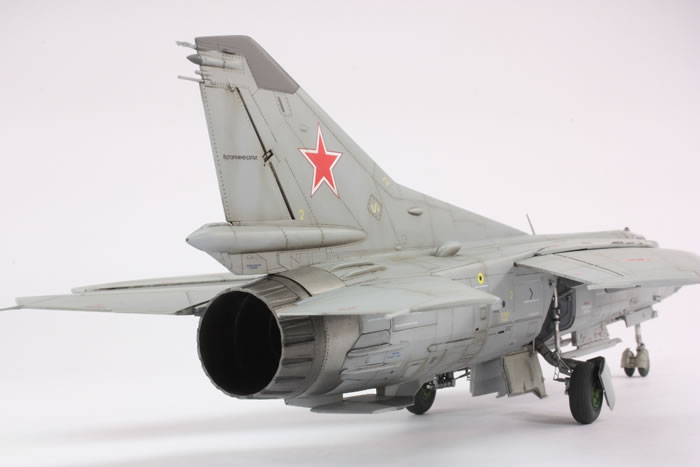
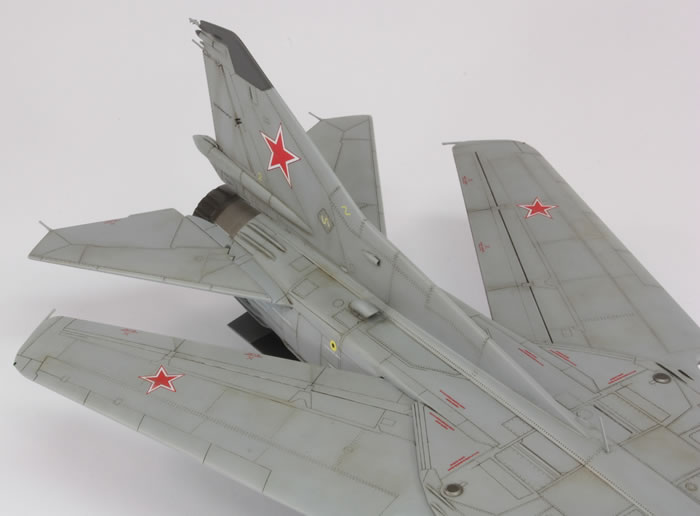
Owing to the swing wing, the fuselage goes together bit by bit. All joints needed attention to varying degrees and rescribing of the surface detail. The most difficult was where the resin intakes joined the upper fuselage part, and where this attached to the forward fuselage. Plastic card, superglue and careful rescribing were necessary to eliminate the gaps. The wings themselves were attached once the fuselage was complete. To make this possible I cut away a wedge-shaped lump from the wing pivot area so the wings could be slotted in after the upper and lower fuselage parts had been joined and cleaned up. I glued the wings in the swept position because I like the way it looks
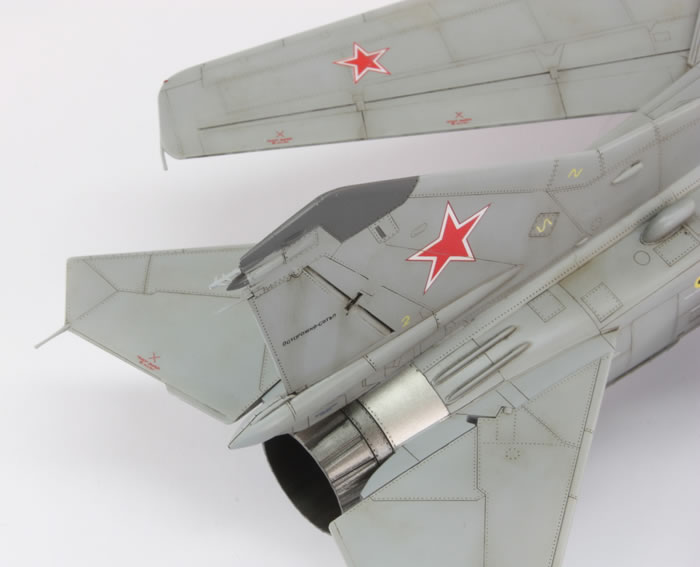
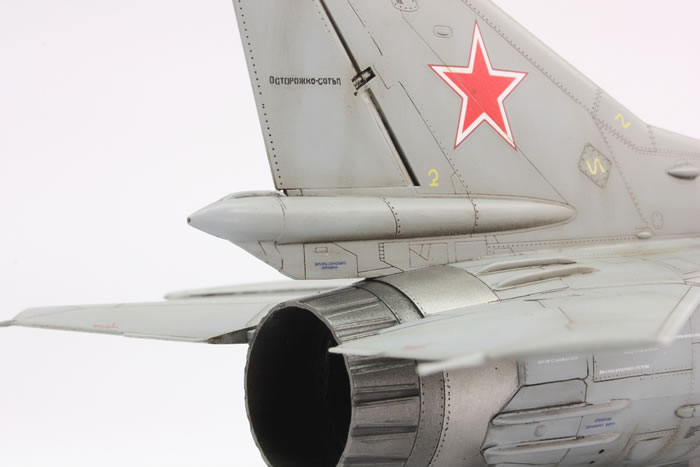
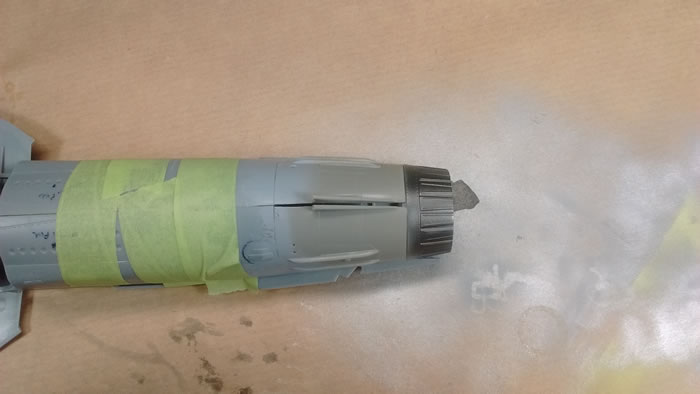
The large tail fin needed the rudder hinge modifying as mentioned above and the parachute cone replacing with Ciro’s resin part. This fitted quite well and then the whole assembly was mated to the upper fuselage. Mr Surfacer 500 was used to fill the gaps between the fin and the fuselage. The little intake (part D13) was clearly designed by someone who’d never actually seen the rest of the kit as it bears no relation to the place it’s meant to attach to.
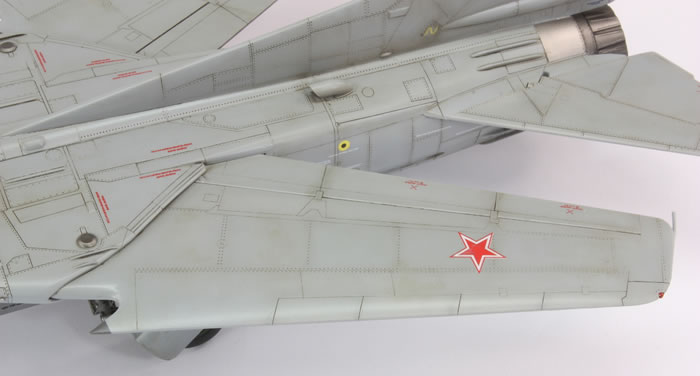
That large ventral fin is also wrong for a Flogger-B. The leading edge of the fixed part should have an extended section; I used some photos to correct this with a part from the spares box carved and then sanded to shape. The moving section is also wrong as it has incorrectly scribed detail. This simply needs filling and sanding and then rescribing.
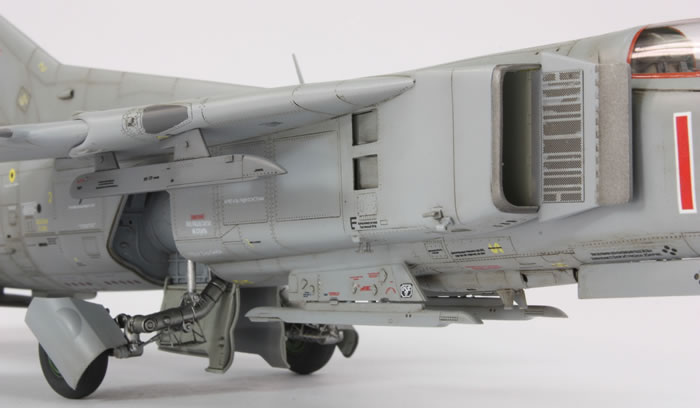
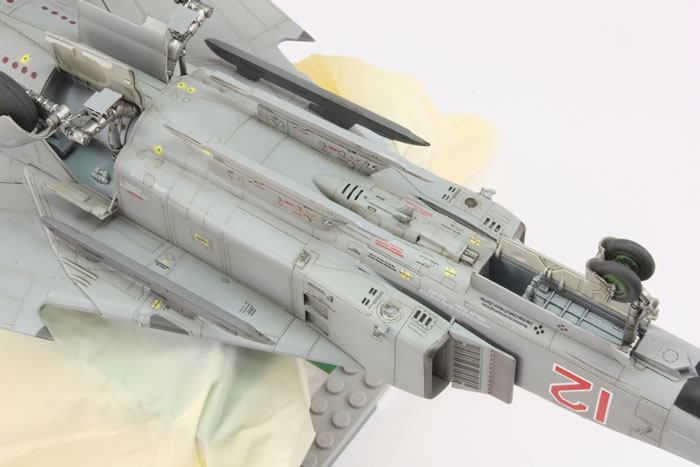
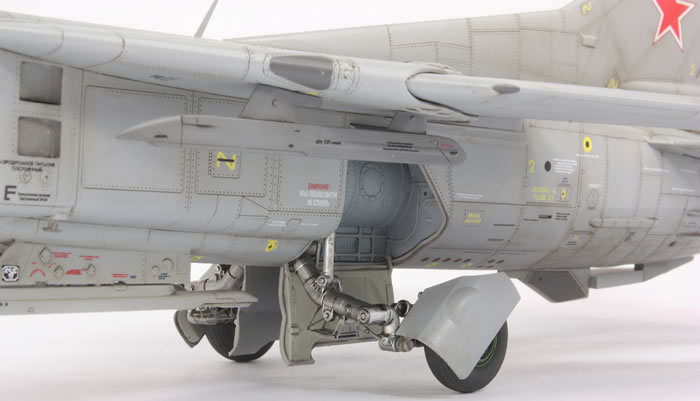
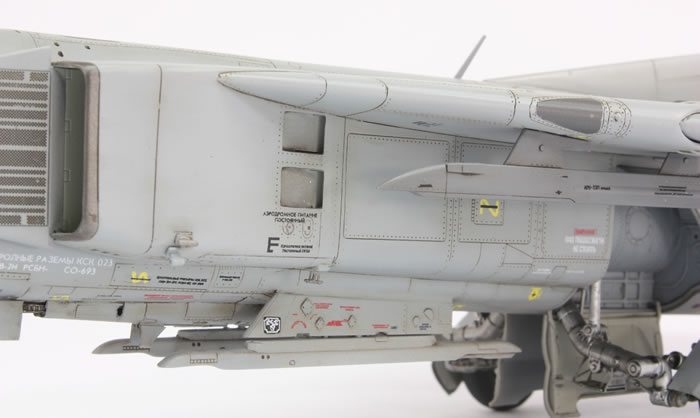
I noted fairly early on that the pylons under the fuselage did not mate with it at the correct angle. If you go with how it’s moulded, they stick out, whereas they should be vertical. This was a pain as I would usually add them at the end, but it meant I added them before painting and faired their bases into the fuselage with Milliput.
The last job prior to painting was to deal with the canopy. I had been dreading this. Vacformed canopies are all well and good when it’s a bubble shape, but this one needed to join with the fuselage. To make matters worse, Ciro only gives you one copy of the canopy and the windscreen and opening section are separate. In the event, I removed the pieces relatively easily and the windscreen fitted well, as did the canopy for the most part. As I predicted, the area where the opening section meets the fuselage behind the pilot’s seat is very difficult to clean up as the clear plastic is so thin and flexible. The hinge section was moulded very indistinctly and so to improve the fit in this area I cut away the section from the kit canopy and glued that in the recess. This was probably a mistake in retrospect as the fit is poor and the area where the vacformed part meets the clear plastic looks, to put it bluntly, awful.
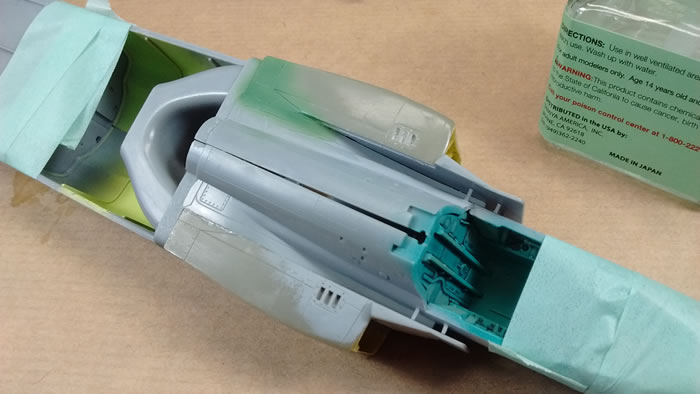
Before paint was committed, I needed to deal with the undercarriage. This is probably the most complex undercarriage I’ve ever made. After looking at it for a long time, I decided to build each unit in situ without gluing anything into the bay. So, for the right side that meant attaching parts D11, C29, C39, D2, C15 and L2 all together and checking it fitted all nice and square into the main undercarriage bay. The complete unit was then removed and painted with Mr Color 8 Silver. This was repeated for the left side and I did a similar thing for the nose gear. At the end these all then just slotted into place. The little square doors (parts C7/19 with PE additions) were not used as Eduard provide PE replacements in their wheel set; the same is true for parts C13/12, which were attached at the very end. The Brassin wheels are beautiful but I didn’t bother with all of the PE details; I don’t find the payoff worth the hassle. I painted the tyres with Mr Color 77 and the hubs with Akan’s green paint formulated for this purpose. Undercarriage bays were painted Mr Color 308 and the inside of the doors was Mr Color 60. These are simply the provided recommendations; I don’t claim they are accurate. The nose gear leg is not right for a Flogger-B and my only superficial concession to this was to omit part L12. The result still doesn’t bear much resemblance to reality.
Trumpeter provide a single decal option, for Yellow 49. There are no other aftermarket options available for a grey MiG-23M, and I had set my heart on a grey MiG-23. In messing around on the internet, and getting frustrated at the lack of good photos of grey Flogger-Bs and the absence of any aftermarket decals, I decided to build this example:
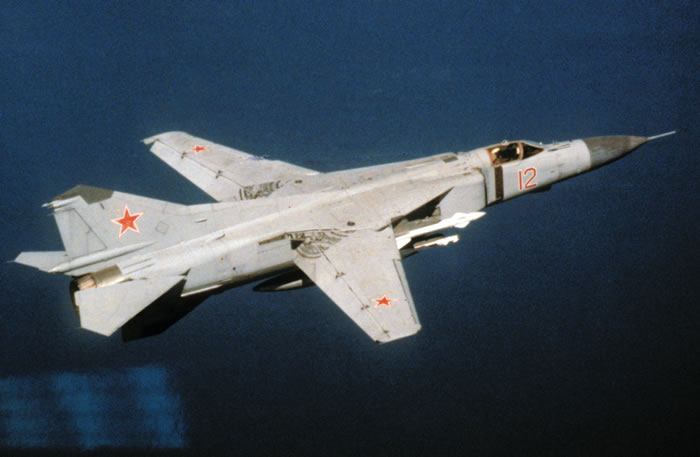
This is a public domain US DoD photo and the caption says it was taken in 1989. There seems to be some scepticism about this since grey Flogger-Bs should have been phased out by then.
These days, after my various masking disasters over the years, I am careful to start with a thorough wash of the model with 100% Isopropyl Alcohol, done whilst wearing gloves. This seems to have solved my problem of paint lifting under masking tape. Once done, a generous coat of Mr Surfacer 1000 was sprayed wet onto the model using an Iwata RG-3. I inspected the seams and found that none needed rectification, and so progressed to actual paint.
A paint manufacturer I’d been aware of for sometime but never used is Akan. They make several ranges, three in all I think, and I liked the sound of their lacquer range with serial numbers starting 6*****. The attraction was their dedication to Russian subjects. I could not find a stockist of this paint in the UK and so bought via an online shop in Finland. The service was excellent and whilst I baulked at the price of £21 for 7 bottles of paint, it works out about normal for such a niche product.
The paint comes pretty thin and I just added about 10% Mr Color Leveling Thinner. It covers very well, dries fast and is very durable, but the paint pots feel tiny. I guess I have been spoiled by Mr Color and the fact their paints require so much thinner that a small bottle lasts for ages.
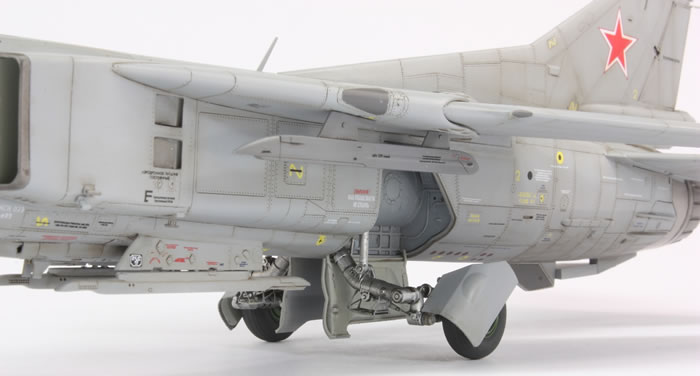
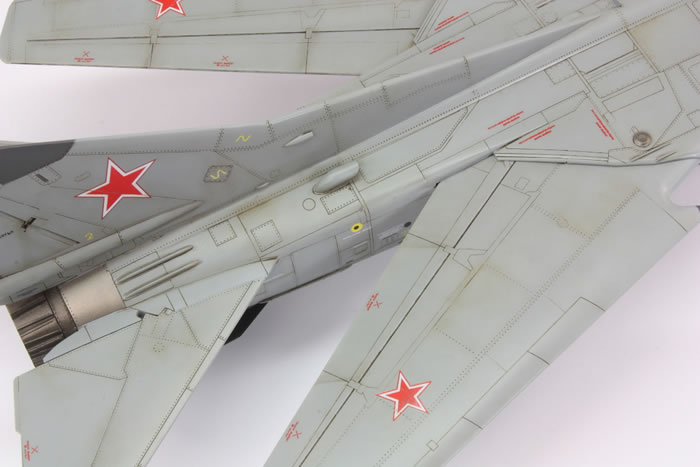
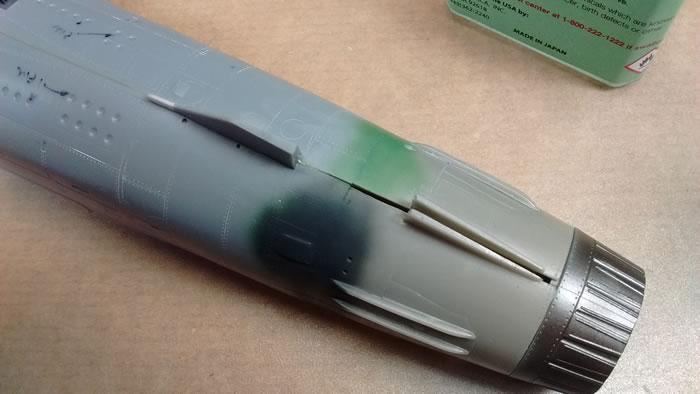
The dark grey areas were all painted with a colour formulated for dielectic panels that came in the Akan MiG-29 paint set I purchased. The photo above shows a couple of areas – like on the spine and tail – that I have not seen marked out in this colour on other airframes. Before I painted this grey, however, I noted that in the photo the nose cone is very faded to a blue/brown colour. I decided to make a half-hearted attempt to approximate this and painted the nose area a blue colour in some areas and brown in others. The Akan grey was then sprayed on top and once dry cut back with some Tamiya Fine polishing compound on a cotton bud.
The exhaust area was painted with Alclad shades as were the front of the splitter plate and the intake lips and the wing pivots. The circles on the underside were airbrushed with Mr Color 29 Hull Red to simulate the Bakelite material they are made from, and masked with little circles made by Maketar; unfortunately these are very imprecisely manufactured.
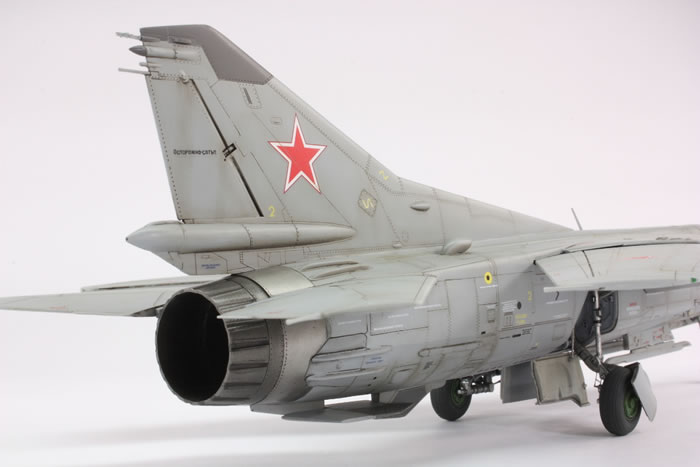
Once all that had been masked off, I airbrushed the whole airframe with the relevant Akan grey through my RG-3. Because I was nervous about running out of paint, I sprayed it on quite thin and dry, which meant the finish around the fin area was unfortunately quite rough. I mixed a slightly darker shade of this grey and applied that to the lower rear fuselage as indicated in Linden Hill’s instructions for a grey Flogger-B. This was all very pleasing (aside from the awful canopy).
I used Mr Color GX100 clear, sprayed quite wet through the RG-3, to get a fairly gloss coat over the matt Akan paints ready for decals. These were mostly from the kit and were surprisingly good, responding nicely to Mr Setter and nestling down into the recessed detail with minimal carrier film visible. On the negative side, the red stars were printed out of register with the white; I caught a couple of these in time to trim them, but not all of them. Also evident from the photo above is that the kit-supplied stars for the tail fin were too small, so I sourced larger ones from Trumpeter’s MiG-19PM kit. The bort number was more problematic. I found suitable numerals on an old Linden Hill Su-25 sheet I had, but noticed too late that the ‘1’ is slightly but significantly shorter than the ‘2’. Oh well.
I did apply all the kit-supplied stencils but have very little faith that they are accurate, especially as a few of them are not in Cyrillic.
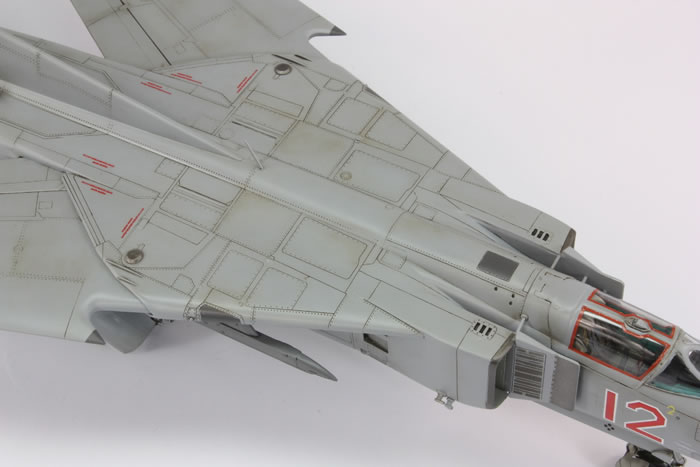
By this stage in a project I am impatient to finish. I don’t enjoy painting and weathering and want to get the whole thing out of the way as soon as possible. Nevertheless, I am trying to learn to rush this stage less to try and get better results. The basic foundation to the weathering is an oil wash mixed to a mid-grey colour. I’ve moved back to oils away from pre-mixed washes as I find them more durable and they stick in the recessed detail much better. Once the wash was (mostly) removed, a brown/grey oil paint mix was thinned with MiG Thinner For Washes and dabbed in various places and then removed with a paintbrush and cotton buds to leave some staining in areas seen on the photo. This was repeated in several different areas. Some streaking, especially that visible on the rudder, was recreated with AK Interactive’s Streaking Grime and Engine Oil, which I paint on with a brush and then almost immediately start manipulating with a dry brush and cotton buds. These products were also used on the underside at the rear of the fuselage in an entirely speculative fashion to produce some streaking. I tied the whole lot together with Tamiya Flat, which is not particularly flat and leaves a nice finish.
The main outstanding item I needed to recreate was the sealant around the canopy. I contemplated ignoring this as fiddling around with that vacform canopy was not appealing. In the end I decided to paint some clear decal sheet with Mr Color 7 Brown, which is an excellent match, and slice it into thin strips. I ignored the windscreen as the sealant seemed much less visible in this area; in reality the sealant was very roughly and unevenly applied but I like things looking neat and tidy.

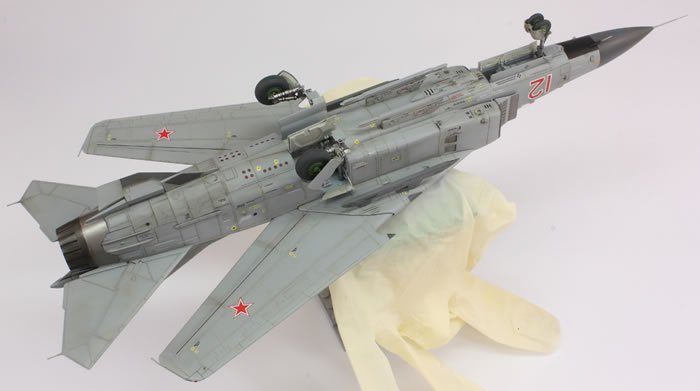
The model came to completion fairly rapidly after that. The undercarriage units slotted into place nicely and the little photoetch doors were dropped in place. The undercarriage doors were surprisingly painless to fit, although the central lower doors are too vertical. The folding ventral fin slotted in between the fixed portions and the pylons under the wing gloves fitted beautifully (these had been painted a darker grey to match the photo). The final stress was attaching the various plastic and PE aerials and other bits and bobs, which went more smoothly that I anticipated. My two complaints are that, a) the plastic parts are far too chunky, and b) the longer pitots above and below the nose are too sharply angled from the horizontal which give the finished model a rather ungainly look.
Once on her wheels she was done. Astonishingly the static wicks at the tips of the wings, tailplanes and fin had survived (the plastic is surprisingly resilient to bending) and everything was pretty much square.
Given the amount of work involved in incorporating the resin and canopy I finished this project much more quickly that I had anticipated, although the finished article does belie the fact that more time would have produced a neater result. Nevermind; I am a completer-finisher and am always hungry to move on to the next project. That was going to be an Academy MiG-29, also with a lot of resin, so I think I’m going to take a brief detour now into something rather different and simpler before returning to my MiG series.
To see more model build articles like this, please visit my website: www.jonbryon.com/model_index.html
Text and Images Copyright ©
2017 by Jon Bryon
Page Created 17 July, 2017
Last Updated
18 July, 2017
Back to
HyperScale Main Page

|
 Home
| What's New |
Features |
Gallery |
Reviews |
Reference |
Forum |
Search
Home
| What's New |
Features |
Gallery |
Reviews |
Reference |
Forum |
Search