Italeri 1/72 scale
Short Stirling B.Mk.I
by Roger Hardy

Italeri's 1/72 Stirling Mk.IV is available online from Squadron
S u m m a r y |
Item No. |
Italeri Kit No. K48050 - Short Stirling B.Mk.I |
Contents and Media: |
233 parts in grey plastic; 24 parts in clear; 41 pieces on a single photo-etched fret; markings for six aircraft on one decal sheet; instruction booklet. |
Scale |
1/472 |
Price: |
£41.50 plus shipping from www.hannants.co.uk and other hobby retailers |
Review Type: |
Full build review |
Advantages: |
Accurate, good fit of parts. Good value |
Disadvantages: |
Turrets, transparencies and undercarriage must be installed during the build and cannot be inserted afterwards. Many will find the surface detailing too heavy. Too much ‘digging-out’ windows, etc to cater for this version. |
Recommendation: |
A massive improvement over the venerable Airfix kit.. |
This model was initially issued as a Mk IV glider tug and reviewed in the box by Brett Green here and a build review by Roland Sachsenhofer here so I won’t repeat them here but I haven’t seen a review of the bomber version on Hyperscale so thought I’d add one. Why Italeri chose to first issue this kit as a glider tug is beyond me; I assume that most modellers simply waited for the inevitable bomber…well, now we have it.
I last built a Stirling about 50 years ago and it was the venerable Airfix offering which came with bomb trolleys, etc, a nice touch that this model doesn’t replicate. This model is, unsurprisingly, streets ahead.
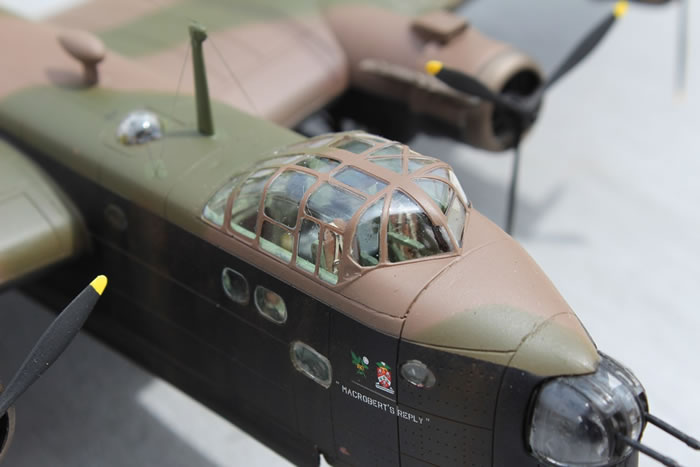
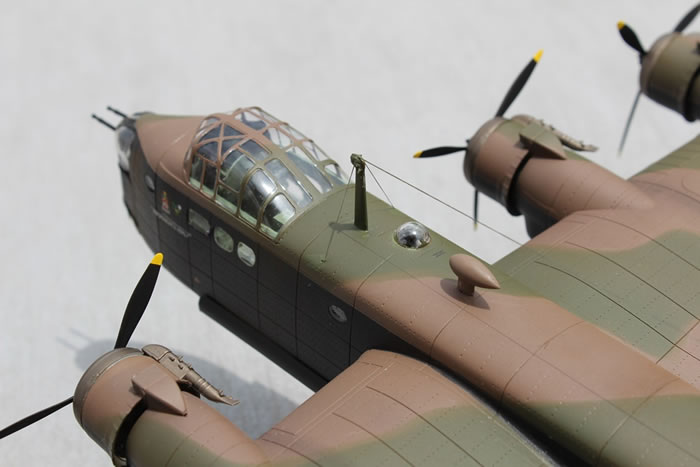
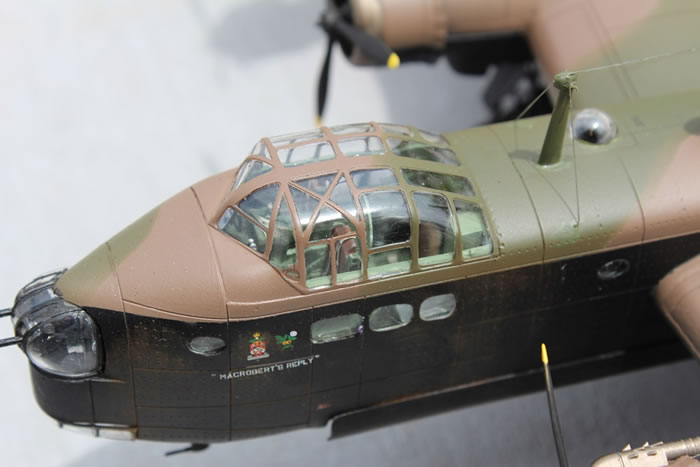
In this review, I wanted to simply highlight things that you might like to be aware of when putting together this kit from Italeri. I built it straight from the box but used the Eduard photo-etched set and the canopy masks. In retrospect, the most visible parts of the p/e set are the seat-belts and the rest can barely be seen. The canopy masks are really useful for the complex main canopy and all of the little elliptical windows down the fuselage that are difficult to mask by other means.
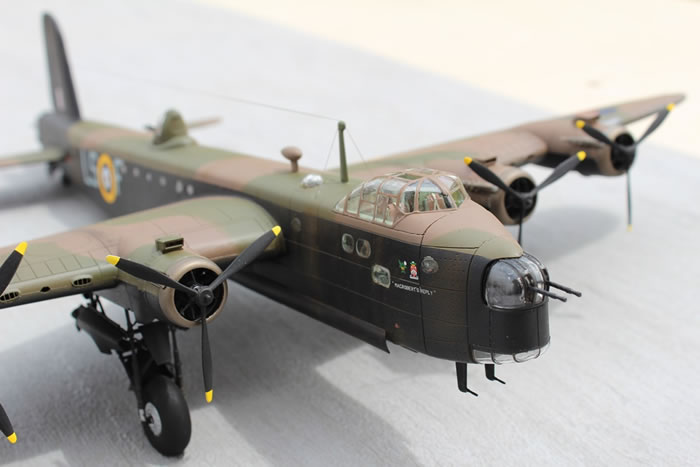
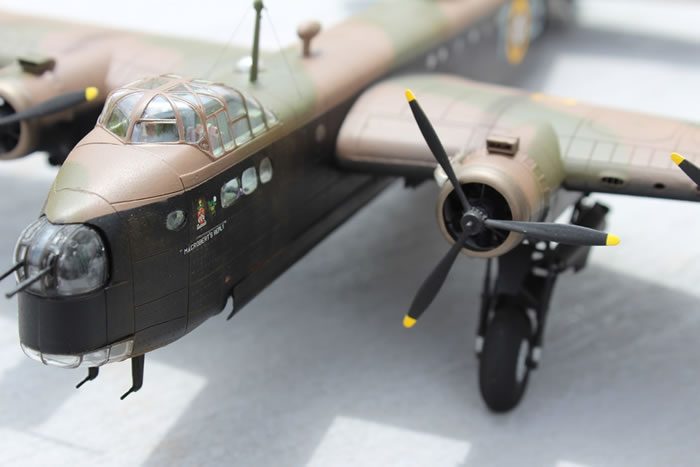
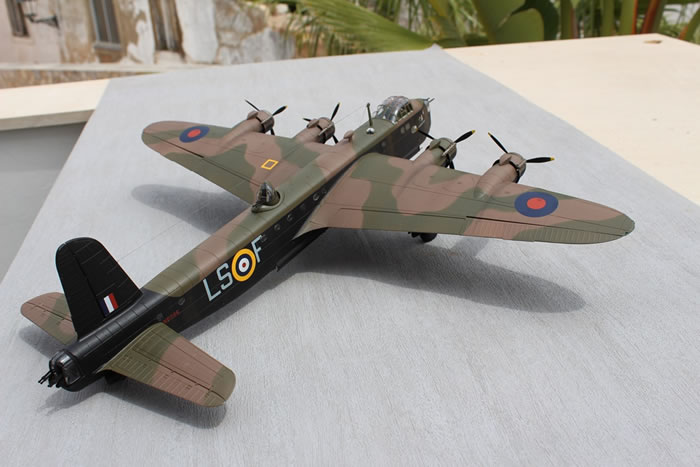
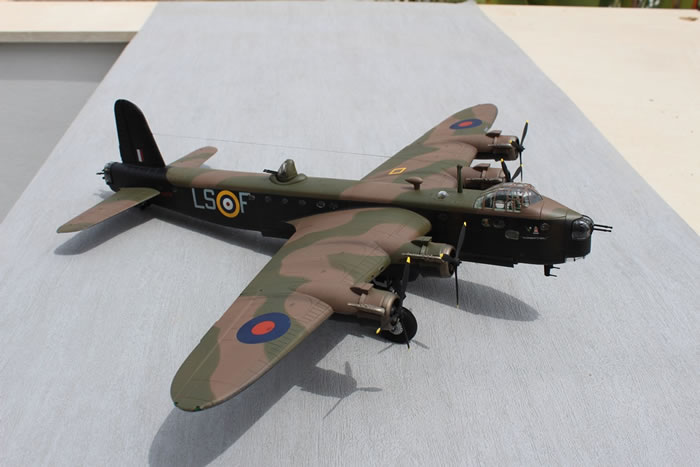
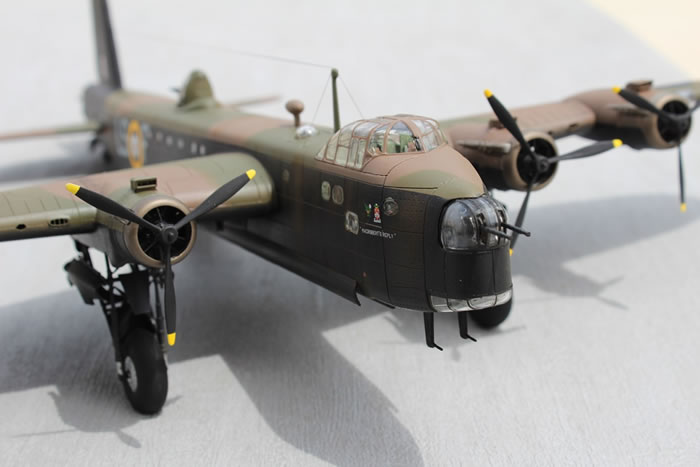
The decals offer the most famous Stirling of all, ‘MacRobert’s Reply’ of 15 Squadron. For those that are unaware, after the deaths of the three Macrobert brothers in RAF service, their mother, Lady Rachel Workman MacRobert, wanted to honour and commemorate them, so she donated £25,000 to buy a Short Stirling bomber, which was named 'MacRobert's Reply'. A feisty lady. They don’t make them like that any more! This was the one I decided to build.
On first opening the box, I was dismayed by the trench-like engraved panels; far deeper than we are used to. In reality, when the aircraft is finished, they look OK to me though many will want to fill them a bit with primer. The instructions are very nice, comprehensive, clear and unambiguous. The cockpit provided is well-detailed, goes together well and looks good when done. The instrument panel is a decal which is quite acceptable as it can hardly be seen. Italeri and Eduard also provide lots of little knobs and levers that are difficult to attach but can be seen on the finished model so are worth persevering with.
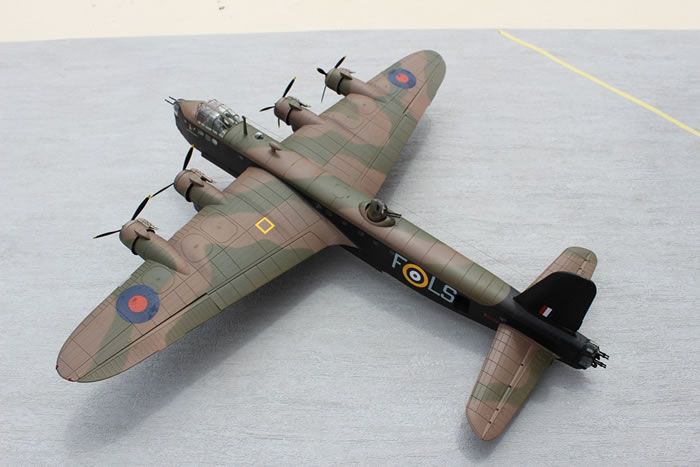
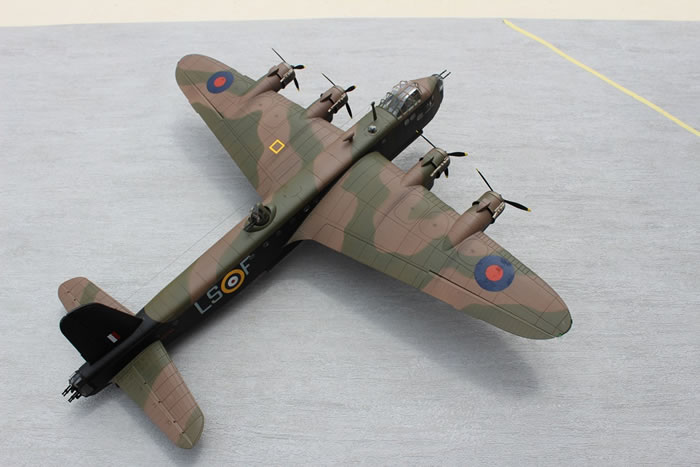
The control surfaces are all separate items (except for the flaps) which seat well and look exactly right, unlike the usual engraved lines. They can be positioned but cannot be made to move. One area of criticism is that the basic mouldings cover both B Mk I and Mk IV and there are lots of differences in the windows down the fuselage sides and leading edge landing lights. All of these need to be cut out by you. The areas are marked inside but the plastic is quite thick and it’s easy to dig out too much. This isn’t just a few little windows, it’s half of the windows, so a lot of frustrating work; it will take you a good hour or more. It would have been easier if the thinned plastic had been a lot thinner. One question: the lower engine nacelles have cutouts for oil coolers that were fitted to the Mk IV. This one has nothing but it looks as if these should be blanked off. However, the jury is out on that because I can’t find any decent photos of a B Mk 1 in this area.
I used no filler anywhere on my model and just a bit of viscous liquid primer along some joint lines with a little attention with wet micromesh. The only re-scribing necessary was the fuselage frames over the central joint. The transparencies are crystal clear and fit well…however…
OK, it’s not all plain sailing. I got the impression that the people who designed this model and the assembly sequence had not build a complex model before. For example, the nose and mid-upper turrets must be installed during assembly so you have loads of opportunities to knock off the guns and infinite difficulties masking the little blighters (the rear turret can be installed at the end). Similarly, the undercarriage assemblies (main and tail), which are unbelievably complex and fragile, must be installed during the build. Drop the model and you might as well throw it away as they are almost impossible to repair if smashed. Likewise, all of the little transparencies must be inserted from the inside so have to be masked before painting. All of these issues should have been avoidable with a little forethought, Airfix have already registered this lesson and Revell are usually pretty good. At least the propellers can be popped on last.
A word of warning to those who refer to the instructions as a last resort. Many parts and sub-assemblies of this kit are handed even when you don’t expect it so follow the part numbers scrupulously.
Markings and Finishing Touches |
The decals are very nice and go on easily. They are simple, of course, as the basic schemes have few stenciled instructions so you’re there in an hour or so. You need to gloss up the surface to avoid silvering then an overall coat of matt varnish to seal everything. There are loads of little decals for the bombs but no suggestions as to where they go. I didn’t use the bombs anyway but you may want to.
Italeri provides German marking for a captured version but this example had a damaged nose and this will require some modelling skills to replicate as the kit contains no alternative parts for this example.
The photo-etched fret includes some oval grilles but there is no mention of them in the instructions; I assume that they were intended to fit in the intakes on the leading edge of the wing (oil coolers for the bomber verion? You have to dig them out…) but had to fit them after the event. They look fine but I’m sure they’d be better if they were inside.
Once the canopy masks are removed it reveals a wonderful large cockpit interior which looks really good. I have to say that I find the rest of this aircraft rather unattractive, the kind of aviating device that only flies because it is so ugly the earth repels it! However, this kit is good and a definite improvement over the ancient Airfix kit. It is not perfect and inexperienced modelers may find it tedious and frustrating at times. I certainly found it more taxing than the recent Airfix and Revell Shackletons and it would have been improved with a little more forethought on the part of the kit designers. I will certainly broach their Sunderland with some trepidation. However, this is a good value, state-of-the-art 1/72 Stirling so is a must-have for fans of these dark monsters and…don’t be put off by the deep panel lines; they really do look OK on the finished model and add a bit of textural interest to an otherwise dull aircraft…or maybe I need some new glasses!
Any correspondence is welcomed at rogerjhardy100@yahoo.co.uk
Model, Images and Text
Copyright ©
2017 by Roger Hardy
Page Created 5 May, 2017
Last Updated
5 May, 2017
Back to HyperScale Main Page
|
 Home
| What's New | Features | Gallery | Reviews | Reference | Resource Guides | Forum |
Home
| What's New | Features | Gallery | Reviews | Reference | Resource Guides | Forum |