Wave 1/72 scale
MAT Arrow 2
by Ken Szeto


Hobby Boss' 1/72 P-61A Black Widow is available online from Squadron.com
Description: Space-Plane from Sci-Fi series “Ultra Man”
Wave Kit No. UT-026
Scale: 1/72
Growing up in Hong Kong of the 1970s, we were fortunate to get TV programs from North America, Europe and Japan. One of my favourites was “Return of Ultraman” from Japan featuring Ultraman Jack, defender of Earth from outer space who fought giant monsters.
In the show, Ultraman doesn’t fight alone as he is part of Earth’s defense force called the “Monster Attack Team (MAT)”. MAT had supporting aircraft that helped Ultraman during fights. The MAT Arrow 2 is one of those and has been my absolute favourite since childhood.
Design
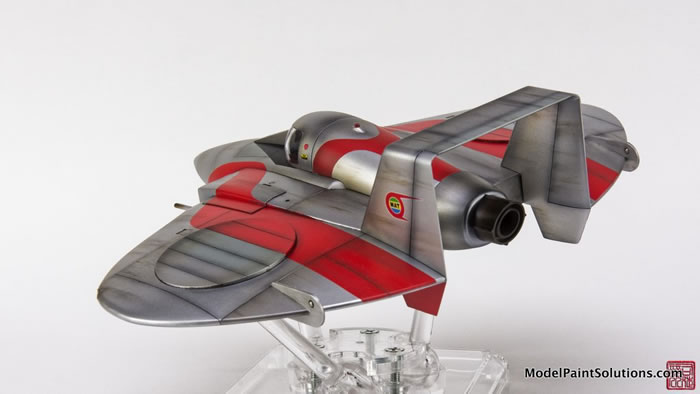
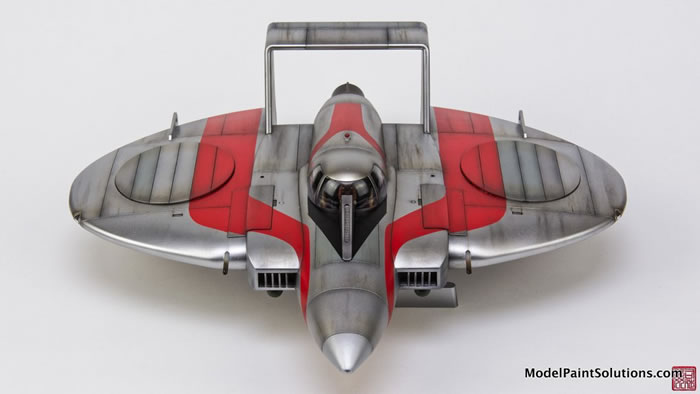
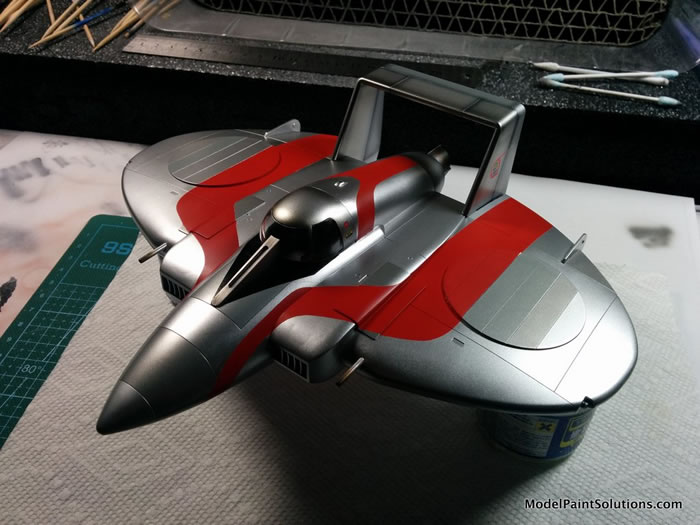
There is something unique about the MAT Arrow 2 that fascinated me as a kid. Although I was a fan of military fighter jets growing up, the MAT Arrow 2’s semi circular wing design and the conventional fuselage looked like the perfect blend of realism and science fiction.

When Wave Models announced they would be producing a model of the MAT Arrow 2, I was overjoyed and wanted to get my hands on the model right away.
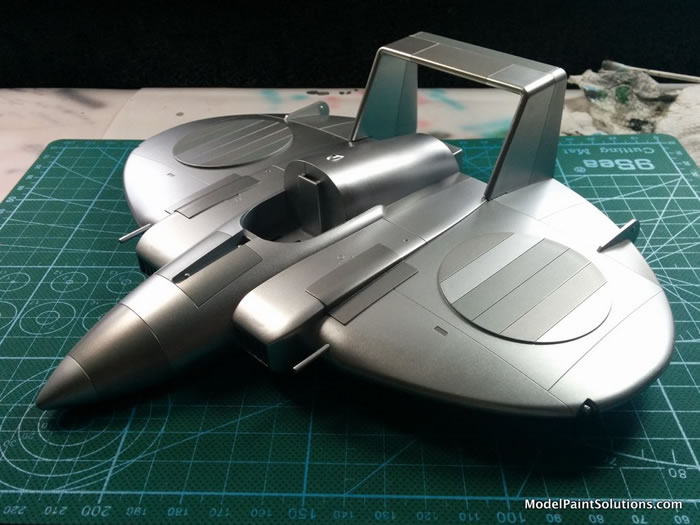
Wave may not be a well-known model publisher in North America, but their models have always been great to work with. The entire model was cast in light gray and the surfaces were near perfect.

There was a small shrink mark on the nose of the fuselage, but a little bit of superglue mixed with baby powder took care of it. The rudders and elevator were flat pieces. The edges of both were thinned with a sanding block so they resembled an airfoil.

Other than that, all the pieces fit together perfectly especially the body of the plane, which consists of top and bottom halves.

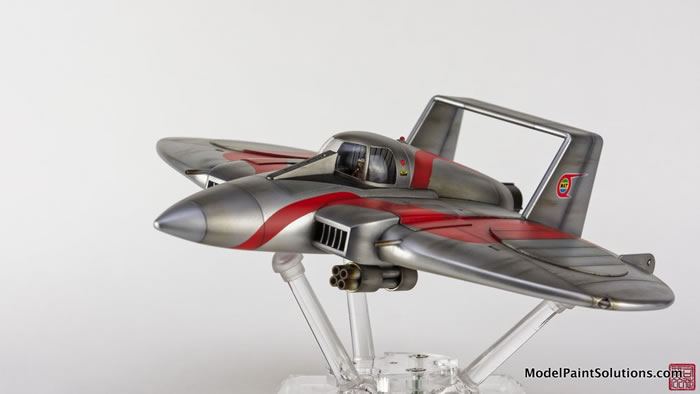
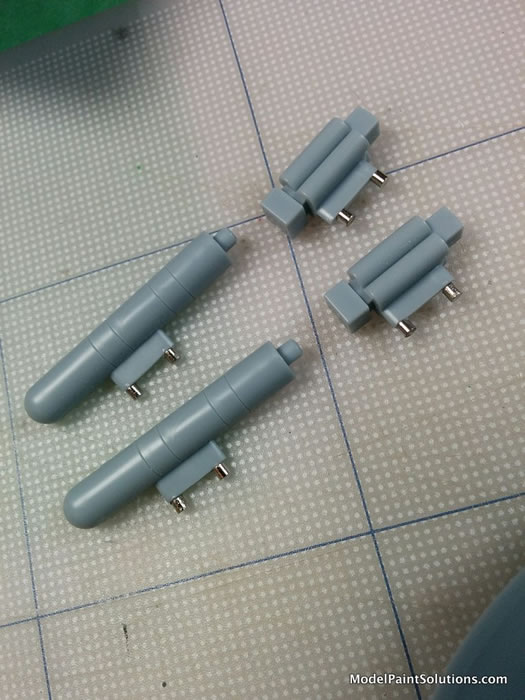
The kit comes with two sets of weapons: rocket pods and missiles. The recommended method of mounting the armaments required choosing one set or the other. I like having the option so I made the weapons switchable by gluing metal plates on the inside of the fuselage and using 2mm circular magnets (held with super-glue) as the hard points on the armaments.
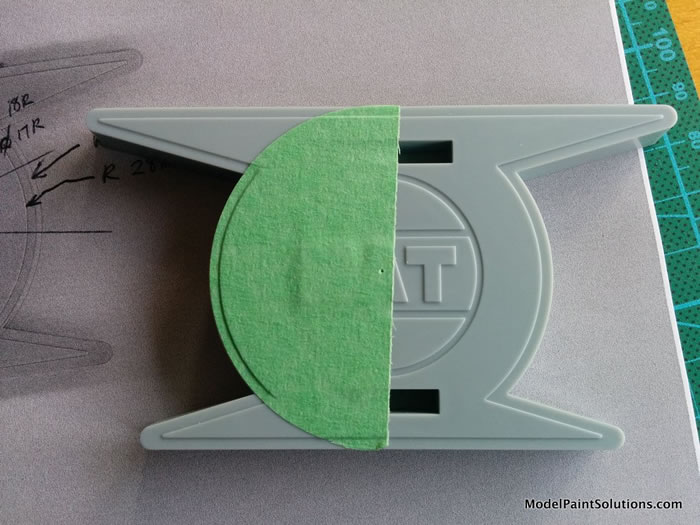
The kit also came with a display stand that is way too low to be useful. I like the MAT Logo however so it deserved just as much attention as the aircraft.

The MAT Logo has only one set of spires (or spikes), usually on the right-hand side. Somehow, Wave put spires on both sides. Given how short and stable the stand is, there is need for extra spires so I sawed the extra spires off, filled them with styrene strips, and did a lot of sanding and filling.
Painting, Markings & Finishing Touches |
The model was primed with Grey Mr. Surfacer 1000. Once confirmed that all the seams and scratches were removed, I moved on to the Silver basecoat: Gaia Colour #121 (Star Bright Silver) applied with an airbrush. Once the base coat dried, random panels were masked and sprayed shades of silver prepared by mixing Gaia Colour #121 with small amounts of Neutral Grey, Extra-Dark Grey or Black. This is a technique I learnt from Mr. Spencer Pollard from his YouTube video “Natural Metal Made Easy!” In addition to mixing different shades of silver, I used Gaia Colour #9 (Bright Silver) on the nose cone and a few panels as well.

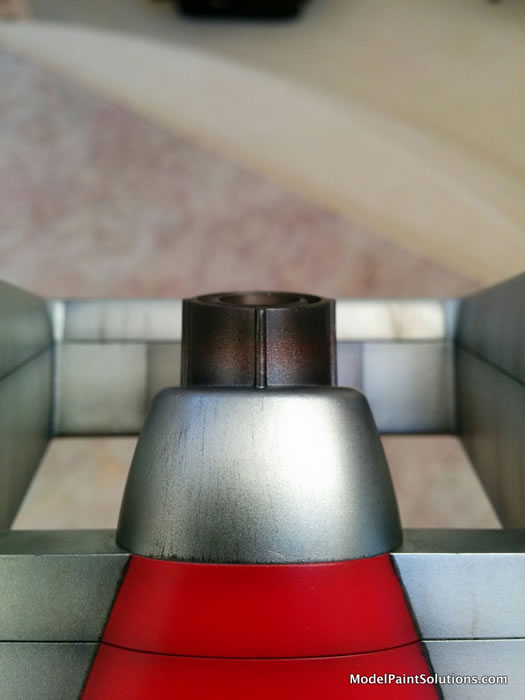
The engine exhaust was first painted with Tamiya LP20 Light Gun Metal in lacquer. The heat effect was achieved by spraying thin lines of colours around the exhaust using clear red, clear blue, and clear yellow. I purposely overlapped some areas with two different clear colours creating the rainbow effect. After that, I covered most of the heat effect by carefully layering Modo Paint MK-41 “Smoke Effect” so the exhaust appears well used with carbon build-up.
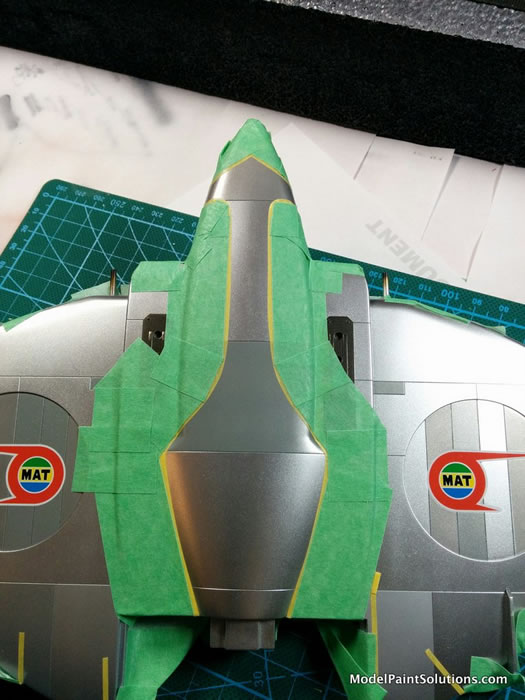
The kit came with a nice sheet of water-slide decals that provided the red stripes however, I wasn’t happy with how well they worked. There were small folds and material that refused to settle down despite using a good amount of Decal Setter and Softener solutions.
After one of the decals tore, so I gave up and removed all the decals with masking tape. Luckily I have a friend who also has this model that emailed me a scan of his decal sheet. Using this, I was able to reproduce the decal shapes and transfer them onto masking tape, which in turn were used as guides for masking the model.

For the red, I used Mr. Hobby UG12 “Sazabi Red” because it’s a nice, bright red. As an aside, Mr. Hobby #68 “Red Madder” is pretty much the same colour.

Having a circle cutter made painting the display stand a whole lot easier. While the Aizu 2mm tape was useful to mask off the outer edge of the red symbol and the 1mm tape was useful for the horizontal lines.

Using a photocopy of the display stand as a stencil for the MAT logo worked like a charm.
Panel Lines:
Before using Tamiya Panel line Accent Colour (Black) to highlight the panel lines, the entire model was coated with Mr. Hobby GX112 Super Clear to protect the layers below as well as to give a smooth surface for the panel wash to flow.
Shading:
For post-shading, I used Mr. Hobby GX101 (Clear Black) and GX109 (Clear Brown) applied with a PS770 airbrush. Clear black was applied first onto the panel lines followed with clear brown lightly dusted in the areas behind the black in relation to the airflow direction.
Weathering:
Before weathering, the model was coated with Mr. Hobby C181 Semi-gloss to blend all the layers and to give the model a slightly rough surface for dry-brushing and washes. Scratches on the edges of the model were simulated with artist oils (Titanium White, Neutral Grey and Black).
For the dirt streaks, tiny drops of artist oil or Mr. Hobby Weathering Colour (Ground Brown) are painted onto the model where I want the steaks to begin. Using a flat paintbrush with enamel thinner, I pull the colour towards the tail of the aircraft in the direction of airflow.
This was a fun build, even though I ended up having to remove the decals and do some minor repair because of them. The best part is that I am now the proud owner of a high-quality replica of the MAT Arrow 2, which also fulfilled a childhood’s dream. I would highly recommend this kit to any one who is a fan of “Return of Ultraman” and while you are at it, consider building the MAT Arrow 1 and MAT Gyro as well!
For more on this build visit Modelpaintsolutions.com.
Text and images by Ken Szeto for Model Paint Solutions Copyright © 2018
Page Created 21 December, 2018
Last updated
21 December, 2018
Back to HyperScale Main Page
Back to Reviews Page

|
 Home
| What's New |
Features |
Gallery |
Reviews |
Reference |
Forum |
Search
Home
| What's New |
Features |
Gallery |
Reviews |
Reference |
Forum |
Search