Scratch Building a 1/1 scale
P-51D Mustang
Instrument Panel
by Maurizio Di Terlizzi
|
|
P-51D Mustang Instrument Panel |

Revell's 1/48 scale Beaufighter TF.X will be available online from Squadron
I have always loved aircraft instrument panels…all those dials, quadrants, writings and labels captured my interest since childhood. Several years ago I started mixing my job (helicopter crew chief) with hobby which became my main interest along with 1/48 and 1/32 aircraft modelling.
Over the years, I have built other panels, trying to complete a collection of the most famous fighter aircrafts of WWII. The first was the beloved Messerschmitt Bf 109G6, then the Macchi C.202 and lately the Mk I Spitfire. A german, an Italian and then a british…what’s missing?
Last year a great friend of mine was involved in the recovery of an Italian P-51D from Garda Lake. The pilot attempted an emergency landing on the water but he did not make it. Although the condition of the aircraft was poor, the panel was incredibly intact. All the dials were on, revealing every single detail.
My friend disassembled all the instruments to clean them up and the metal panel, so I asked him to trace its contour onto a large cardboard. In three days I had the drawing in my hands.
After having cut the previous panel without the use of any “modern device”, this time I opted for a sharp water cut. Another good friend provided me with a 3 mm thick sheet of aluminium, and another drew an Autocad file of the panel.
The guys at the water cut factory took just a moment to cut a perfect Mustang panel. After that, I passed a light-abrasive sponge over the entire panel to smooth all the parts that were really sharp ! Then followed a coat of metal primer and one of matt black. In the meantime, I asked the water-cut guys to create two “L” shaped support for the back of the panel for me, using some scrap of the sheet.
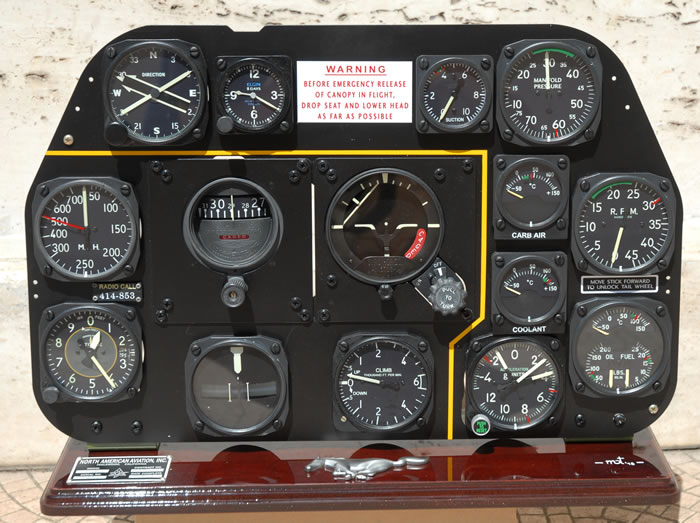
My panel was beginning to take shape!
Now instrument cases, dials, bezels and glasses must be made. I noticed that many instruments were identical with a large size, many were identical in small size, and two were completely different. The first step was to buy the two sizes of instruments, one for each size. These have been the same since the 1970s, so it was sufficient to buy a 1950s large turn slip indicator and one 1946 suction small instruments. They were carefully opened, wearing gloves and mask to avoid danger from radioactive powder. After a long bath in degreaser, the two cases were submerged in a rubber mould. It was difficult to create a partial mould because I wanted to copy only the front frame and not the entire case. I started pouring resin into the moulds after a week, using the standard cream coloured resin added with suitable black colours. The many front frames comes out perfectly coloured at the beginning, didn’t need any spray or black paint and resembled closely the Bakelite appearance. To the great displeasure of my local glazier, I asked him for 15 circles of 2 mm thick glasses, divided into 4 different diameters. At home, my PC was burning, running Photoshop, to realize 15 different bezels…
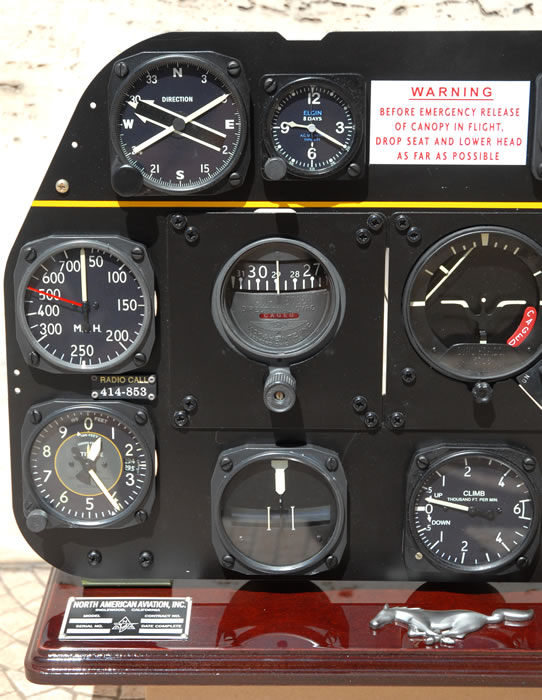
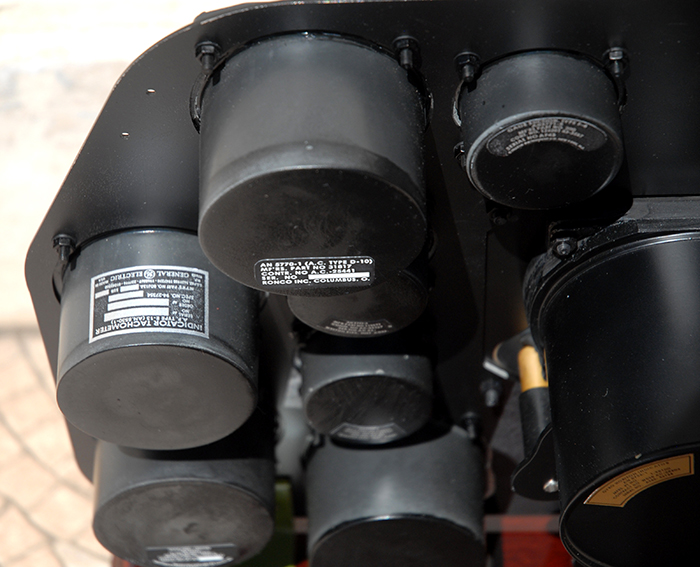
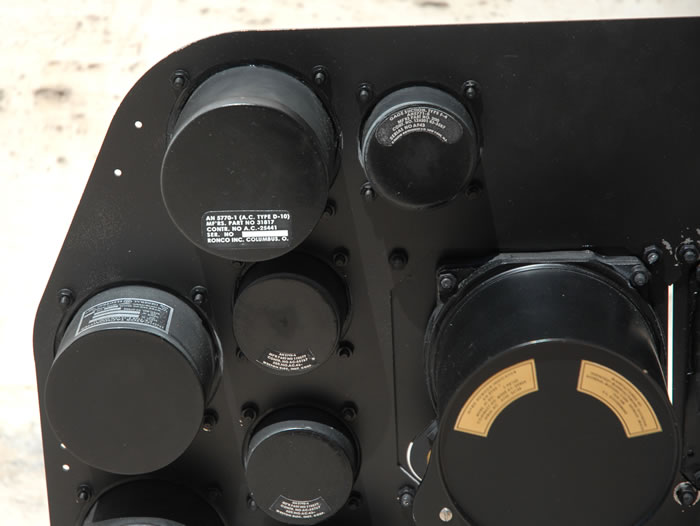
Once the files were ready, they were printed professionally with chemical process, respecting the exact diameter and using satin photo paper. Now was the time to realize the back cases for the instruments, as I didn’t want to have a “flat” back of the panel. Slow and carefully, the instruments were assembled one after the other, using brass, forex, CA glue, metal sheet, copper, glass and steel. What a beauty ! After an instrument was completed, I put it into a cardboard box, protected with soft clothes. In three months, the box was full, it was time to assemble the panel.
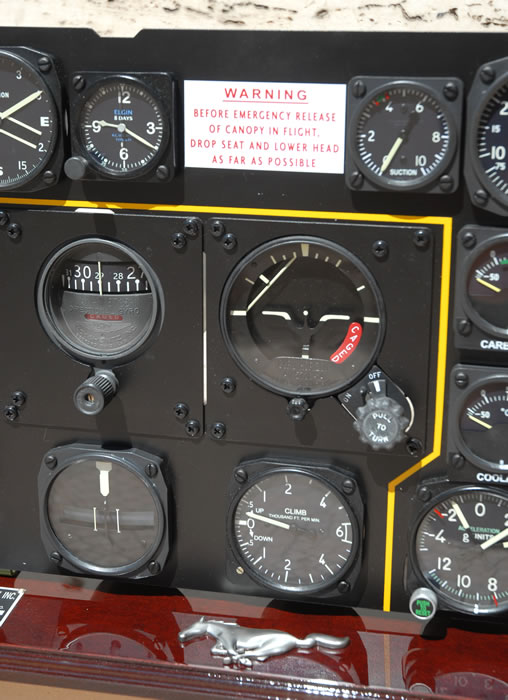
I went to my local carpenter ordering a beautiful wood base, painted and polished as a mirror. I bolted the panel onto it, giving a few degrees of inclination, to allow a better vision once on a table. Then came the adhesive tags and plasticard…they were realized in Photoshop respecting the correct shape, size, spacing and fonts. In the perspective of assembling the instruments, I started thinking about screws. I noticed that all of them were slotted mushroom-head except the ones for the two large instruments in the middle that were Phillip’s type. I discovered that this Mr. Phillips invented the screw with a cross on top instead of a slot, and they retain his name. I bought them on Ebay, made of nylon and already black tinted...fantastic!
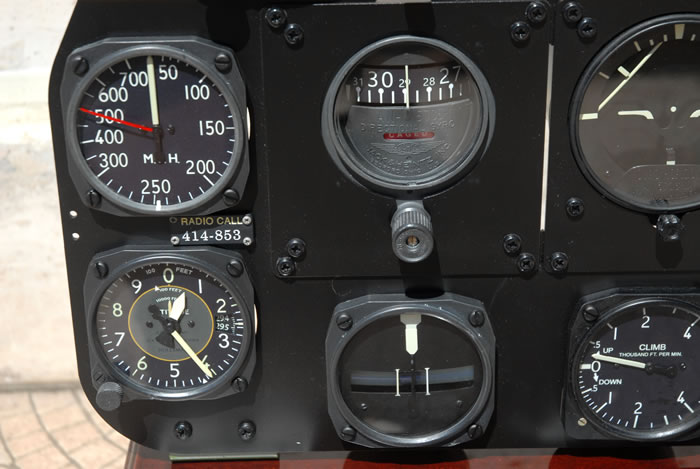
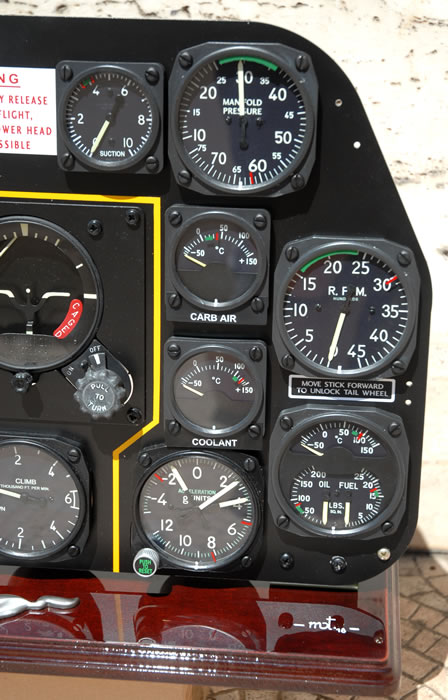
Before assembling the whole, I had to paint the yellow black stripe that run across the panel face. What was the exact width ? Why some people say it was white, and what is its purpose ? Thanks to Hyperscale and Britmodeller I knew all these things, some very kind guys replied saying that the stripe was white until the xxxxx Bu.no, then turned to yellow. It was a 1/8” stripe and its purpose was to include all the instrument working with air, feed in depressions by a pump connected to the engine. Last thing to do, was to paint all the limits, onto the glass surfaces of the instruments. These were made to re-use the instruments on a bomber or on a different plane in case of need or following a wreck of the donor. Instrument was IN COMMON with other planes and was sufficient to rub down the limit with a cloth wet with thinner, to use it once again in another aircraft…Americans at that time really had a great mind, a mighty industry and were the first to know the meaning of the word STANDARDIZE.

To paint the correct limits I used the original flight manual where all is perfectly explained, and also some “de visu” checking of the instrument panel of the P51D now preserved in Italian Air Force Museum, it is in pristine condition and wasn’t retouched or repainted.
With a screwdriver and a spanner, the fun began….I forced myself to assemble just one or two instrument a day, just to keep the fun going on, but it was so nice that in two days the panel was fitted with all the instruments.
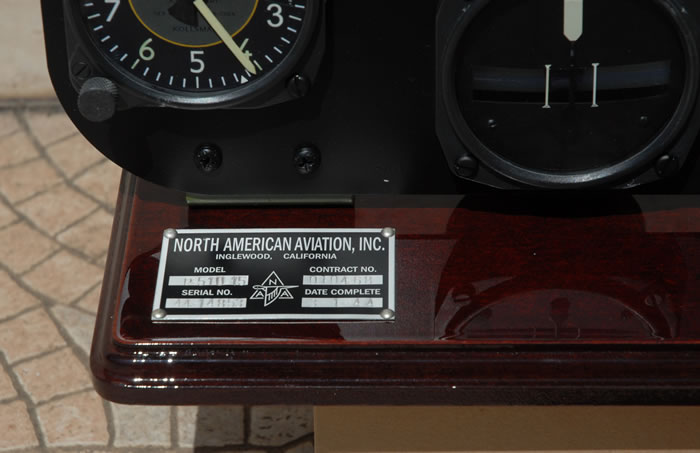
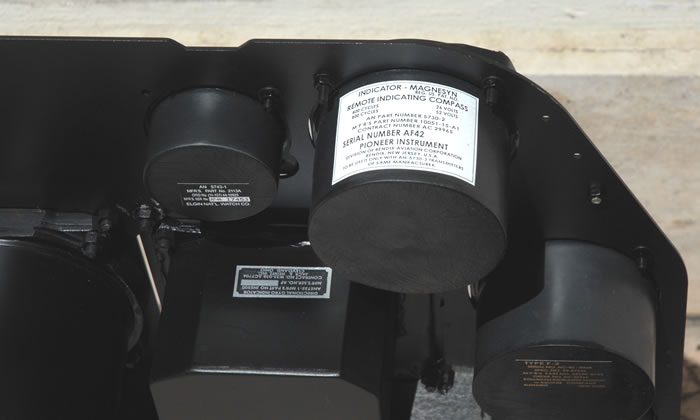
Now just two details were missing. I wanted to put on the base something connected with the idea of the Mustang (as a horse) and something giving the idea of the real stuff. So I bought a belt from eBay that included Ford Mustang goodies, with a nice horse running as a buckle. It was carefully copied in resin and painted chrome, before being fitted on the base centre. The other was a replica of the original Constructor data plate. I also bought a set of metal punches with which I carefully engraved the serial number and the other data on blank fields. What a panel ! Smaller that my previous ones, but with a flavour of modernity that others doesn’t have.
This panel is now FOR SALE…..I wanted to complete a resin model kit in 1/32 scale to be produced in a hundred kits and need to finance it to let it hit the market in spring 2019. Price is not cheap, but I took 14 months to complete this Mustang panel. It is really a piece of art and could be a unique model at hope of passionate people or even in the Museums.
I hope you like it.
Ciao,
Maurizio.
Acknowledgements
The author wants to thanks the many friends that helped so much during this particular and unusual work. My thanks to Gabriele, Attilio, Fabrizio, Valerio, Marco, Gregory and Maurizio. A special thanks to my beloved family.
|
 Home
| What's New | Features | Gallery | Reviews | Reference | Resource Guides | Forum |
Home
| What's New | Features | Gallery | Reviews | Reference | Resource Guides | Forum |