The Zoukei-Mura 1/48 scale
F-4S Phantom II
in Mission Models Paints
|
McDonnell-Douglas F-4S Phantom II
|
by Richard Powers

Hobby Boss's 1/48 F4U-7 Corsair is available online from Squadron.com
I have a soft spot for the F-4. My first job out of college (1967) was in the aerodynamics department of McDonnell. I was put on the F-4 project temporarily until my security clearance was approved. I calculated external store drag index data for the F-4J pilot’s handbook updates. I remember walking on the flight line at lunch- Phantoms for the USN, USAF, USMC, Germany, Israel, Iran….
After a decades-long absence from modeling, my re-entry was sparked by Eduard’s Limited Edition “Good Morning Da Nang” F-4B. My second Phantom was Hasegawa’s F-4G in Hill 2 camouflage. When Zoukei-Mura’s F-4J was issued, I immediately snatched one. When Z-M’s Sierra version came out I bought one of those as well: ditto the “D” and same for the Marine “J” re-boxing--except I bought two.
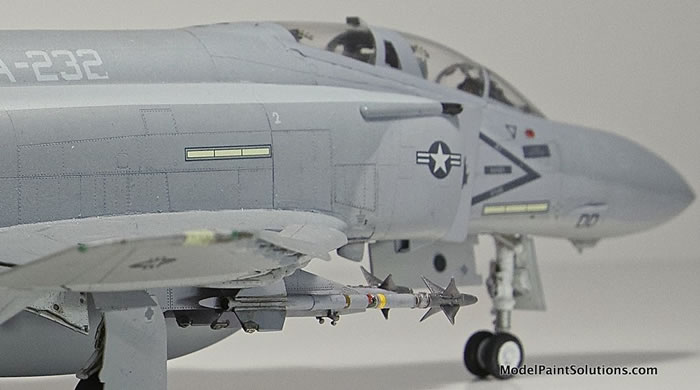
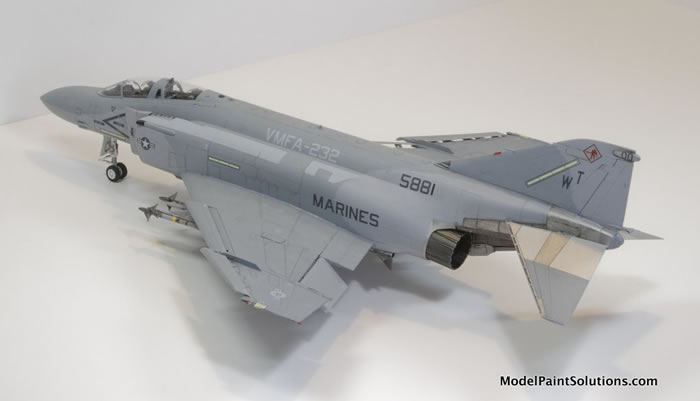
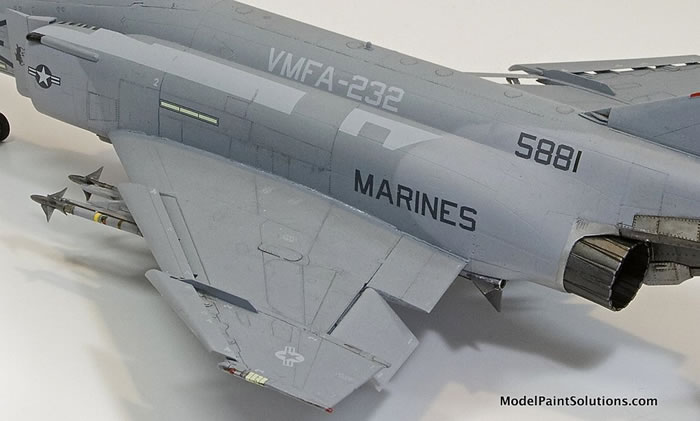
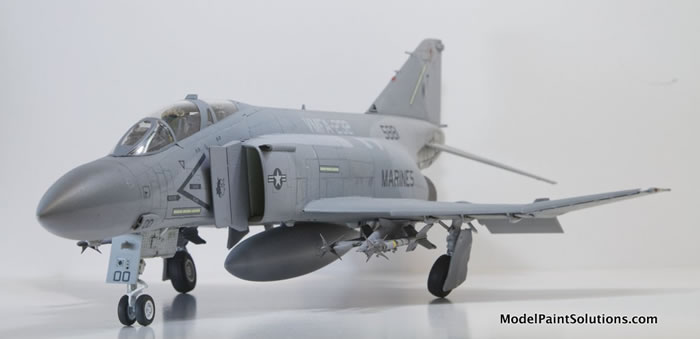
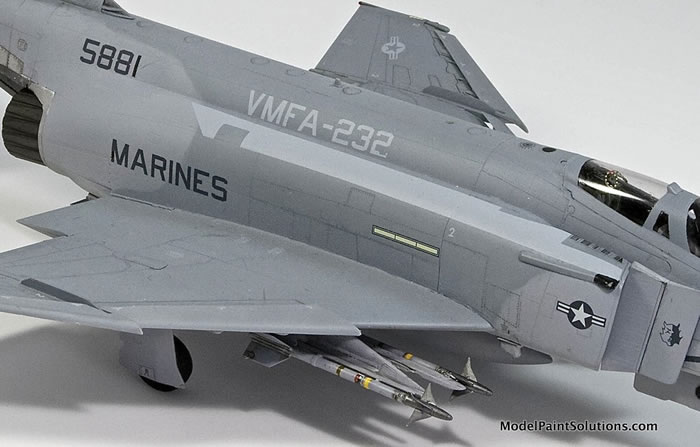
Since I had built a Navy Phantom and a USAF Phantom it was time for a Marine bird. Furball’s “Low-Viz Devil Dog Rhinos” (48-063) decal set included a nice selection of eleven Marine Sierras (and one J) so I decided to build the F-4S. I vacillated between VMFA-333 and VMFA-232 finally settling on 232 in the “tactical” camouflage.
This was my first Zoukei-Mura kit, my first time using Mission Models Paint.
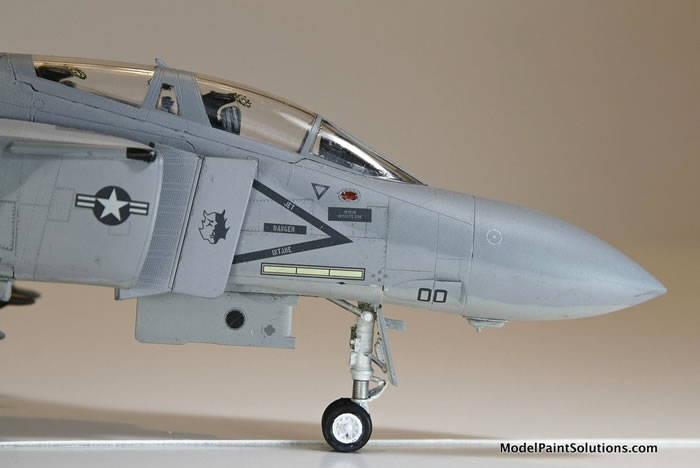
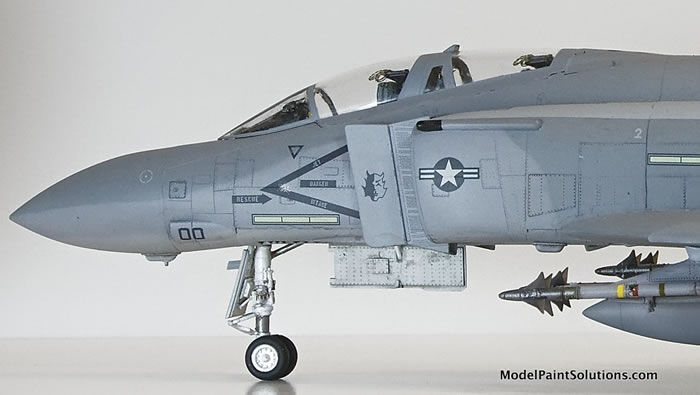
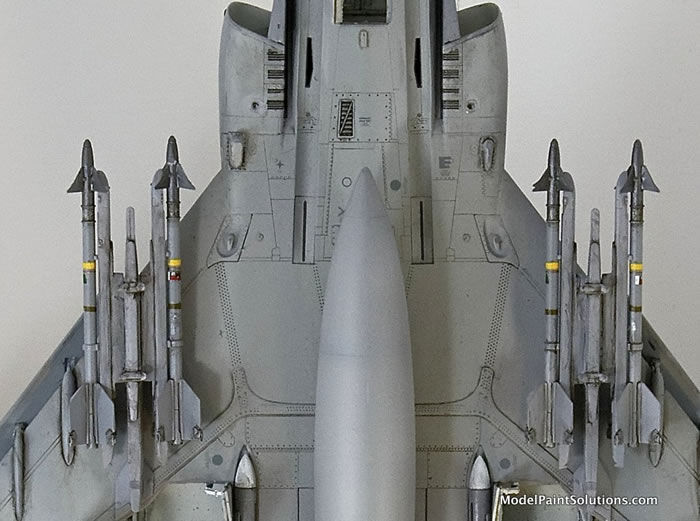
I’m a minimalist when it comes to super-detailing. I always build with closed canopies and equipment bay/access doors shut. The fully slatted wing is one distinguishing feature of the ‘S’ version. Although the inboard wing slats are retractable (and probably would be retracted sitting on the flight line) I decided to model the slats in the extended position.
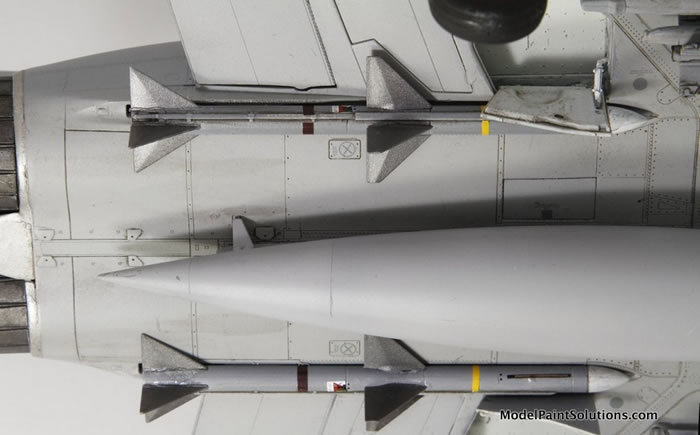
Photos of the Sierra version show the most common USMC loadout to be a centerline fuel tank, inboard pylons with AIM-9 launchers, and no outboard pylons. That’s what I built with four AIM-9s and two AIM-7s.
Without going into a lot of detail, some of my observations are summarized below.
There are lots of tiny parts to manipulate. I didn’t follow the suggested instruction sequences and only glued the bits when it was absolutely necessary. Be careful: the first slat actuator I removed I cut in the wrong place resulting in an actuator that couldn’t’ support the slat. Luckily, there are three per slat.
Getting the fuselage halves together with the dorsal insert and cockpit tub is critical. When I dry-fitted the fuselage halves and dorsal insert together, I found that the edges of depressed dorsal area didn’t meet and couldn’t be glued.
After completing the cockpit tub and grinding away until it fit between the halves with no resulting gap, I started by taping the nose together (cockpit tub in place) making sure the fuselage halves aligned. I then glued the aft end – vertical fin and lower fuselage. Next, I dry-fitted the dorsal insert, gently sanding edges until I was satisfied with the fit. I taped it in place and used several strips of styrene glued between the depressed dorsal area edges to stabilize the fit.
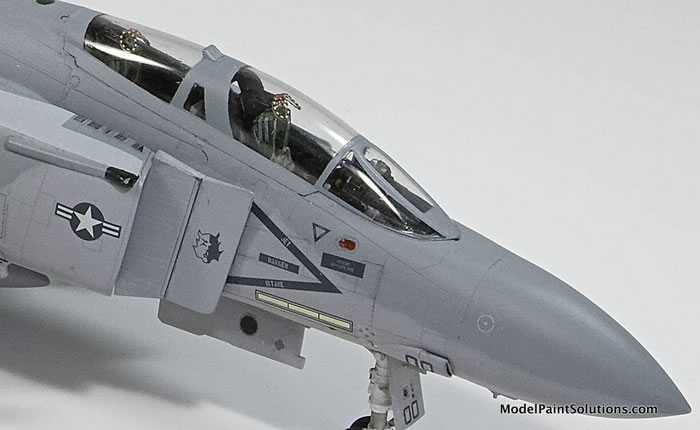
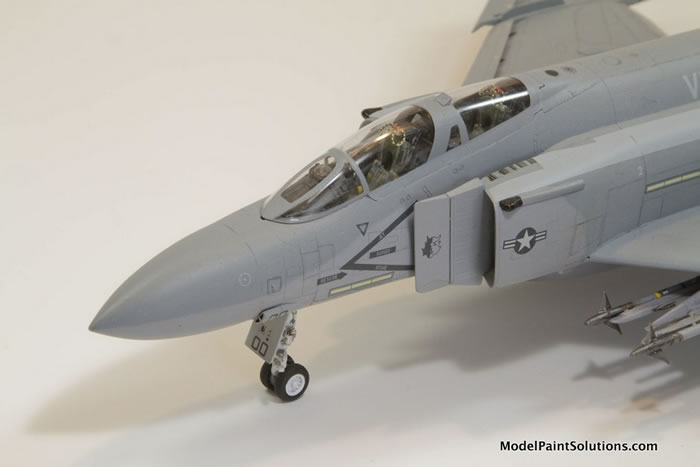
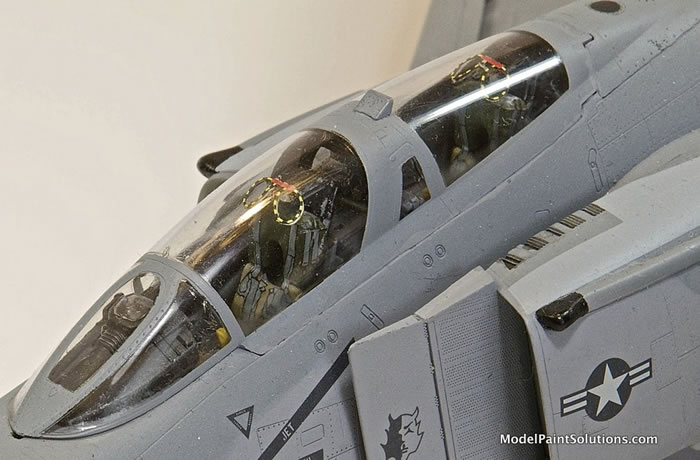
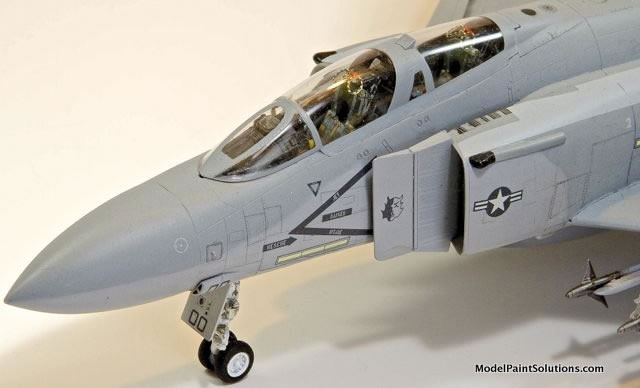
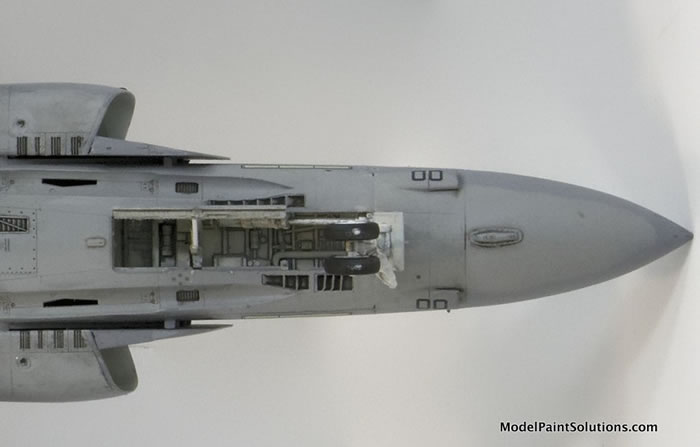
Next, I glued the fuselage front together with cockpit tub in place. The kit seats are adequate. Z-M doesn’t include belts and harnesses which is a shame. The prominent yellow/black face curtain and the belts/harnesses are quite noticeable even with a closed canopy. To remedy this omission, I used Furball ‘s “F-4B/N, J/S Cockpit Detail Set” (48-047) which includes decals for instrument panels, side consoles, ejection seat face curtain, and seat belts/harnesses. The seat belts look OK when in place through the closed canopy. The ejection seat face curtain decals didn’t work so were replaced with PE parts from an Eduard seatbelt set.
The main landing gear fits into the wing via a side facing tab. This provides positive orientation of the gear. Further, the gear is supported by the wing upper surface, the landing gear strut projecting so that, if everything is aligned, the model’s weight is supported by the strut/wing top surface glue joint. Somehow, when I glued the main landing gear in place, I missed this detail – there was a gap between the strut and the wing. I didn’t notice it until I set the model on the landing gear. After an hour or so the left gear had started to collapse inward. I remedied this somewhat with shims of 0.02” thick styrene set in place with a glob of 5-minute epoxy. That’s why you won’t see any head-on photos.
Zoukei-Mura’s missiles are very nice, with body molded separately from the fins. The AIM-7 body includes the external conduit and the AIM-9 fins include the “rollerons”. No need for aftermarket parts here.
There are lots of parts and building isn’t difficult, just tedious.
Painting:
When I completed basic assembly, (airframe ready; landing gear/tires, exhaust nozzles canopy, slats, stabilators to be painted separately before attaching), it was time to paint.
Priming. After cleaning the surfaces with denatured alcohol, I airbrushed Mission Models “White Primer” (thinned to 60% with Mission thinner) on the aft fuselage natural metal areas. The first coat (several passes with the airbrush) lightly sanded with a 4,000 grit pad followed by a second coat, again sanded. Then the natural metal area was masked with Tamiya tape to be painted last. The remainder was airbrushed with two coats of 60% Mission “Gray Primer”. Each coat consisted of multiple passes of the airbrush, carefully layering the primer to avoid flooding the surface – although I didn’t count the number of passes I’d guess about 10 for each coat. Each primer coat was lightly sanded with 1500 grit paper to remove the “tooth”. The primer color was very close to the plastic color making it difficult to determine whether coverage was complete. (Lesson: it’s probably a good idea to prime with a color different from the final coat.) Small parts – slats, landing gear doors, stabilators – were primed on their sprues. Priming complete, any bad joints or other imperfections were corrected with putty. I use Deluxe Materials “Perfect Plastic Putty”, a water-base filler. The excess can be easily removed with a Q-tip.
Now for the finish coat using paints thinned to 60% with Thinner-10 (Mission Thinner with 10% Polymix by volume) starting with the lightest, Mission “Light Ghost Gray”, on the undersurfaces. Although I’m not a fan of heavily weathered models, I thought I would try pre-shading the undersurfaces so I outlined the control surface hinge lines with Mission Gunship Gray and applied random patches of White to provide some variation in the uniform color. The LGG finish coat was applied with multiple layers airbrushed until I thought the pre-shading was barely visible.
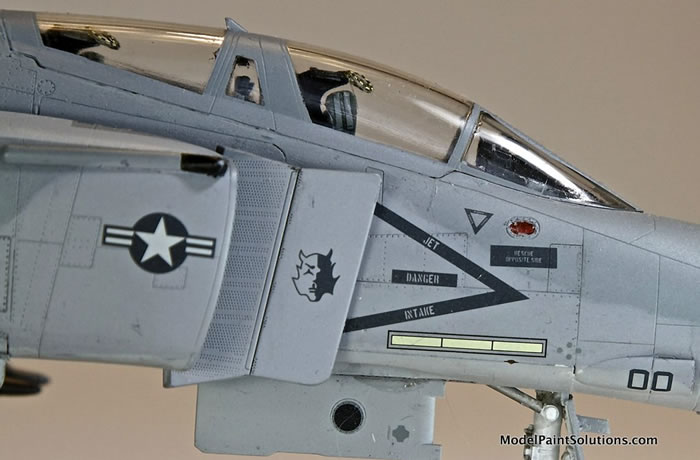
Next, “Dark Ghost Gray” (Mission-074) was sprayed on the fuselage sides and vertical fin. Separation lines between colors were masked using 3M Mounting Putty rolled into 1/8” diameter worms. Again, slowly layering the paint, taking my time. When the DGG was complete I noticed that there was no noticeable contrast between LGG and DGG. Not good. As a test, I sprayed patches of the two colors on my paint test model (an abandoned Hasegawa 109). This showed that the two colors do have discernable differences in color and the separation line should be noticeable. I suspected that my finish coats were not opaque, and the primer was showing through. Time to re-paint. After lightly sanding the DGG areas, I started applying another coat. OK-now I had an acceptable DGG coat, although the undersurface LGG needed some additional work. I started with the Medium Gray (Mission-072) coat – upper nose, fuselage tops, part of the vertical tail. Again, 3M Poster Putty was used to mask borders between the colors. The MG coat went off without a hitch. Nice and opaque with visible differentiation between MG and DGG.
Then back to the LGG undersurfaces. First, a light sanding with 1500 grit paper to remove and “tooth”, then layering the paint. Bye-bye to pre-shading, but hello to color differential: the three base colors look good.
After touching up spots where paint spray carried over to adjacent areas (more tedious than it sounds) , time for the natural metal aft fuselage which was still primed and taped.
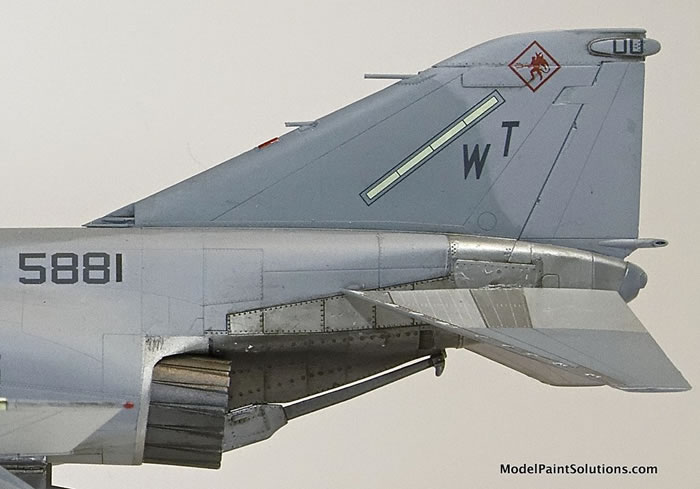
I removed masking tape from NMF area and reverse-masked the painted area. I airbrushed a base coat of Mission Models Duraluminum. While I was working with metal paints, I also sprayed the exhaust nozzles with Mission Cold Rolled Steel (CRS), which required several coats for coverage. I also used CRS to overspray the Duraluminum for the darker parts of the aft fuselage metal panels. When dry, I masked and airbrushed several metal panels with Mission Dark Aluminum. Inboard sections of the horizontal stabilizers were painted with Mission White Aluminum, Dark Aluminum, and Dural.
I’m not a fan of heavy panel line wash use, where every seam stands out equally – aircraft skin joints are engineered to be as smooth as possible. After reviewing photos, I decided to emphasize panel lines (actually access panels, as opposed to skin joints) on the nose forward of the intakes, on fuselage sides, aft of the intakes, and above the metal panels on the aft fuselage. I used Testors Createfx Black wash (actually a brownish black). Some of the panels were more prominent that I wanted, so I re-sprayed MG or DGG as appropriate.
For the metal panels and exhaust nozzles, which can show engine exhaust and heat-related stains, I used Tamiya Black panel line wash followed by an overall wash of Testor’s Createfx Black. Tamiya Black Panel Line Accent Color was also used to emphasize the stabilator leading edge slat.
Decals:
The tactical camouflage apparently eliminated the myriad of access panel stencils, leaving only the NATO servicing symbols and a few warning stencils; not many, but some are very small – “NO STEP” and “NO PUSH”- and lots of these. Before applying the decals I tested one from the Furball set on a test paint patch. Even though the patch wasn’t gloss, the decal settled nicely with no silvering. I did, however, apply Mission Gloss Clear Coat (thinned to 25% with Mission thinner) before applying the decals. I only layered a few airbrush passes, and didn’t intend to go to a full gloss finish.
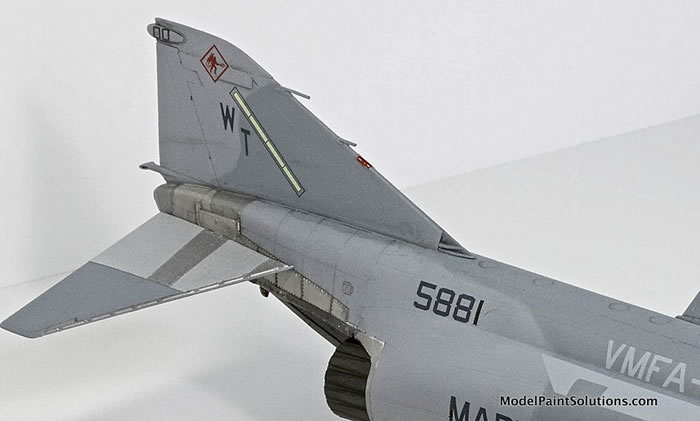
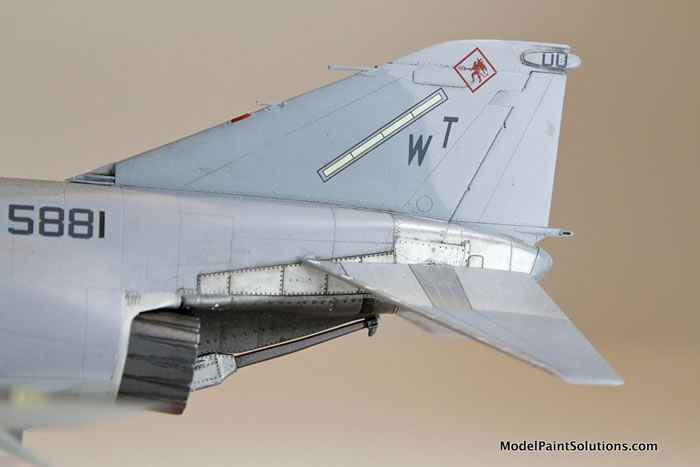
Furball’s decals are VERY thin with minimal carrier film between letters but can be somewhat fragile. I used Micro-Sol to get the decals in place – particularly the smaller decals, and Micro-Set to get them to snuggle down. In the process I broke a few letters and numbers, visible in the photos, but nothing serious. After completing the decals, I noticed that the large “5881” on the aft fuselage seemed to be the wrong color. According to photos of Marine Sierras in tactical camouflage, the serial number, “MARINES”, vertical tail code (WD) and the intake warning chevron should all be the same dark color. Here “5881” was a lighter color. I cobbled together two replacement serial numbers from the decal sheet. If you look closely at the photos, you’ll see that the “1” is a bit darker than the other numbers – it is really an “I” from “MARINES”.
External Stores: The AIM-9 and AIM-7 decals used a combination of kit (stripes) and TwoBobs (other details) with a healthy dose of Solvaset.
Decals finished, painting done, access panel lines accented--time for the clear flat coat. I thinned Mission Flat Clear to 25% concentration with Mission Thinner (no polymix added) and started applying in dry coats. Dry coating is new to me, but eventually got the hang of it. It does take good lighting and proper surface placement to see the where the flat coat is landing.
How much Flat? I stopped when the overall appearance was flat enough and the decals didn’t look like decals. The flat finish looks good, and although it’s somewhat “pebbly” and it’s really tough.
Time for the little bit of weathering I usually do. Using Testors Createfx Black Wash (its not really black – sort of a brownish black) I accented selected spots: some structural plates, a few joint lines, and other spots remembering less is more.
A word (or two) about the canopy. I used the supplied closed canopy.
And purchased DNModel’s masks for the Zoukei-Mura F-4s. These masks don’t look or feel like tape; more like thin adhesive-backed mylar. They really do a great job, particularly on the front canopy section with the tiny curves at the top. After masking, the canopy was airbrushed Mission Medium Grey with a Flat Clear coat.
Painting complete, time for final assembly – all the little parts I left off so I wouldn’t break them during painting. Landing gear and wheels, landing gear doors with the tiny actuators, inboard slats etc.
Finally, the last step was adding the canopy. Since I didn’t want to scratch it or end up with dust on the inside, I dry fit and trimmed the canopy then attached it with un-thinned Elmer’s white: wiping off the excess with a damp Q-tip. I then used Elmer’s on a paint brush as a filler for the gap, again removing the excess. Finally, I hand brush Mission Medium Gray over the joint lines.
Model Complete. Total (calendar) time start to finish: Four months.
I’m looking forward to another Z-M Phantom; a “J” or a “D” something with a bit more color. Mission Models are now my go-to paints. I notice that Eduard’s latest instructions include Mission equivalents in addition to Creos. Although I’m still learning how they work with my particular airbrush (Iwata HP-C). I’m learning patience and layering thin coats instead of flooding the surface. Since Mission paints dry quickly (I’ve masked after as little as 10 minutes) this isn’t such a hassle.
For more on this build visit Modelpaintsolutions.com.
Text and Images Copyright ©
2018 by Richard Powers
Page Created 2 November, 2018
Last Updated
2 November, 2018
Back to
HyperScale Main Page

|
 Home
| What's New |
Features |
Gallery |
Reviews |
Reference |
Forum |
Search
Home
| What's New |
Features |
Gallery |
Reviews |
Reference |
Forum |
Search