Laboratory Spin Tubes
Mixing, and Storing Model Paints
by John Miller

Hobby Boss' 1/72 P-61A Black Widow is available online from Squadron.com
The Ideal Tool for Measuring, Mixing, and Storing Model Paints
One of the keys to achieving happy modelers syndrome is the ability to prepare mixtures of paint that behave in a predictable and reproducible manner when sprayed. Reproducibility is essential if you intend to shoot the same brand(s) of paint often and want to rely on a predictable set of characteristics everytime. Variables such as the best spraying pressure, optimal working distance, and fine-line ability will be known ahead of time based, in large part, on the concentration of paint (high or low) in your mix.
Conversely, a lack of reproducibility forces the modeler to determine the optimal paint dilution and settings by trial and error each time they paint something. This leads to variability which often leads to a less than ideal finish and frustration for the modeler.
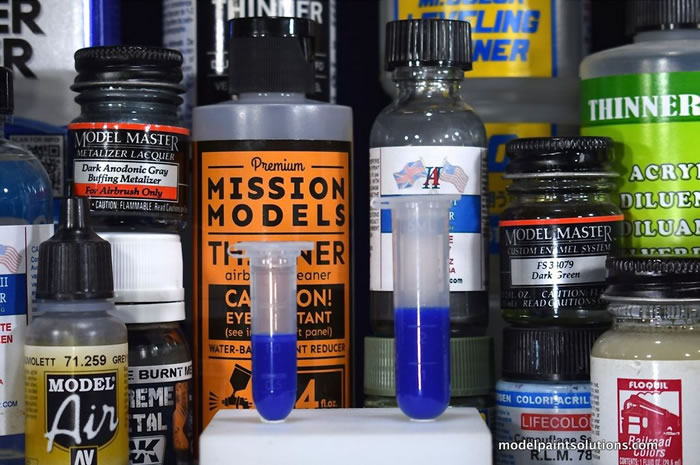
In my previous life as a scientist I prepared solutions on a daily basis. One of the tools that made that job easy were laboratory spin tubes. These sturdy and re-useable tubes have easy-to-read measuring gradations and are designed to hold all manner of nasty chemicals while enduring high-G centrifugation----without leaking. I’ve measured, mixed, and stored practically every brand of model paint using these tubes and they aren’t affected by anything including lacquer thinners, acetone, and denatured alcohol. These tough little tubes quickly “migrated” to my modeling workbench becoming an essential tool anytime I dilute a paint or clear coat for spraying.
Diluting Paints for Spraying with an Airbrush:
Across many different airbrush manufacturers the two most common volumes for airbrush paint cups are: Small-equating to a volume of 2-3 milliliters or ml’s (pronounced mils) and Large-equating to a volume of 5 ml. I’ll refer to them as 2 or 5 ml cups.
By using 2 or 5 ml spin tubes one can prepare mixtures of paint and thinner that will be appropriate for either small or large sized airbrush paint cups. This lessens the amount of unused paint that gets poured out or used to shoot the inside of your shop trash can (you know you’ve done it).

In addition, that unused paint can be put back in the spin tube and stored for future use. The seals on both the 2 and 5 ml tubes are tight enough to store even lacquers for years with no problems. They seal that tightly.
Most importantly, if you use the measuring gradations and follow some simple suggestions (below) whatever volume of paint you mix will have the same exact ratio of paint to thinner every time you mix it. That’s reproducibility and the first big step to airbrushing happiness.
Getting a Grip on the Gradations:
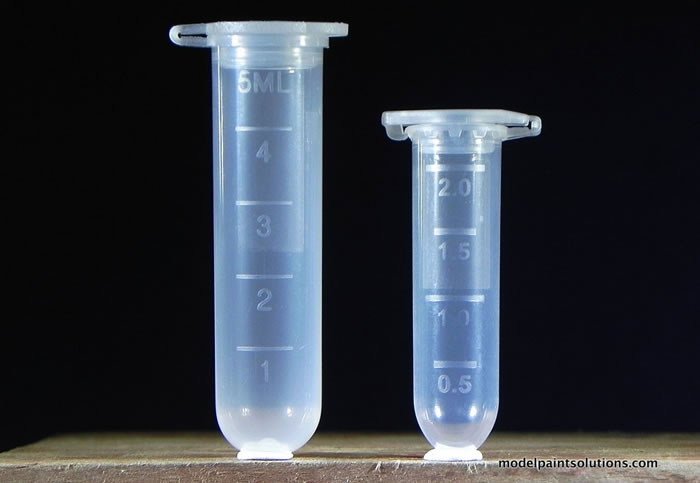
Both 2 and 5 ml spin tubes have gradations that permit you to quickly and accurately measure the amount of paint and thinner you mix together. Before we get to some easy examples of paint/thinner mixtures, let’s consider the gradations.

In order to reliably measure small amounts of paint using either size tube you only have to remember one easy relation:
One ml equals one thousand micro-liters or “Mikes”. That’s cool-guy lab jargon but much easier than micro-liters.
1ml = 1,000 Mikes.
Applying a little basic math:
2ml = 2,000 Mikes.
5ml = 5,000 Mikes.
The gradations on the sides of the 2ml tubes from top to bottom indicate the following volumes in Mikes:
Gradation Mikes
2.0 2,000
1.5 1,500
1.0 1,000
0.5 500
The gradations on the sides of the 5ml tubes from top to bottom are in 1ml increments:
Gradation Mikes
5.0 5,000
4.0 4,000
3.0 3,000
2.0 2,000
1.0 1,000
Suggestions for Diluting Your Paint to Match the Job:
General Jobs:
For general airbrushing jobs, I dilute most acrylic paints to roughly 30% or ~1/3 paint using the manufacturers thinner. A mix of ~30% paint is what I would use to shoot the blue of a Hellcat, the panzer grey of a 1/35 Tiger, or 1/48 landing gear parts. Most paints diluted to ~30% spray well at 10-15psi (~70-100 Pascals) with a working distance of 7-10cm.
For applications where I want better coverage (meaning denser paint requiring fewer passes to get an opaque coat), I might use 40% paint. The exception to that would be Mission Models which sprays beautifully at concentrations of ~50% paint.
Fine-Line Work:
For fine-line work, I dilute Mission Models, Vallejo, Tamiya, and LifeColor to ~10-20% paint. Such low concentrations of paint require the pressure to be lowered to ~6-10psi (~40-70 Pascals) and the working distance (tip to model) decreased to less than 2-3cm.
Spraying Over Pre-Shading:
If I’m going to be shooting on top off pre-shading, I err on the side of lean or less paint and use 20-25%. I apply this at 10-12psi (70-80 Pascals) with a working distance of 5-7cm. A thinner paint mix will require more passes for acceptable coverage however this gives you better control over the density or opacity of the resulting coat. This lessens the chance of applying too heavy a coat thereby loosing subtle pre-shading underneath. In the extreme, a thick coat of paint can obliterate engraving and subtle details on a models surface. In general, my working rule is the thinner the layer of paint, the better.
The table below provides the the amount of paint in Mikes that should be added to each tube (2 or 5ml) to obtain mixtures of 10, 20, 30, 40, and 50% paint. After adding paint, add thinner to the maximum volume for the spin tube you’re using (2 or 5ml).
| Percent Paint |
10% |
20% |
30% |
40% |
50% |
|
|
|
|
|
|
| Ratio of Paint to Thinner |
1:10 |
1:5 |
1:3 |
1:2.5 |
1:1 |
|
|
|
|
|
|
| |
|
|
|
|
|
| 2ml Tube - Paint in Mikes |
200 |
400 |
600 |
800 |
1,000 |
|
|
|
|
|
|
| |
|
|
|
|
|
| 5ml Tube - Paint in Mikes |
500 |
1,000 |
1,500 |
2,000 |
2,500 |
Example 1: 50% Paint
Let’s start with an easy one: 50% paint or a ratio of paint to thinner of 1:1.
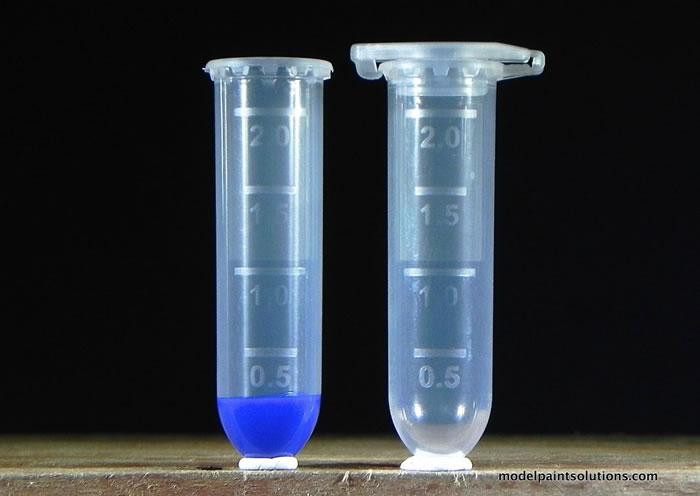
For a 2ml tube, paint is added up to the 1ml or 1,000 Mikes gradation as shown. Thinner would then be added to the 2ml (2,000 Mikes) gradation resulting in a final mixture of 50% paint.
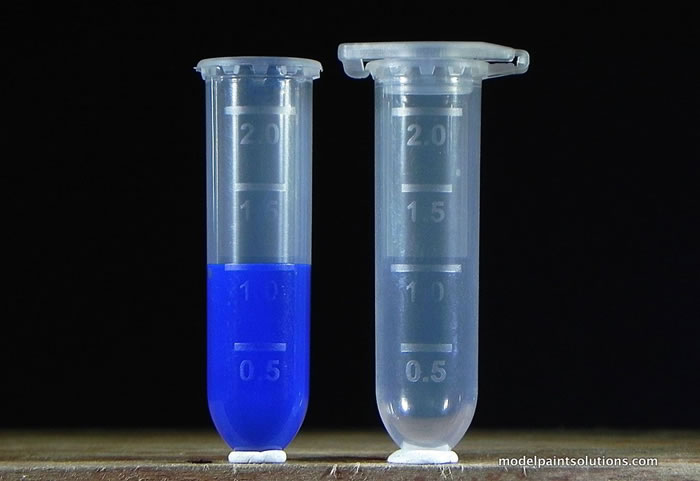
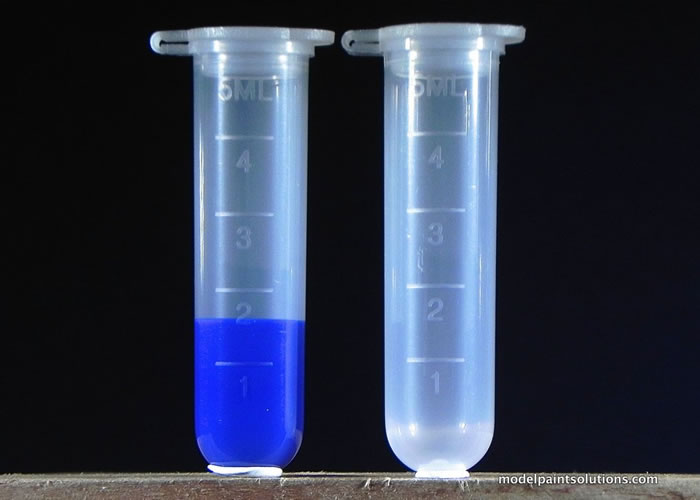
For a 5ml tube, paint is added to a point equidistant between the 2 and 3ml gradations. This would be 2.5ml or 2,500 Mikes as shown. Thinner would then be added to the 5ml (5,000 Mikes) gradation resulting in a final mixture of 50% paint.

Example 2: 30% Paint
This dilution equates to a ratio of paint to thinner of 1:3 and is the dilution I use most often for general spray jobs.
As shown in the chart above 600 Mikes of paint are required to make 2ml of a 30% paint mixture. For a 2ml tube, paint is added to a level just above the 0.5ml (500 Mikes) gradation. This would be ~600 Mikes. An easy way to estimate that is to divide the distance between the 0.5 and 1ml gradations in halve and then halve again. As with many things in modeling, it gets easy with a little practice. Thinner would then be added to the 2ml (2,000 Mikes) gradation resulting in a final mixture of 30% paint.
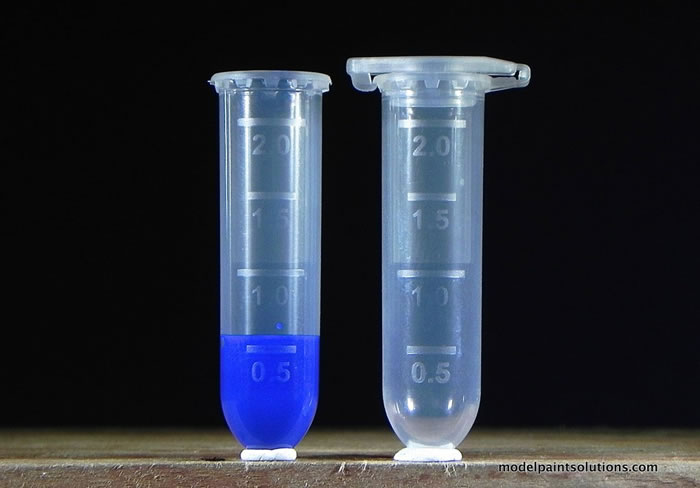
For a 5ml tube, paint is added to a point equidistant between the 1 and 2ml gradations. This would be 1.5ml or 1,500 Mikes as shown. Thinner would then be added to the 5ml (5,000 Mikes) gradation resulting in a final mixture of 30% paint.
Example 3: 10% Paint
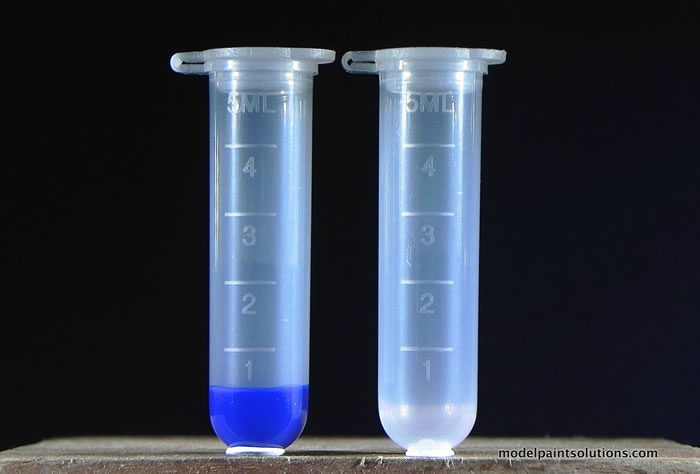
From the chart above 200 Mikes of paint are required to make 2ml of a 10% paint mixture.
From the chart above 500 Mikes of paint are required to make 5ml of a 10% paint mixture.
I've been using lab spin tubes to mix all my paint, primers, and clear coats for more than 20 years. As long as these tubes are properly sealed (with a click) they simply don't leak. Moreover, using the tube gradations to prepare paint mixtures will permit you to make dilutions that have reliable and predictable spraying characteristics every time you mix paint. Since the caps seal so tightly, your unused mixtures can be stored for use at a later time. Although it may be unnerving, both sized tubes can be stored upside down on their flat lids, which is what I do on my workbench. Alternatively, foldable tube racks that accommodate both the 2ml and 5ml tubes are available here.
Thanks for reading along. If you have questions about using lab spin tubes or diluting any brand of model paint, drop me a line at john@modelpaintsol.com.
Now I gotta go paint something!
Visit MPS for more information
Review Text and Images Copyright © 2018 by John Miller
Page Created 14 June, 2018
Last updated
14 June, 2018
Back to HyperScale Main Page
Back to Reviews Page

|
 Home
| What's New |
Features |
Gallery |
Reviews |
Reference |
Forum |
Search
Home
| What's New |
Features |
Gallery |
Reviews |
Reference |
Forum |
Search