|
Tempest Mk.V Engine Set
for Special Hobby kit
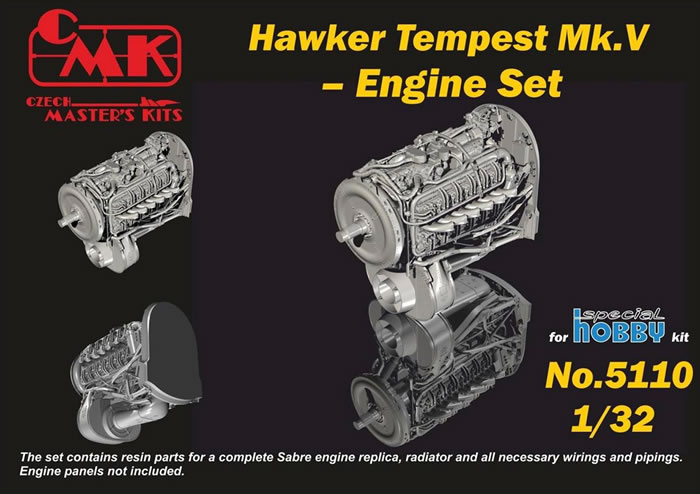
CMK, 1/32
Reviewed by
James Hatch

Special Hobby's 1/48 scale Model 339-23 Buffalo will be available
online from Squadron
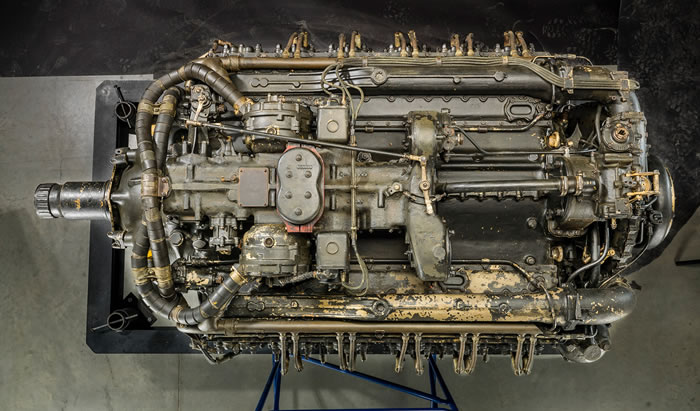
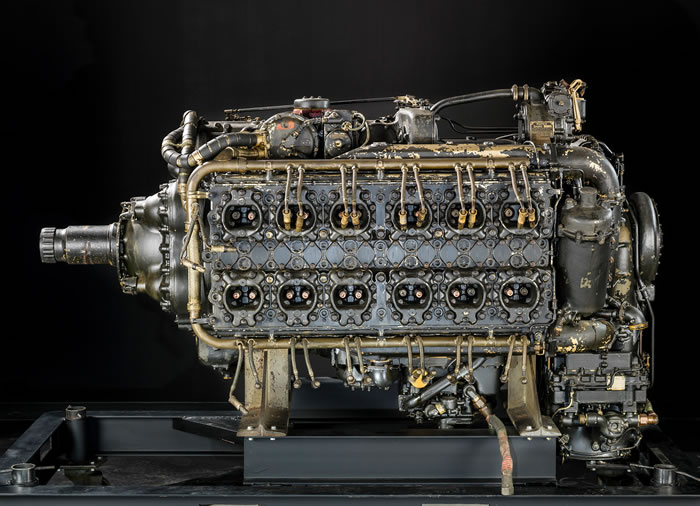
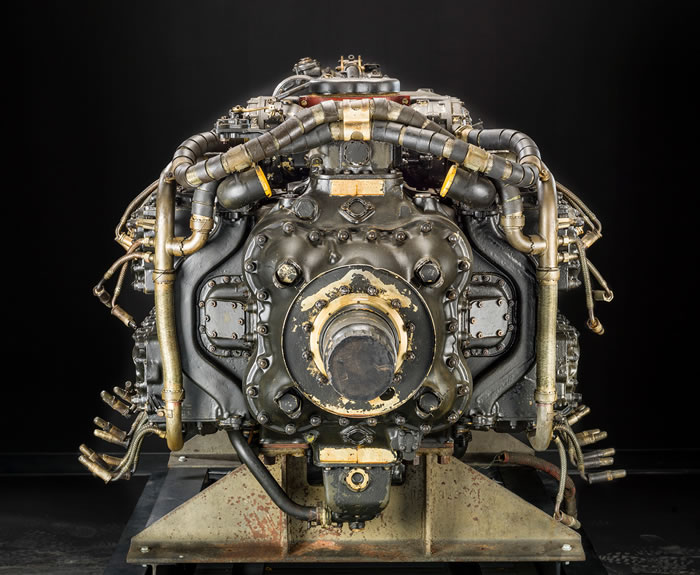
The Napier Sabre was a British H-24-cylinder, liquid-cooled, sleeve valve, piston aero engine, designed by Major Frank Halford and built by D. Napier & Son during World War II. The engine evolved to become one of the most powerful inline piston aircraft engines in the world, developing from 2,200hp in its earlier versions to 3,500hp in late-model prototypes.
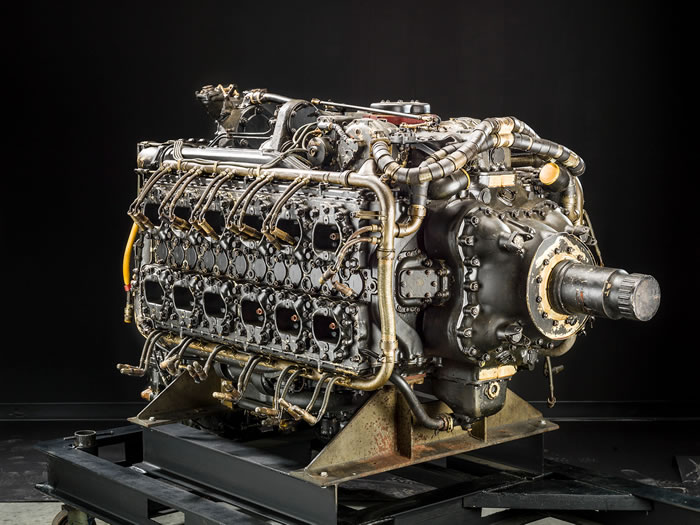
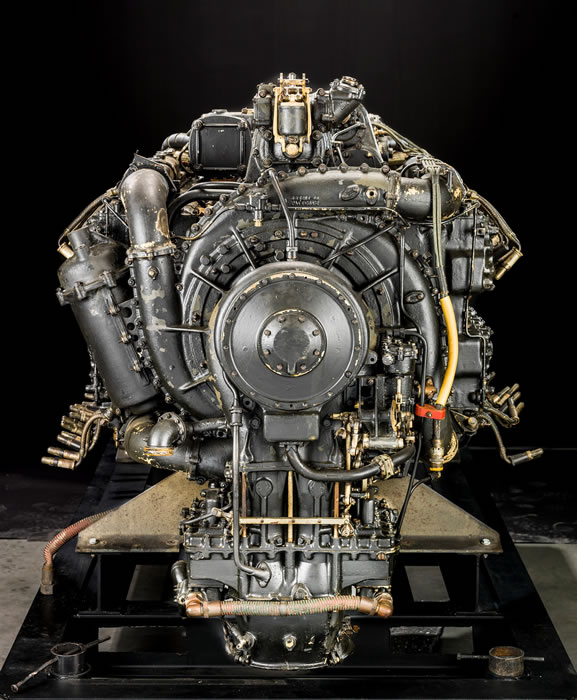
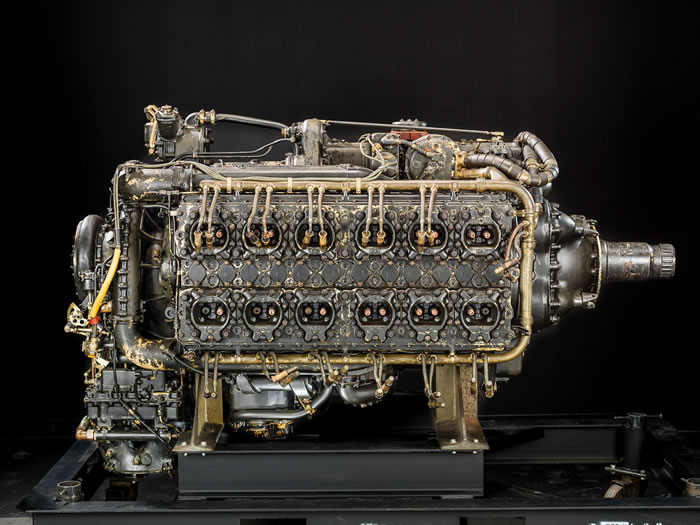
NASM Napier Sabre engine
The first operational aircraft to be powered by the Sabre were the Hawker Typhoon and Hawker Tempest; the first aircraft powered by the Sabre was the Napier-Heston Racer, which was designed to capture the world speed record. Other aircraft using the Sabre were early prototype and production variants of the Blackburn Firebrand, the Martin-Baker MB 3 prototype and a Hawker Fury prototype. The rapid introduction of jet engines after the war led to the quick demise of the Sabre, as there was less need for high power military piston aero engines and because Napier turned its attention to developing turboprop engines such as the Naiad and Eland.
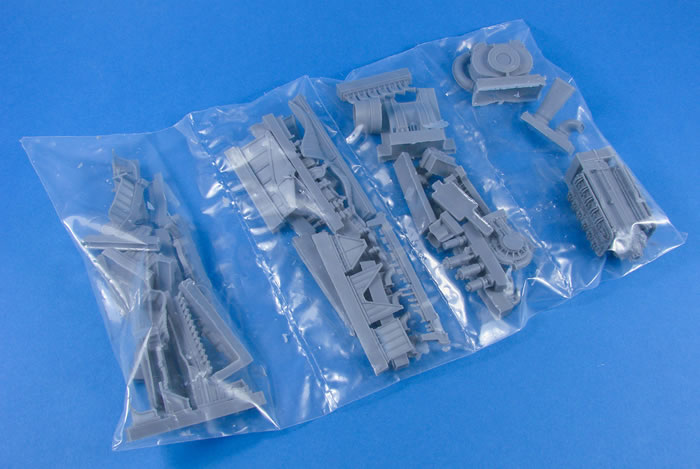
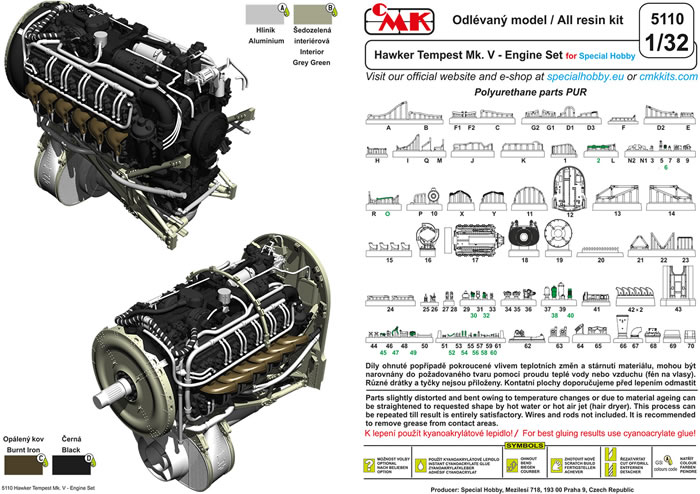
First of all, you need to know that this kit is designed specifically to fit the recent 1/32 Hawker Tempest Mk.V kit from Special Hobby, although there’s nothing stopping you building this as a standalone model in itself, complete with aircraft firewall. This is definitely a very nice inclusion to the growing line of aftermarket components for that particular kit. CMK’s engine set is presented in quite a reasonable-sized corrugated box with a large glossy product label on the reverse, showing some nice CAD images of the Napier Sabre. There’s actually a reason why a box this large has been used, and that is to cater to the sheer volume of resin within, with a parts count that in excess of 100 components. This is also a pure resin kit, with no PE needed. Inside the box, all light grey resin parts are packed into a single sleeve which has been heat sealed to create four compartments. You will need to slice open to access, and I suggest you then bag the resin into individual zip-lock bags, based on their original grouping.

Of course, I’m not going to go through every single resin part and try to name and ID it against photos, but I have included a series of images here, courtesy of the NASM, which show a prime example of this powerful aero engine, for you to judge for yourself. Accompanying these are the various CAD images from Special Hobby, along with my own photos of the various resin parts. I have broken these down into a couple of images per heat sealed compartment, along with other useful detail images.
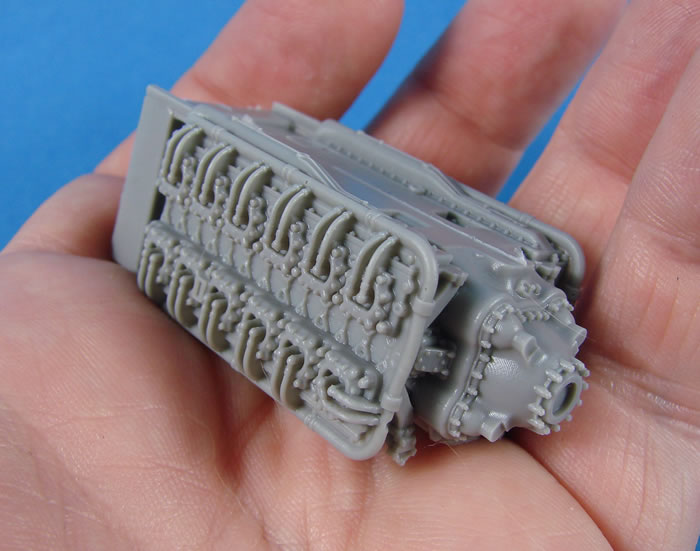
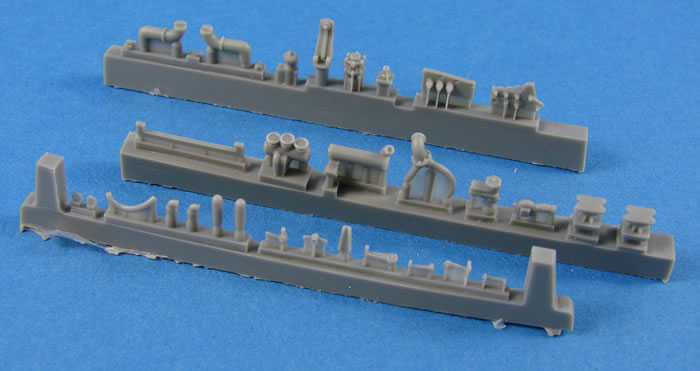
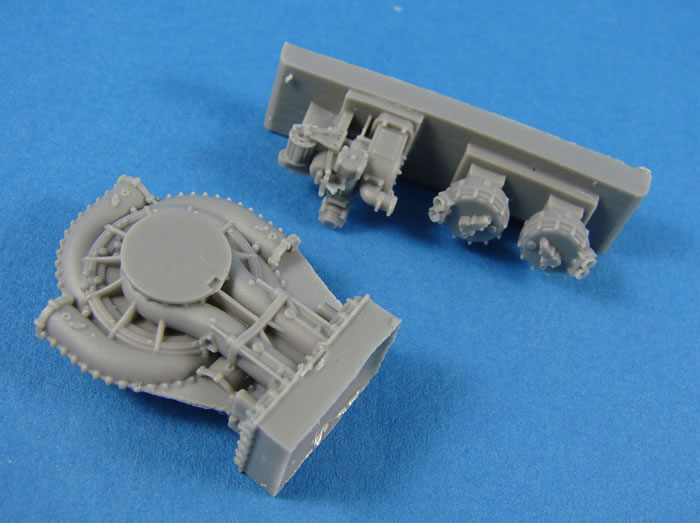
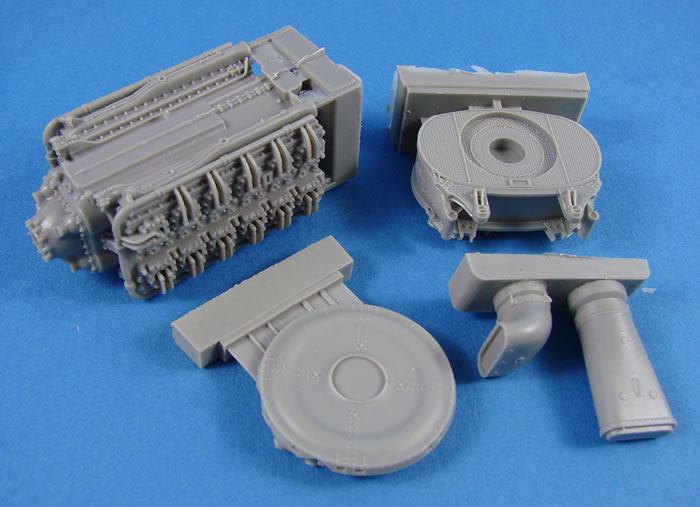
Now, as you would expect, this set doesn’t just provide the engine. It also includes all of the associated pipework to plumb this into your Tempest kit, via the amazingly detailed resin firewall. Also to be found in this set is the large radiator that defined the Series V Tempest marques, plus the glycol tanks that sit inside each cheek of the cowl, adjacent to the radiator sides. Attention to detail is first class, with some of the most intricate detailing on the main engine block, including ignition plugs, down to beautifully hollow exhaust stubs.
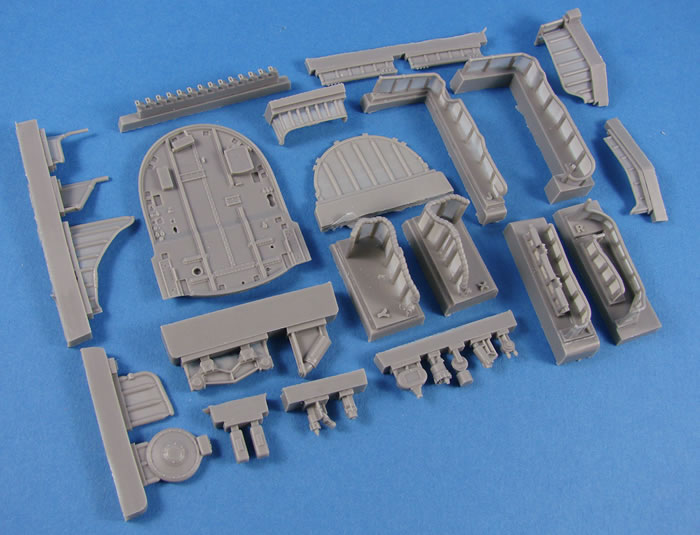
Casting is about as flawless as you can expect with a set with this number of parts, and also what must be quite intricate pouring techniques involved. There is barely even a pin hole to be seen. When it comes to seams (paring lines), these are also extremely minimal, with the engine block having the most obvious, but in an area where it will never be seen. Even this is still easy to remove and is mostly covered by other assemblies. Casting block connections should be easy to navigate in order to remove them from the parts. CMK seem to have done the same thing as Eduard with the piping, having thin webs to connect the parts to the blocks, with thicker veins of resin that punctuate the webs. In all, there should be no problem except for the sheer work in removing so many parts and cleaning them up.
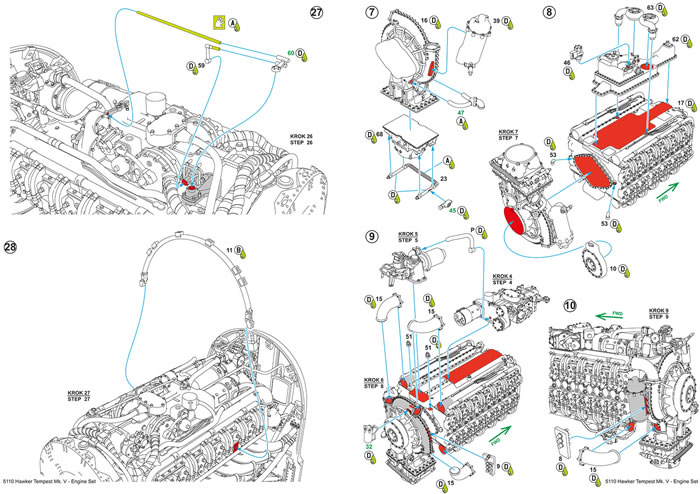
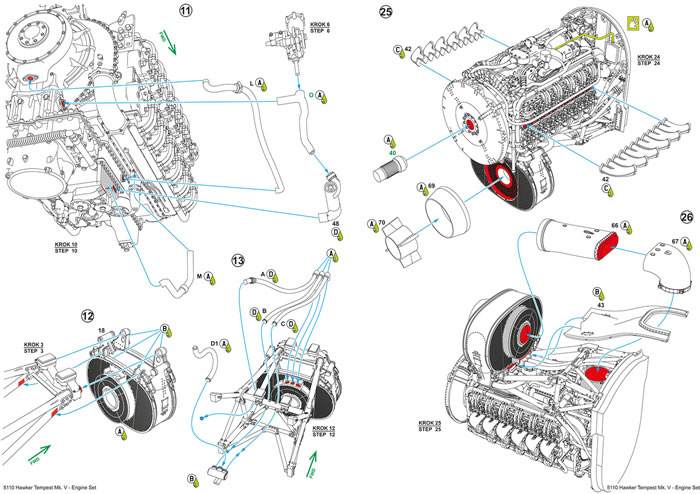
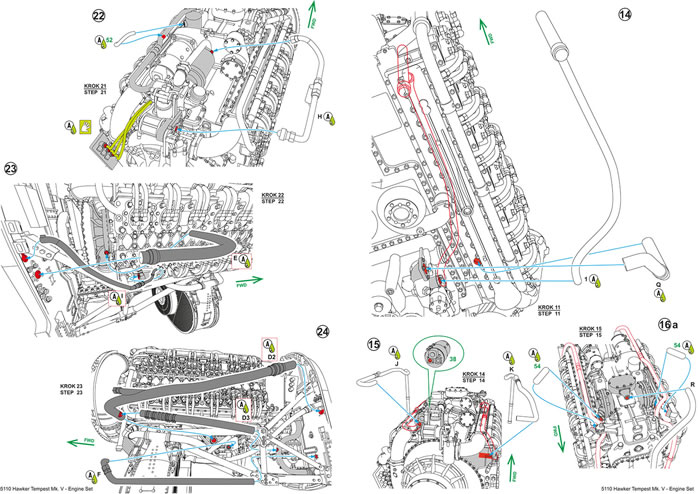
The instructions are easy to follow with their line drawings and selective use of coloured ink to denote faces that need to be glued. Colour references are also provided throughout assembly, with those colours being specified on the last page of the manual. The last two pages show more CAD images, but in colour so as to make painting even easier. There are only four colours that really need to be used, with black being the main hue. This means that most of this can first be assembled and painted before the need to add parts of other colours. Other smaller painting, such as the ignition plugs and lines, can easily be painted post-assembly.
Along with the gun bays and cockpit upgrades, this has simply got to be the ultimate aftermarket set for the Tempest V. With everything thrown into the mix, you have the recipe for a seriously impressive model. This set is most definitely not aimed at the novice, but I would say is more suited to those with plenty of resin experience due to the complexity of the set. A nice bit of work is essentially done though, when it comes to mating this to the Tempest, as the host kit comes with a separate nose, meaning this should just plug and play!
A seriously impressive and high-quality product that is reflected in the price. One for both the detail connoisseur and Tempest enthusiast alike.
Thanks to MPM / Special Hobby for the
review sample.
MPM
kits are available worldwide through hobby retailers
worldwide
and at
Squadron.com
Review and Images Copyright © 2018 by
James Hatch
Page Created 8 March, 2018
Last updated
9 March, 2018
Back to
HyperScale Main Page
Back to
Reviews Page |
 Home | What's
New | Features
| Gallery |
Reviews | Reference
| Forum
| Search
Home | What's
New | Features
| Gallery |
Reviews | Reference
| Forum
| Search