Tempest Mk.V Series 1
Eduard ProfiPACK, 1/48 scale
S
u m m a r y |
| Catalogue Number: |
Eduard ProfiPACK Kit No. 82121 - Hawker Tempest Mk.V Series 1 |
| Scale: |
1/48 |
| Contents and Media: |
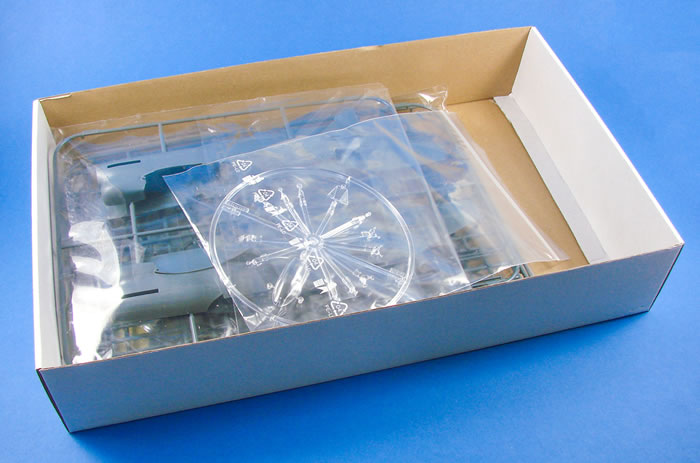
four medium grey styrene sprues, with the fuselage sprue being packed separately to the other five which share the same resealable sleeve. A circular, clear sprue is supplied in a zip-lock bag. Underneath the plastic lies a colour-printed PE fret in a small sleeve, plus a set of masks. To complete the contents, a 20-page A4 manual is included. |
| Price: |
Available Soon |
| Review Type: |
FirstLook |
| Advantages: |
Beautifully detailed cockpit and gear bays, and modern renditions of the various surface textures. |
| Disadvantages: |
|
| Recommendation: |
This is certainly a very welcome release, and of course one in Eduard’s modern tooling standard. This very much puts Eduard’s 20yr old release out to pasture, and it’s not hard to see why. Beautifully detailed cockpit and gear bays, and modern renditions of the various surface textures, this really is one to pick up if you have a hankering to build a Tempest and missed out on the now discontinued original Tempest release. Just a great, great kit! Watch out for the release date and you won’t be disappointed. |
Reviewed by James Hatch

Eduard's 1/48 scale Fw 190 A-3 is available online from Squadron.com
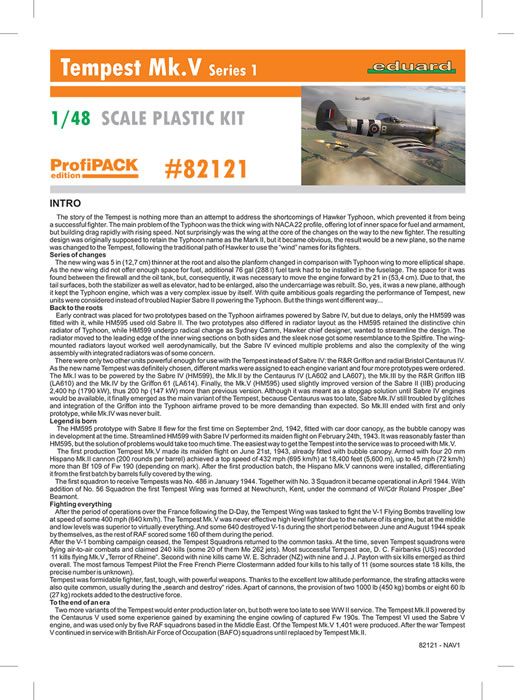
In March of 1940, Hawker initiated a number of design studies aimed at improving the Typhoon. Among these studies were ways of improving the Typhoon's high-altitude performance. These involved the use of a new wing design that featured a thinner wing section and a reduced wing area. The new wing had an elliptical planform and showed a great potential for increasing performance at altitude while reducing the tendency of the original Typhoon wing to buffet at speeds around 500 mph. The maximum depth of the new wing occurred further back, at 37,5 % chord, while the thickness/chord ratio reduced to 14,5 % at the root tapering to 10 % at the tip. This meant that the new wing was five inches thinner at the root than the original Typhoon wing. The thin wing meant that alternative space for fuel had to be found and this was achieved by moving the engine 21 inches forward and inserting a 76-gallon tank between the firewall and the oil tank. The redesign also included a new undercarriage and the latest of the Sabre engine, the Mark IV.

In order to save development time, Sidney Camm decided to mate the new wing to a modified Typhoon airframe which retained the Sabre powerplant. The RAF ordered two prototypes under Specification F.10/41 18 November of 1941 and the project quickly became known as the Typhoon II. Hawker´s biggest problem with the new fighter was the engine. Upon entering service in 1944, the Tempest was used as a low-level interceptor, particularly against the V-1 flying bomb threat, and as a ground attack platform, in which it supported major events such as Operation Market Garden. Later, it successfully targeted the rail infrastructure in Germany and Luftwaffe aircraft on the ground, as well as countering such attacks by German fighters. The Tempest was effective in the low-level interception role, including against newly developed jet-propelled aircraft such as the Messerschmitt Me 262. The further-developed Tempest Mk.II did not enter service until after the end of hostilities.
Extract courtesy of Wikipedia and hawkertempest.se
It was certainly a last minute rush for Eduard to prepare their new-tool Tempest Mk.V in readiness for limited sales at Scale Model World, Telford, this year. An announce was made on social media, informing of a limited number of kits (200 pcs) that would be available for sale over that weekend. Along with the kits, Eduard would also offer the first sets of their own aftermarket for it too. When the show opened, the queue to pick these up was long! My sample was ready to pick up at the show later that day, so as this is a brand-new release (no relation to any previous kit), I thought I’d tend to a review straight away.
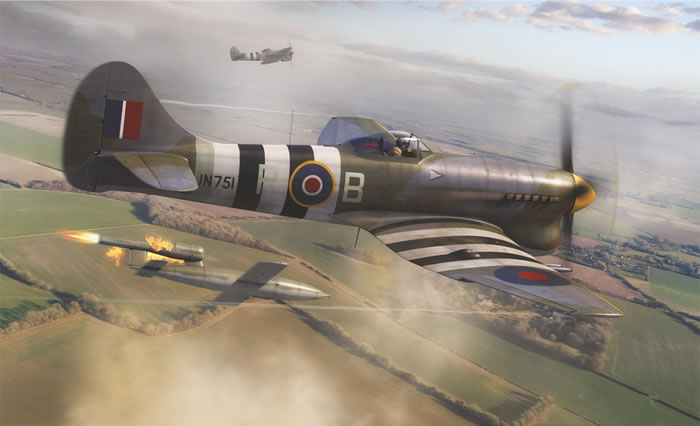
This kit is a ProfiPACK edition, and a full-release version, including both photo-etch and masks. The kit itself is packed into the size of box that we’ve seen with many of their 1:48 fighter releases, with a superb image of Wing Commander Roland Beamont’s Tempest having just tipped a V-1 flying bomb off target. Of course, Beamont’s machine would have to be included with a release such as this, with him being synonymous with the type and his actions in destroying the vengeance weapons. Inside, there are four medium grey styrene sprues, with the fuselage sprue being packed separately to the other five which share the same resealable sleeve. A circular, clear sprue is supplied in a zip-lock bag. Underneath the plastic lies a colour-printed PE fret in a small sleeve, plus a set of masks. To complete the contents, a 20-page A4 manual is included.
Sprue A
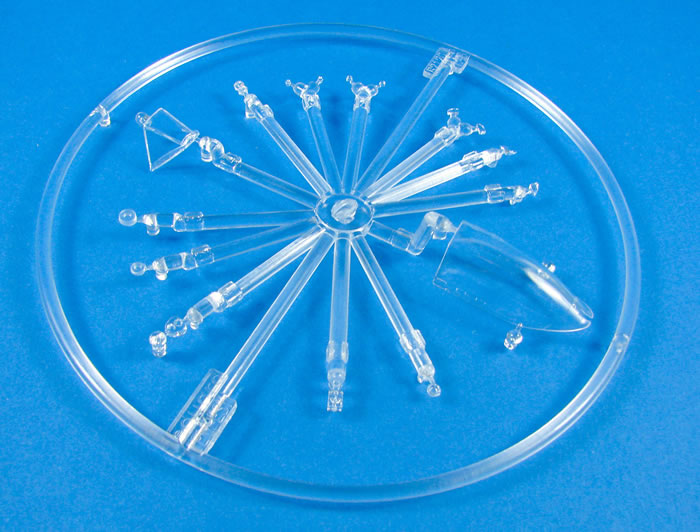
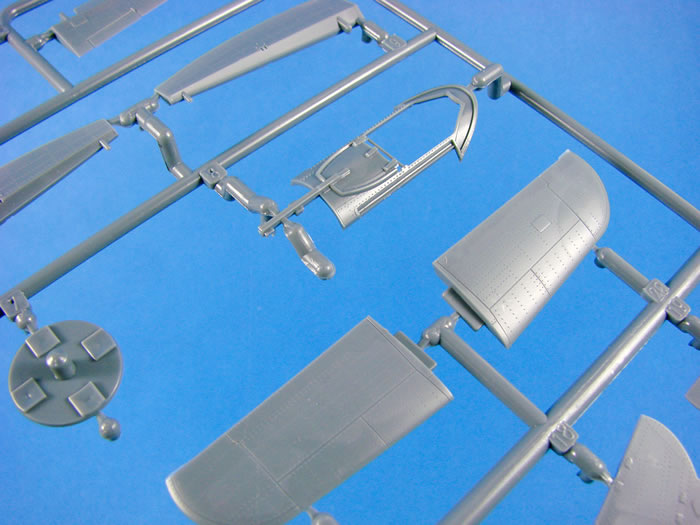
We start with the clear sprue, and as with a lot of Eduard’s releases over the years, this one is produced as a quirky, circular shape, moulded with crystal clear clarity. Here you will (obviously) find the windscreen with integral fuselage fairing, and the rear, sliding hood. Another fourteen parts occupy this sprue, of which thirteen are slated for use. These parts include the compass, rear fuselage lights, wingtip light, cockpit lights, gun sight, and lower wing lights.
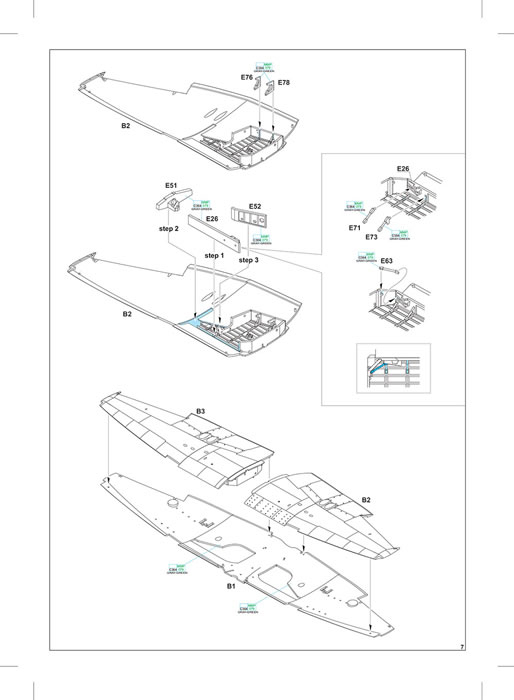
Sprue B
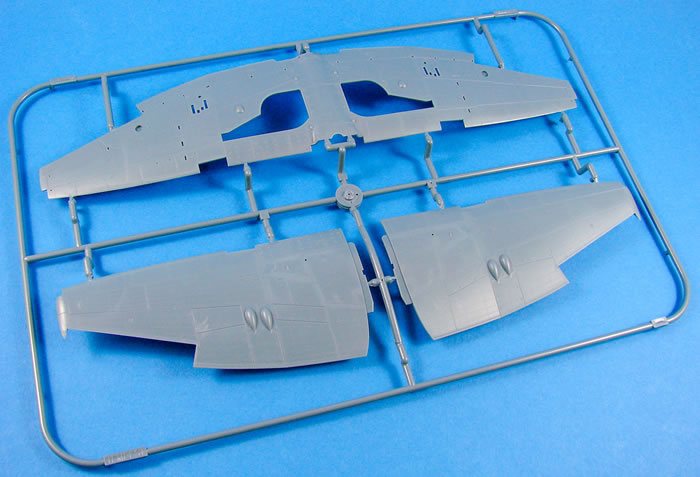
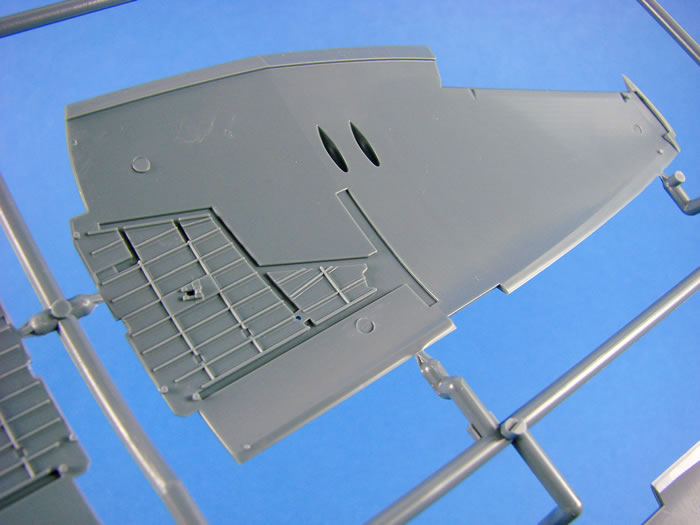
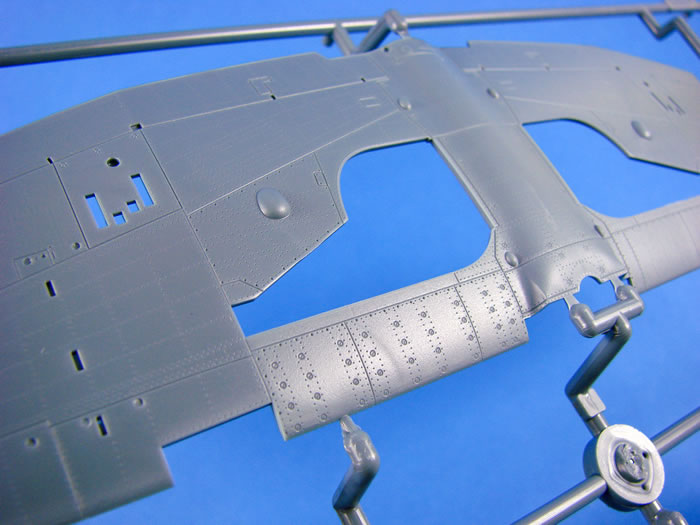
Here we have the wing panels. The lower wing is moulded as a full-span unit, with integral main gear openings. Note that the ailerons are moulded separately, and Eduard has thankfully chosen to mould the gun fairings separately to the wing, unlike on their Spitfire series of kits. This means that there are now no awkward seams to align and remove on the new Tempest kit. Surface details really are very, very nice, with finely recessed panel lines, subtle recessed rivets and fasteners, as well as access panel details. Shell ejection chutes are moulded open, and recesses are moulded into which the lower landing light covers will sit, so these aren’t fixed from the inside.
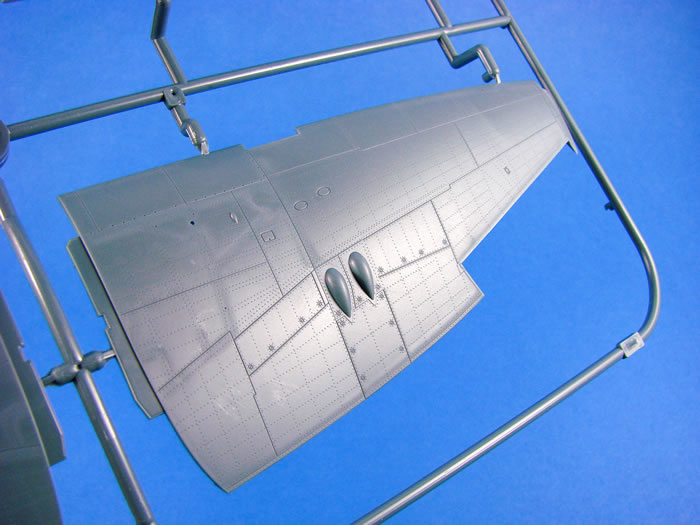
The upper wing panels exhibit the same standard of detail, with well-defined gun blisters and surrounding access panels with their Dzuz fasteners. Tabs protrude from the wing joint, providing a solid connection point to the recesses inside the interior wing fairing of the fuselage halves. Flip the upper panels over and you’ll see the moulded details of the main gear bay ceilings. Again, this detail is sharp and looks excellent. Notice the main gear lock which is also moulded in situ.
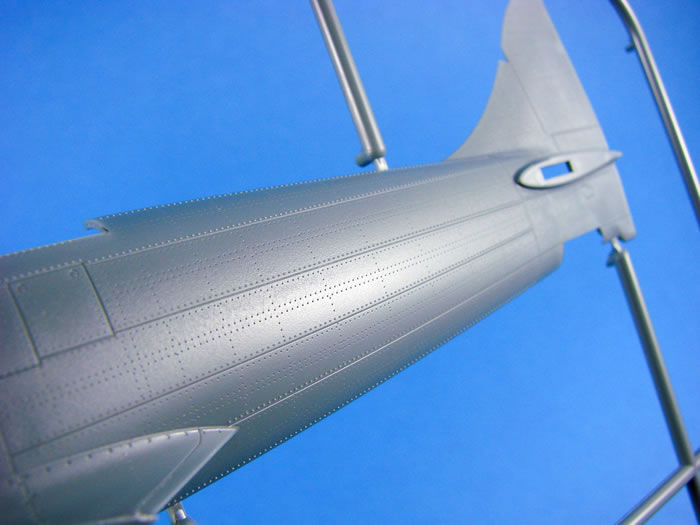
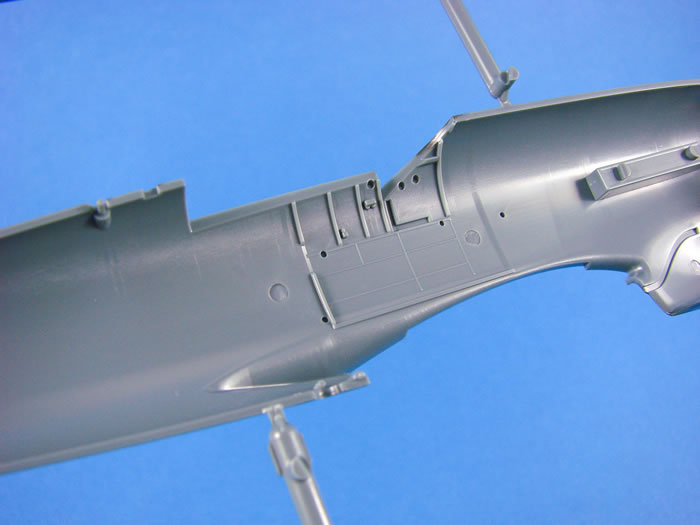
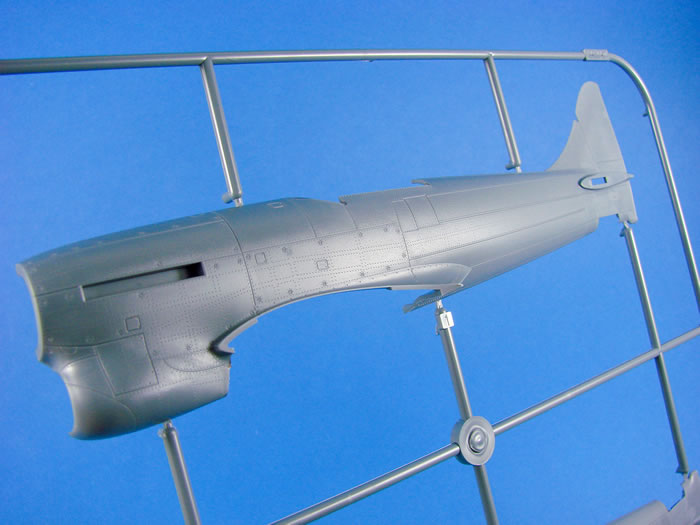
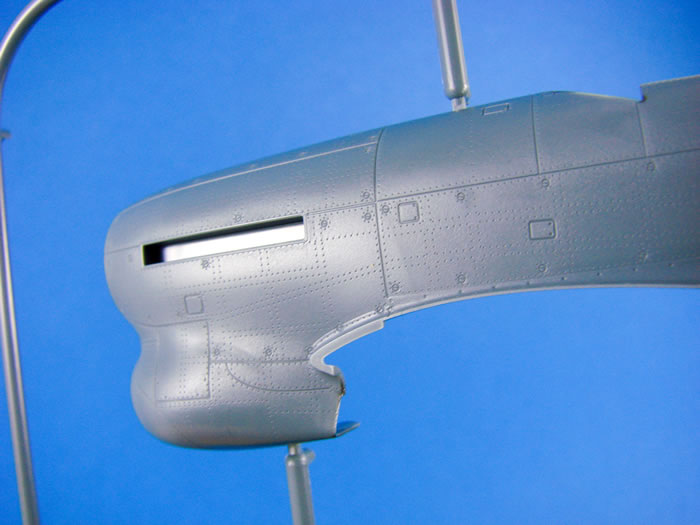
Sprue C
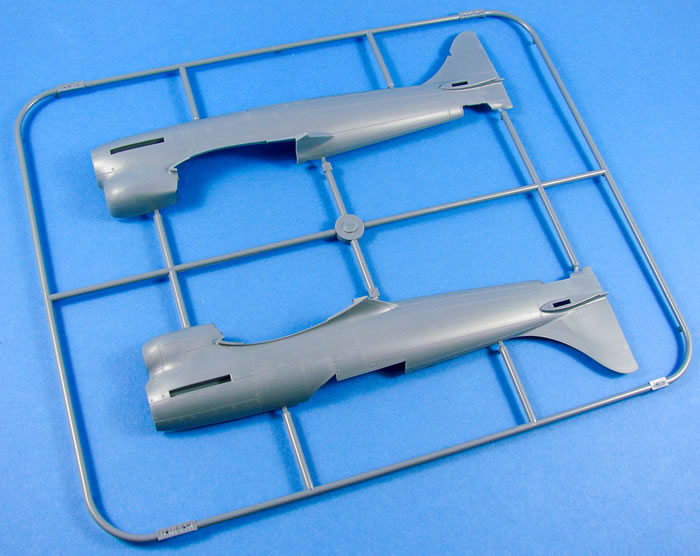
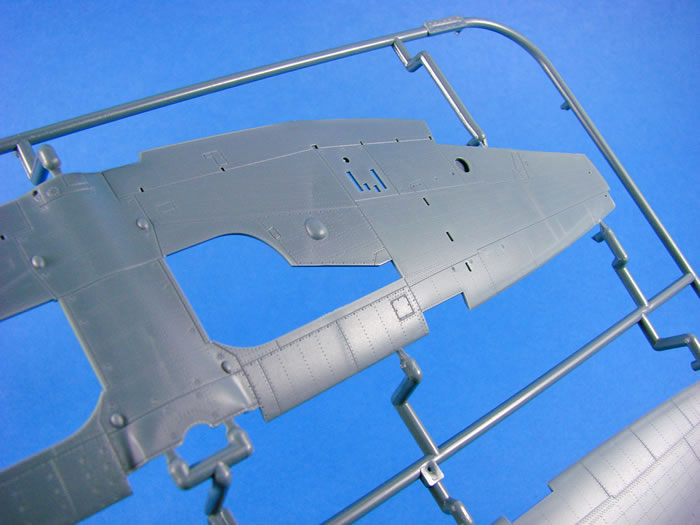
Eduard has moulded the fuselage as a full-length unit, minus the rudder. Recesses exist for fitting the rob of exhaust manifolds, with no separate box needing to be glued from within. Fine panel lines and Dzuz fasteners adorn the cowl area. Note that the upper turtle deck is separately moulded to the fuselage, meaning that there are no tricky seams to remove when the fuselage is closed up. The rest of the fuselage not only has the same superbly recessed panel lines and rivets, but also key rows of raised rivets on the overlapping panels on the rear fuselage. I’m very pleased to see the inclusion of these. If you look at the tail joint line, you’ll see no fishplate detail. This release includes them as PE parts, which will certainly looks sharp when installed.
Internally, there is moulded cockpit wall detail which will supplement the cockpit tub, when installed. This detail consists of formers, electrical boxes etc. Detail is also provided in the tail wheel well area.
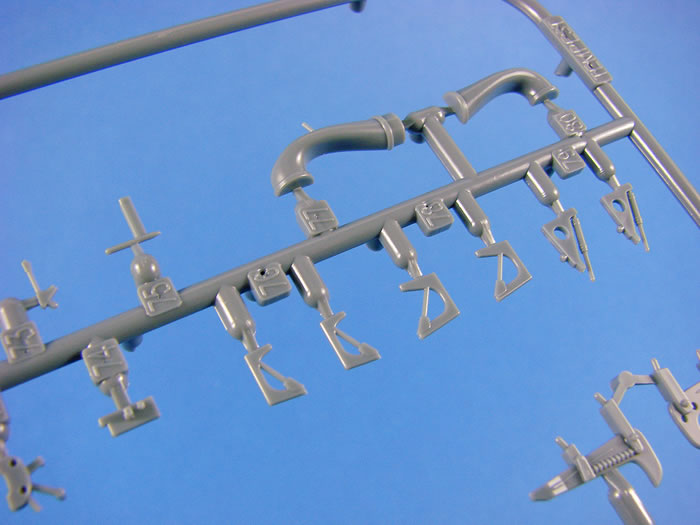
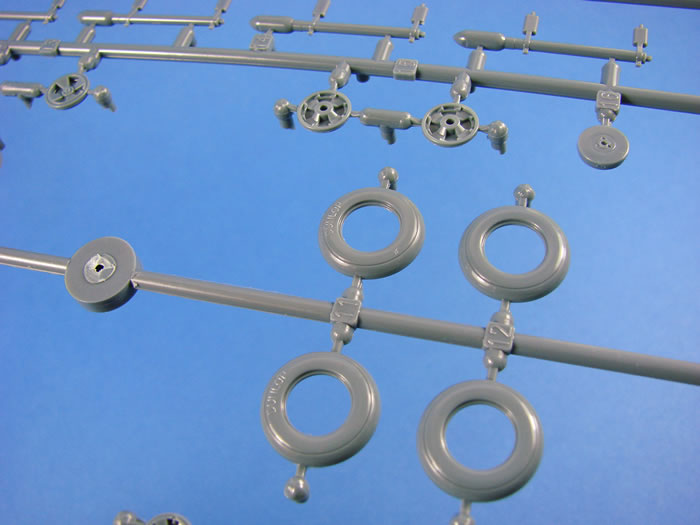
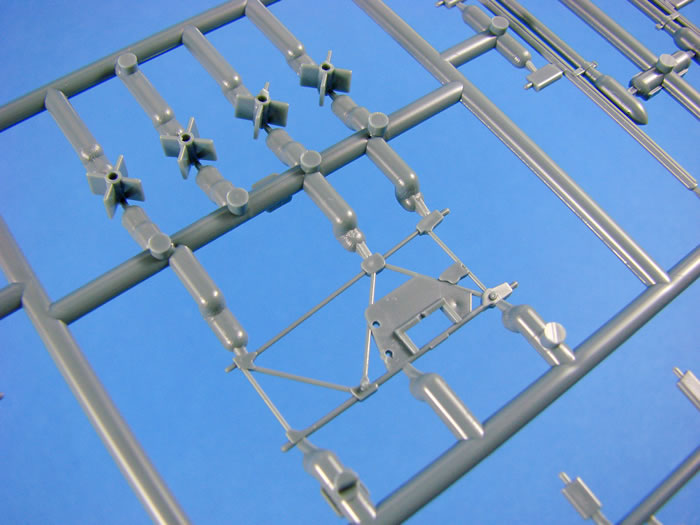
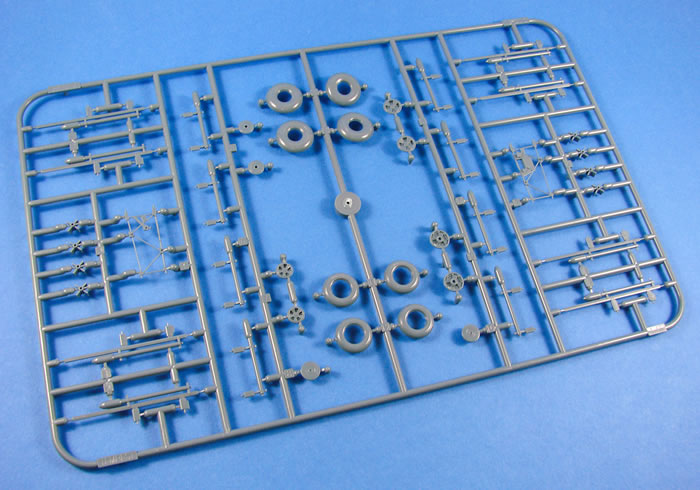
Sprue D

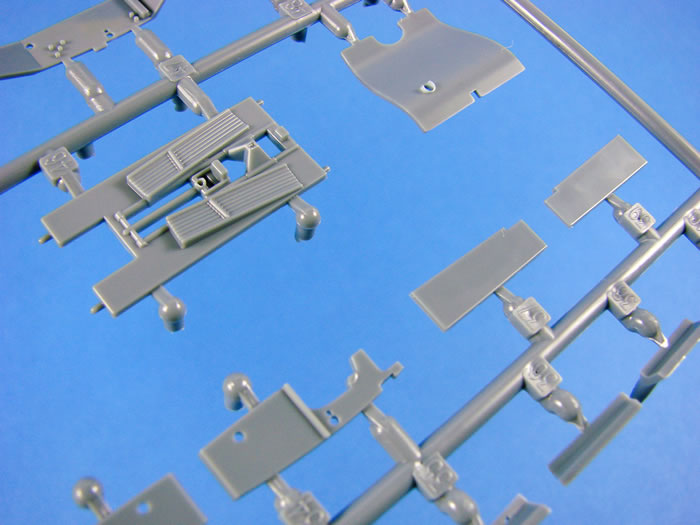
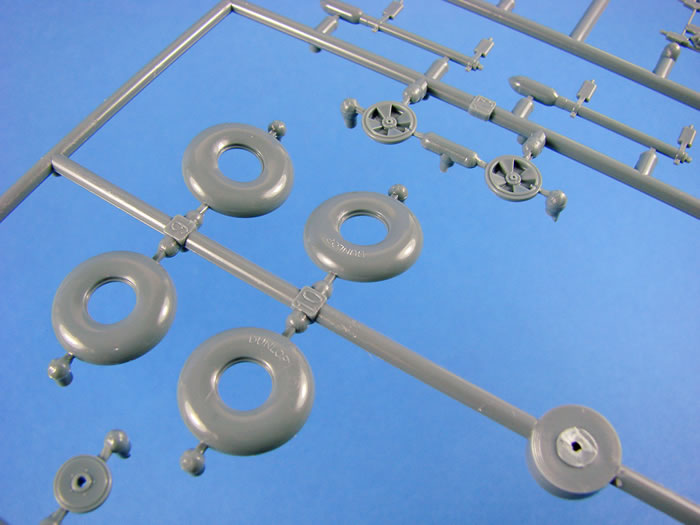
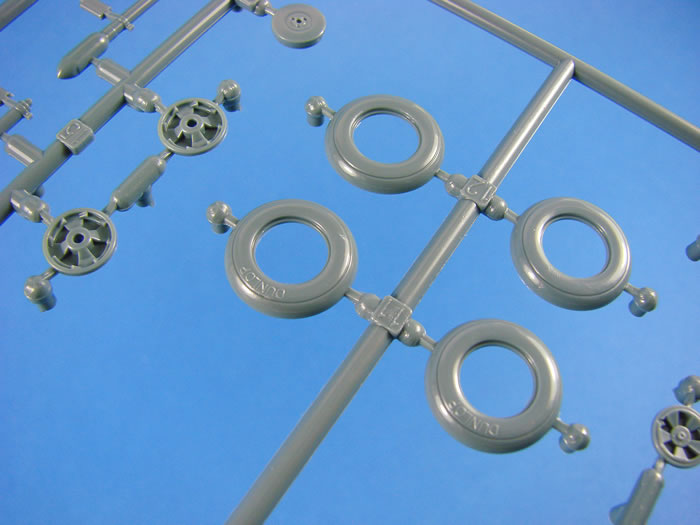
Look at all those parts! Rockets, two styles of when and different spoked hubs… WAIT! There is actually very little you will use on this sprue for this initial release, and certainly not those rockets! The only parts that you will use here are the balloon-style tyres with the four and five spoke hub options, a tailwheel, and the two frame cockpit tub sides. Those frames are pretty fragile, so care needs to be exercised when removing them from the sprues. These frames contain the basic panels upon which you will add the consoles, trim wheel, throttle quadrant etc. Optional decals are supplied for some of the console detail etc.
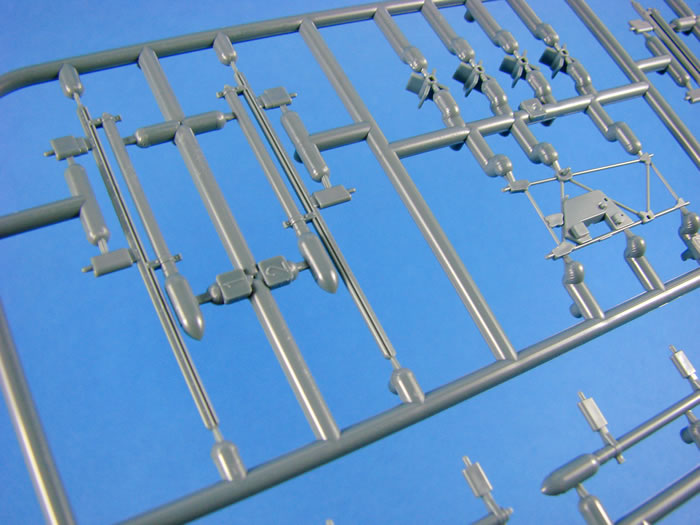
Eduard has supplied the wheels as halves and with separate hub details. The wheels themselves aren’t weighted, and you may wish to use their resin alternatives, although these can be made to look very nice, and then also have the DUNLOP name emblazoned on them.
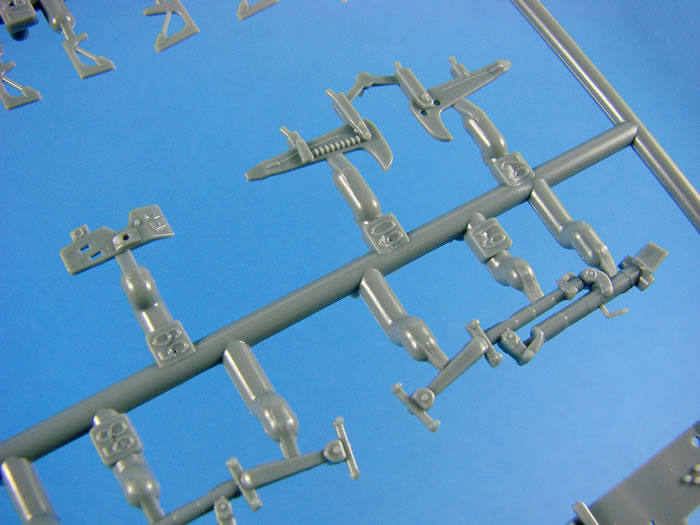
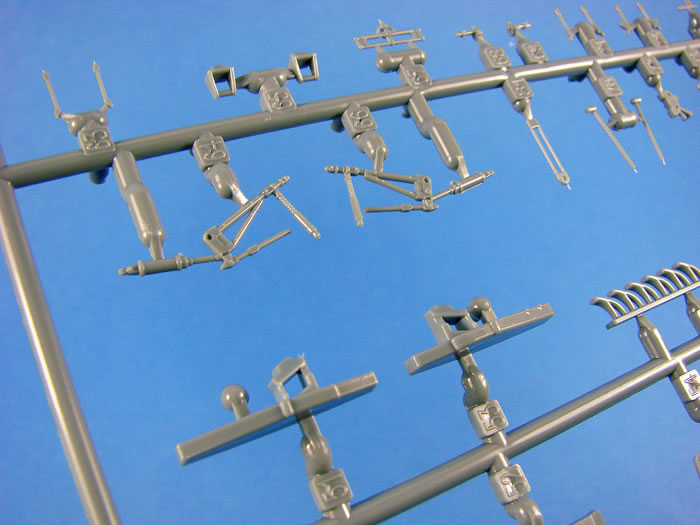
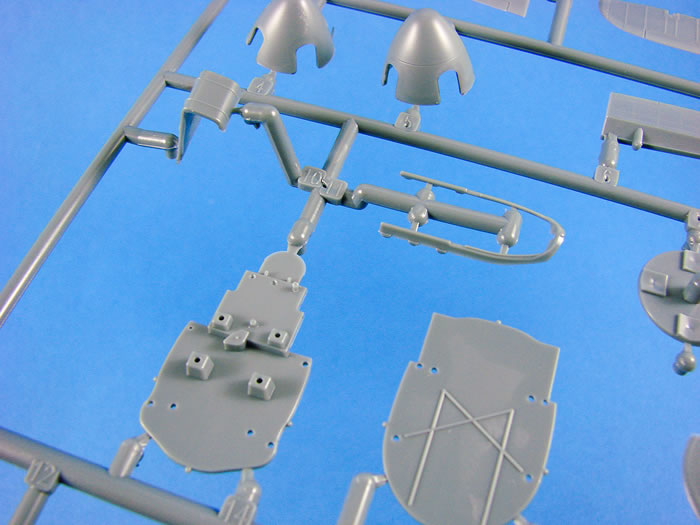
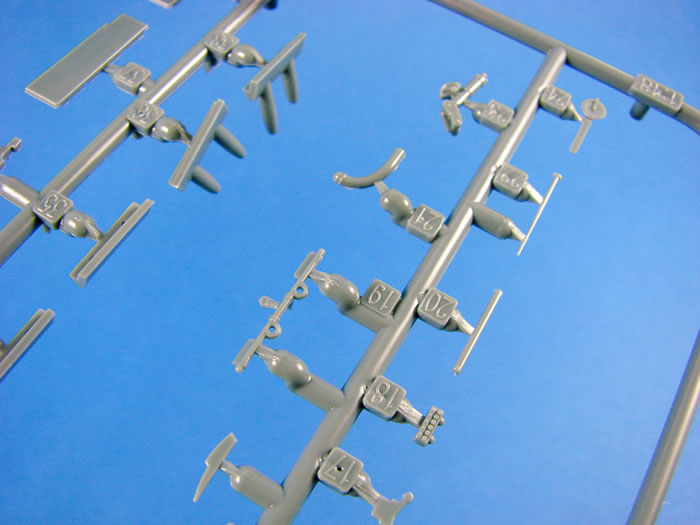
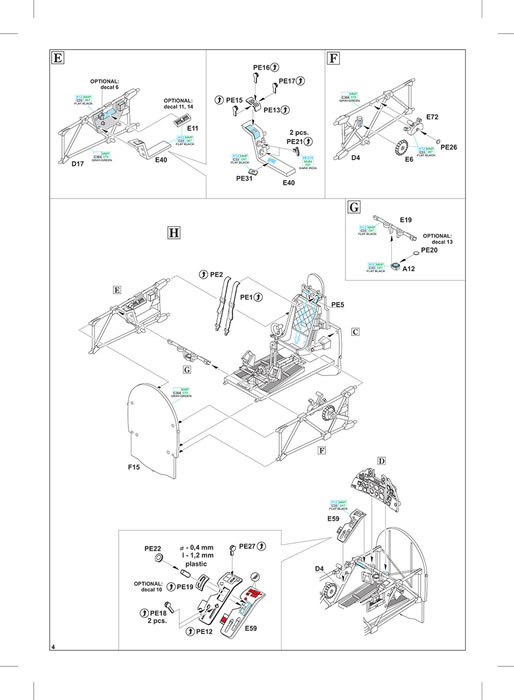
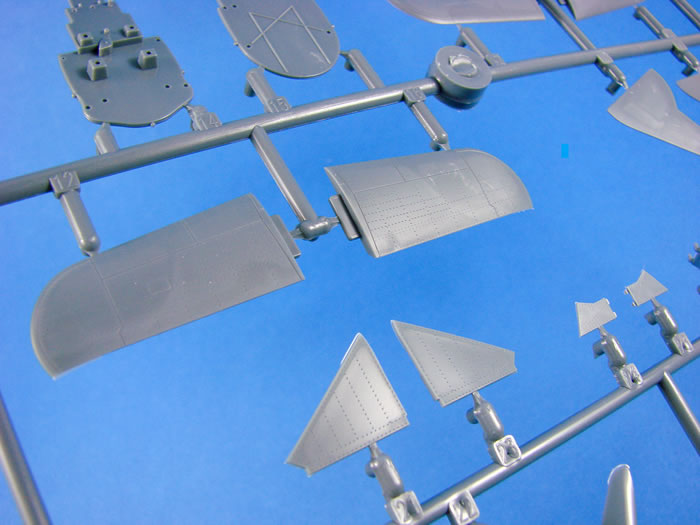
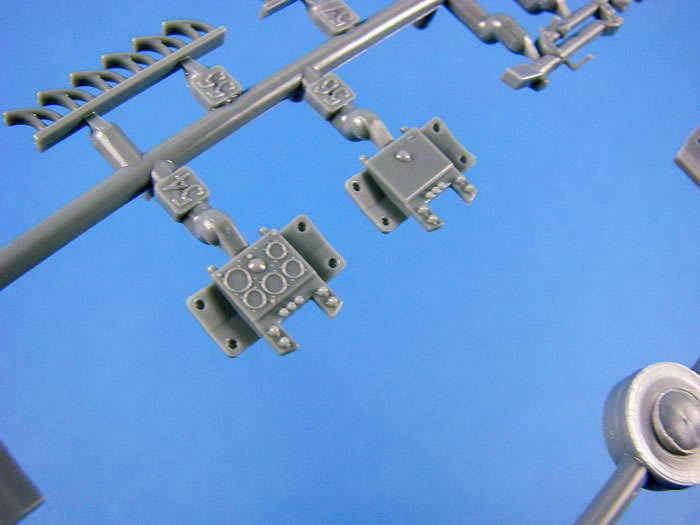
Sprue E
Many of the Tempest’s cockpit parts are to be found here, such as the floor with integral foot boards, rudder bar and separate pedals (PE alternatives are supplied for the latter), control yoke with spade grip, three-part seat with quilted back rest, consoles, etc. There are actually THREE instrument panel options provided. One of them is for a three-piece plastic item with gauge details into which you can add instrument decals. Another option is also for a three-part unit, but with blank faces upon which you can use full decals. The last option is contains a single piece central unit onto which the various colour PE parts can be installed. As this is a ProfiPACK, I assume most will make use of the latter option.
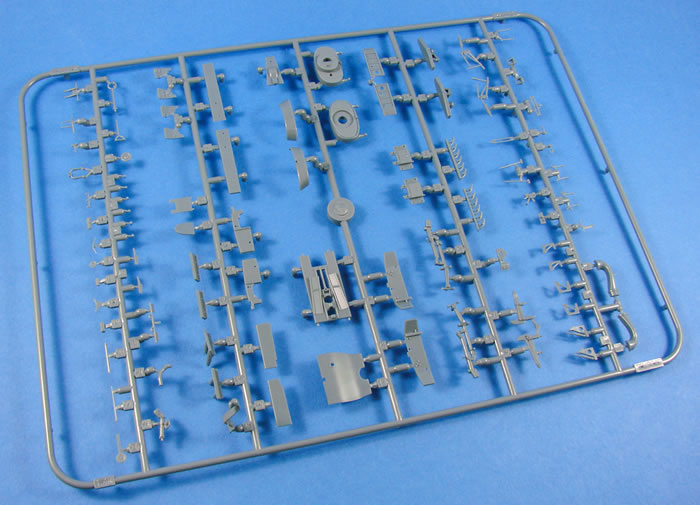
You will also find the undercarriage struts here, with some superb linkage details, as well as the retract mechanism with their hydraulics cylinders.
Eduard has broken down the intake unit into seven parts, all to be found on this sprue, including the large chin radiator unit, with its fine grille details.
Other parts on this sprue include the main gear well walls and rib details, tail wheel bay unit and strut, tailwheel doors and closing mechanism, single-piece leading edge insert with gun barrel fairings and hollow ends, rudder control horn, pitot, main gear retract indicators, and exhaust stubs etc. The latter are nicely moulded but lack any hollow ends, unlike their Brassin option which is will be available soon.
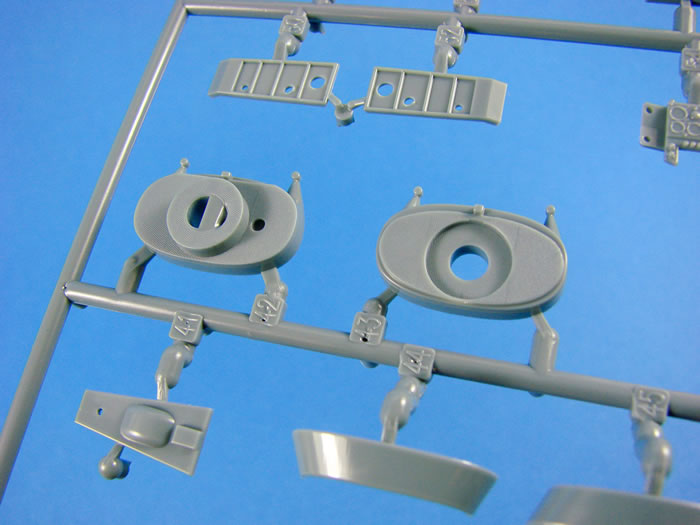
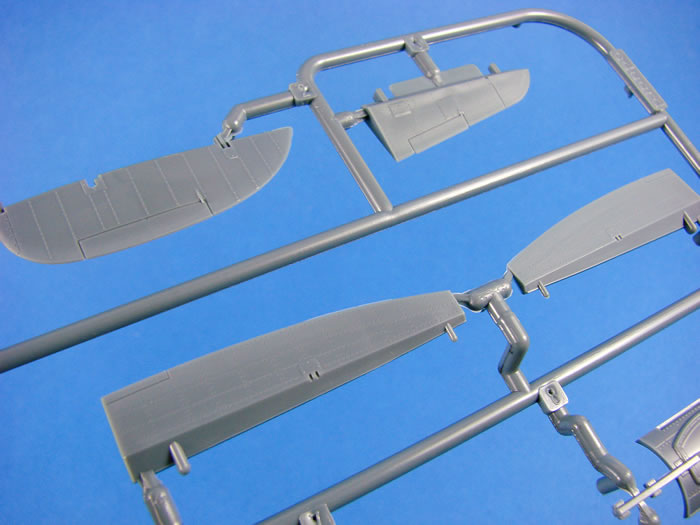
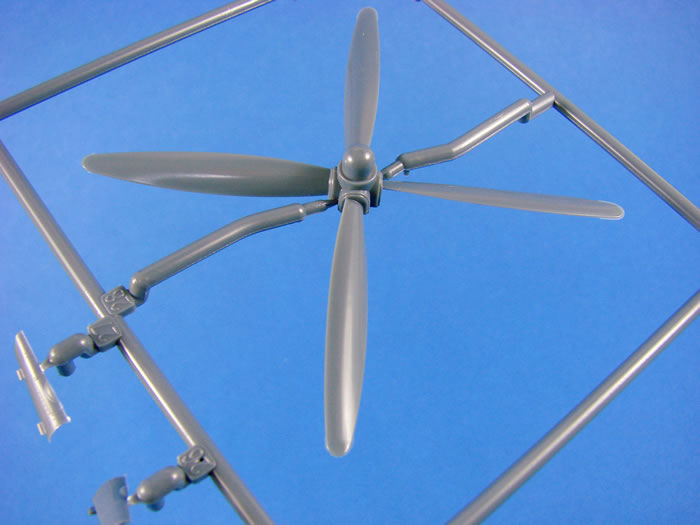
Sprue F
Our last sprue contains key areas of the Tempest airframe. Two propellers are supplied, but only one is to be used in this initial release. These are moulded as single-piece units and integral hubs. Two spinner options are provided, but one only for use with this kit. Here you will see the two-part stabilisers with separate elevators. Whilst these plug in, it will be easy to alter these so you can pose them dynamically. As with the other main airframe components, you’ll note the fine panel lining and subtle rivet lines. A key fuselage piece is the upper cockpit/turtle deck and canopy retract unit. Here you will see that the windscreen recesses nicely into this part. Another interesting design element is the main canopy interior frame that can of course be painted separately before installation, meaning that there is no actual interior masking to undertake.
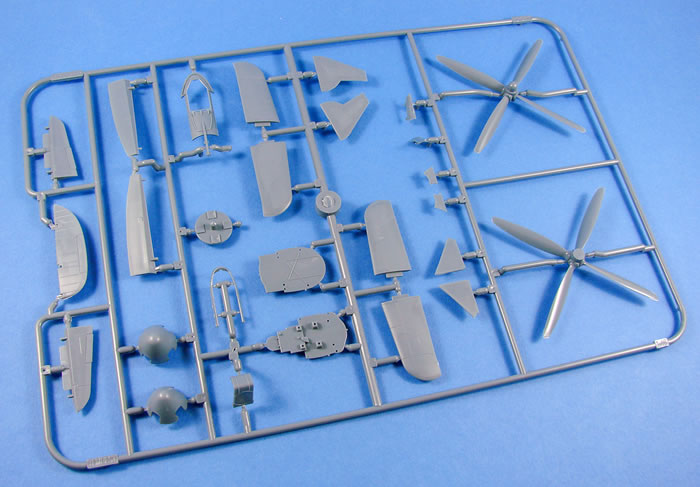
A single piece rear cockpit bulkhead and integral armoured headrest and forward cockpit bulkhead are moulded here too.
Other parts found here are the single piece metal ailerons, fabric covered rudder with nicely depicted rib tapes, and detailed landing gear doors.
Photo Etch
There are quite a lot of parts on this small fret, with many of them printed in colour. Those parts pertain to the cockpit with the multi-part and multi-layer instrument panel and various levers with their coloured handles.
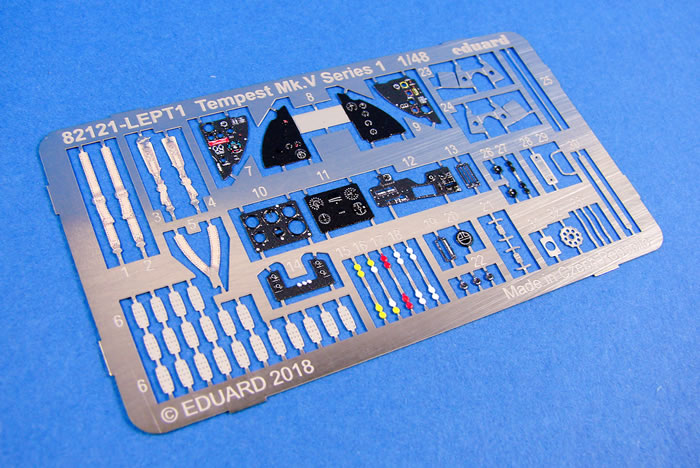
A nicely shaded set of seatbelts is included here, as are a whole series of fishplate reinforcement parts. Production is typically Eduard in its quality with manufacture and printing being first-rate.
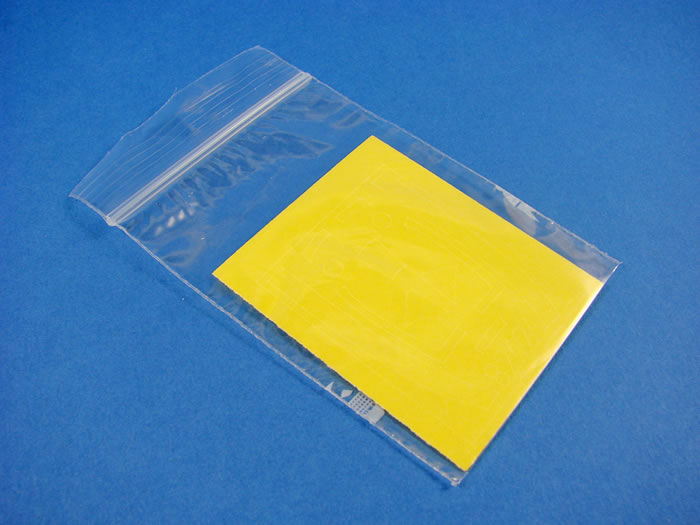
Masks
A set of kabuki tape masks is included for the canopy, wheel hubs and wing walkways. Strangely, no masks are supplied for the various airframe lights.
Marking Options
A single decal sheet is provided, catering to the SIX schemes in this release. Half of the sheet is dedicated to the various serials and codes, as well as the national insignia, whilst the other half caters to the many stencils for the airframe. Not all of these will be used, such as the drop tank decals. Printing is thin, has minimal carrier film, and has solid colour. Registration is also perfect.
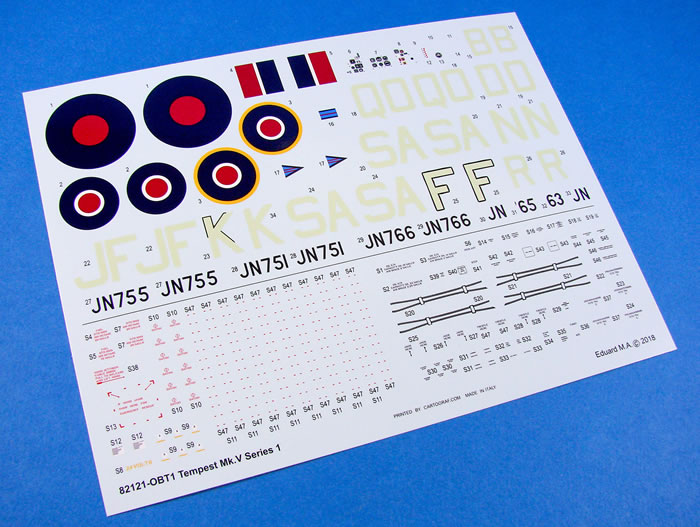
The six schemes included are:
-
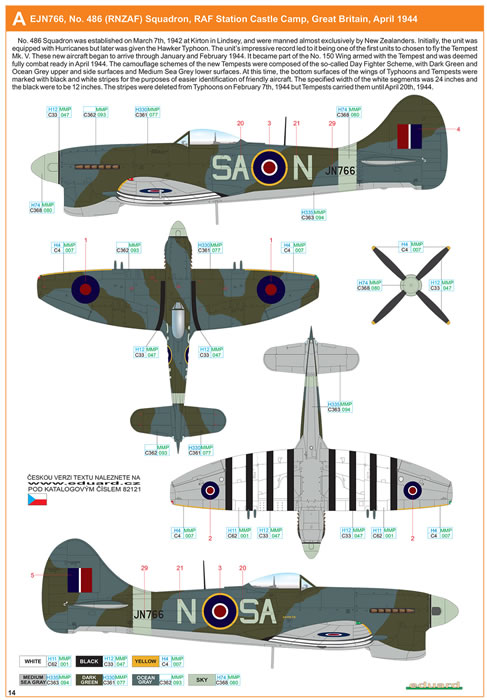
EJN766, No.486 (RNZAF) Squadron, RAF Station Castle Camp, Great Britain, April 1944
-
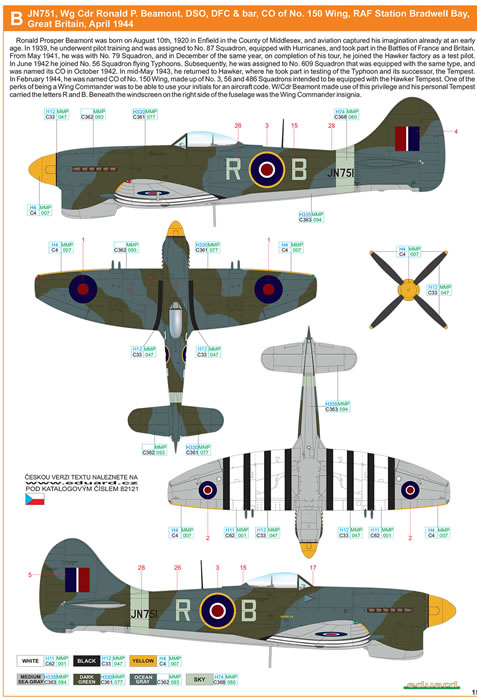
JN751, Wing Commander Roland P. Beamont, DSO, DFC & Bar, CO of No.150 Wing, RAF Station Bradwell Bay, Great Britain, April 1944
-
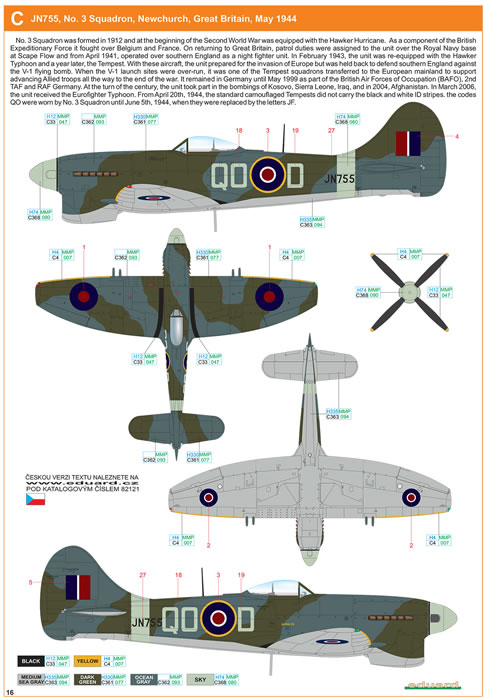
JN755, No.3 Squadron, Newchurch, Great Britain, May 1944
-
JN751, Wing Commander Roland P. Beamont, DSO, DFC & Bar, CO of No.150 Wing, RAF Newchurch, Great Britain, June 1944
-
JN763, No.486 (RNZAF) Squadron, Newchurch, Great Britain, June 1944
-
JN765, Mo.3 Squadron, Newchurch, Great Britain, June 1944
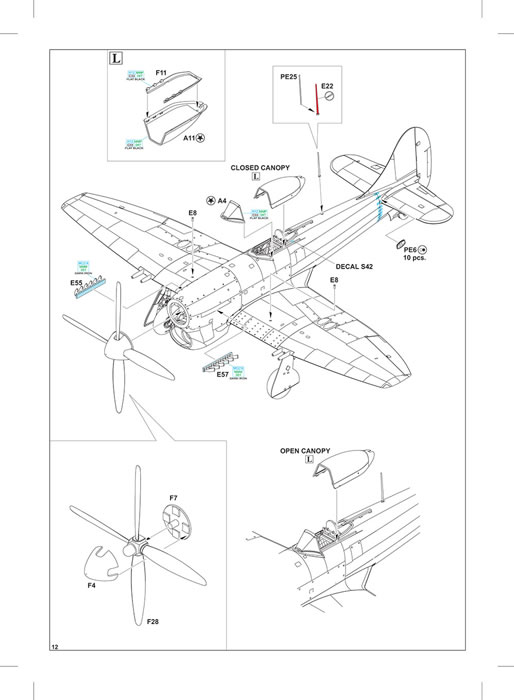
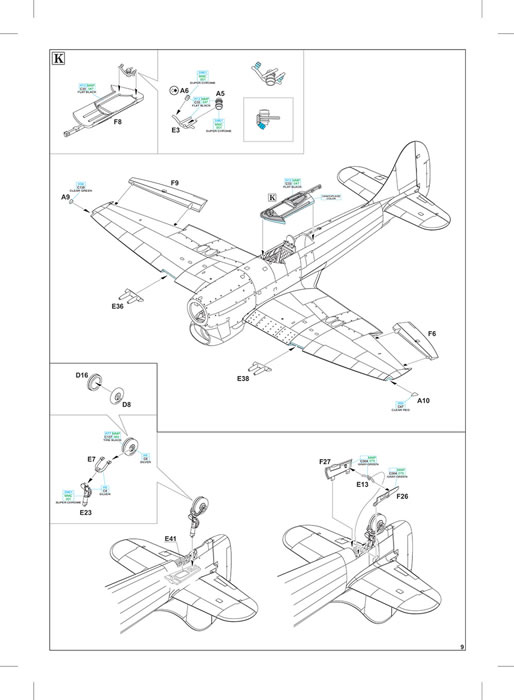
Instructions
Starting with a rather comprehensive history of the Tempest, this A4 colour manual then provides a parts map of the sprues with shaded areas for unused elements, followed by the construction of the Tempest in black/white/shaded illustration. Paint references are given throughout and correspond to Gunze and Mission Models colour codes. The last pages are given over to the six schemes, with the very last page containing a stencil placement illustration.
This is certainly a very welcome release, and of course one in Eduard’s modern tooling standard. This very much puts Eduard’s 20yr old release out to pasture, and it’s not hard to see why. Beautifully detailed cockpit and gear bays, and modern renditions of the various surface textures, this really is one to pick up if you have a hankering to build a Tempest and missed out on the now discontinued original Tempest release. Just a great, great kit! Watch out for the release date and you won’t be disappointed.
Thanks to Eduard for the sample
Review Text Copyright © 2018 by James Hatch
Page Created 12 October, 2018
Last updated
12 November, 2018
Back to HyperScale Main Page
Back to Reviews Page |
 Home
| What's New |
Features |
Gallery |
Reviews |
Reference |
Forum |
Home
| What's New |
Features |
Gallery |
Reviews |
Reference |
Forum |