Monogram's 1/48 scale
Lockheed F-80C
Shooting Star

|
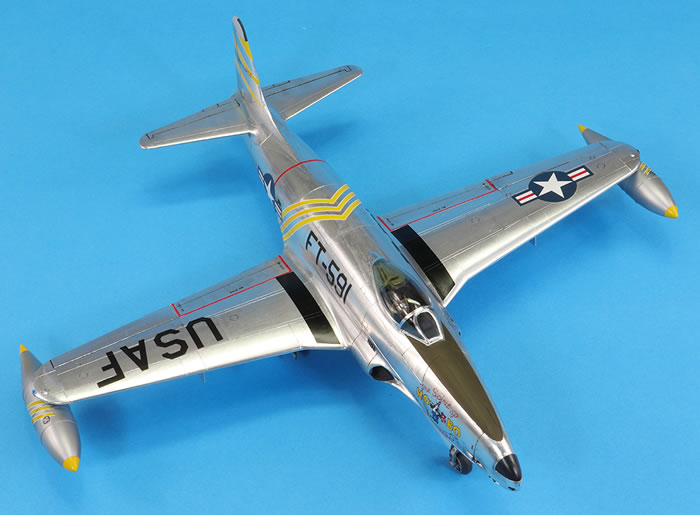
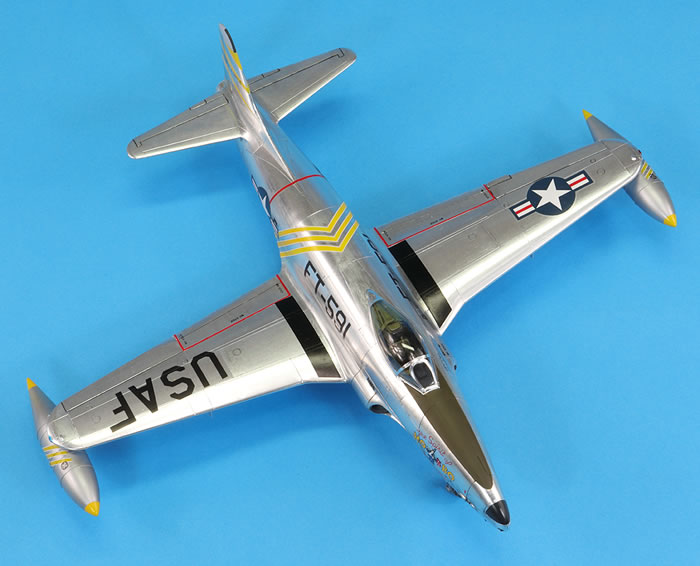
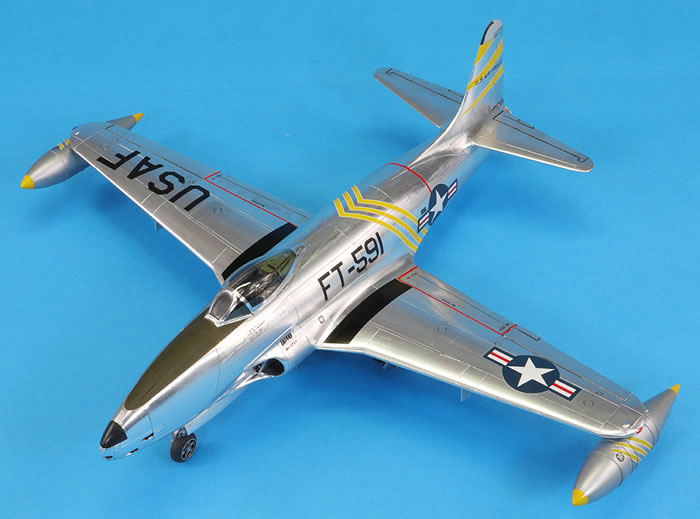
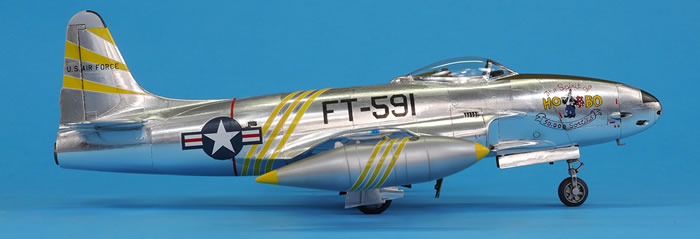
Lockheed F-80C Shooting Star
US Air Force, 80th FBS, Korea 1952
|
with Microscale decals
and Falcon vacform canopy
by Jon Bryon

Hobby Boss's 1/48 F4U-7 Corsair is available online from Squadron.com
This is how model shows usually work for me: I’m wandering down the aisles at Scale Model World and a model on a table catches my eye. It looks great. I head towards it, eager to appreciate its workmanship and quality. But as I get closer the disappointment sets in and the flaws become visible. It looked great from 6 feet away; less so from 6 inches. I set off again for the next model to catch my eye.
This is one of those models.
According to the moulded stamp on the tail, Monogram’s 1/48 F-80 is a year older than I am and in considerably worse shape. It’s a real pig of a kit. This moulding harks from 1991 and I don’t think I have anything good to say about it. It wasn’t a kit I wanted – it came into my possession unexpectedly in an Ebay purchase in 2002 – and has sat half-started mocking me from my stash as the oldest unbuilt kit I’ve owned for a while.
Projects I undertake that involve rescribing always have a greater inertia to them. I made a start a few years ago and did most of the airframe before realising there was no canopy in the kit. So it went back into its box and into the loft. A couple of years ago I stumbled across a Falcon vac-formed canopy set in AJ Aviation (near Heathrow) which resurrected the prospect of finishing this kit.
As I contemplated restarting the F-80 I realised this was an opportunity to try something I’d never had the nerve to try before: foiling. I think it was Will Pattison who, a little while ago, made a throw away remark that painted natural metal finishes always look like painted finishes and never like real aluminium. I think there’s some truth in that and it inspired me to give foil a go.
I wish it hadn’t.
But that’s getting ahead of ourselves; let’s discuss the kit first.
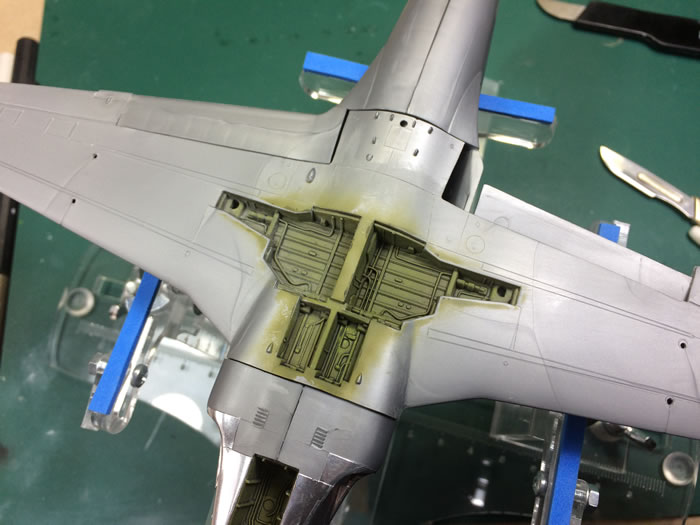
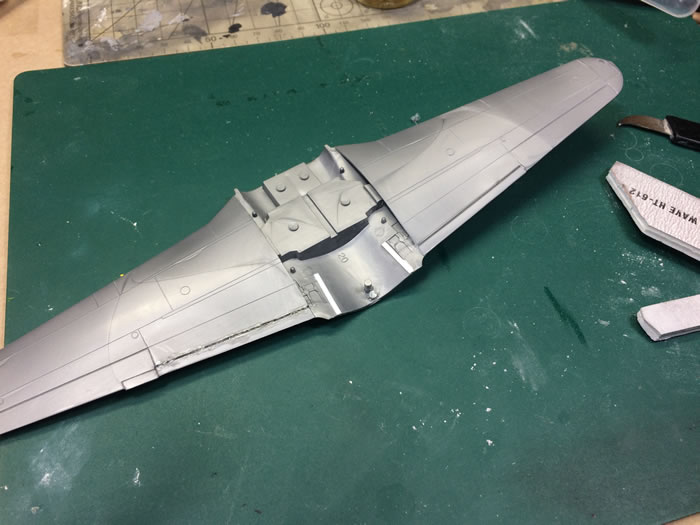
Nothing fits. There are enormous gaps between the front and rear fuselages, between the left and right fuselage halves, between the wings and the fuselage, around the separate gun door on the nose, between the tailplanes and the fuselage, and between the flaps and the wings (I made life difficult for myself by modelling the flaps up). I think that’s pretty much all the major parts. The best fitting part of this kit was the canopy, which I had cut out myself.
The moulding quality is very, very poor. Flash is everywhere, there are terrible ejector marks (on places like the undercarriage door interiors), sink holes (in places like the main wheel hubs) and even a nose wheel where the axle is well off centre on one side.
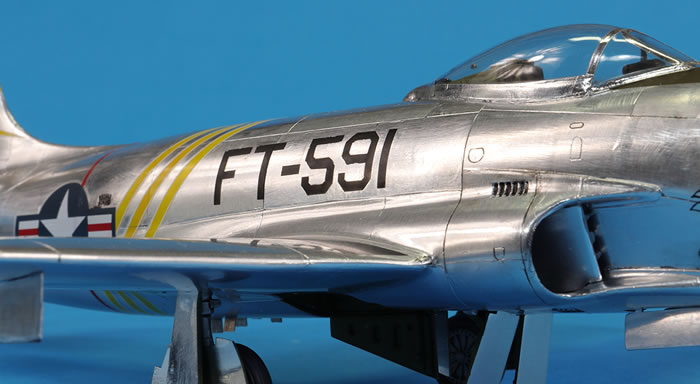
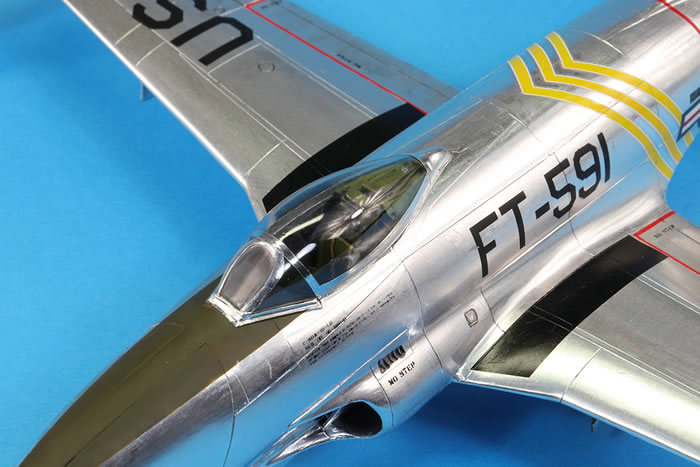
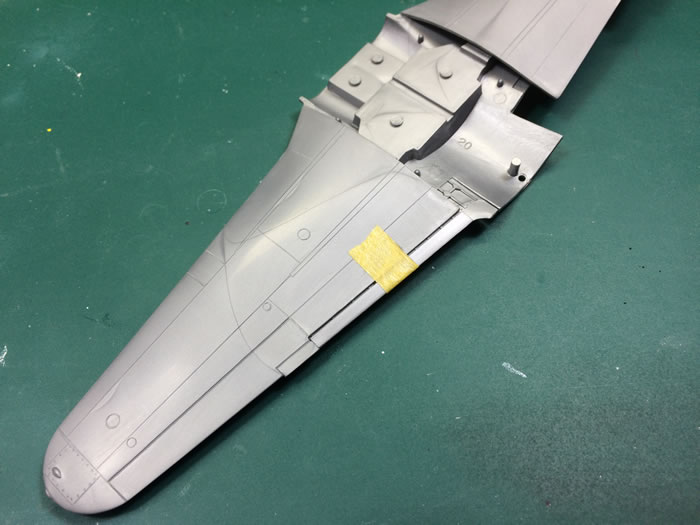
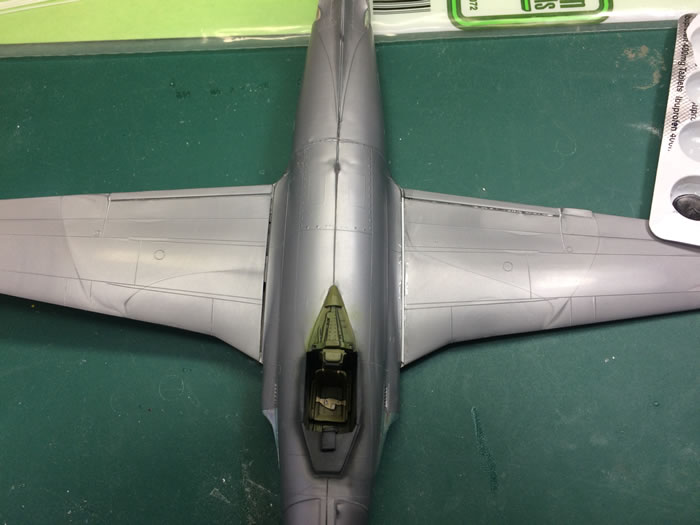
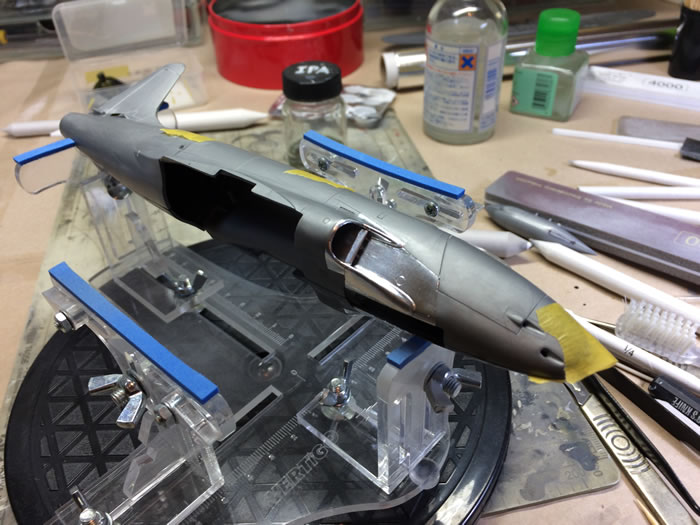
I used CA to construct the major pieces and then to fill all the many large gaps. The engine was included since it was required to seat the tailpipe, although I could not get it central as it should be. The instructions made no mention of nose weight, but I added some heavy metal ballast just in case. Given how the finished model rocks a little on its main gear, I’d say the nose weight was essential. From the kit I used the wing tip tanks which best matched the photos of FT-591 I had. These featured prominent raised detail around the circumference which I replaced with stretched sprue. The canopy, which I was very nervous about since it has almost no relief for the frames, fitted surprisingly well and was attached with Tamiya Extra Thin.
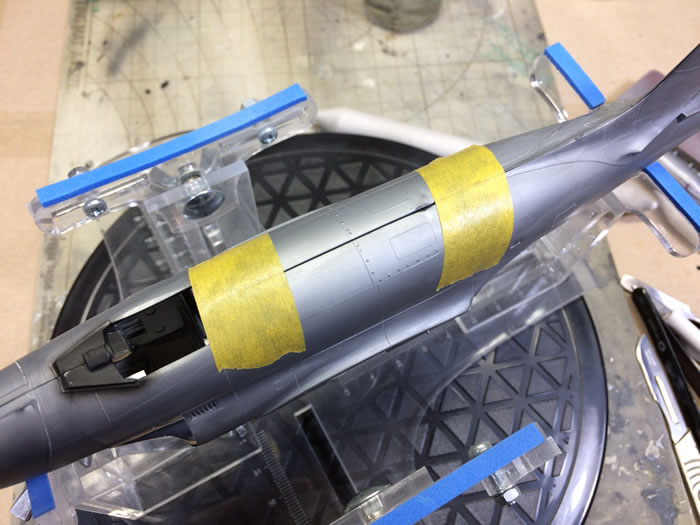
This model was always going to be about the finish. I thought about using Bare Metal Foil, but I had a sheet of Chrome and wasn’t that impressed with it. It was wrinkled when I bought it and did not handle that easily. I decided to give the DIY approach a try. I purchased the cheapest foil I could find (79p in the local Co-op) and a bottle of Microscale Foil Adhesive. With foil and glue at the ready, I had a happy afternoon experimenting with sticking bits of foil to a Spitfire wing, a Tomcat beaver tail, a Neptune wing and the spare kit drop tanks. This all went swimmingly. Wrinkles were minimal, the glue seemed bulletproof (I could mask it with all kinds of tapes) and I could even get paint to stick to it pretty well with a Johnson’s Klear undercoat. I was lulled into a false sense of confidence.
I also tried abrading the foil via a variety of different methods to try and reduce the shininess and match the scuffed nature of the real thing. I tried Micromesh pads, various sanding sticks and sponges, a fibreglass pen, Tamiya polishing compounds and steel wool. I didn’t like any of the effects. The scratches were either too large and out of scale, or the grits too fine and the foil ended up being polished. I decided to leave the foil in its natural state.
I experimented with various burnishing implements. In the end I settled on paper stumps and a blunt pointed dowel, shaped like a lead-less pencil.
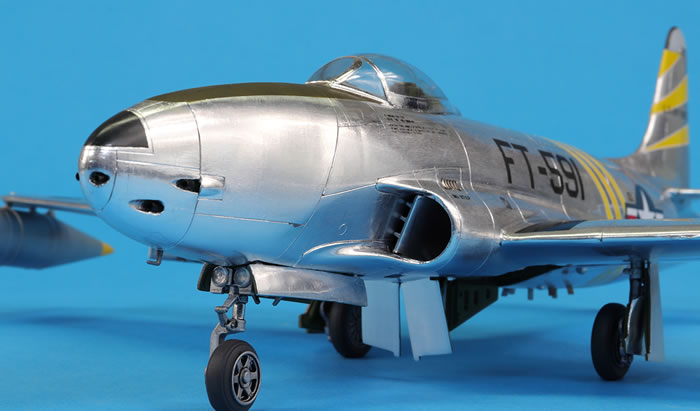
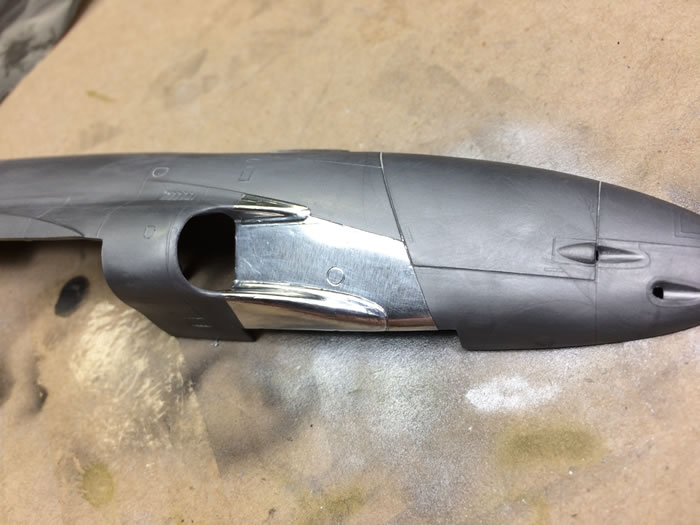
The next step was to try it for real. My plan was to tackle the tricky areas first to get a sense of how the foil would behave. The most difficult area to me seemed to be the intakes. This actually went better than I expected, but I hit the first and second major problems with foil.
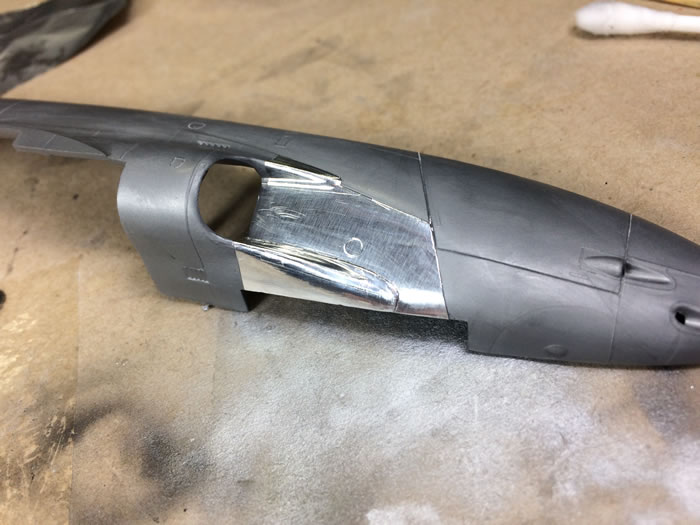
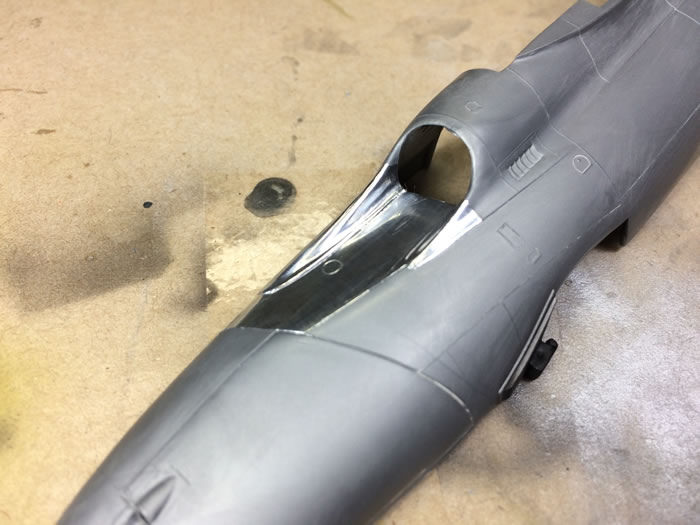
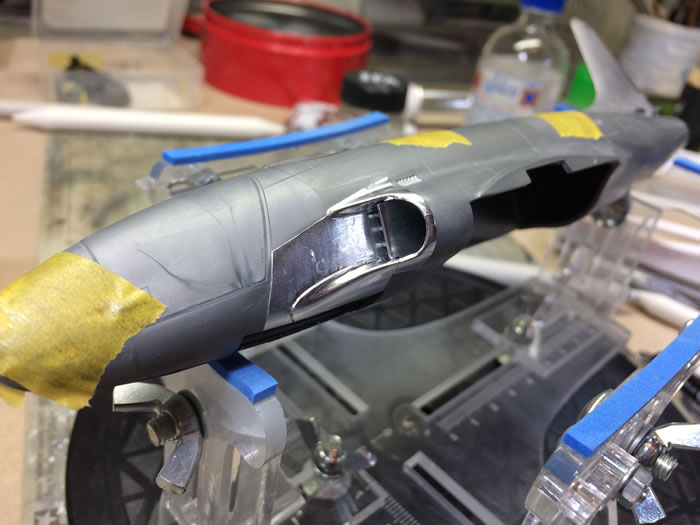
The first problem was that wrinkles are just unavoidable in some places. And they are very, very difficult to get rid of, and very, very noticeable. I learned to live with them in general, but in some prominent places, like the big gun doors on the nose, I plucked up the courage to sand and then polish them out. This was better, although still not perfect. In other areas that were more inaccessible, like the wrinkles caused by small protrusions, there was no chance of eliminating the wrinkles.
The second problem was that of joins. The F-80 is relatively smooth and the panels are large. This mean that either you had large pieces of foil to stretch between the panel lines (and therefore wrinkles) or smaller pieces of foil (and therefore joins mid-panel). I went for the latter, but eliminating joins also proved impossible. Some people recommend sanding down the underlying foil before joining the adjacent panel, but I could not do this reliably. Steel wool is also usually recommended, but created such a mess it was more trouble than it’s worth (see below). So the joins are very visible.
As foiling progressed the problems multiplied. Getting the adhesive to spread evenly on the foil proved impossible; fish eyes would appear in it, sometimes small, sometimes enormous. I tried cleaning the foil with white spirit and with 100% IPA. I tried thinning the glue with water (as recommended on the bottle) and with 100% IPA. None improved matters, except maybe adding a drop or two of IPA. This became very stressful for two reasons:
i) uneven glue shows up through the foil in the finish. As does absolutely everything else, especially tiny fibres of steel wool that seem impossible to get rid of. Foil is in no way more forgiving than metallic paint.
ii) the little fish eyes were patches where the foil wouldn’t stick, and this made masking very unpredictable, as little bubbles would appear when the masking was removed. This did not show up in testing.
In short, foiling would be immensely more doable if the adhesive were more predictable and reliable in application. I ended up spreading adhesive over fairly large pieces of foil and then selecting areas were the fish eyes appeared minimal.
There were more issues. Where the glue had been applied properly, the foil stuck like a limpet. You apply the foil with the adhesive dry, and its hold increases with time and pressure. This is fine when you are trimming against an un-foiled panel: you trim it up, peel the foil away and clean the plastic with IPA. But where you are trimming against an already-foiled panel your blood pressure goes through the roof. You have a short window of time to trim the excess and peel the foil from the underlying foil. Miss that time window, or accidentally burnish it down, and it will be stuck. This first happened to me under one of the wings and I ended up having to scrape both layers of foil off with a steel scraper down to the plastic. This marked the plastic and it was a great big mess. Foil is very unforgiving.
Eventually the whole thing was done. There were little patches here and there, repairs where the foil had torn or peel up at a corner. Every time I picked it up (which was often) I’d damage the foil somewhere. Even during taking the photos, I’ve lost a bit of foil on the wing trim tab.
The canopy was finished with Bare Metal Foil Chrome. It doesn’t look great close up, but passable from a distance.
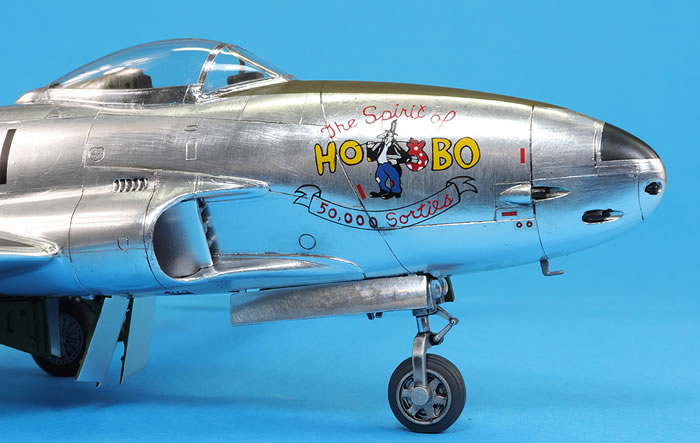
My kit, which was sold as an F-80B, came with three decal sheets in the box, all unusable. It turns out the world is not flush with aftermarket decals for single-seater Shooting Stars, and my only choice was an ancient Microscale sheet I managed to find on Ebay. This is a very odd sheet. First, for some reason, they only included two stars and bars, whereas four are required. Second, the stencilling was for an F-80A. Third, they provide two walkway markings (the red striping) for the left wing and nothing for the right. And fourth, it was poorly researched. I went for the ‘Spirit of Hobo’ option since that suits the nosewheel that comes in the kit; ‘Kansas Torndao’ would require a different nose wheel and, I suspect, some modifications to the wing. ‘Spirit of Hobo’ was also an exceptionally shiny aircraft and therefore suited to the foil, unlike the much duller ‘Kansas Tornado’.
I managed to get a copy of Osprey’s F-80 Shooting Star Units Over Korea. This has a couple of excellent photos of ‘Spirit of Hobo’ along with a few others I found on the internet. The Microscale instruction sheet should be thrown away and the photos used as a reference instead. In summary:
-
Microscale have the nose art on the wrong side
-
Microscale neglect to edge the yellow striping in white
-
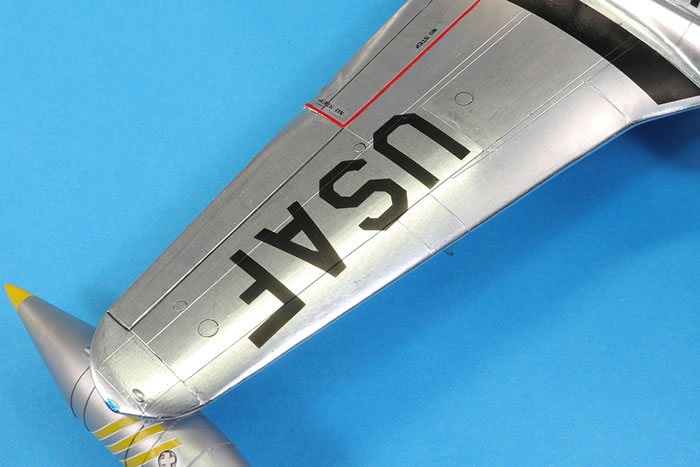
Microscale do not include the required ‘U.S. AIR FORCE’ marking on the tail
-
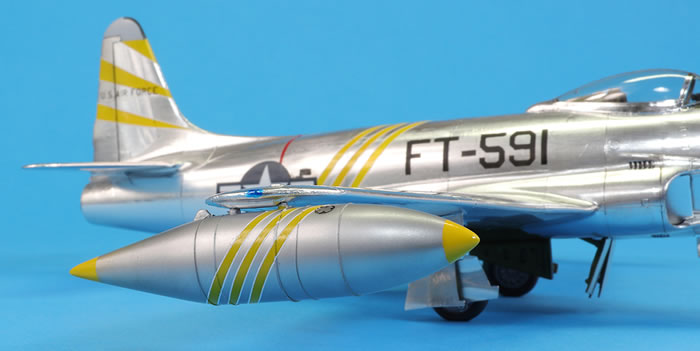
Microscale do not indicate that the nose and tail of the wingtip tanks should also be yellow
-
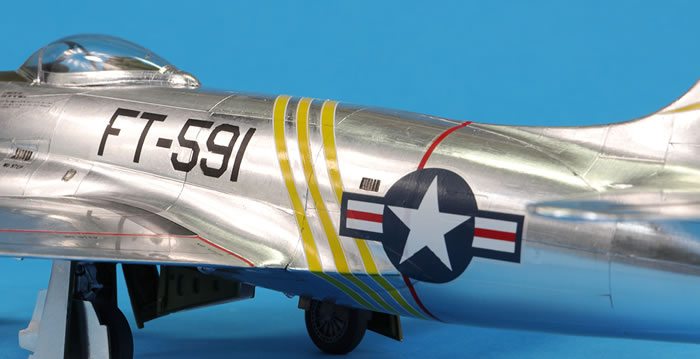
Microscale got the placement of the national insignia relative to the yellow striping noticeably wrong
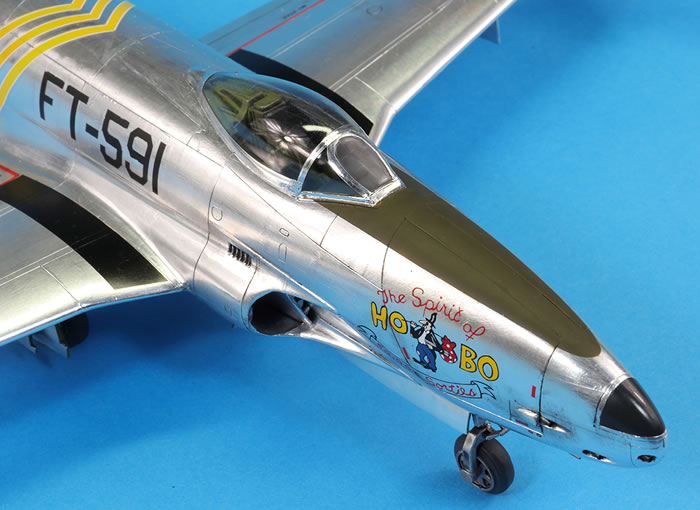
The nose art is pretty simplified compared to the real thing and a lot of stencils are missing. What is striking is just how shiny and reflective ‘Spirit of Hobo’ was for an in-theatre airframe.
Carrier film was always going to be an issue on the foil. For some items, like the nose art, there would be no way around this. It was serendipity that I noticed some posts on Facebook about Silhouette cutters just as I was beginning to think about the markings for this kit. Before I knew it I’d ordered a Portrait 2 and hooked it up to my computer.
I scanned the Microscale decals and used these to create stencils in Artool Ultramask for the ‘FT-591’ and ‘USAF’ markings. This was surprisingly straightforward. Now the moment of truth.
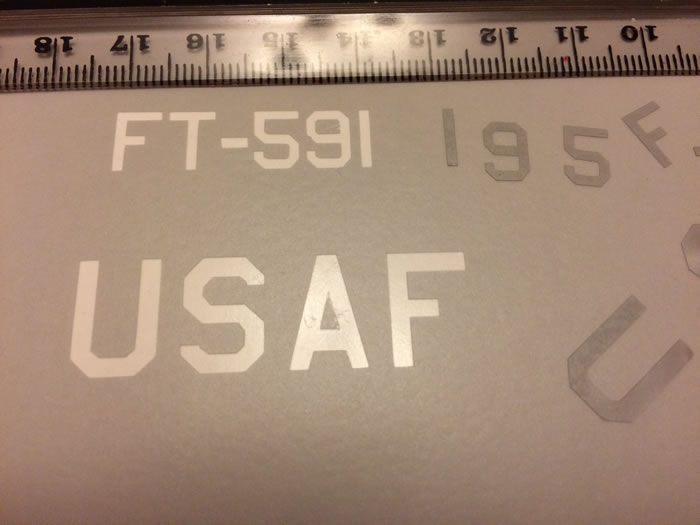
First attempt using the Portrait 2. This was with the default Oramask settings.
To match what had worked in testing, I brushed a thin coat of Klear over the model. I applied the stencils to the airframe, so far so good, sprayed some Mr Color 33 Matt Black and then lifted the stencils. Disaster. The paint would rather stick to the stencil than the foil. Furthermore, some of those little patches I mentioned above where clearly the foil adhesive did not cover properly, were pulled up too, creating a slightly bubbled or rippled surface. The latter I could do nothing about, but the former was solved by using Tamiya X-18 Semi-Gloss Black, which seemed to stick to the foil much better. The stencilling worked very, very well, but yet again, the unpredictability of the foil was the source of a lot of frustration.
For those who care, the Portrait settings were (thanks to Tony Bell) blade 3, speed 4, force 4, 2 passes and with the overcut option on.
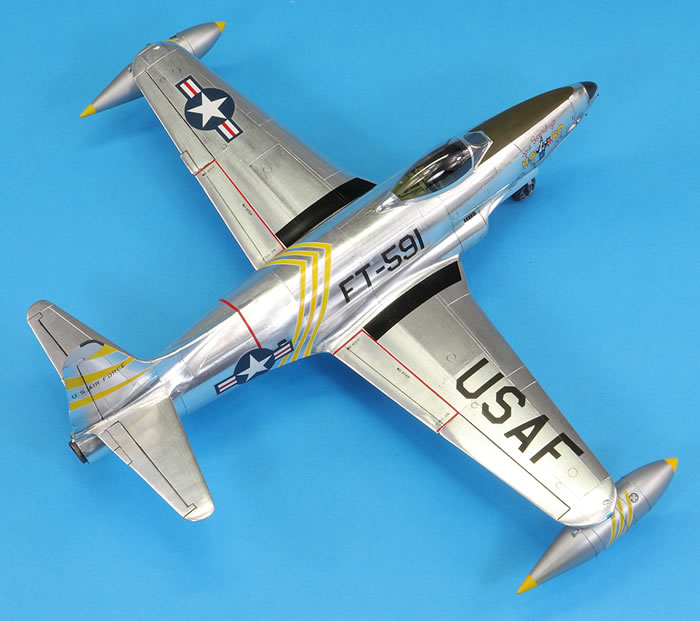
The stars and bars came from an old Revell F-86D sheet. They were the only ones I could find that provided the two sizes I needed and would give the required consistency in blue and red shades. Sadly, these decals were thiiiiiickk, matt, the carrier film is very visible and they were translucent. The red walkway markings for the right wing were chopped up from the Microscale sheet for the left wing and the nose art went on pretty well. The ‘U.S. AIR FORCE’ tail markings were separated from the tail number for Kansas Tornado and used. Considering how ancient I’m assuming they are, the Microscale decals weren’t bad.
The yellow striping was always going to be a challenge. I don’t think Microscale got the dimensions right, but in the end I don’t think I did either! They should, I feel, be narrower. I carefully masked the tail and fuselage stripes using Aizu 0.7mm tape and sprayed the stripes with Mr Color 327. As expected, this did not stick well to the foil and the edges were very ragged after I removed the tape. I always intended to edge the stripes with white decal strip from Xtradecal and hoped this would cover up the jagged yellow edge. I think I got away with it…from a foot away anyway! The close up photography is rather depressing as what looked fine to the naked eye does not look good blown up. One of the images of the real thing shows some yellow striping on the horizontal tail surfaces. I’ve convinced myself they’re reflections from the yellow markings on the vertical tail, but…I’m probably wrong.
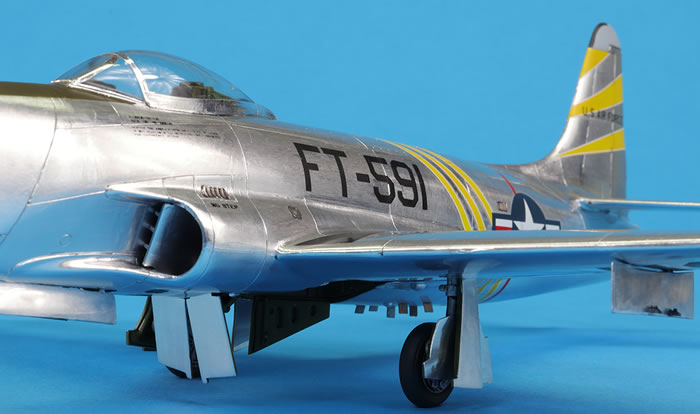
The stripes around the wing tip tanks were created in the same manner. The tanks themselves were painted Mr Color 8 Silver and 327 Yellow to match the much duller appearance apparent in the photos.
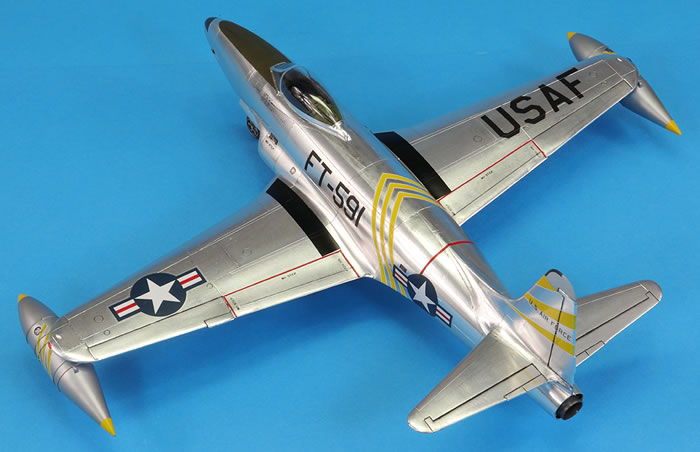
The anti-glare panel was Mr Color Olive Drab (2) and fortunately left a fairly consistent edge when I took the masking off. The tail tip is also Mr Color (I forget the shade) as is the black nose panel (Mr Color 137).
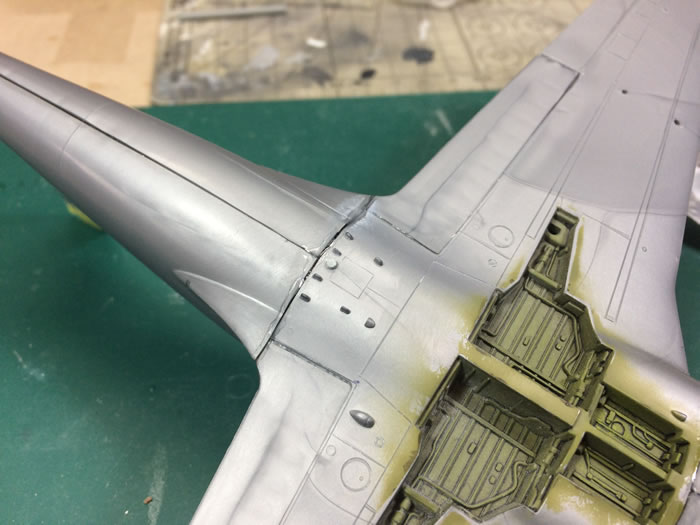
The gun barrels are Albion Alloys 1.1 mm brass tubing slotted in place at the end of construction. Sway braces were added to the pylons by cutting up some old ones I found in the spares box. The lenses for the nose wheel leg also came from this source. The pitot under the nose is, I think, from an A-4 Skyhawk kit. Various protrusions under the rear of the wing which had to be removed for foiling were replaced by pieces of photo-etched metal, which turned out to be a little too large.
So, foiling. What do I think? It looks like aluminium, that’s the big positive. But the negatives are numerous:
-
The unpredictability of the coverage of the Microscale Foil Adhesive
-
The reality that there will be wrinkles
-
The difficulty of rectifying mistakes – where the glue is, the foil *really* sticks and won’t come off
-
The difficulty of hiding joins that don’t fall on panel lines
-
The fact that paint won’t stick to it
-
The number of knife blades I went through
This is one of those models I described in the opening paragraph. It looks striking from a foot away, but get closer and it just looks ugly. The finished article is too shiny and clean, especially things like the black walkway markings, but because the foil, paint and decals were so fragile there was no way I was going to risk much weathering. I ran some Tamiya black panel line wash into the control surfaces and vents, but left it at that. Ideally the foil would be tarnished a little, but in the end, I’ve left it shiny. The real thing was pretty shiny anyway.
My next build will be Kitty Hawk’s F-94C Starfire in markings from the 29th FIS. I am torn, because photos of this unit’s aircraft show that they had highly polished fuselages. Should I use the foil again, because that it the best way to get that finish? Or go back to what I’m familiar with and try paint? At this stage, I don’t know. I will definitely use foil in future for some small areas, but I don’t think I have the stomach to press on with the technique for another entire aircraft.
As for the F-80, it’s a mystery why this workhorse of the USAF is so poorly served in 1/48 scale. I understand why no one’s made a decent Cutlass, or Tiger, or F-94B, but the Shooting Star saw extensive combat service, had many interesting markings and was a pioneer of the jet age. Come on, someone (not you Hobby Boss): make a decent F-80 in 1/48!
For more articles like this, please visit my website .
Text and Images Copyright ©
2019 by Jon Bryon
Page Created 25 June, 2019
Last Updated
25 June, 2019
Back to
HyperScale Main Page

|
 Home
| What's New |
Features |
Gallery |
Reviews |
Reference |
Forum |
Search
Home
| What's New |
Features |
Gallery |
Reviews |
Reference |
Forum |
Search