Me 262 A-1a
Halb und Halb (Half and Half)
Airfix, 1/72 scale
S
u m m a r y : |
Description and Item No.: |
Airfix Kit No. AX03088 - Me 262A-1a Halb und Halb (Half and Half)
£10.82 Plus Shipping from Hannants |
Scale: |
1/72 |
Review Type: |
Build |
Advantages: |
The kit is simply engineered with crisply rcessed surface details and a low parts count allowing for a quick build (well almost; more below). |
Disadvantages: |
The kit suffers from a poorly designed pitot tube and badly fitting main gear doors. Extra effort is required to fill and blend the nacelles to the wings and both the canopy and the nose wheel well insert to the fuselage. These isues require a lot of test-fitting and modification throughout the build if you wish to get the most out of the model. |
Conclusion: |
It’s good to take on a modeling challenge occasionally as the exercise often leads to new abilities and techniques. That was definitely my experience in finishing the Halb und Halb. |
By John Miller

Hobby Boss' 1/72 P-61A Black Widow is available online from Squadron.com
I started this kit not long after its initial release and, as usual, completion took longer than I anticipated. The kit goes together easily although it's not without it's issues: more on some of those later.
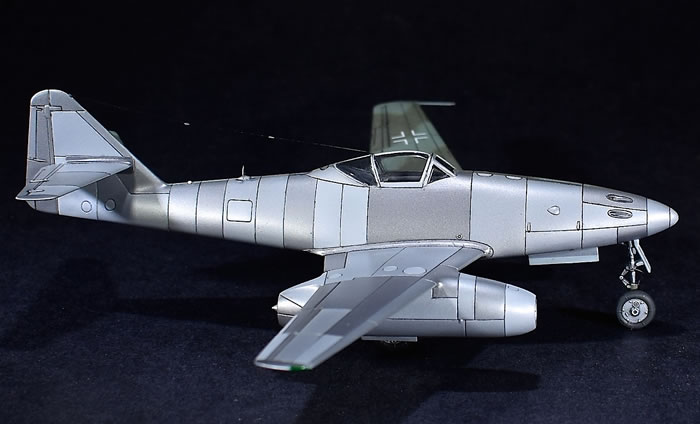
Initially, the natural metal finish (NMF) was intended to be the start of a Czechoslovakian S-92. Once done however, I couldn't resist the temptation to try something a little different. Thus was born the Me-262A-1a, Halb und Halb (Half and Half).
Parts were removed from the sprues with cutters (Xuron) and cleaned up with a #11 X-Acto blade, the grey portion of a Triple-Grit sanding stick and/or a piece of folded Alpha Abrasives 600 grit paper.
Cleaned parts were wiped down with a Kimwipe saturated with Denatured Alcohol (Crown: “For Cleaning Glass”) in preparation for being shot with primer.
Tinterior of the fuselage, outer aspects of the cockpit tub, and portions of the lower wing and wheel well areas of the upper wings were then shot with Mission Models Aluminum.
When this was dry a pin wash of Tamiya Black Panel Line Accent Color (Tamiya Dark Wash) was used to bring out the details. The halves were then joined with Tamiya Extra Thin Cement and the fit was excellent with a couple of caveats (more below).
The instrument panel decals have little/no decal film on the periphery of the panels obviating the need to trim around them prior to removal from the sheet: nice. The decals were applied using Micro-Set and –Sol and they worked beautifully. I have to say the final result is quite nice with very little effort expended.
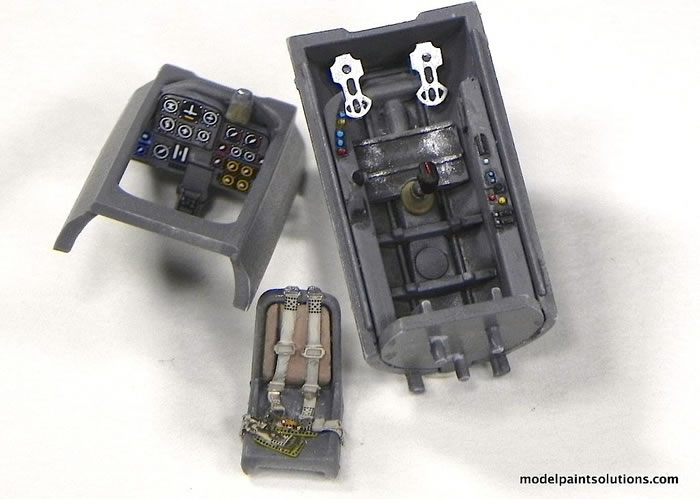
With the cockpit complete I set about assembling the fuselage. This kit is sure to be a tail-sitter so lead was added to the nose wheel well. The open ammo chutes were covered with strips of aluminum from a soda can.
The assembled fuselage presents a few issues that have to be dealt with to ensure both accuracy and an acceptable fit. These issues include:
-
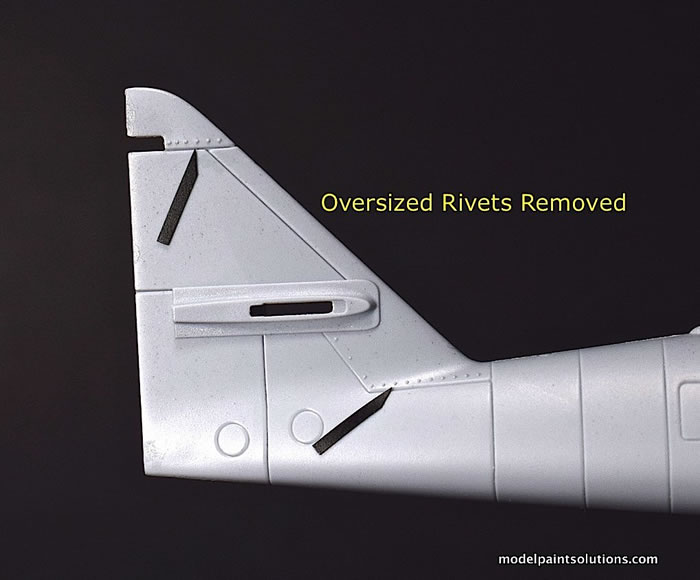
Removal of over-sized “rivets” on the horizontal stabilizer.
-
Lines for hinged panels on each side of the nose are missing and have to be scribed.
-
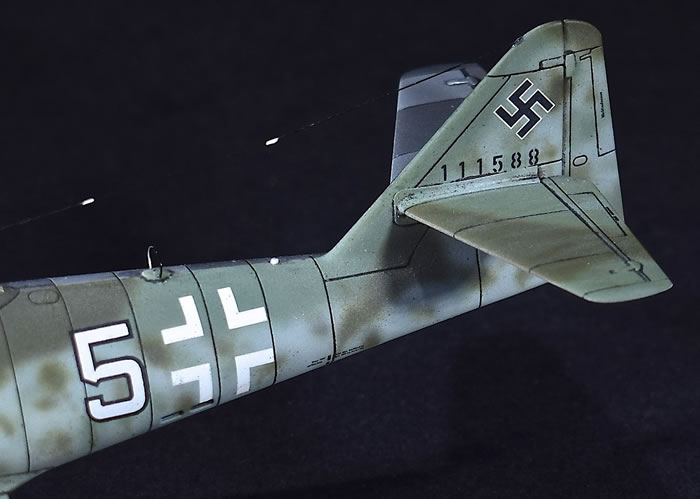
The loop antenna on the dorsal fuselage is rather clunky as is it’s large, square mounting hole. This was filled with a mixture of CA and talcum powder and a new PE antenna was sourced from the spares box.
-
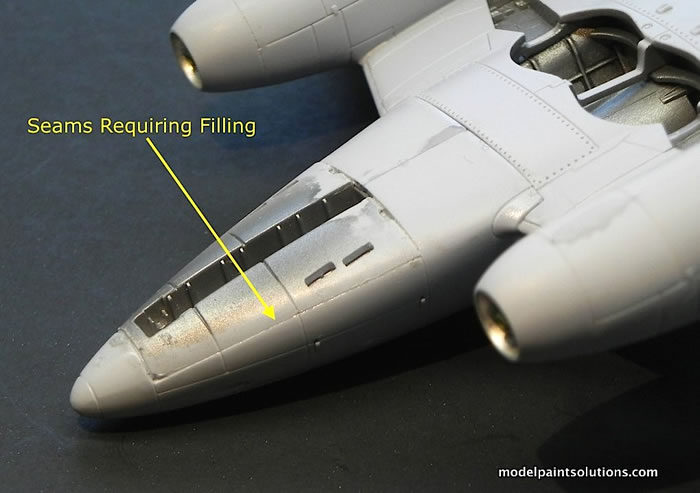
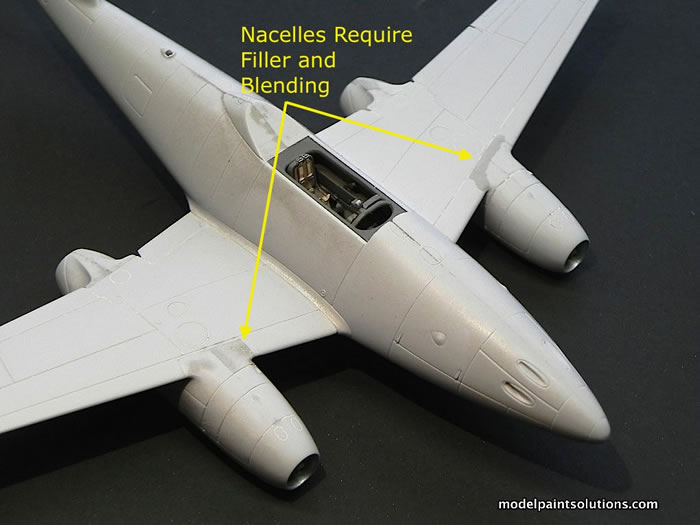
The join between the wheel well and fuselage leaves a lot to be desired and had to be filled and blended.
-
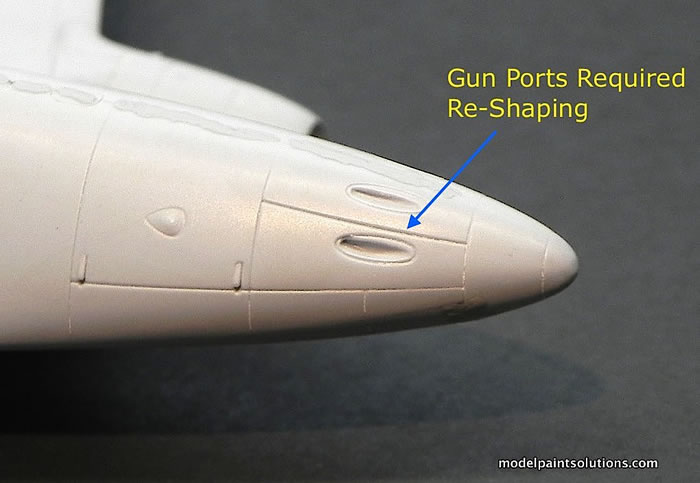
Some of the gun ports were misshapen and required re-shaping and blending.
Once the fuselage issues were dealt with, I moved on to the wings and engine nacelles. The fit between the upper and lower wing halves is spot on and required just a little blending with a sanding stick.
I wish the same could be said about the pitot tube assembly. The clunky, Lego-like design is totally lacking in finesse and accuracy. Moreover, the result looks akin to a child’s toy. This and the horrible fit of the main gear doors (below) are the real letdowns of the kit. The mounting point for the offending pitot was filled in and completely re-worked with files. A new pitot was fashioned from aluminum tubing.
The fit of the nacelle halves is passable. The fit of the nacelles to the wings is not. A fair amount of plastic had to be removed from the nacelle mounting points to achieve a reasonably good fit.
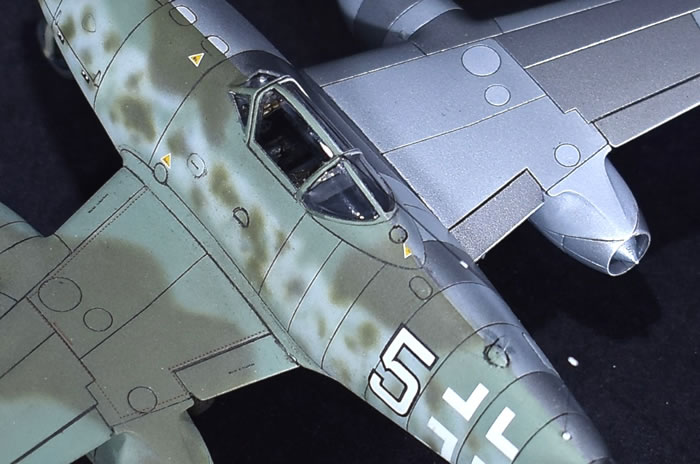
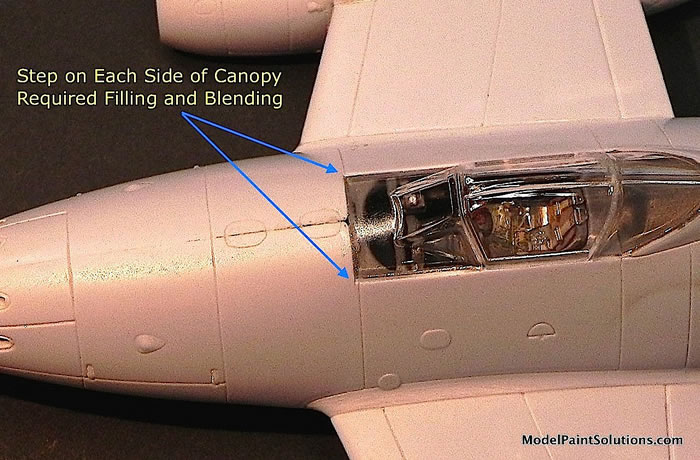
The canopy parts are acceptably clear if not a tad thick. The poor fit of the canopy results in a step that runs along the left and right sides that had to be filled, blended, and re-scribed.
The canopy panels were then masked with Aizu micro masking tapes and Mr. Masking Sol.R.
In preparation for priming, the model and various parts were wiped down with a Kimwipe saturated with a 1:1 mix of Windex and Denatured Alcohol.
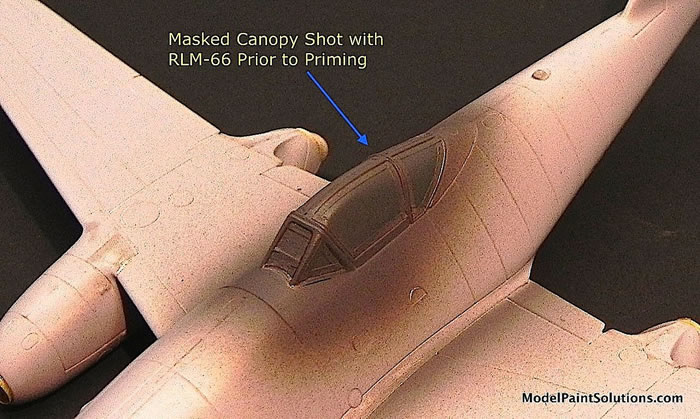
To ensure the inner canopy frames would appear the appropriate color when viewed from the outside, the canopy was shot with Mission RLM-66 prior to priming.
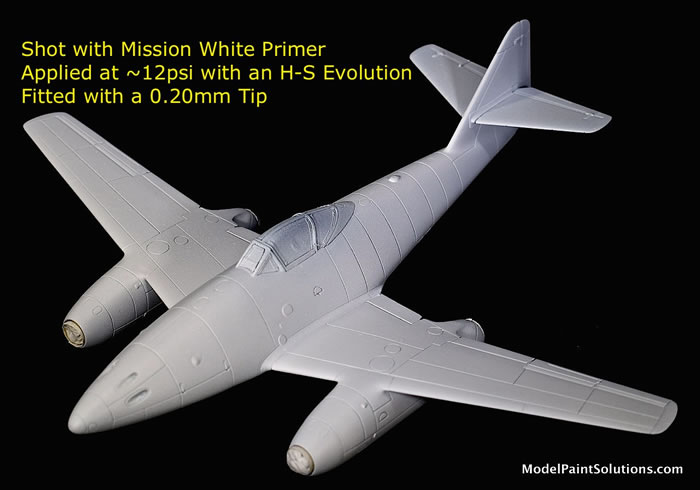
The de-greased model was then sprayed with Mission White Primer. When dry, the finish was wet-buffed with Micromesh 6,000 (Pads and Sheets) resulting in a glass-smooth finish ready for metallics.
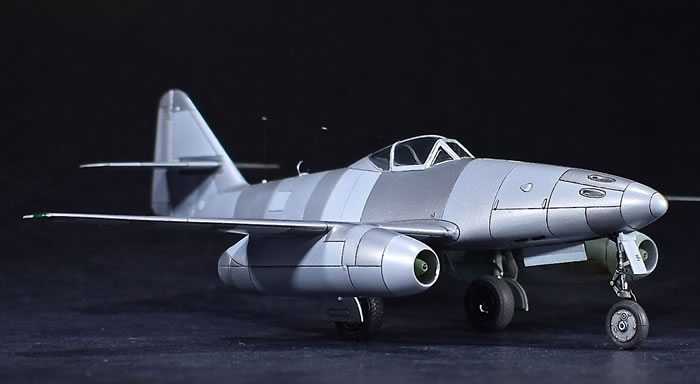
The metallic paints were shot starting with the palest shades followed by progressively darker shades. First up was Mission White Aluminum.
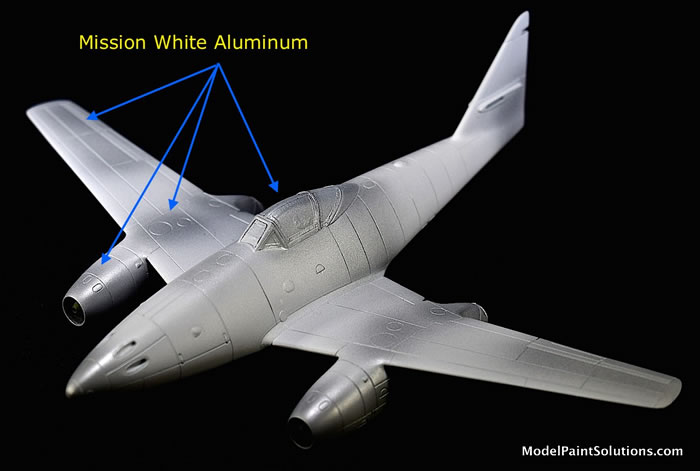
After allowing the White Aluminum to dry for ~2hrs, the first round of masking was completed using Tamiya Tape that had been de-tacked with my fingers prior to placement on the model.
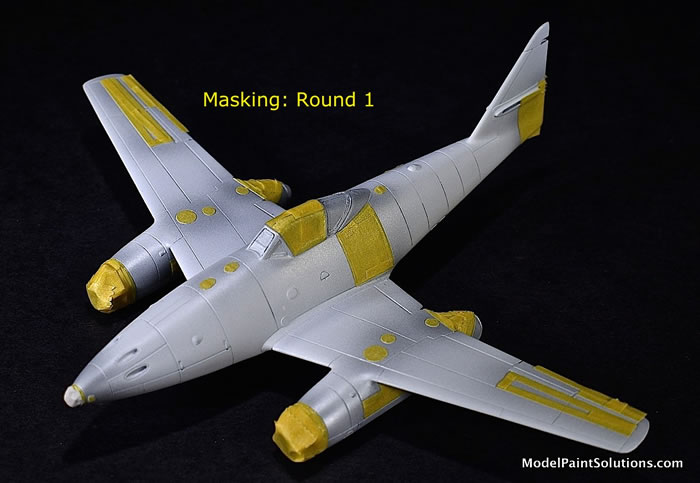
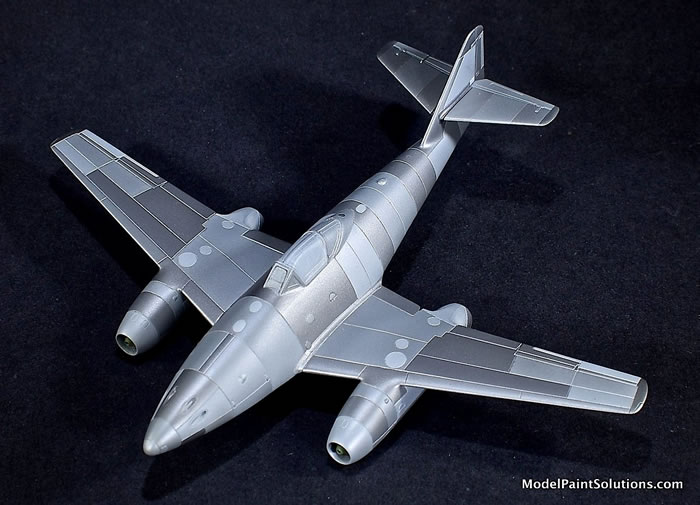
The next darker shade, a mixture of White Aluminum with 25% Mission Dark Aluminum, was then applied. This process was continued with 3 additional mixtures of White and Dark Aluminum culminating in the darkest colored panels being painted last.
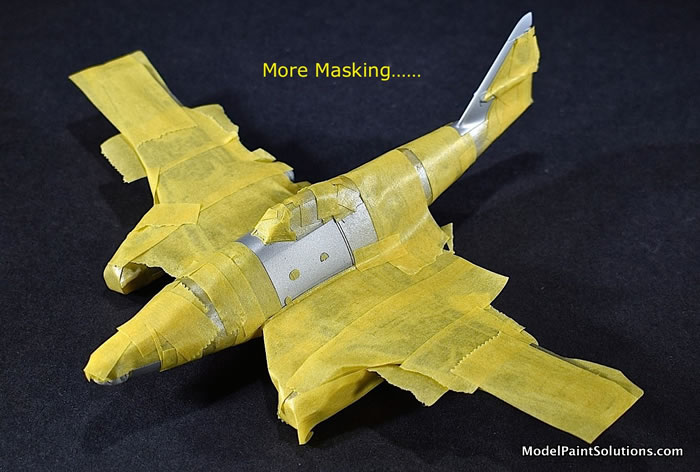
After the tapes were removed and some panels tightened up a bit the metallic finish was complete. Whew!
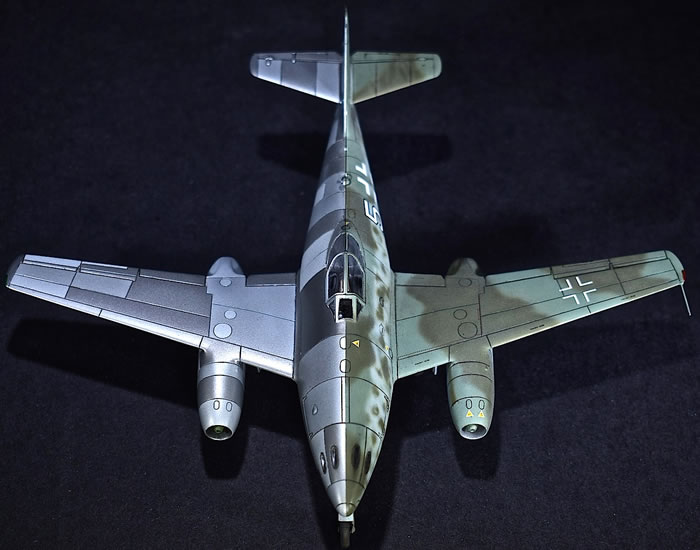
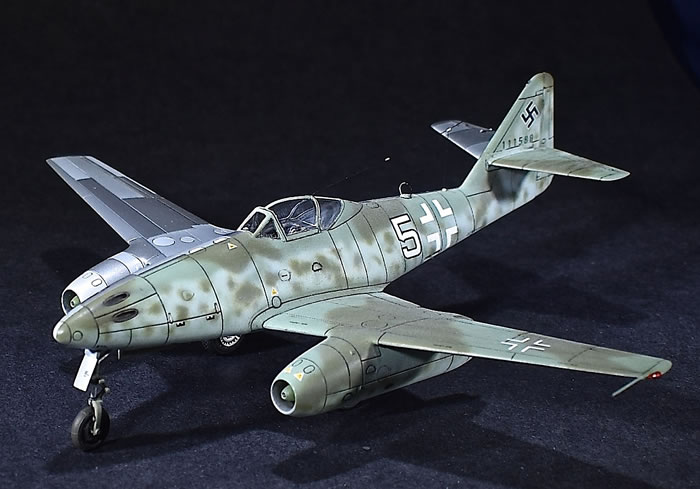
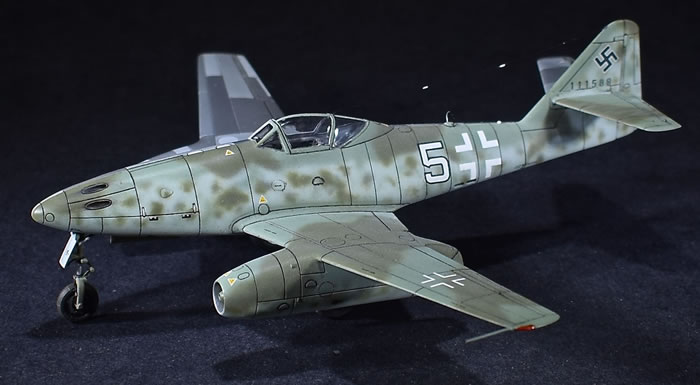
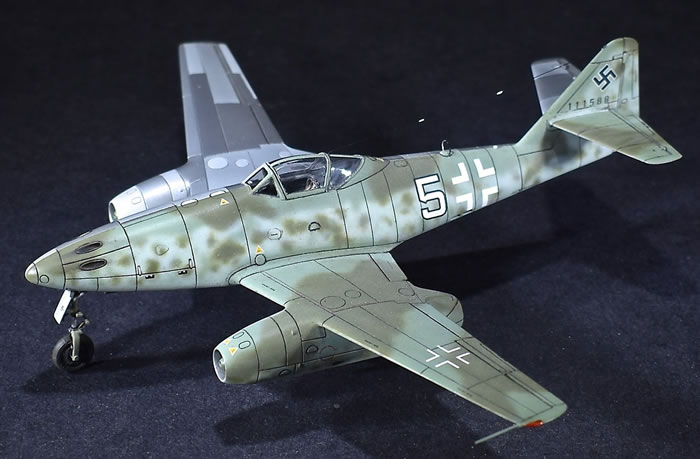
It was at this point in the painting process that I was struck with the idea of doing a half and half scheme: part bare metal, part camouflage. For years I’ve seen beautiful builds, online and in magazines, that were finished similarly and always enjoyed the results. After a few moments of pondering the possibilities, I dove in and placed a piece of 0.40mm Aizu Tape down the middle of the fuselage and used this as the starting point to mask the right (starboard) half of the model.
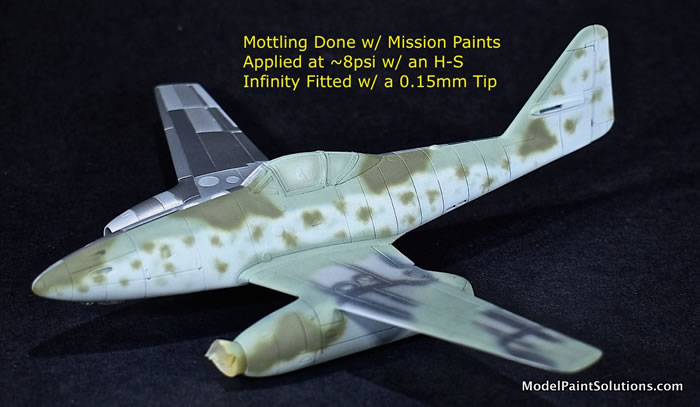
My goal was to find a scheme that would accentuate fuselage mottling. A suitable scheme was found in Volume 17 of “Planes and Pilots-German Jets of WWII” (ISBN: 978-2-35250-224-1). On page 28 of this rather colorful book is a depiction of “White 5” (Serial 111588), which served with II/JG-7 “Nowotony” at Brandenburg-Briest, January 1945. The camouflage worn by White 5 (RLM-81/83 over RLM-76) featured mottling higher up the side of the fuselage than was typically seen----perfect J
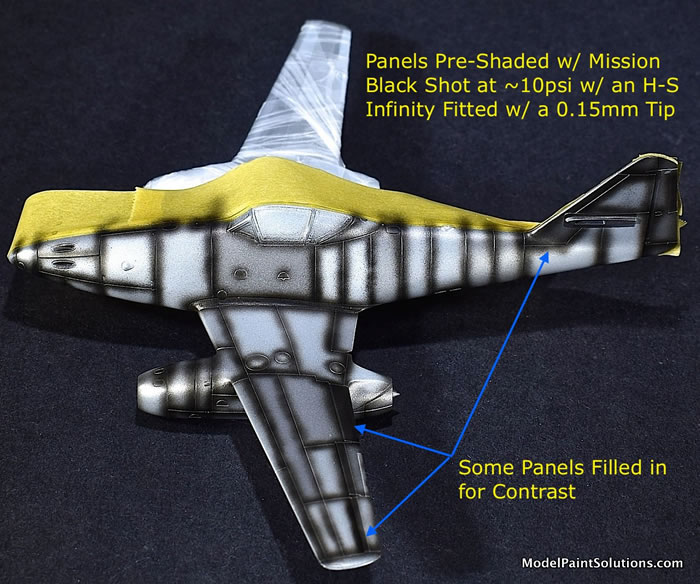
Prior to shooting any color coats, panel lines were pre-shaded with Mission Black, diluted for Fine-Line work and applied with a Harder-Steenbeck Infinity fitted with a 0.15mm tip.
The scheme was started with a coat of Mission RLM-76 lightened ~10% by volume with Mission White and diluted for modulation (~30% paint).
The dorsal aspect of the fuselage and wings were shot with Mission RLM-81 and -83 each lightened with 10% Mission White. The mottling was shot with an Infinity fitted with a 0.15mm tip.
In preparation for decaling, the model was given a coat of Mission Gloss and allowed to dry overnight. Decals were sourced from the spares box and applied using Micro-Set and –Sol.
A Few Last Issues:
I opted to use aftermarket wheels (Neomega Resin), as the kit parts were a bit crude despite having separate wheels and tires.
Final assembly revealed an issue with the fit of the main gear wheel well doors: they simply didn’t fit between the main gear leg and the side of the adjacent nacelle due to the thickness of the mounting point. This was a bit frustrating as these parts had all been painted and modification would require a fair amount of additional work---ah well. Once modified and repainted, the gear doors fit with little room to spare.
Finishing Up:
I kept weathering to a minimum but made an exception with the port Jumo-004. Given the technological challenge of producing the first airworthy jet engines, the Jumo-004 was notoriously unreliable, prone to fire if mishandled, and limited by a short operational life. To reflect the nature of the beast, a greasy, wind-smeared, leak was added to the belly with artists’ oils and Mona Lisa Odorless Thinner.
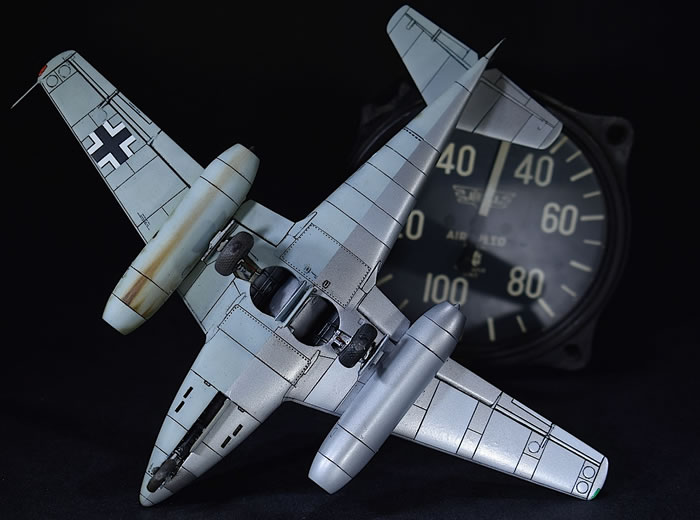
To maintain a contrast between the bare metal and camouflage, the metal half was briefly masked while Mission Flat was applied as light, dry coats to the camouflaged side.
With the addition of the dorsal loop antenna from the spares box and rigging the aerial with Uschi “Fine” line, the Halb und Halb was complete.
That was a blast! It’s good to take on a modeling challenge occasionally as the exercise often leads to new abilities and techniques. That was definitely my experience in finishing the Halb und Halb. I hope you enjoyed reading along.
--John
For more information on this build visit ModelPaintSolutions.com
Text and Images Copyright © 2019 by Model Paint Solutions
Page Created 29 November, 2019
Last updated
29 November, 2019
Back to HyperScale Main Page
Back to Reviews Page

|
 Home
| What's New |
Features |
Gallery |
Reviews |
Reference |
Forum |
Search
Home
| What's New |
Features |
Gallery |
Reviews |
Reference |
Forum |
Search