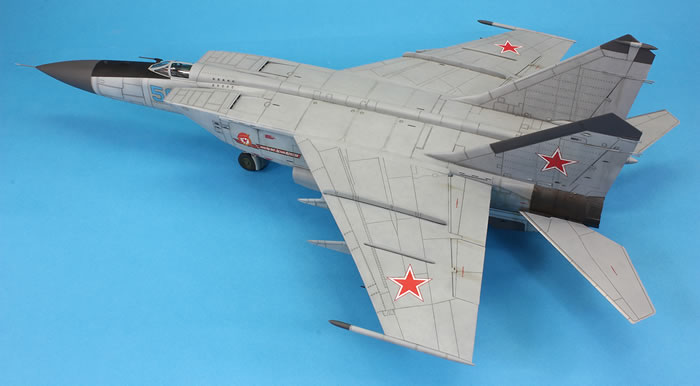
ICM's 1/48 scale
Mikoyan-Gurevich
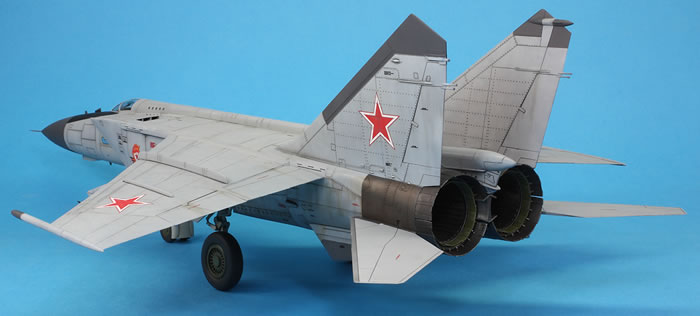
MiG-25PDS ‘Foxbat-E’
with Cold War Studio resin ventral fins
by Jon Bryon
|
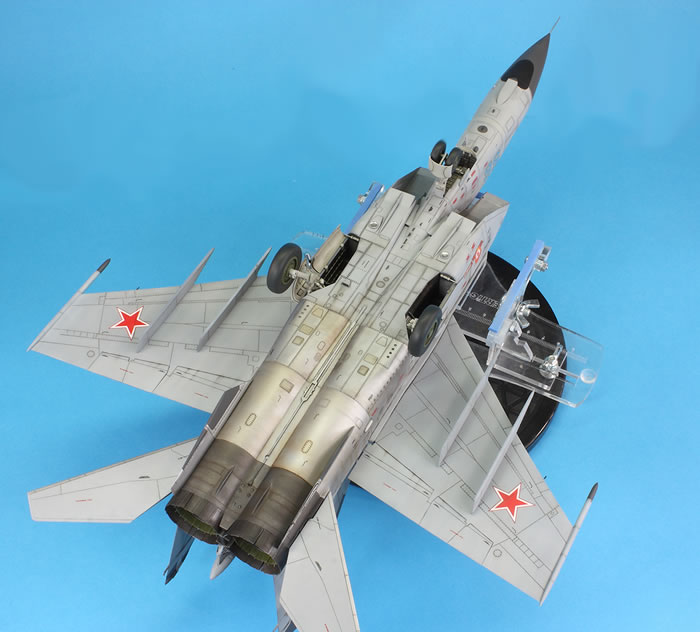
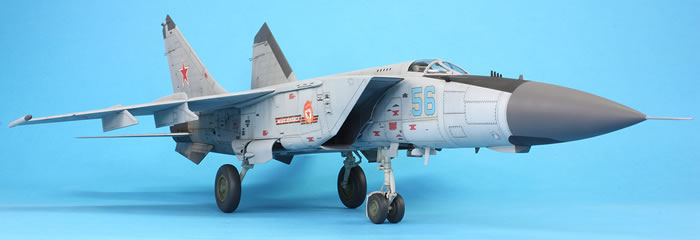
MiG-25PDS Foxbat-E
Soviet Air Force, 146 GvIAP, USSR 1989 |

Hobby Boss's 1/48 F4U-7 Corsair is available online from Squadron.com
At the end of my series of building MiG models, I noted that no one had yet made decent kits of the MiG-25 and MiG-27. The MiG-27 remains sadly neglected, but ICM have plugged one of my gaps with a really decent MiG-25 series including the variant I wished to model: the interceptor PD/PDS. After acquiring one from Dorking Models, this kit leap-frogged up my ‘to build list’ and was started in the dying hours of 2018.
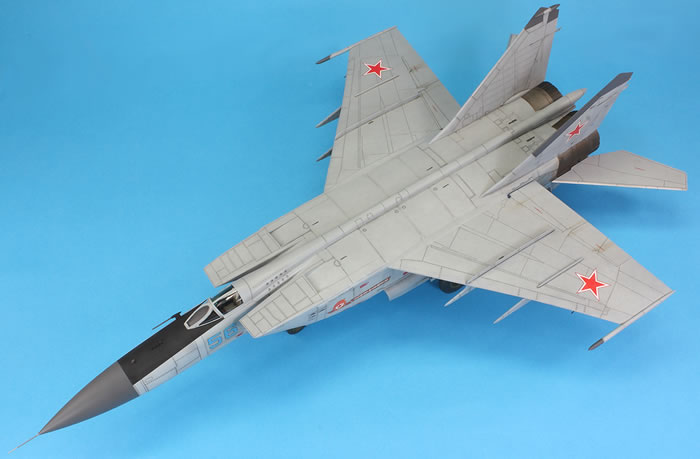
Until building this kit I had never appreciated what a great looking aeroplane the interceptor Foxbat is. The recon versions are definitely the ugly sisters, with their witch-like noses, and the PD/PDS is the Cinderella. One reason for its unappreciated lines is, I think, the lack of photos taken from any angle above the horizon.
At one point during the build I was trying to establish the paint demarcation near the engines on the upper fuselage and discovered that there are almost no photos taken of the upper surfaces of the interceptor.
ICM’s kit is a very strange affair. On the one hand, the engineering is precise and the moulding excellent. On the other hand, the parts, in general, just don’t quite fit together. This means there are gaps everywhere, but they are extremely even and precise gaps. This is typified by the main wheel halves, which fit precisely, but have an even gap all the way round their circumference. It’s also the case where the lower wings fit into the upper wings: the joint is neatly poor all the way round. This may not afflict the non-interceptor versions as the wings are different. The joint does not lie on a panel line and needs to be removed in its entirety.
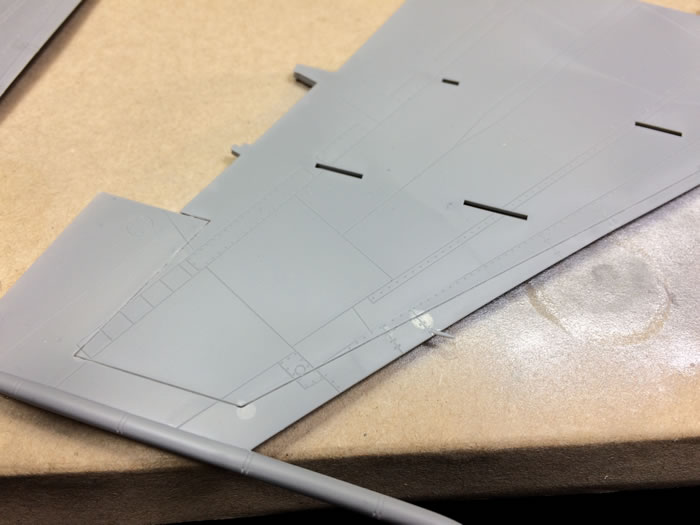
That joint needs eliminating!
Other major components need their locating tabs to be substantially thinned before a decent fit could be obtained. This is particularly true when joining the nose halves to the front fuselage halves and the rear tail fins with their integrally moulded rear fuselage sides.
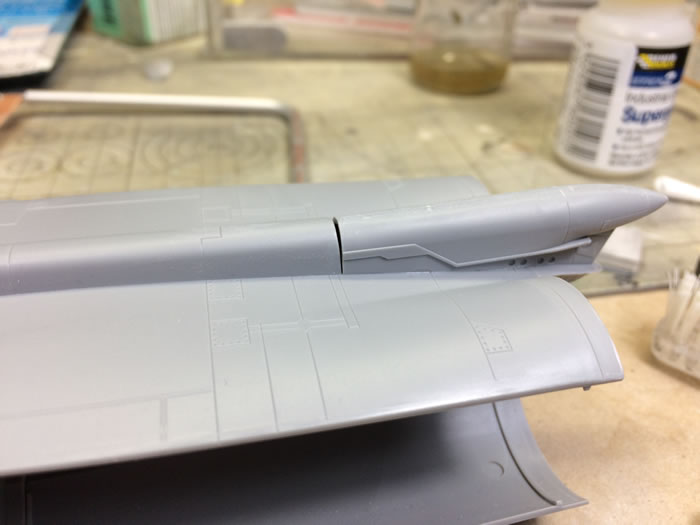
The main fuselage is made up as a box with a separate bottom, sides and top, rather like Revell’s 1/48 Tornado (although somewhat better moulded and with a better fit). The front fuselage joins to this box. If you follow the instructions this will not work. ICM would have you attach the forward bulkhead (part F11) to the rear of the front fuselage. This will not then fit with the main lower fuselage as intended in the instructions. I tried to solve this by joining F11 to A14 before attaching the front fuselage, but this just gave me other problems fitting the intake trunking in. In short, dry fit everything and look many steps ahead before committing to glue. Were I to build another, I would cut the front lip off part A14 and otherwise follow the instructions. As it was, I was left with a big gap on the upper surfaces where the front and main fuselages joined that needed to be eliminated with copious amounts of superglue.
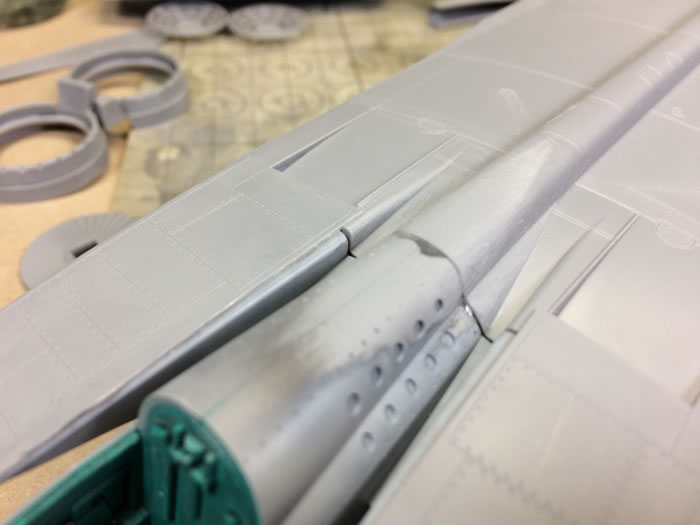
The gap on the spine has been dealt with but those on the intakes still await CA as a filler
The intakes themselves offer full trunking, but are too short. Given that I’ve just built three Hasegawa Phantoms with no trunking at all, I couldn’t care less and used the kit parts as provided.
The other part which is a challenging fit is the rear fuselage spine with parachute housing. I was left with a huge gap that needed more CA used as a filler.
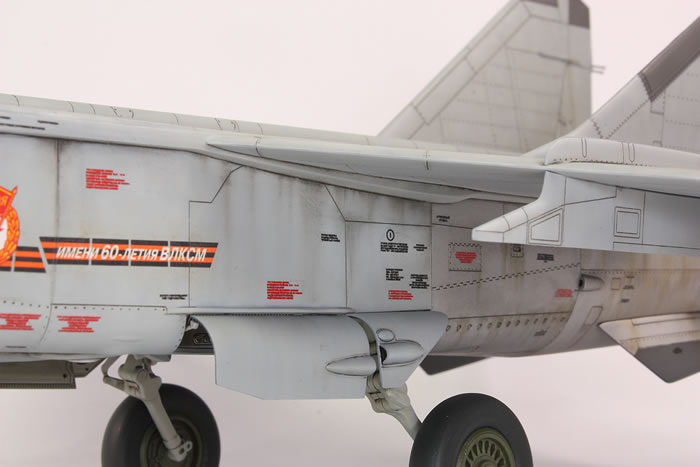
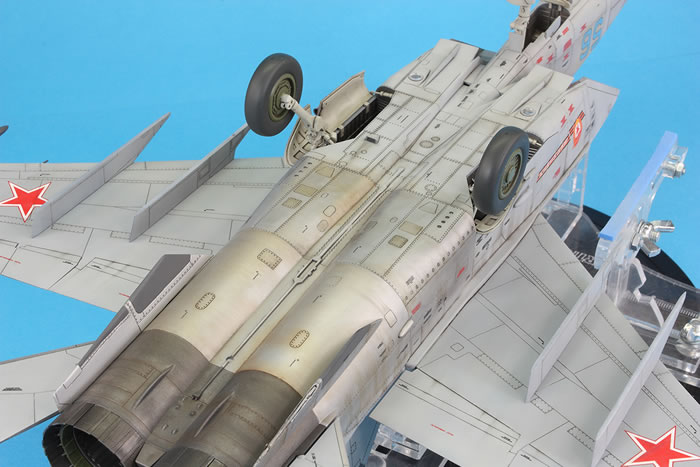
The only inaccuracy I decided to address was the rear ventral fins. The port fin should, apparently, have a sort of bumper in it. To be honest, I couldn’t really see this in any photos, but I ordered a correction set from Cold War Studio anyway. I removed the moulded fins and prepped the resin parts. The resin casting is not great and the surfaces are a little rough. Fitting the new resin fins in place was challenging. In retrospect I would consider this a correction not worth making and I think the model would have just looked better with the kit fins in place.
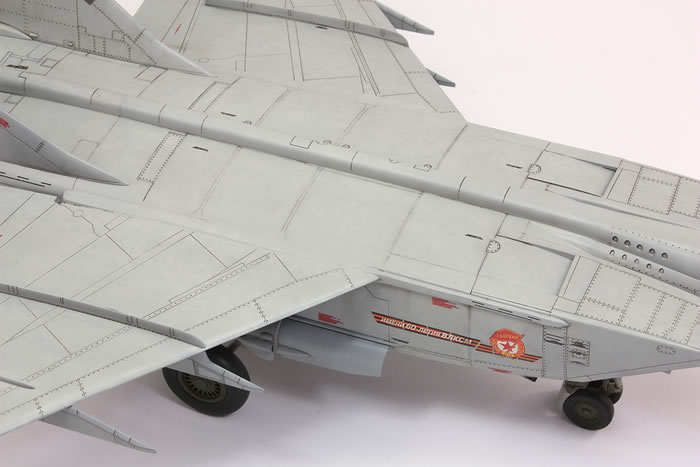
ICM provide a large external fuel tank for the centreline. I believe this was never used by the interceptor Foxbats. Unfortunately, ICM have moulded in the three locating holes on the lower fuselage, which are large and straddle some intricate surface detail. I plugged them…well, I plugged two of them. It wasn’t until decalling that I realised there was a third hole that I had not noticed! This remains unplugged…
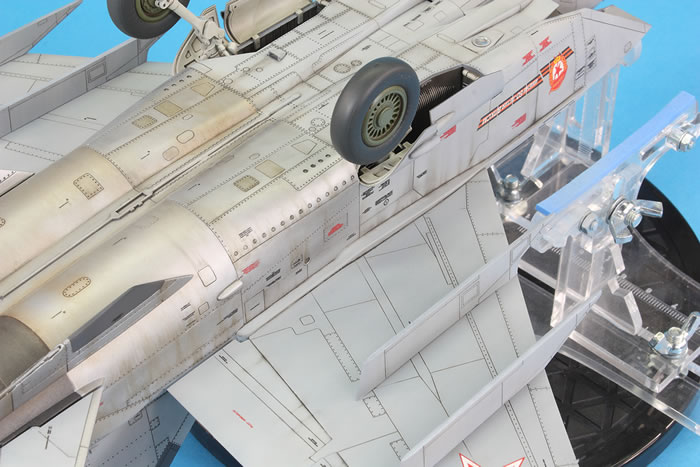
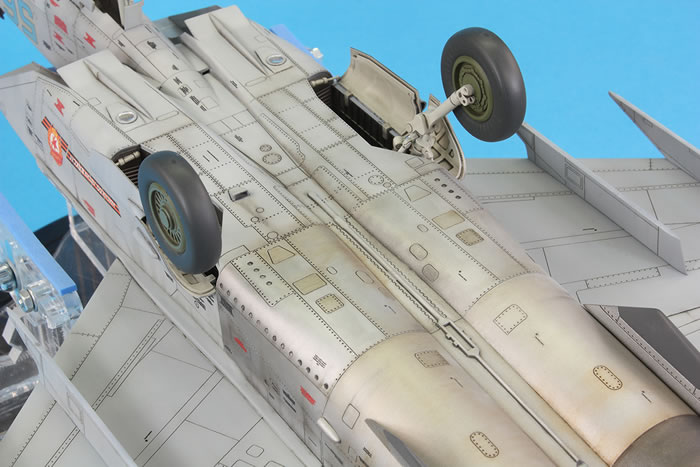
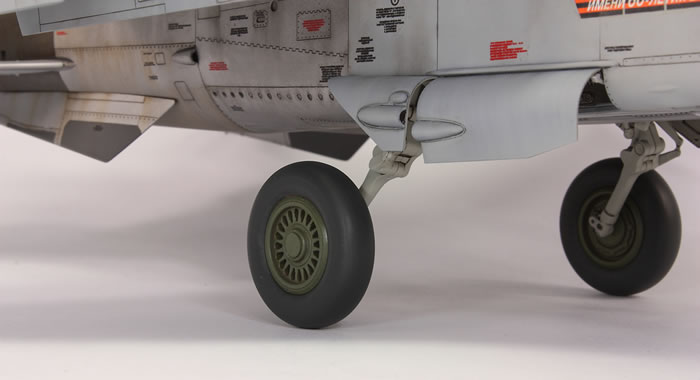
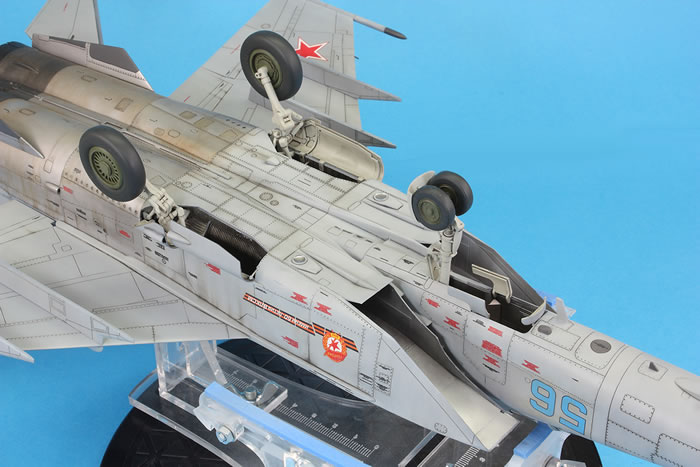
ICM would have you fit the landing gear very early on in the construction sequence. Don’t do this. The nose gear fits perfectly at the end, and is very well engineered. The main landing gear is more complex. I built it in place, but did not glue it in the well, and then removed each unit. They can be added at the end, with some difficulty, as long as the fuselage sides remain unglued to the main gear wells. Similarly, I did not attach the little retraction struts for the main gear doors and added them at the end, although they do not meet with the doors as they should.
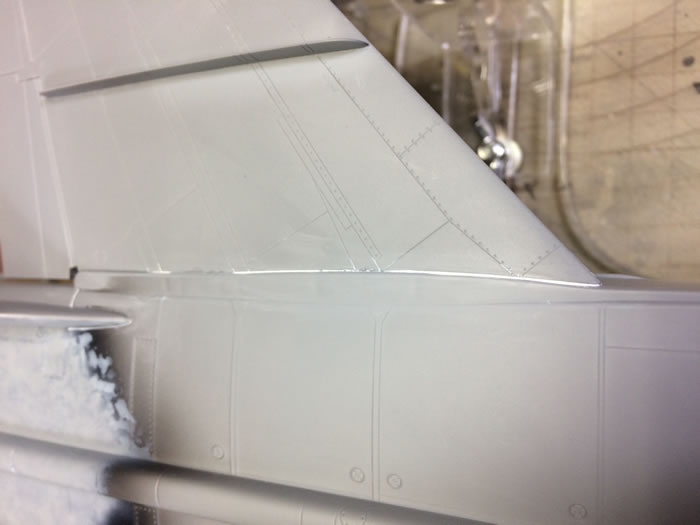
Milliput fills the gap.
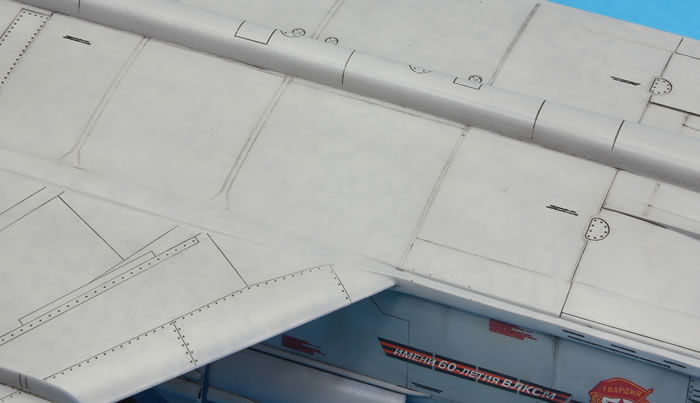
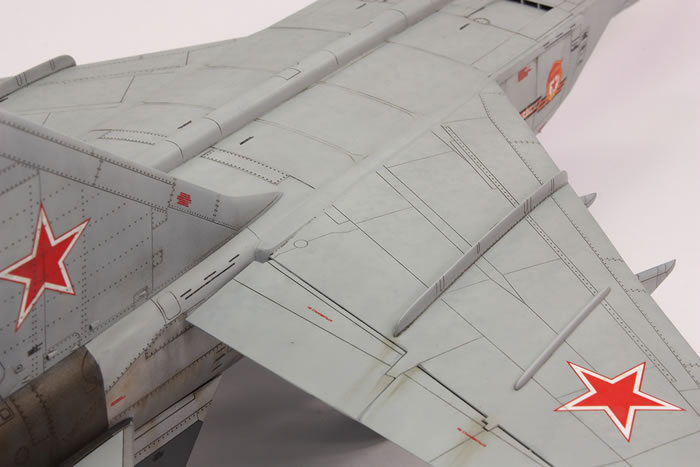
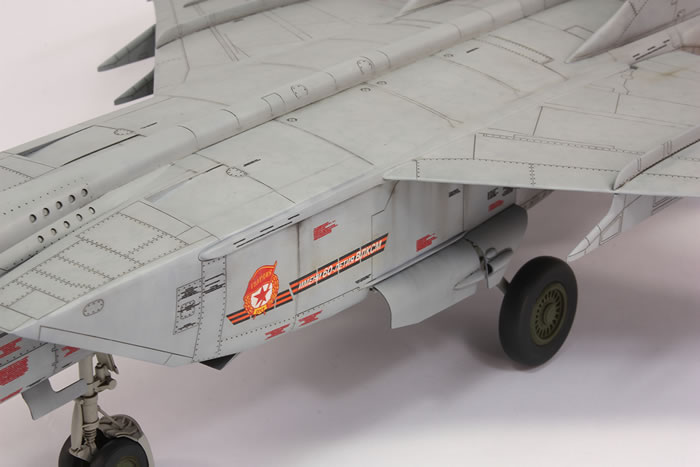
As with many other parts, the wings join to the main fuselage precisely, but with a significant gap. I used Milliput to fill this to try and minimise damage to the surrounding surface detail.
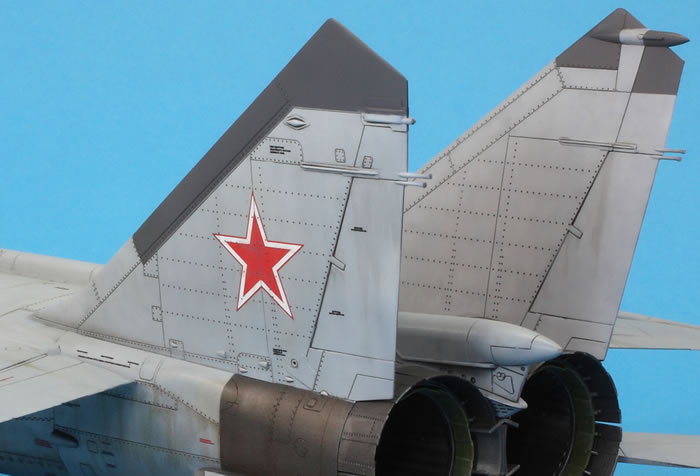
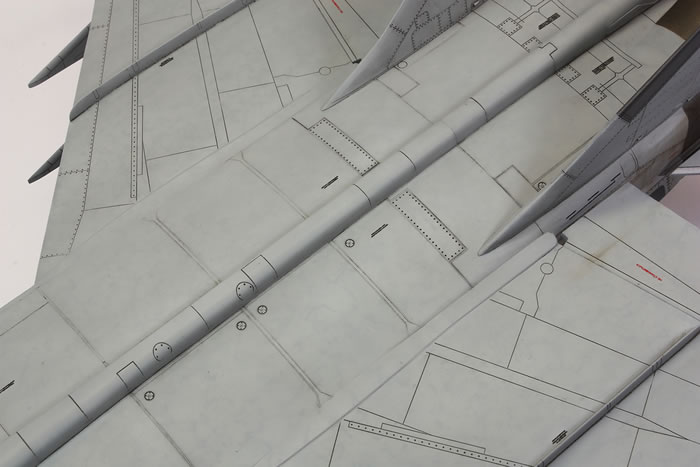
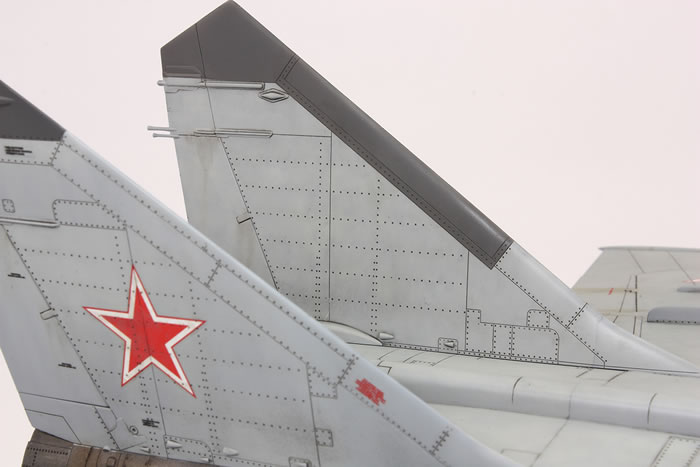
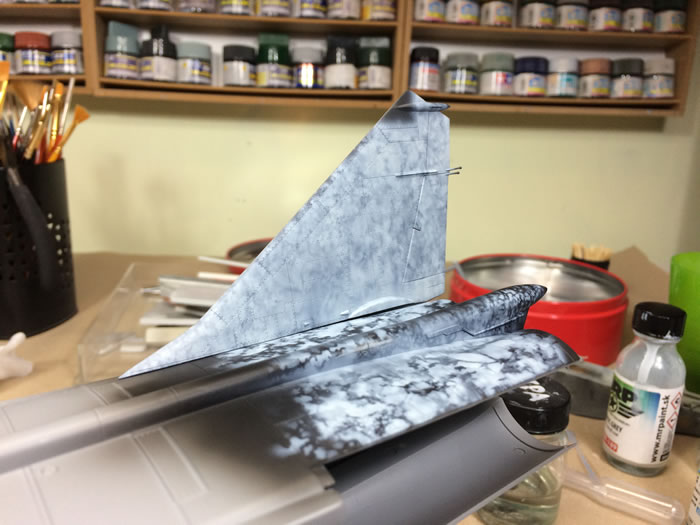
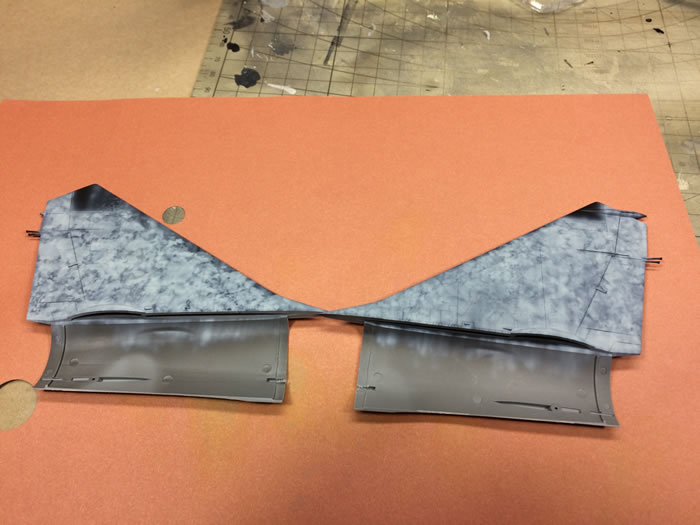
The MiG-25 airframe has quite a few perpendicular surfaces, especially around the tail area. When painting with lacquers, this can be problematic as air turbulence where the surfaces meet can often cause a gritty paint finish. There are various ways to combat this, and I’m not particularly adept at any of them, so for the first time since 1992 I decided to paint some parts before construction. I essentially painted a few of the areas that would be very hard to reach properly later on, such as between the tails and between the air intakes and the front fuselage, and finished them to the point where they would be ready for decalling and weathering. I masked them off once construction was complete and the rest of the airframe was painted. This worked surprisingly well:
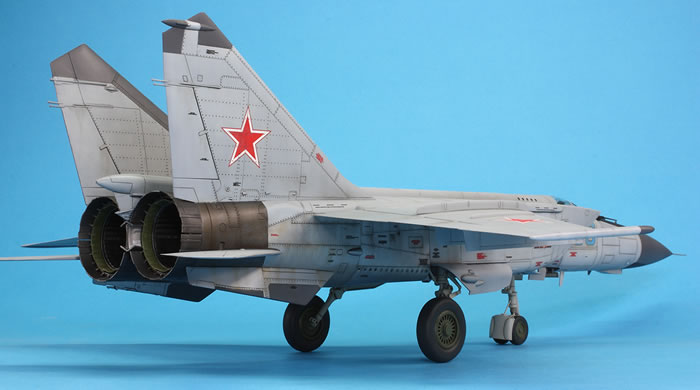
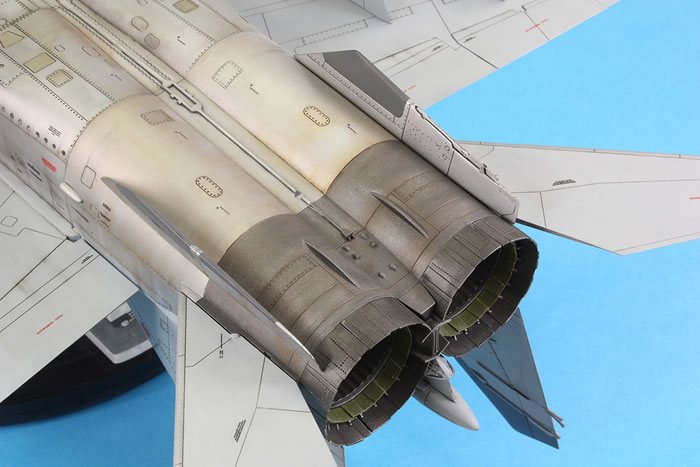
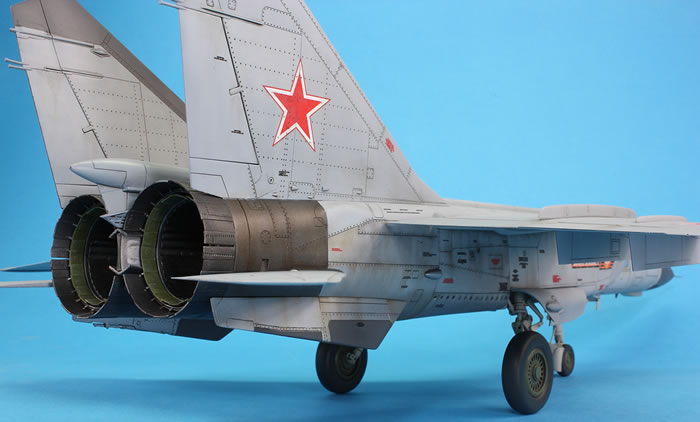
The engines are quite nice, although there are ejector pin marks on the inner surfaces that really should be removed; I was too lazy. I made a mistake and decided to leave the exhaust petals separate until the end of the build after painting. I could not get them to fit at all well and there are some very ugly gaps between the petals on the finished model.
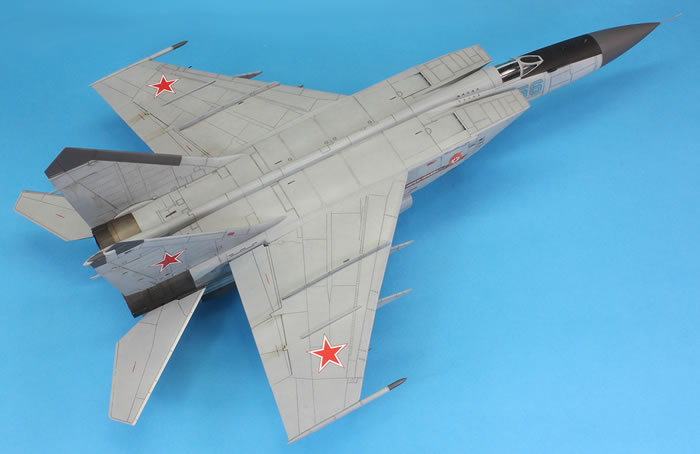
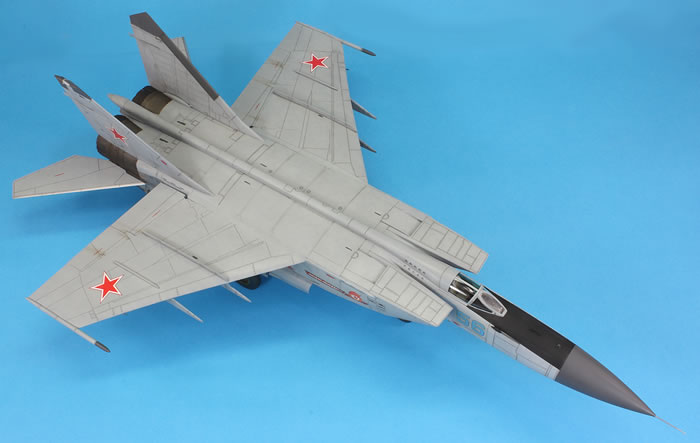
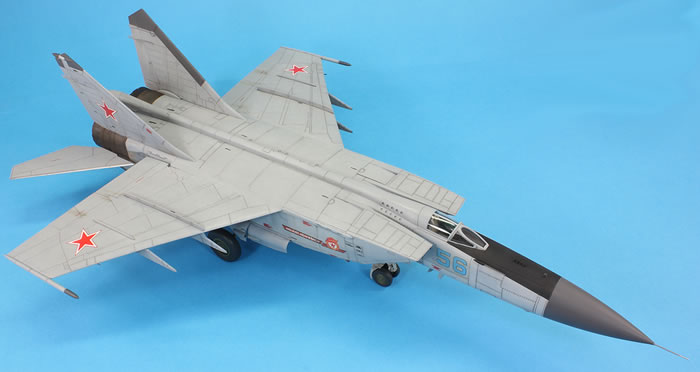
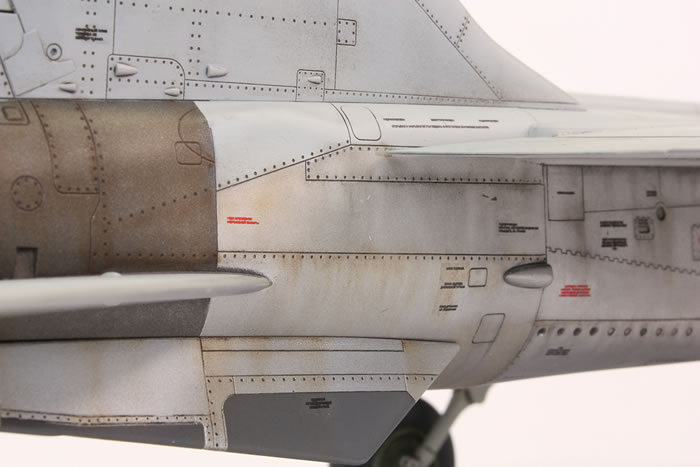
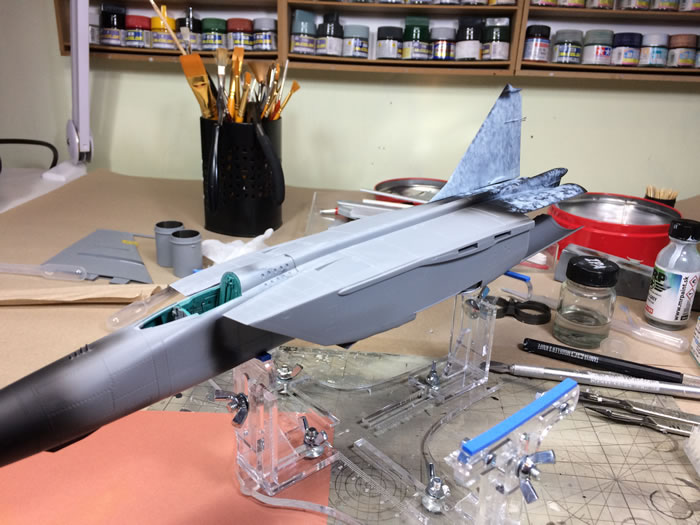
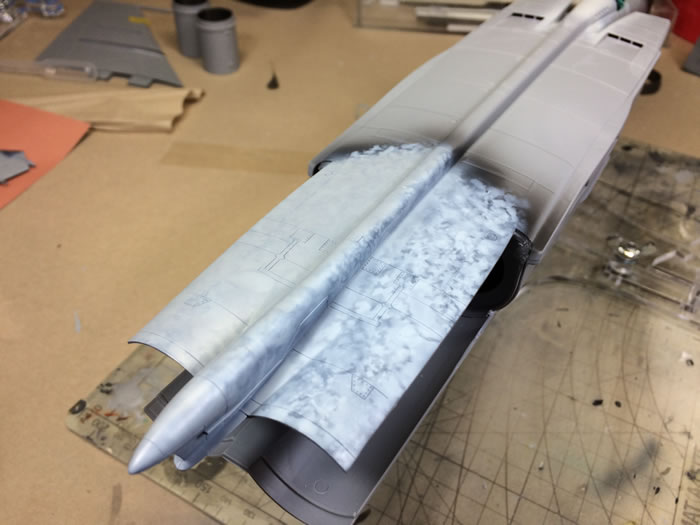
In relatively short order I had the airframe ready for painting. I decided to use black-basing to try and get some depth and variation in the monotone grey finish. I used Mr Finishing Surfacer 1500 Black for the primer and then MRP Traffic Grey for the marble coat. In reality, I did not marble the upper surfaces, but used some Artool airbrushing stencils. I used these in multiple layers and orientations to end up with a densely mottled surface. I also thinned the MRP paint and added some Mr Mild Retarder to get more variation in opacity for the marble coat and better spraying characteristics through the 0.18mm needle in my Custom Micron.
When using this MRP paint for my MiG-31, I commented that I did not like the shade much and thought it too cold and pale. In order to warm it up a bit, the blend coat over the marble coat was Akan’s interpretation of the same colour, which is far warmer and a bit darker. I sprayed this on very thin and liked the overall effect. The tonal variation in the grey is subtle, and does not photograph well, but was worth the many, many hours it took to fully paint the upper surfaces.
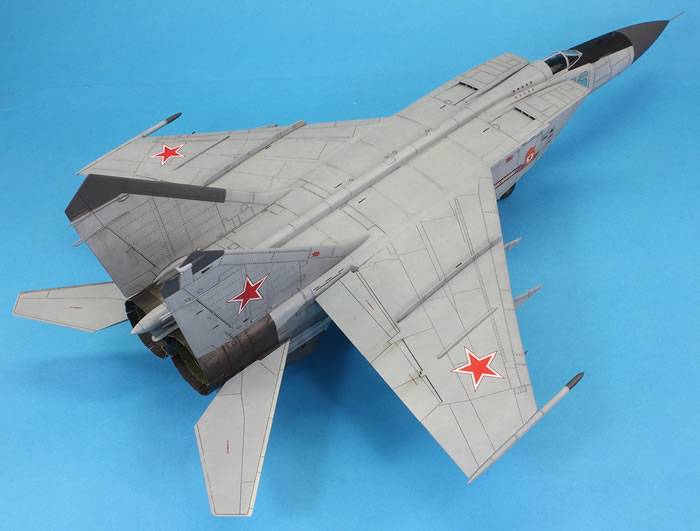
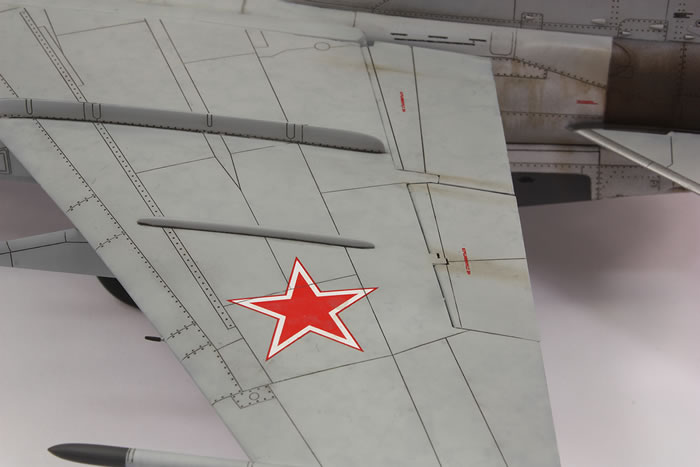
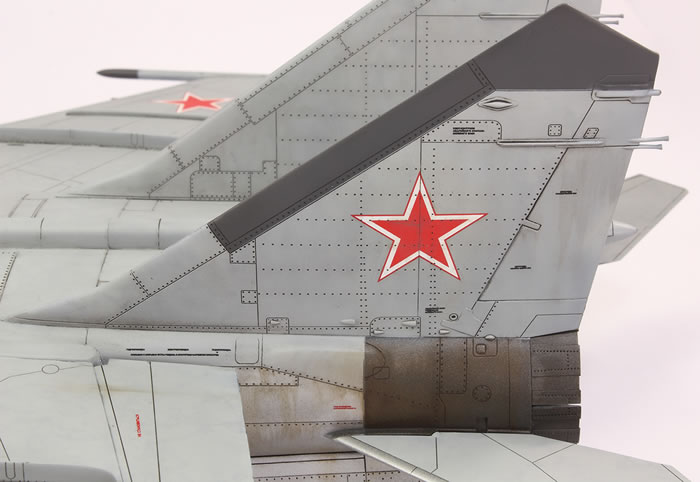
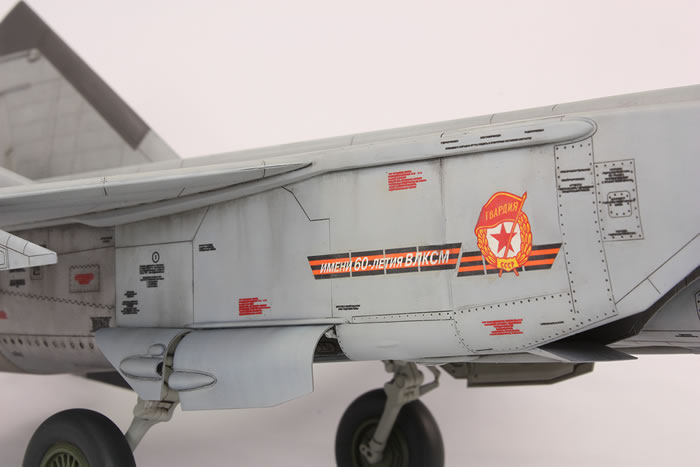
The MiG-25 is pretty huge, and so for the undersides I used a far looser and quicker marble coat, and on the fuselage sides and tail fins applied it with a vertical grain to replicate the streaking commonly seen on these aircraft.
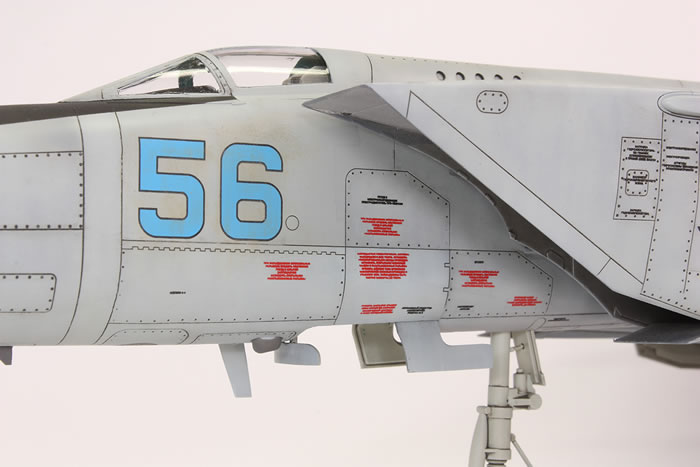
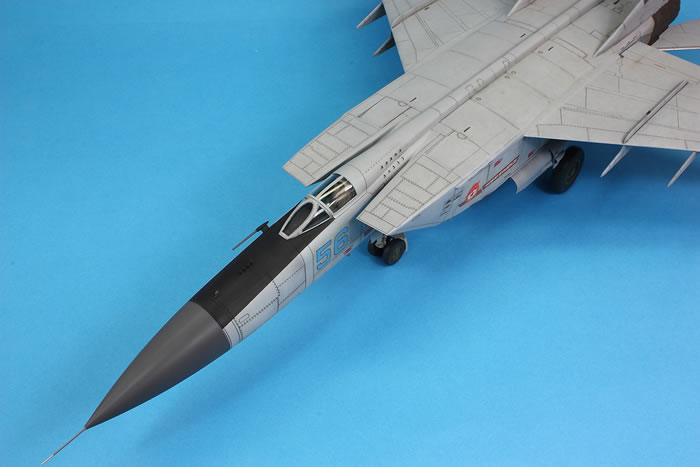
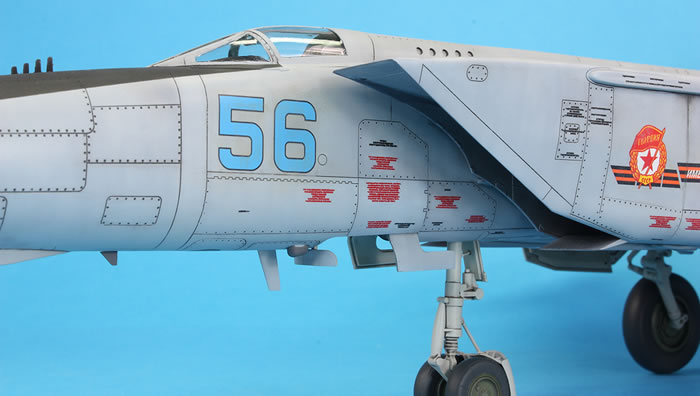
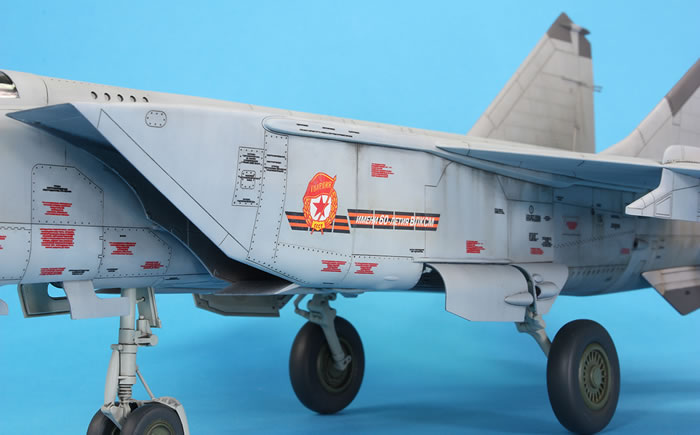
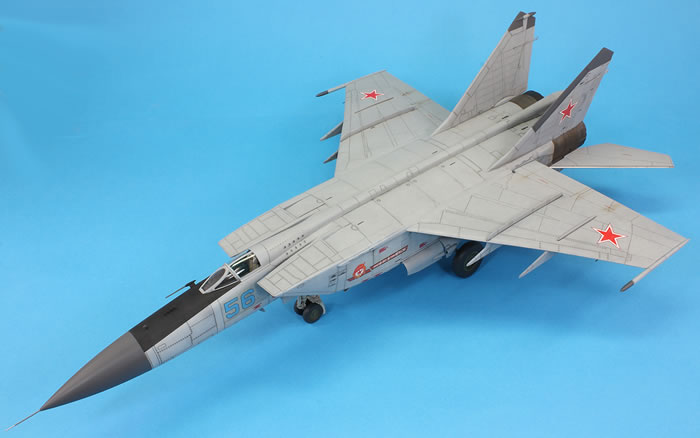
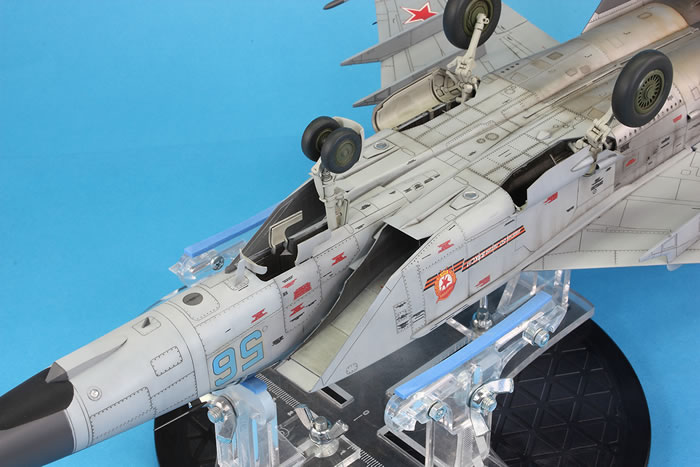
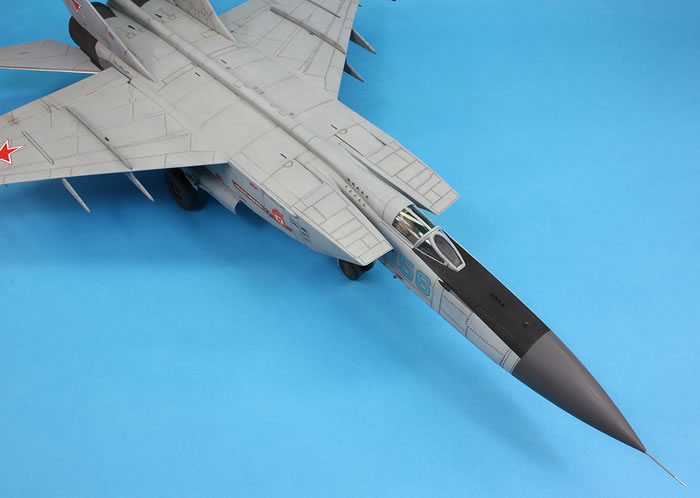
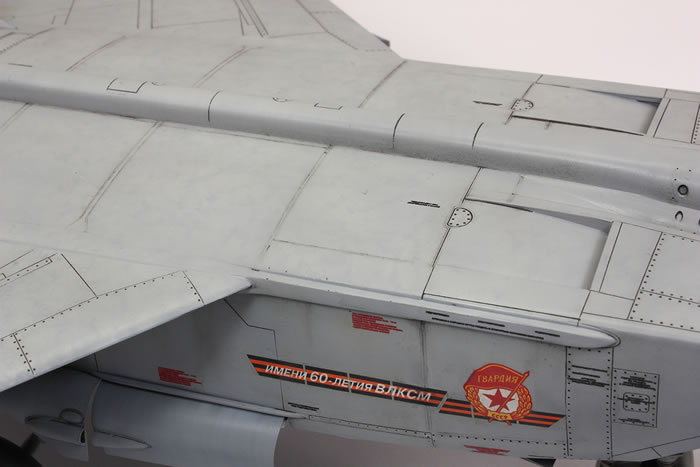
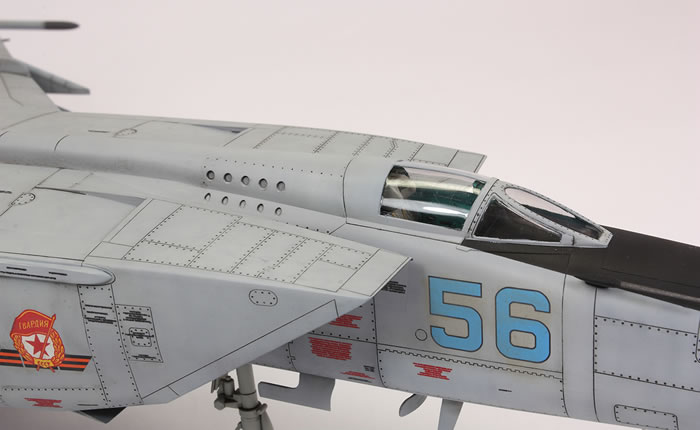
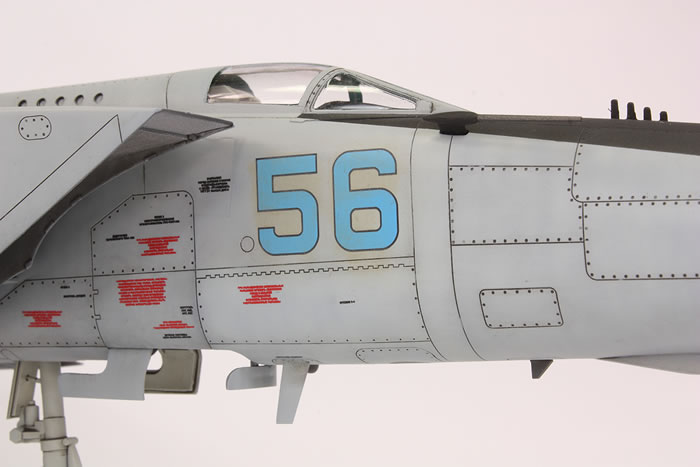
Eventually the grey was done and the darker grey dialectric panels were painted in Akan radio transparent grey and the anti-glare panels with Mr Color 33 Matt Black. Many MiG-25s have very sloppily painted anti-glare panels, with fuzzy and crooked demarcations. I could not find a photo of Blue 56 which I was modelling, but other contemporary aircraft from the same unit showed neat paint application in this area, and so I followed suit.
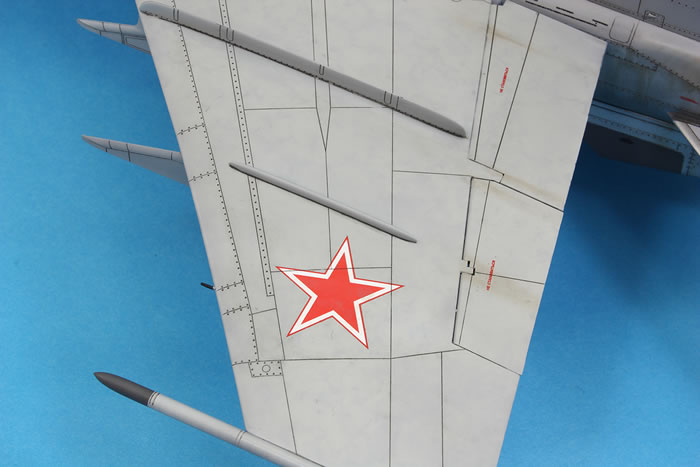
I used one of the kit decal options for a Soviet Foxbat from 1989, and they went down fine over a coat of Gunze GX100 gloss varnish. Once applied I went to work with various oils, using a dark grey for a panel line wash and other shades for streaking and staining of various parts of the airframe. Some of the streaks were also formed using AK Interactive Streaking Grime. I don’t particularly enjoy the weathering stage – I become impatient to finish the kit by this point – but I was pleased enough with some of the effects and sealed it all in under a coat of Gunze GX113 matt varnish. It was whilst applying the wash that I realised ICM have not completely moulded the surface detail along the fuselage spine and that some of it fades away to nothing. In a couple of other areas the surface detail is a little incomplete, with a few panel lines that prematurely terminate.
Fitting all the bits and pieces at the end was a mixed bag. There are some highlights: the undercarriage doors were possibly the easiest I’ve ever had to fit, and the clear lenses fitted into their recesses beautifully. The canopy, which I had attached before painting, was a perfect fit, and the the pitot by the windscreen slots into place with wonderful precision. I replaced the nose pitot with one constructed from Albion Alloys brass tubing and faired into the nose with super glue. The wing pylons fitted nice and positively.
There are also low points: the (comically huge) main wheels have an atrocious fit to the main undercarriage legs. For some reason, ICM have used a conical peg instead of a cylindrical peg, which means the wheel has almost nothing to attach to and just flops around at any old angle. I had to use my Vertigo Miniatures jig to hold the wheels vertical and square whilst the epoxy cement set. It took ages to line up, was unbelievably fiddly, and I’ve no idea what the intention behind this engineering innovation was. The nose wheels, by contrast, were a secure and accurate fit.
I am not sure what I think about this kit. I think I really like it, despite the gaps and odd engineering choices in places. It engaged me, I thoroughly enjoyed building it and if life were not so short I would not hesitate to acquire and build one of the recon versions. As it is though, life is too short and there are plenty of other kits waiting in the loft.
But can we please have a half-decent MiG-27?
For more modelling articles like this, please visit my website www.jonbryon.com
Text and Images Copyright ©
2019 by Jon Bryon
Page Created 26 April, 2019
Last Updated
26 April, 2019
Back to
HyperScale Main Page

|
 Home
| What's New |
Features |
Gallery |
Reviews |
Reference |
Forum |
Search
Home
| What's New |
Features |
Gallery |
Reviews |
Reference |
Forum |
Search