Hasegawa 1/72 scale conversion
General Dynamics F-111B
by Bill Gilman
|
|
General Dynamics F-111B |

Tamiya's 1/32 scale P-51D Mustang is available online from Squadron.com for just $146.99!
Finally, I have an F-111B in my collection!
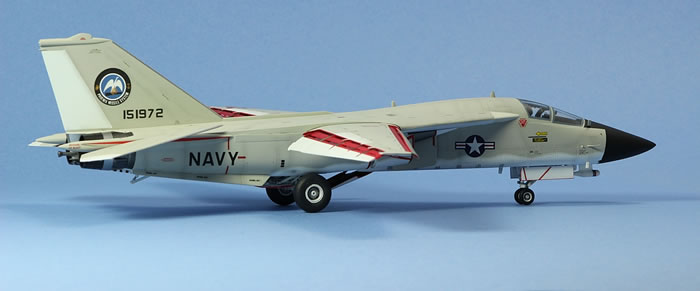
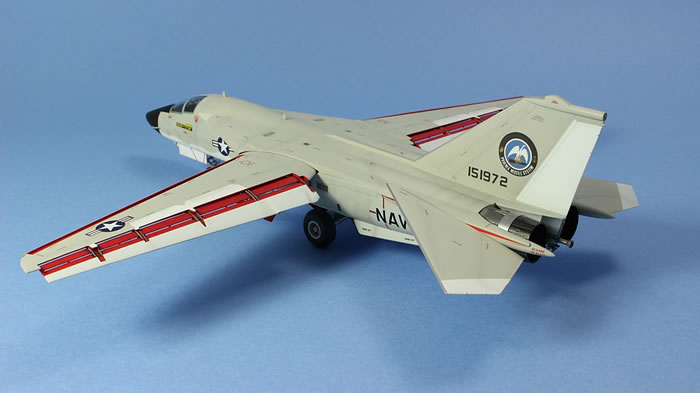
This is a conversion of the 1:72 Hasegawa F-111C/G kit with quite a few modifications necessary to represent F-111B BuNo 151972 as she appeared during Phoenix missile testing at Hughes Aircraft. As I'm sure most are aware, the F-111B was an attempt to develop a version of the USAF F-111 "TFX" to meet the US Navy's fleet defense requirement. If you don't know the story, I suggest you start with the Tailhook Topics blog, maintained by Tommy Thomason. Tommy literally wrote the book on the F-111B, which I kept under my pillow during the build. He was a tremendous help during this project. Thanks Tommy!
Only seven F-111Bs were built, and they differed from each other in many ways. The subject of my model also differed significantly from the Australian F-111C on which I based the conversion. Nevertheless, I think this was probably the easiest way to do it.
The kit I used was the 1:72 Hasegawa F-111C/G RAAF version (kit 00952), with a variety of parts kitbashed from the old Revell F-111 TFX kit (H-208).
I also used portions of the resin F-111B conversion set from Pete's Hangar, which is unfortunately out of production, and various photoetched pieces from Eduard.
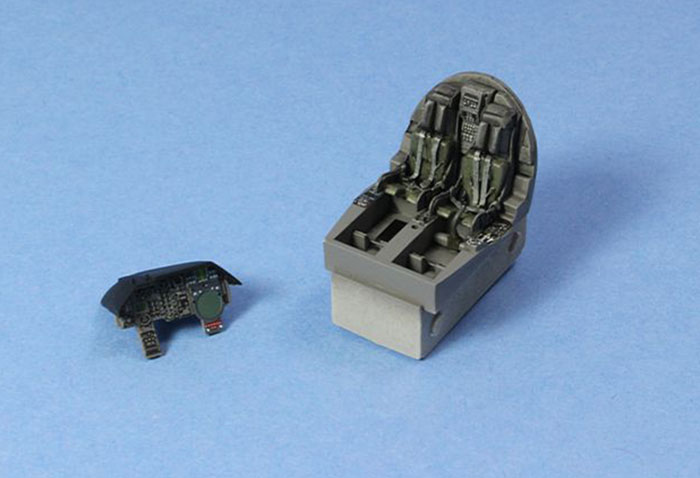
Improvements, corrections, and conversions were numerous. 151972 did not feature the ubiquitous F-111 ejection capsule, and was instead fitted with Escapac 1C-6 ejection seats. These were procured from Pavla.
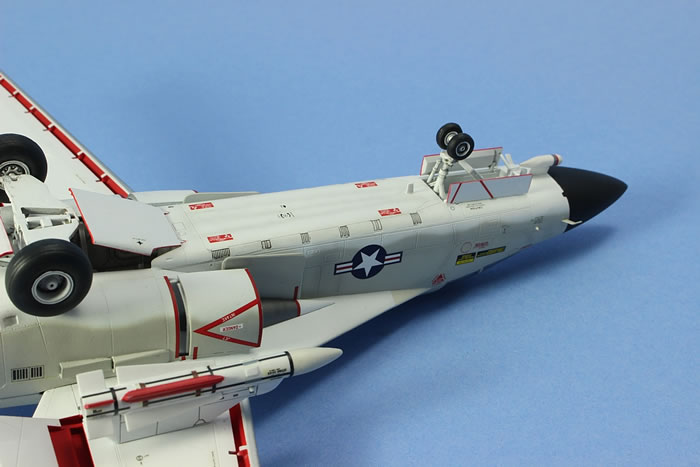
I replaced the kit nose with the resin part from Pete's Hangar, but it had to be extensively reshaped, along with the underside of the forward fuselage on the Hasegawa kit. I made templates based on published drawings to help in this reshaping. I'm satisfied with this, but I think it could be better yet.
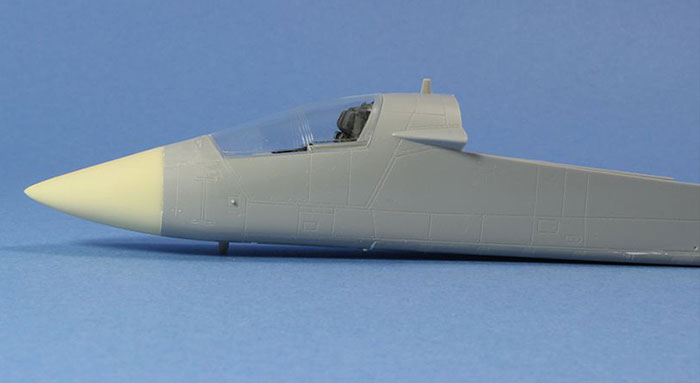
151972 had the earlier translating cowl intakes, and I had to replace the "kinked" intake ramps with straight ones made from sheet styrene. The moveable intake cowling is shown in its open position as was the case when the aircraft was on the ground. I added two vent covers, made from sheet styrene, immediately below the wing glove on each side in agreement with photos of 151972. Also in this area, 151972 did not have the rotating wing gloves as seen on later F-111 models, so I had to shorten the wing slats at their inboard edge, and reconstruct the wing area that they recess into. I filled in the triangular vents on the fuselage spine and used decals to represent the smaller vents on 151972.
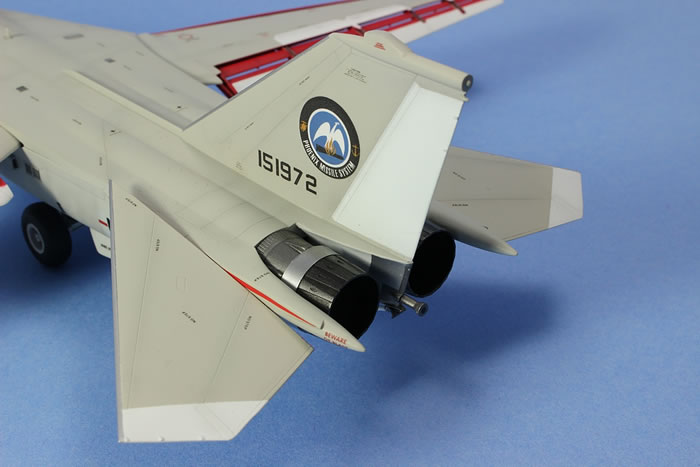
The conversion of the aft end of the fuselage benefitted from the old Revell kit. I replaced the kit's boat tail with the knife edge version from Revell, and also replaced the blunt fuselage extension fairings (where the tailplanes attach) with the pointed ones from Revell. The Revell parts matched up well with the Hasegawa fuselage.
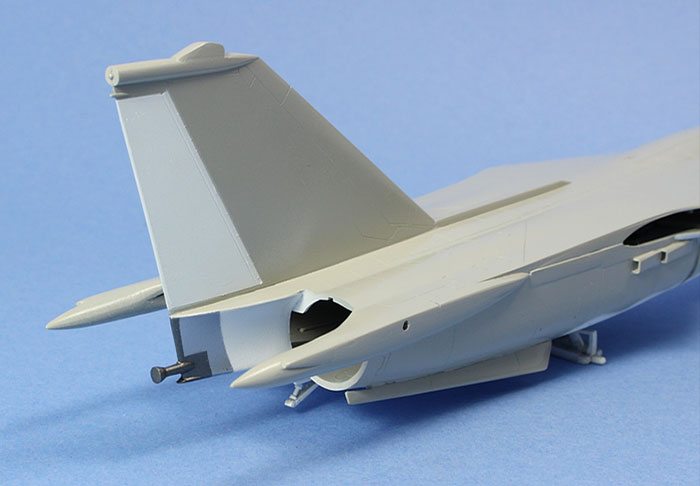
I modified the resin tail hook fairing from Pete's Hangar (it did not match photos of 151972 and may have been meant for a different F-111B prototype) and scratch built the arresting hook. Whilst on the underside, the main gear door and deployment mechanism was different than production planes, and pieces had to be modified or scratchbuilt. Luckily, 151972 was known to have used the larger main gear tyres at times, so I elected to use those from the kit.
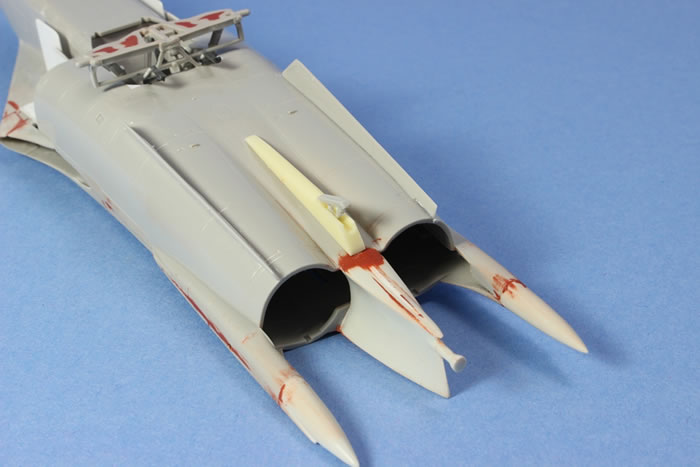
The instrument panel was scratchbuilt from sheet styrene and various pre-painted photoetch pieces. This was necessary to show the large radar screen. Seat harnesses came from Eduard. Since I was building the aircraft as it appeared during Phoenix missile testing at Hughes Aircraft, I sculpted a motion picture camera from resin and added it to the top of the vertical fin. I also added numerous telemetry antennae that were attached by Hughes. The single Phoenix missile was taken from a Hasegawa weapons set, and modified to add a rounded instead of pointed nose. The missile was painted to match photos. The single pylon was modified from an old F-18 kit.
The model was painted primarily with GSI Creos Mr. Hobby Aqueous colours. Any natural metal portions were painted with Alclad. The overall egg-shell sheen is from Floquil. Decals came from a variety of sources, including an old Microscale F-111 stencil sheet. 151972 had a special Phoenix missile testing badge on each side of the vertical tail, and I had decals for this from both Pete's Hangar and Microscale. However, neither were correct so I decided to recreate the artwork in Corel Draw and print my own decals on a Canon inkjet printer. I also made my own decals for the BuNo and various stencils.
This was a fun project, and made more satisfying by the kind assistance provided by Tommy. It wasn't a particularly difficult conversion, so I think it's a good choice for US Naval aircraft fans who would like something different in their display cases.
Model and Text Copyright ©
2019 by Bill Gilman
Page Created 24 September, 2019
Last Updated
24 September, 2019
Back to
HyperScale Main Page

|
 Home
| What's New |
Features |
Gallery |
Reviews |
Reference |
Forum |
Search
Home
| What's New |
Features |
Gallery |
Reviews |
Reference |
Forum |
Search