Airfix's 1/72 scale
British Phantom FG.1
by Jumpei Temma
 |
British Phantom FG.1 |

Airfix's 1/72 scale Junkers Ju 87 B-1 Stuka is available online from Squadron for only USD$11.99
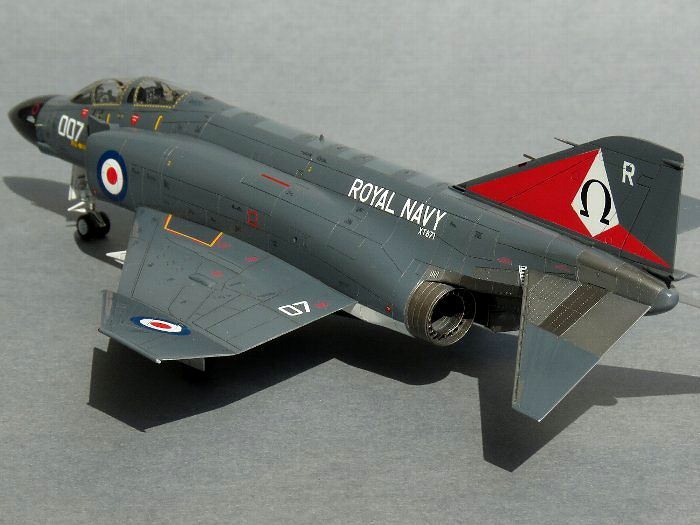
Here is my Airfix's 1/72 British Phantom FG.1. Before I started construction, I made drawings as usual. As a result of collating with my drawings, I found the kit's outline shape is highly accurate.
Unfortunately, the kit's detail parts and panel lines are not very sharp so I added some details which the kit lacks.
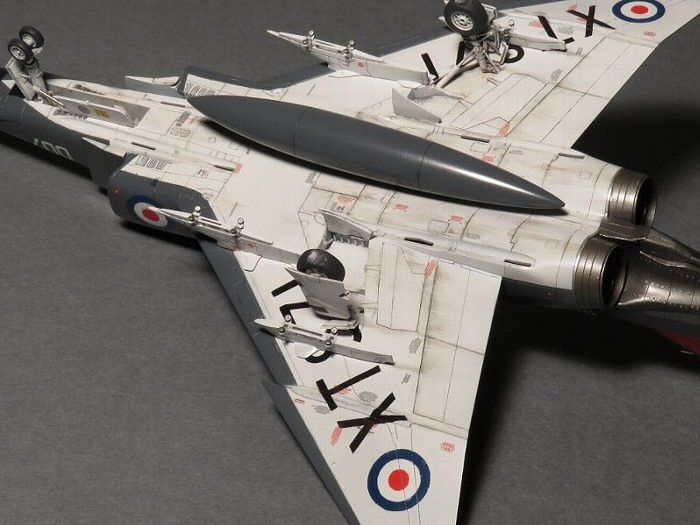
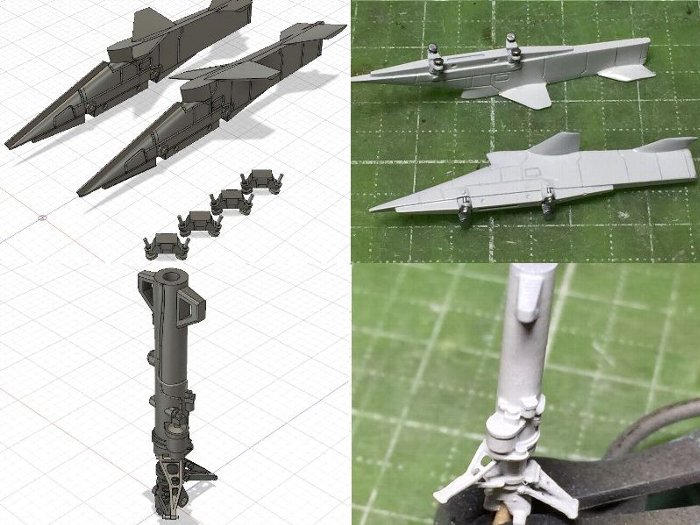
While I was building the kit, I purchased a 3D printer. The jet nozzle, air outlet slits, fuel vent, inner and outer pylon, tail hook and nose gear, were replaced with 3D CAD designed and printed parts.
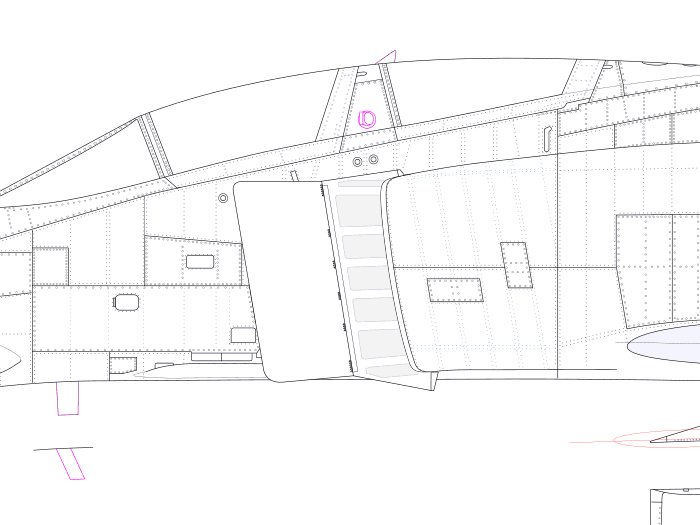
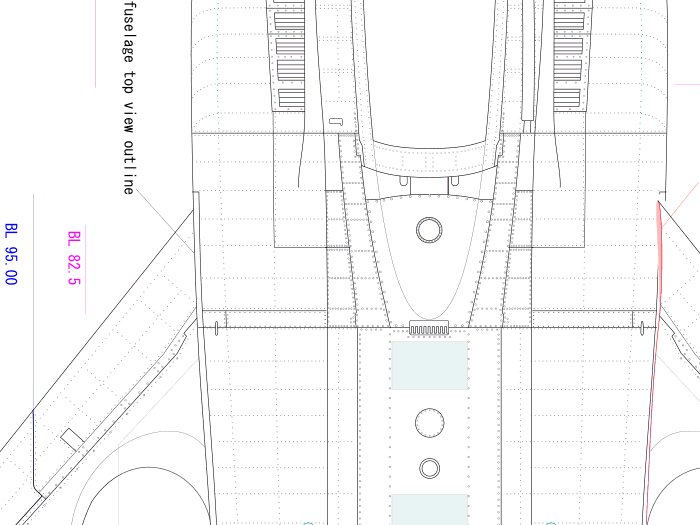
I made three view drawings of Phantom FG.1/FGR.2, F-4C, F-4E and RF-4C.
In the process of drawing, I noticed an interesting fact. Short nose and long nose windscreens are different. The short nose windscreen is longer than the long nose.
To be precise, the glass parts are basically the same, but the outlines of the fuselage are different, so the boundary lines are different.
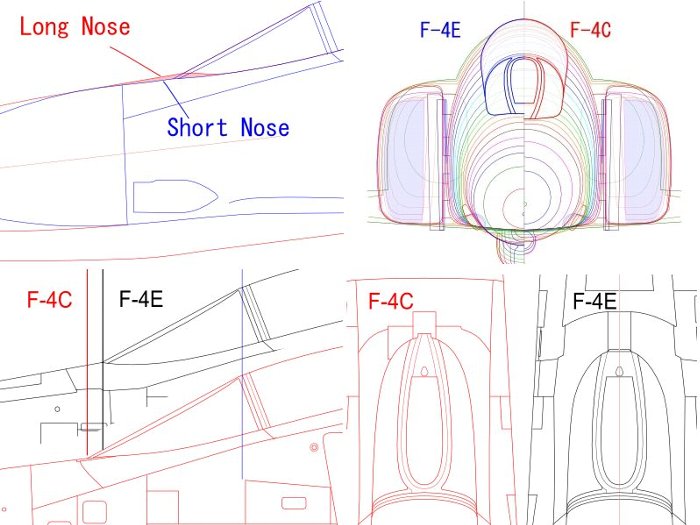
Of course, Phantom FG.1 and FGR.2 are the same as F-4C.
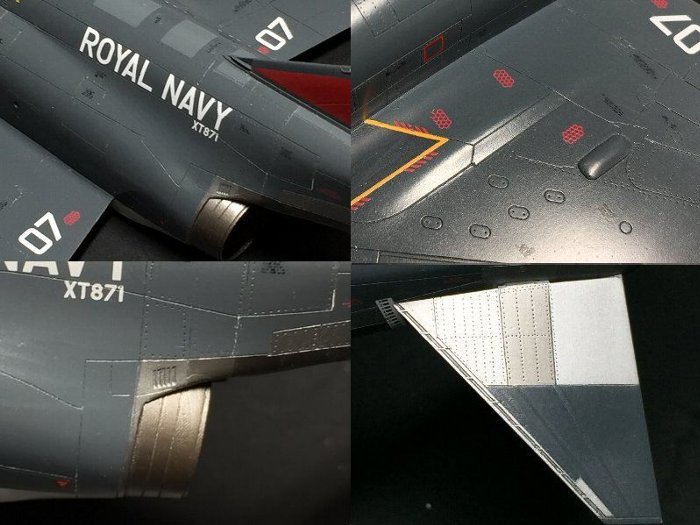
Boundary layer discharge slits are reproduced with laminated plastic plates. All panel lines were filled with CA glue and re-engraved. The outer wings were cut off because it gets in the way of sanding. And it was combined again.

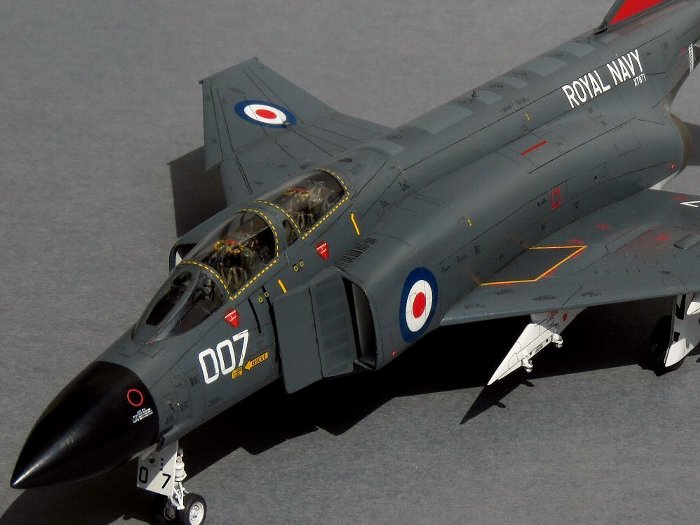
Ejection seats were replaced with Quick Boost resin parts. Frames of the canopy were sanded off, and engraved.

The jet nozzles, air outlets and fuel vent are 3D designed using the "Fusion 360". And they were printed by the LCD 3D printer "Photon".
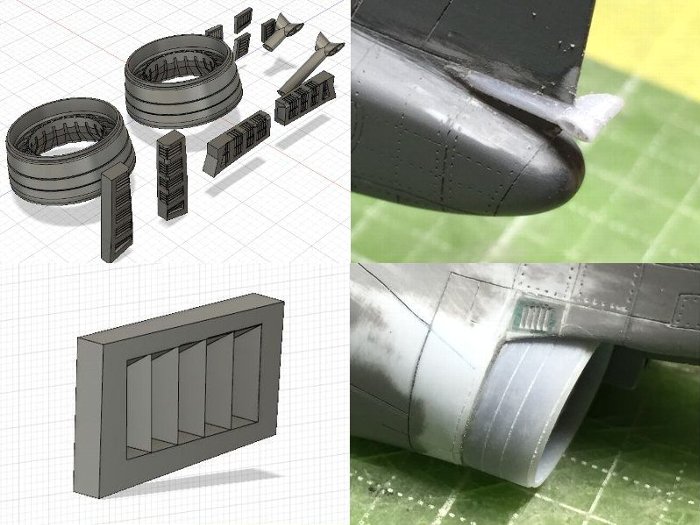
The tail hook, outer and inner pylon and nose gear leg were also 3D printed.
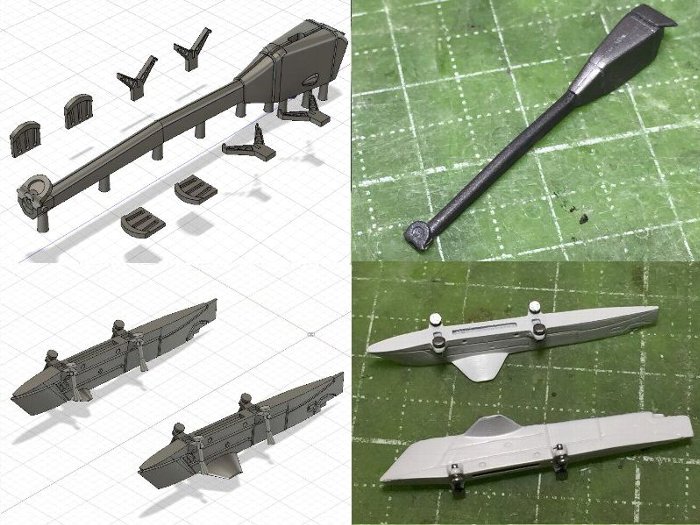
Stays of the stabilator slit were replaced by 0.14mm (.006") plastic sheet.
The tread of the tire was engraved using a rotating tool and a needle.

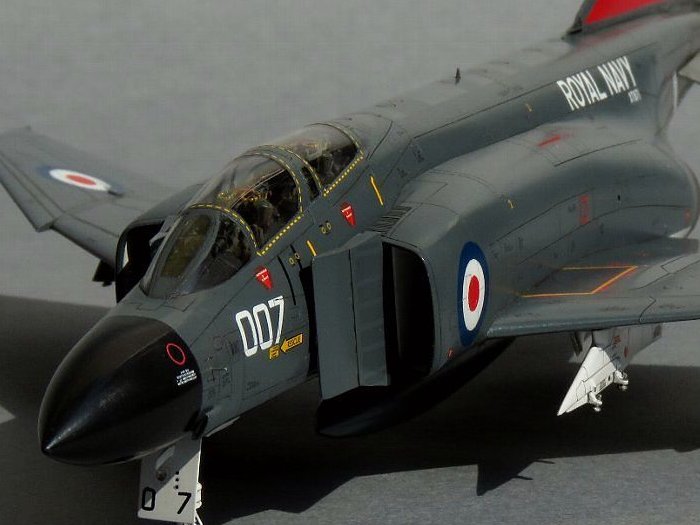
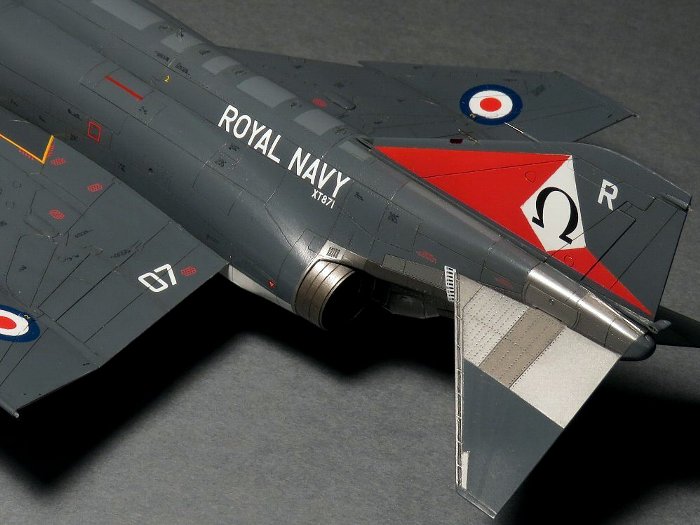
Roundels, tail fin marking and the serial number on the lower wing were all painted.
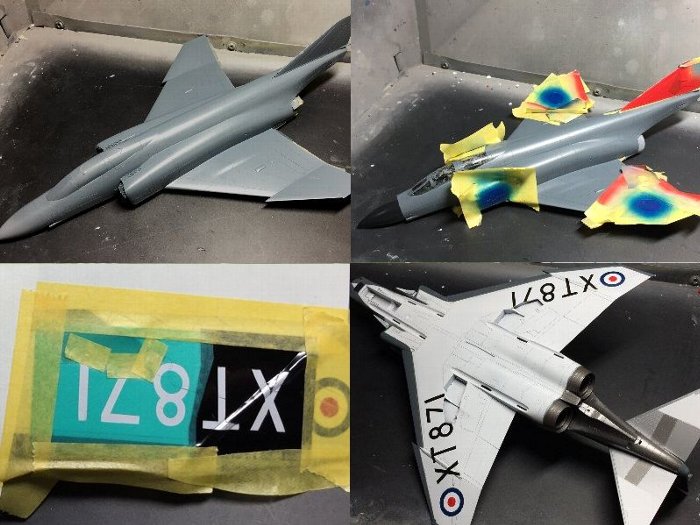
Letters of ROYAL NAVY, 007, and caution stencils were depicted with custom made dry decals.
My model was finally completed. This was my first experience of 3D printers. It helped to improve the quality of the work. I would recommend it for modelers who are not satisfied with details of existing kits. As for drawings, it took a lot of hard work, but I think I could make accurate drawings.
The further article including full size three view drawings and 3D CAD data of Fusion 360 is here.
Model, Images and Text
Copyright ©
2019 by Jumpei Temma
Page Created 3 June, 2019
Last Updated
3 June, 2019
Back to HyperScale Main Page
|
 Home
| What's New | Features | Gallery | Reviews | Reference | Resource Guides | Forum |
Home
| What's New | Features | Gallery | Reviews | Reference | Resource Guides | Forum |