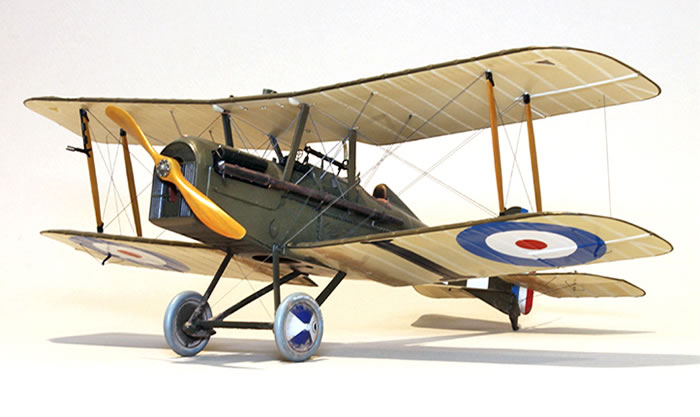
Wingnut Wings' 1/32 scale
RAF S.E.5a
by Garfield Ingram

Hobby Boss' 1/32 Spitfire Mk.Vb Trop is available online from Squadron
This is the first Wingnut Wings kit that I have built and I must say, it was like reading a good book- I couldn’t put it down. The large scale of the kit invites the builder to move into and around the model, developing the details and easing the construction. For example. The strut connections are robust, allowing the builder to be confident in the strength of the joint but have enough room to access it easily. Wingnut Wings pack a lot of detail and a number of options into the kit. There are two options for the fuselage, one with tight side fabric, the other with saggy fabric. As with all of the kits by this maker, the tolerances are extremely small and so it will be necessary to clean paint from mating surfaces in order to get it to close up. In this write-up, I will concentrate on the finish of the build.

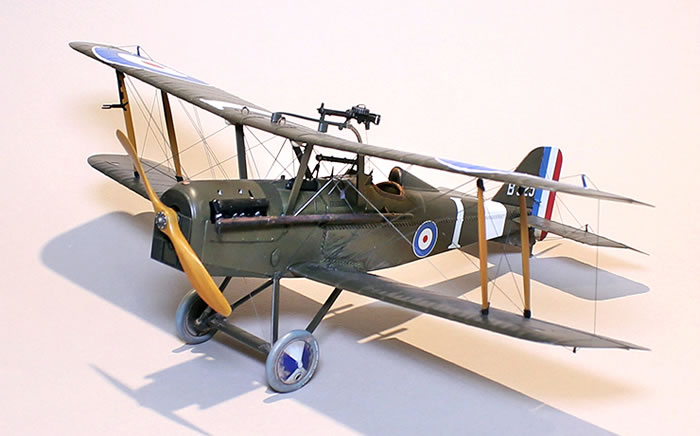
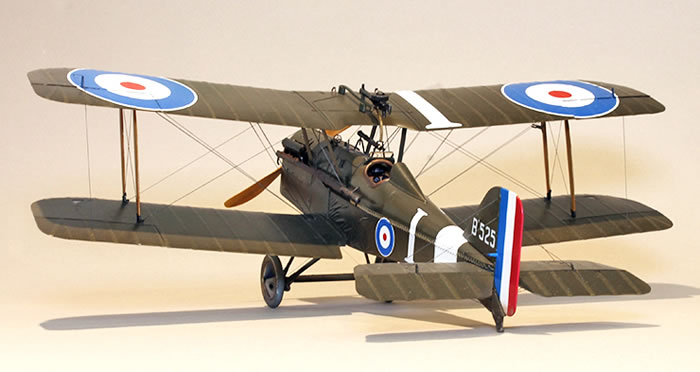
As a child, I read James McCudden’s autobiography and have always been thrilled by the exploits and achievements of 56 Squadron. This made the choice of markings a ‘no-brainer’, for me. As the kit doesn’t have 56 Squadron markings on the decal sheet, I went for ones made by Peon decals. I am hoping to do McCudden’s machine one day if Wingnut issue the Viper engine version but in the meantime, I vainly chose a machine with my family initial on it. This aircraft was flown by Lt. Rhys Davids who was known to be an aggressive, skilled fighter. Wingnut Wings operate somewhat differently than other manufacturers in that their kits go out of production and stay out for a while. They often re-appear as duel kits or special editions so if you don’t have one, be patient as it may very well re-surface.
As with most British aircraft, my model was of an aircraft finished with clear doped linen on the bottom and PC-10 on the top. I prefer to mix my own paints and did this for this model. For the CDL, I mixed up three values of a light beige. If you are not comfortable with mixing colours, Tamiya XF-55 Deck Tan works. You might just want to make a couple of versions of it by adding white. I used the very lightest value over the entire lower surfaces and then masked off the rib tapes with narrow strips of masking tape. I then used the next two values to represent the main field of fabric, spraying it chord-wise between the rib bays, some were darker, some lighter. This modulates the values across the wing, simulating subtle weathering and the bit of inconsistency of the manufactured fabric. I admit this is largely a modelling device to create interest so I keep it subtle.
The PC-10 was mixed using yellow and black with a touch of red and blue to modify the colours. I look at a multitude of colour photos on the web and use my gut to get the colour in the ball park. I mixed up three versions of this paint as well, using the different values to create some visual interest across the canvas. As on the bottom, I used the lightest value over the entire model and masked off the rib tapes. The next two values were sprayed across the wings from front to back, leaving a subtle variety of values across the wing. Once done. I removed the rib tape strips and went over the entire wing with a very thin mix of one of the darker shades. This knocked back the contrast of the tapes a bit but made them pop as well. Oil paints were used to accentuate the wrinkled sections of fabric on the side of the fuselage.

The model was gloss coated, decaled, re-sealed etc., as usual and the final finish was Floquil Flat. I love this finish as it creates a soft, semi-gloss finish that is just right to my eye for WW1 aircraft. A final note on the rigging- I like to keep it as simple as possible. You can put on fancy turnbuckles and anchors if you want but a nice clean rigging job goes a long way. I drilled out the lower wire contact points with a #80 drill bit. On the upper surfaces, I imbedded Gaspatch loops after pre-drilling the holes with a #78 drill bit. Using painted mono-filament thread, I picked up a small ball of CA on the end and embedded it into the hole. After the glue was cured. I threaded the upper end through the eyelet and pulled it taught with a pair of self-closing tweezers. I then applied a small dab of very thin CA to the loop and trimmed it when it was cured. It is essential to keep the tension on the thread until it is fully cured or you’ll end up with a sag. This stage can be very tedious but it is best to be patient, do the model over a few evenings and keep it clean. Think the process through and work from the fuselage, out to the tips.
This is a wonderful model and I hope it will be available again and if so, I’ll buy one.
Model, Images and Text Copyright ©
2019 by Garfield Ingram
Page Created 21 March, 2019
Last Updated
21 March, 2019
Back to HyperScale Main Page

|
 Home
| What's New | Features | Gallery | Reviews | Reference | Resource Guides | Forum |
Home
| What's New | Features | Gallery | Reviews | Reference | Resource Guides | Forum |