Special Hobby 1/48 scale
Fiat G.55A Centauro
with Falcon vac-formed canopy
by Jon Bryon
|
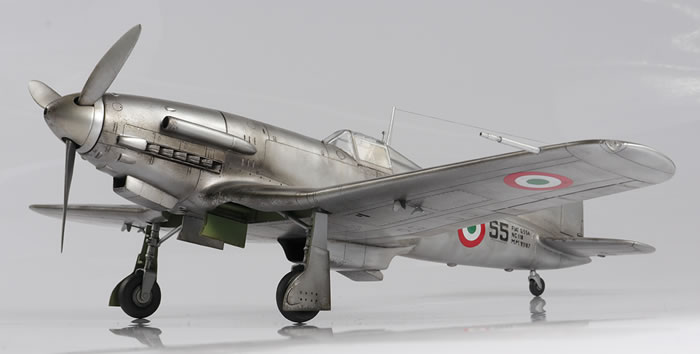
Fiat G.55
Italian Air Force, Italy, 1947 |

I tend to pepper my build schedule with single-engined prop fighters as a break between more protracted projects, so in between my quad A-4 undertaking and an upcoming Revell Catalina with a sizeable resin correction set, I settled upon Special Hobby’s Fiat G.55A as a quick palatte-cleanser.
Yeah, about that…
Special Hobby’s kit is not a bad kit, but neither is it a good one. It’s typical for a limited run production from the first decade of the century: some nice surface detail, good photo-etched parts, a couple of resin pieces and decently printed decals. That’s on the positive side. On the negative side is a ton of flash, especially on components like the landing gear and tail planes, some not-so-nice recessed detail and various pits, gouges and lumps on the surface of the plastic. The fit is similarly variable: the fuselage halves go together really well, the wings are pretty good, the tail planes and nose are more towards the ‘awful’ end of the spectrum.
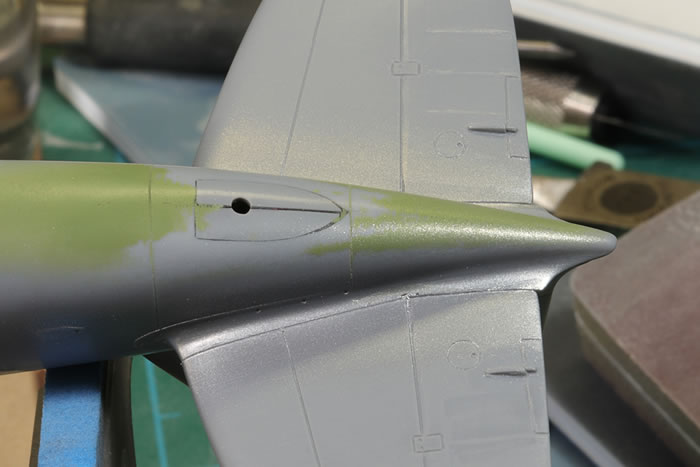
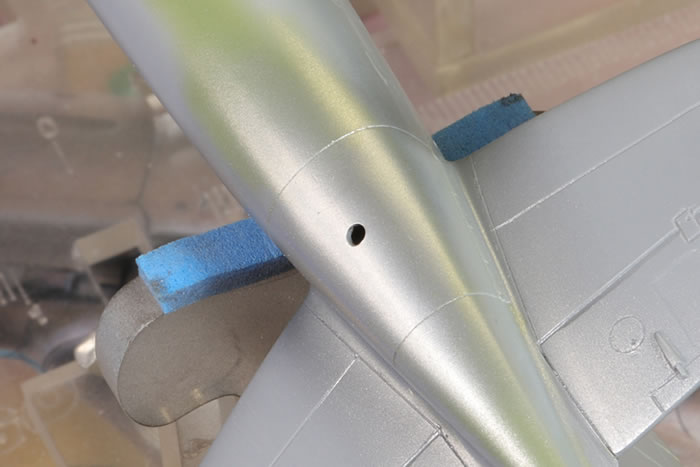
I know nothing about WWII Italian aircraft, so a quick visit to http://www.stormomagazine.com was in order. Here, from several build articles of this kit, I learned I needed to remove the bump on the fuselage behind the tail wheel and that the aerial mast is the wrong shape. From a photo of ’55’ that I found on several places on the internet, I couldn’t see most of the bumps on the cowling and so did not add these, and I also omitted the DF loop. The aerial mast was replaced by something from my spares box. There are two ‘lumps’ under the rear fuselage which, in the absence of any better pictures, I replicated with two further random items from the spares box.
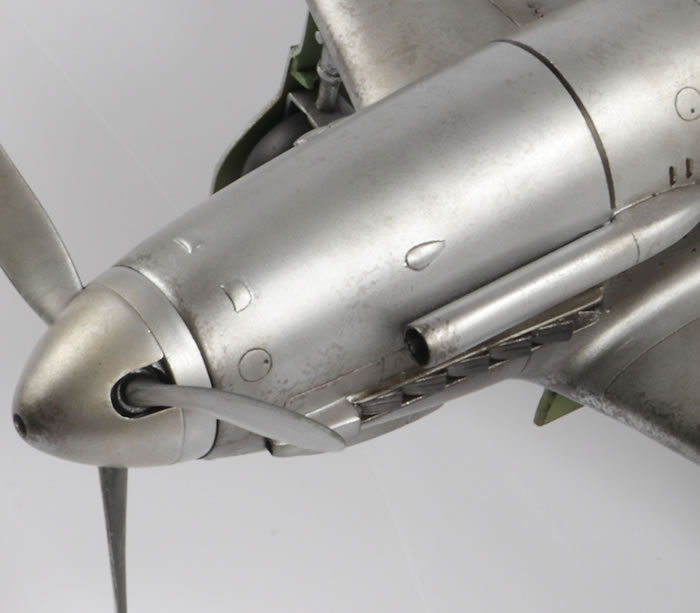
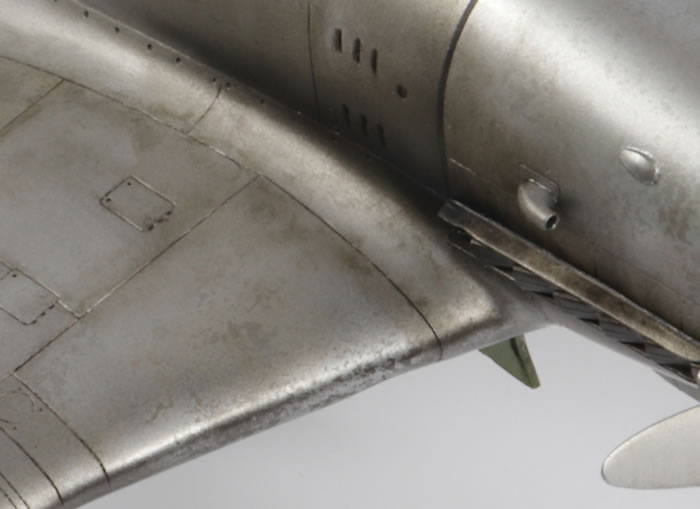
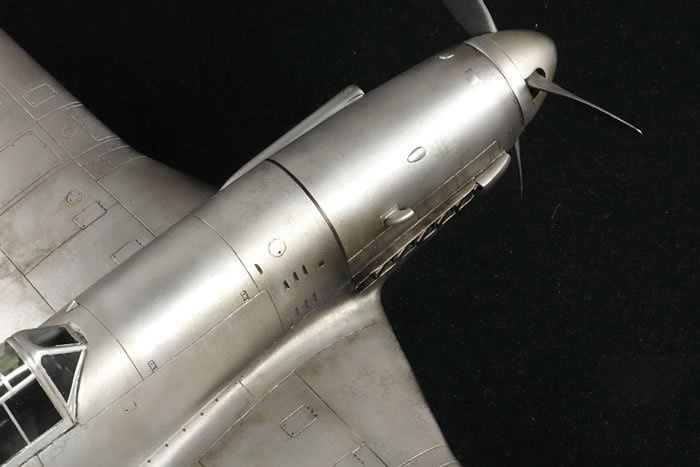
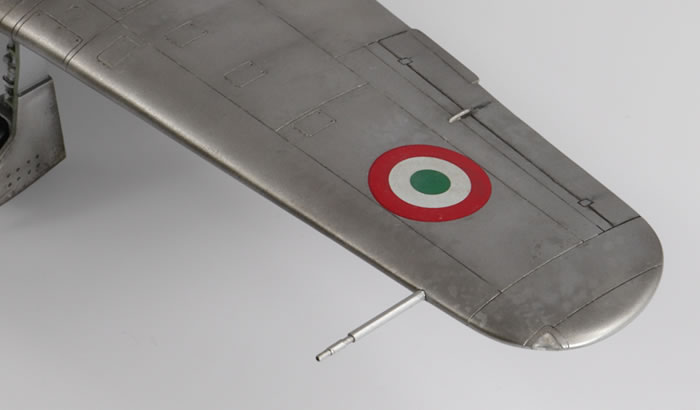
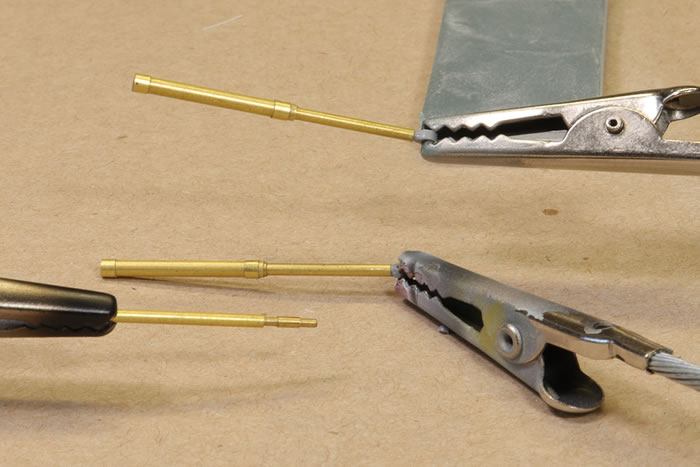
Cleaning up the flash was disheartening. For some parts, like the main landing gear legs, I had no option. But for others I just thought it would be easier to make the parts from scratch, so the landing gear actuators and wing-mounted pitot tube are all made from Albion Alloys brass tubing. The supercharger intake is formed of two halves, and after I’d glued them together and sanded out the joint, it was distinctly non-circular in cross section. Rooting through my spares boxes, I came across an old missile from an Academy Su-27 of the right diameter. This was cut up and the end hollowed out for a better intake.
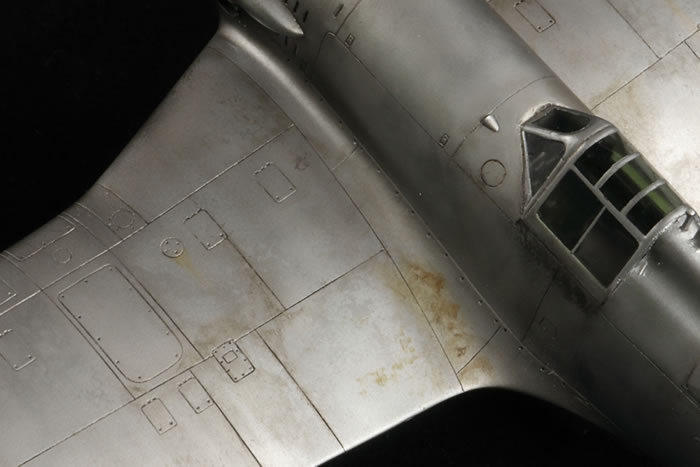
In addition to the flash, there are the surface imperfections. There were gouges, lumps, pits and other imperfections on various parts of the wings and fuselage. Under a coat of silver paint, the resin nose cowling also displayed a bunch of issues that needed sanding out and polishing.
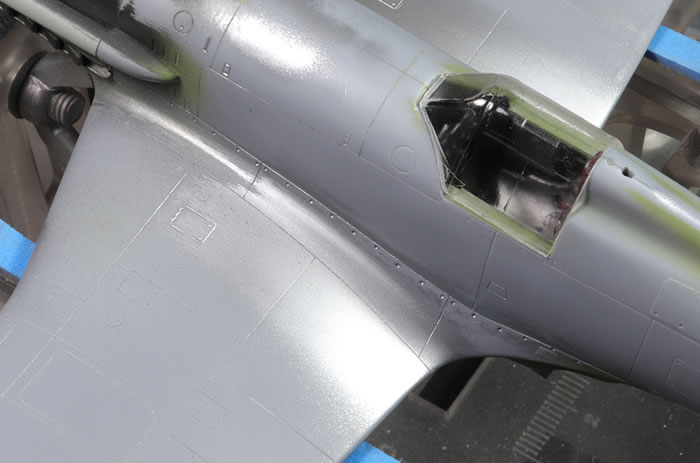
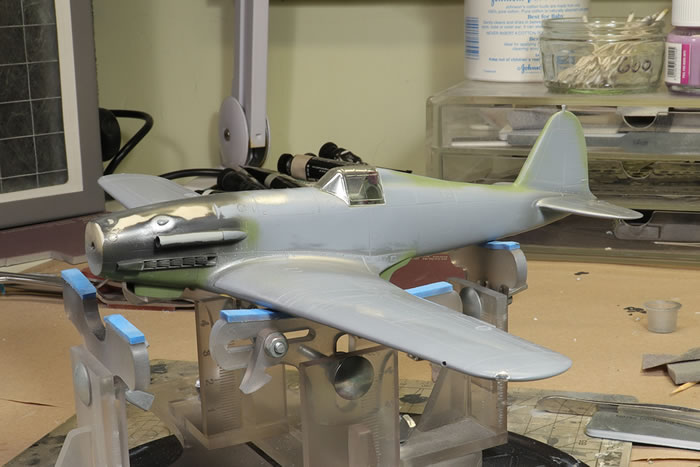
The cockpit is well detailed and fits together surprisingly well. I left out nearly all the photo-etched detail as it would be invisible through a closed canopy. Special Hobby recommend you make a complete cockpit tub and insert that between the fuselage halves. That route looked fraught with risk to me, so I stuck the sidewall panels in their respective fuselage halves, built the floor and seat up and then taped the fuselage together. The front and rear bulkheads were glued to one side and the fuselage halves separated. I then played about with the fit, which was excellent, and stuck the fuselage halves together with superglue. Once the seams had all been sorted, the cockpit floor was added from underneath.

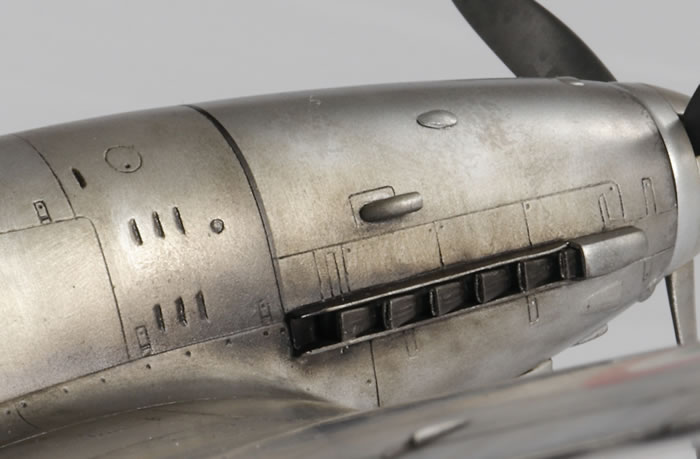
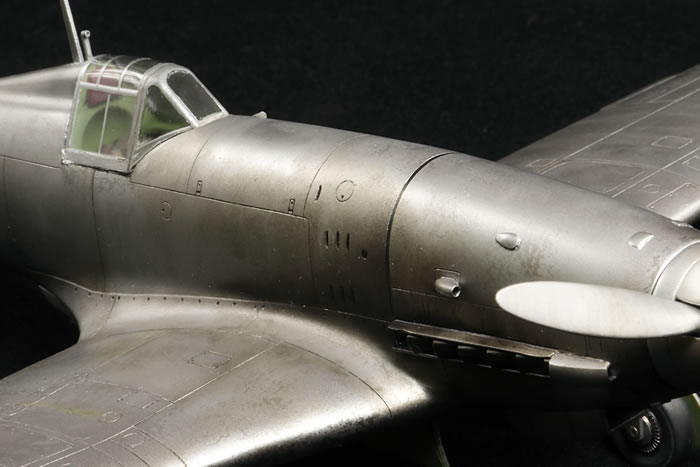
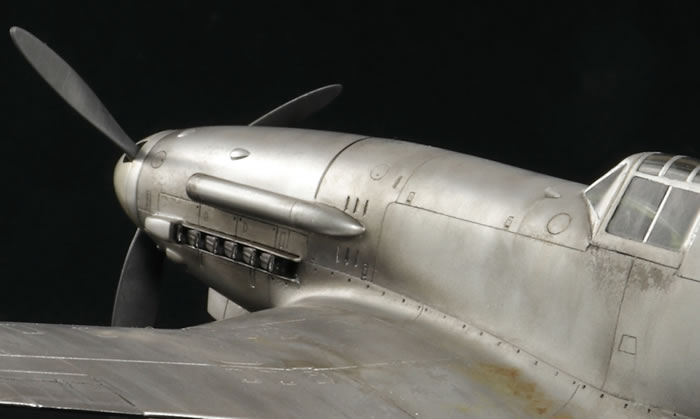
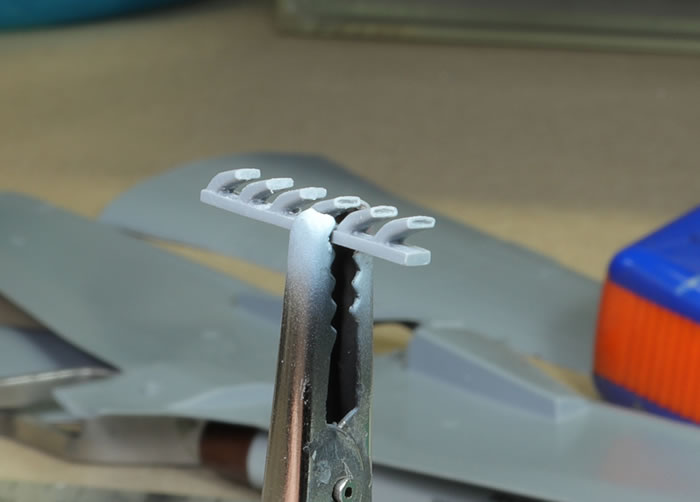
The kit breakdown is not simple around the nose area. The upper nose cowling, down to the exhausts, is a resin part. The lower nose is plastic, and these two are meant to join together to the fuselage. I decided to add the lower nose to the main fuselage as the fit was pretty good. The exhaust mounts were then added, and finally the resin upper cowling. I improved the fit by leaving out the bulkhead Special Hobby provide. The fit of the cowling in cross section was not bad, but there was a large gap above one of the exhaust mounts. This was filled with plastic strip and superglue.
The exhausts are a part ripe for replacement in resin. I pressed on and hollowed out the pipes myself; a tedious and somewhat challenging task for me.
I made several dry runs of attaching the main wing to the fuselage. I had to hack quite a lot of plastic away from the top of the undercarriage bays as they interfered with the upper wing. I’ve not read of this in the several articles I’ve seen on building this kit, so this was possibly down to me, although I can’t see how. Eventually I got the wing halves to mate quite well and the dry run for attaching the wing to the fuselage was reassuring.
Sadly, as is often the way, when the time actually came to commit to glue, the fit was nowhere near as good as during the dry run. The wing sat lower than the fuselage root. Using spots of superglue, a clamp and some accelerator, I managed to bend the wings upward a bit to reduce the step by about half.
The tail wheel doors need to be attached closed, filled and a hole drilled for the non-retractable tail wheel. These fit poorly and plenty of CA was required to fill the gaps:
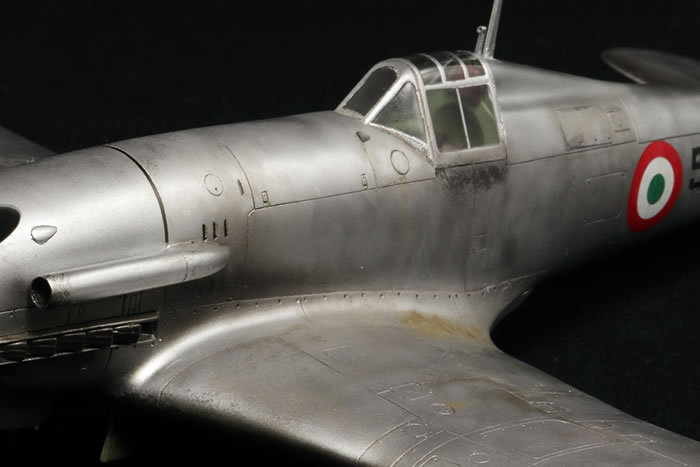
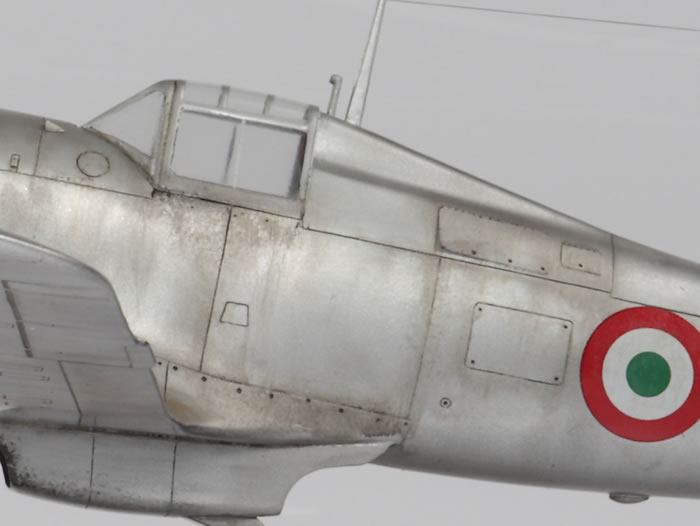
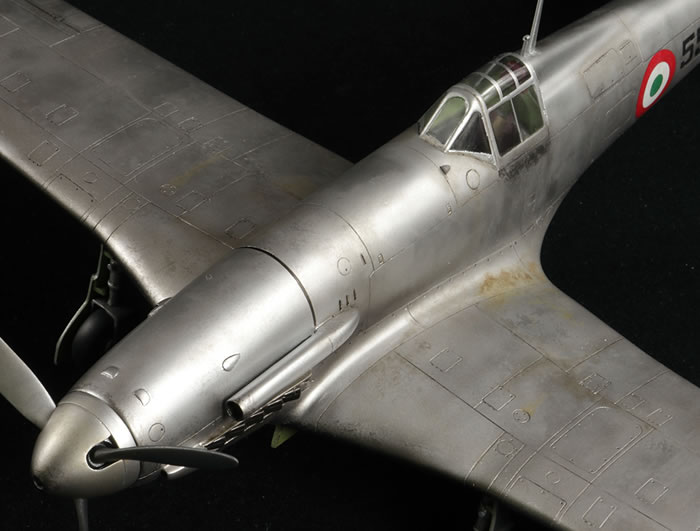
I’d seen a couple of articles on building this kit in MAI and SAM and immediately noticed that compared to my photo, there was something wrong with the canopy framing. The kit canopy (which is moulded closed) has heavy framing with squared-off corners to the panes. In reality, this is not how it should look, and the vertical frame in the centre of the side windows should be very petite. It really bothered me.
Falcon make a vac-formed canopy for the G.55 in one of their sets, but it was moulded for the Classic Airframes kit. I vacillated for ages about whether to buy this, as £16 from Hannants for something that might not work was a but excessive. Fortunately, A J Aviation had it for £7, so I took the plunge and ordered the set…
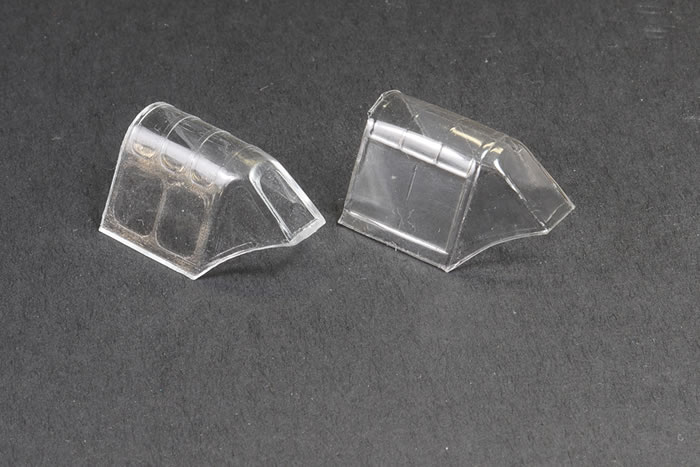
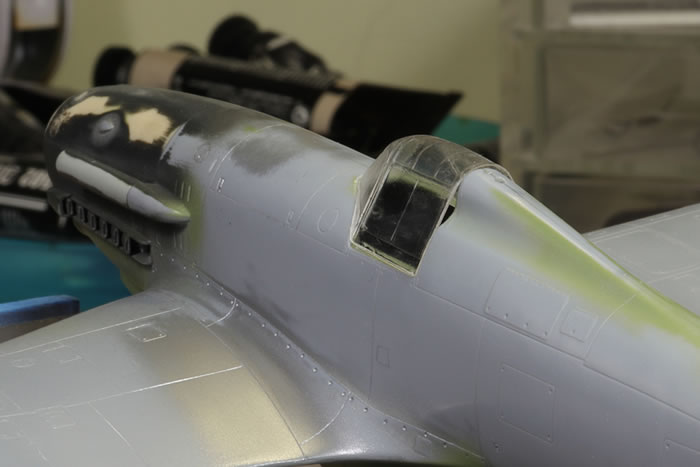
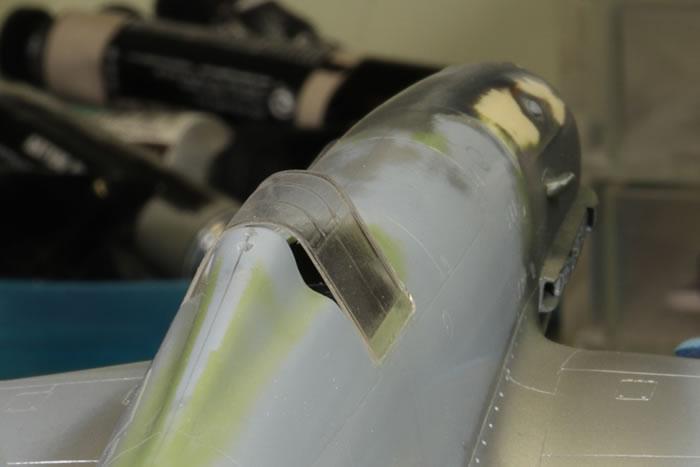
The fit was better than I expected. The main issue was that the rear of the canopy sat too high. I fiddled about with it by trimming the lower the rear end, but that just made the overall fit worse. In the end, I settled for lining the rear lip of the canopy with a strip of Evergreen plastic and having it sit a little proud. I attached the canopy using Tamiya Extra Thin. The final result is much rougher than I would like around the edges, but the framing looks much better than the injected part. On balance, I’m glad I made the change.
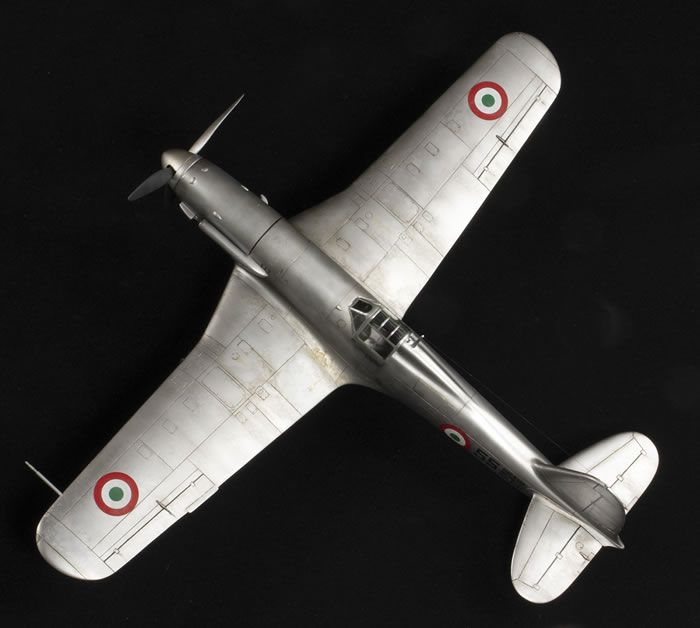
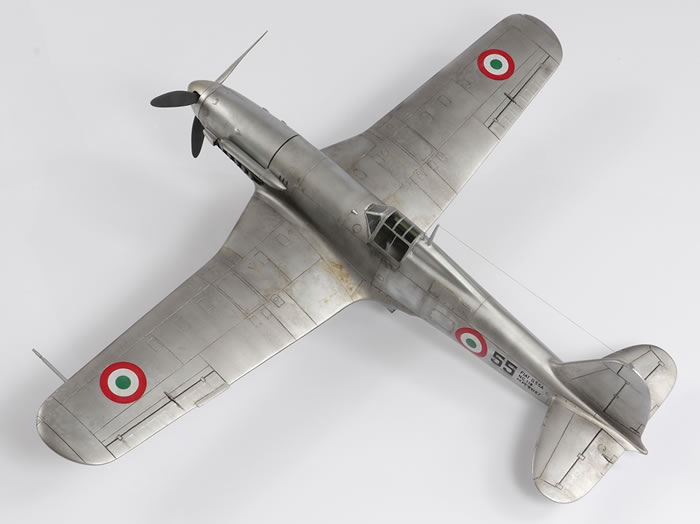
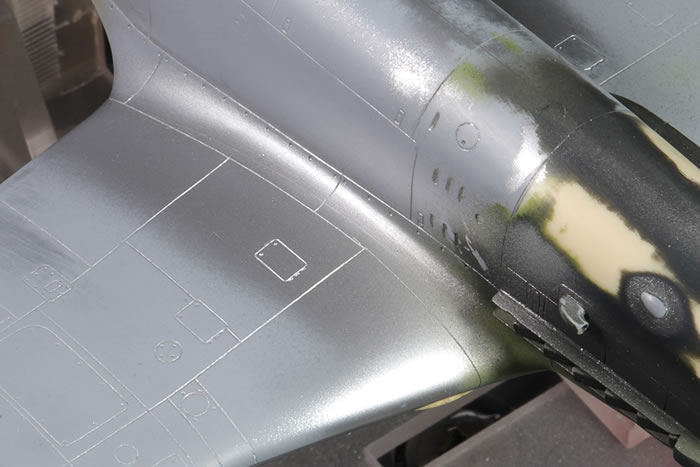
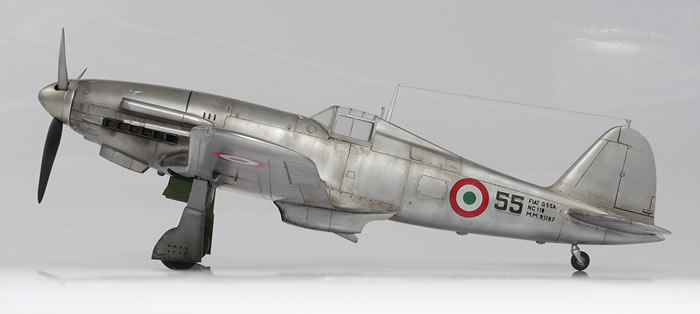
The model was painted in stages over a primer coat of Mr Finishing Surfacer 1500 Black. The intention was to try and get a patchy, layered silver finish. I airbrushed Alclad White Aluminium, Steel and Magnesium in various mixes, Mr Color 8 Silver, 104 Gun Chrome and 211 Chrome, and also threw in a few areas of KColors Steel. Some of the darker areas were masked using liquid frisket film dabbed on with a sponge around the leading edges of various items before paler shades were airbrushed over the top. I also made good use of some Artoolfx and Uschi van der Rosten stencils to get more a more blotchy finish.
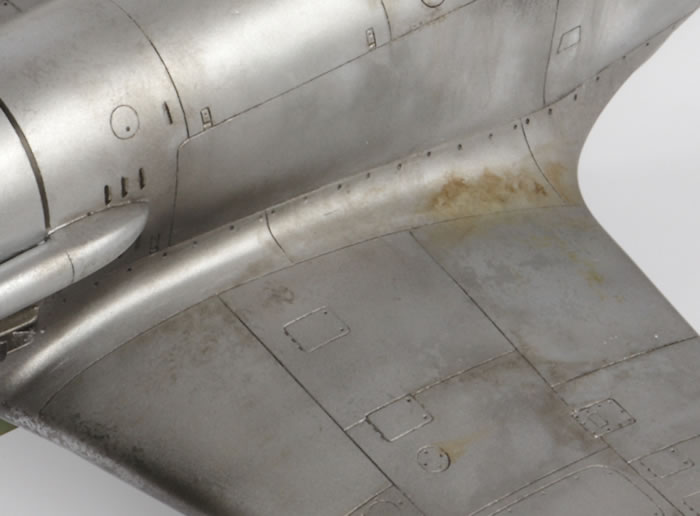
Directly over the paint I applied a wash of Abteilung 502 Smoke oil paint, and then used more shades from this range (Engine Oil, Dark Mud, Sepia) to apply some washes, filters and streaking. The brown shades over the wing roots are from an AK weathering pencil applied quite wet with water. The very smooth finish of the paint made this weathering difficult because the oils had nothing to grab onto and they took a long time to dry. I was pretty heavy with the dark oils around the exhausts to match the staining I could see on the photo I had.

In the end, the weathering is a little heavier than it probably should be, the chipping a bit more extensive, and the lustre rather too deep, but I thoroughly enjoyed the process and the finished result
It then came to markings. Aside from the canopy, the other thing that immediately jumped out at me from the photo of ’55’ is that the shape of the ‘5’s as provided on the kit decal sheet is wrong. I tried making my own by designing a mask in Inkscape and cutting it on a Silhouette plotter. I sprayed the numbers using MRP Flat Black and the result does look a lot more accurate than the kit decals, although not quite perfect.
This left only eight decals to be applied from the sheet. The decals were applied directly to the paint (there were no clear coats applied anywhere at anytime to this mode) and they were beautiful. I was concerned about setting solutions causing stains, so used the smallest amount of Mr Mark Setter and this time I did wick away the excess. I cannot speak highly enough of these decals.
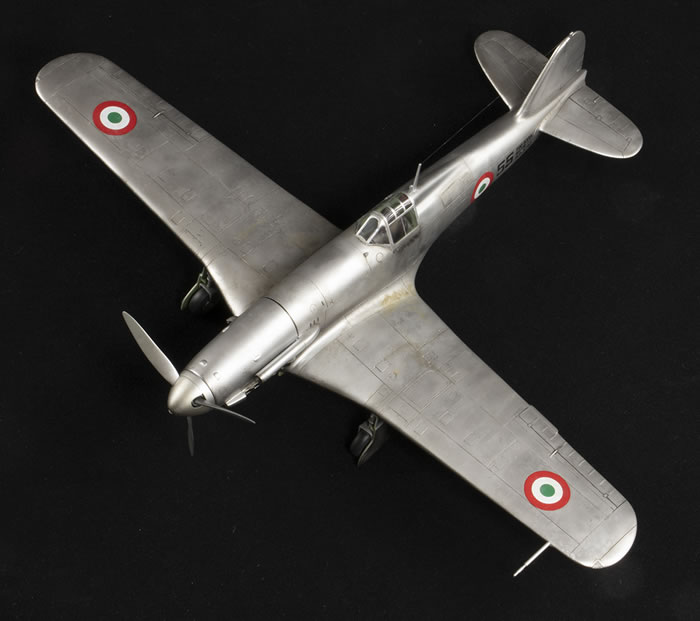
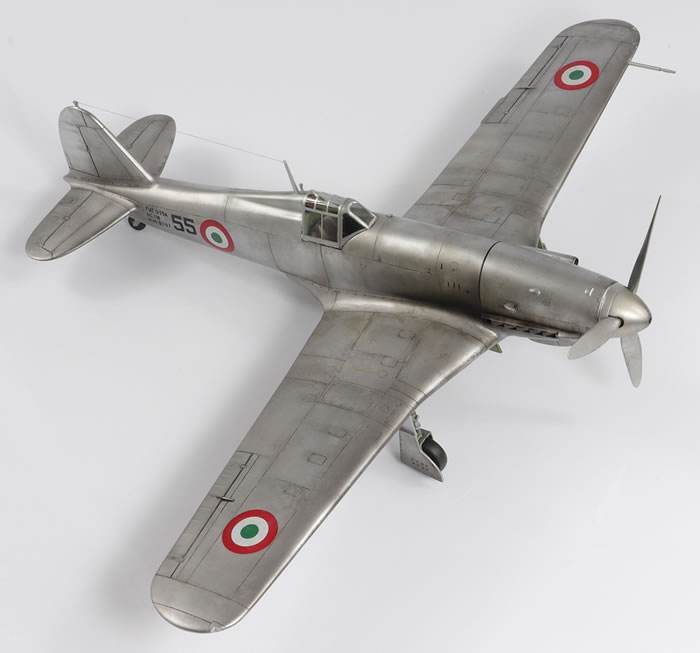
The end then approached quite rapidly. The tail wheel has no mounting points within the fork and is just barely held by some Tamiya Extra Thin. Putting the fork in caused a small hairline crack in the rear under-fuselage seam, but it’s only a millimetre or so long and just visible under magnification, so I left it. The main undercarriage is horrible – a combination of the Fiat design where the wheel is trapped between the large forks and the poor moulding quality of the kit parts. I did my best, but one of the wheels ended up a bit wonky and the forks are not uniform in shape when viewed head-on. Nevertheless, with a decent jig made up of magnets arrayed on a steel baking tray, I got the undercarriage attached and the wings level.
The final parts are the pitot tube and aerial mount behind the canopy. The antenna thread is from Uschi van der Rosten fine rigging thread. The prop fits okay, but it turns out I did not quite get the spinner attached evenly to the backing plate. I guessed at the prop colours.
Overall, I’m pretty pleased with the final result. It’s a great looking aircraft, and whilst I’ve finished it in a very simple scheme, I find it quite striking. It was not the easy build I was hoping for, but it did get done in under four weeks and has set me up well for my next project.
For more articles like this, please visit my website at Jon's Models
Text and Images Copyright ©
2020 by Jon Bryon
Page Created 16 July, 2020
Last Updated
16 July, 2020
Back to
HyperScale Main Page
|
 Home
| What's New |
Features |
Gallery |
Reviews |
Reference |
Forum |
Search
Home
| What's New |
Features |
Gallery |
Reviews |
Reference |
Forum |
Search