Airfix 1/48 scale
Supermarine Seafire F.XVII
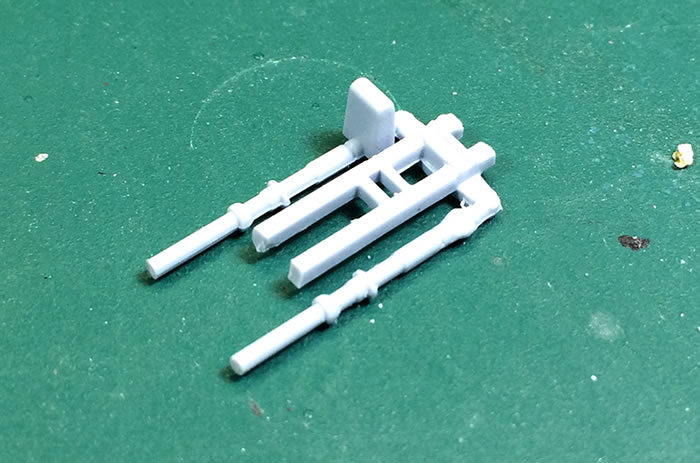
with Master brass cannons
|
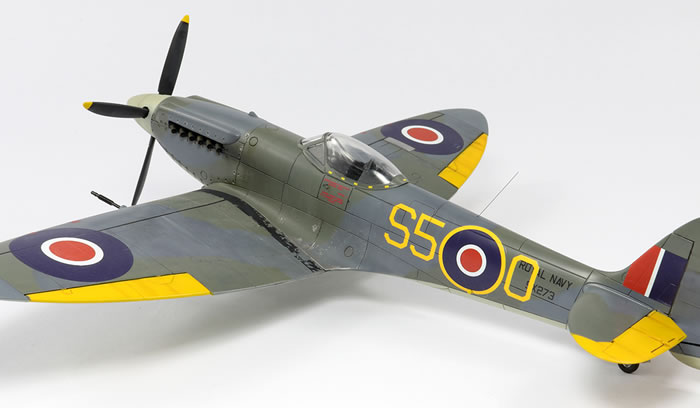
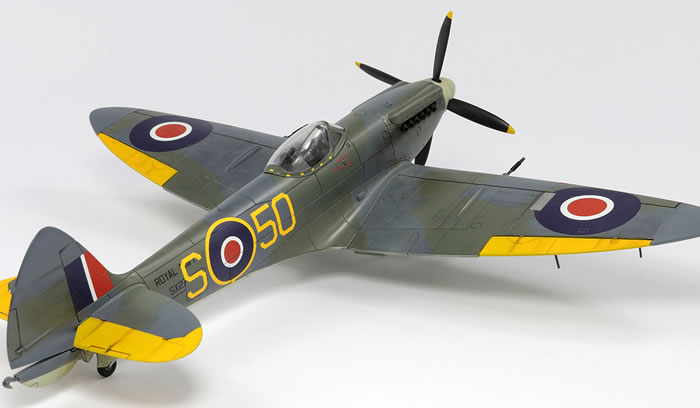
Supermarine Seafire F.XVII
741 Naval Air Squadron, Royal Navy, UK 1947
|
by Jon Bryon

Hobby Boss's 1/48 F4U-7 Corsair is available online from Squadron.com
Coming off the back of a fairly involved build, and facing the next challenge of making four 1/48 Hasegawa Skyhawks simultaneously, I needed a quick project to keep me motivated in between.
This Airfix Seafire fitted the bill perfectly.
Airfix does not hold back with offering lots of plastic: two wings to cater for folded/unfolded options, two canopies for open/closed, different undercarriage for retracted/unretracted, etc. Unfortunately the moulding quality is poor: sprue gates are very, very thick and encroach onto the parts themselves, there’s flash, shapes are poorly moulded (e.g. the wheel hubs are not quite round) and there are huge panel lines, some (mainly the little circular panels under the wing) very poorly formed. Oh, and as is usual with Airfix kits these days, a short shot part:
This is a real shame. In 1996, Airfix released two Seafire/Spitfire kits which were moulded to a standard comparable to the best anyone else was making. 15 years later, this kit was a significant retrograde step, and judging by the FR.XIV I bought earlier this year, Airfix are still not back to where they were 23 years ago. (The only other company I can think of which has similarly gone backwards is Revell: compare their 1/48 F-15E (2000) with the Tornado released 14 years later…)
Anyway, it’s not all bad news. The standard of fit is pretty good, and particularly commendable areas are the wing roots, the front fuselage underside and the fit of the canopy. The ailerons, flaps, rudder and elevators are all separate, which is a feature I don’t care for unless the real thing had them dropped/drooped, but I understand I’m in a minority. The elevators do not fit well, but can be improved by separating the left one from the right and installing them individually. The ailerons have some pretty big gaps around them when fitted closed, as do the flaps.
The radiators have very thick leading edges. They don’t fit that well either. I found it best to thin down the base where they attach to the wing and then glue down one side. Once dry, I could clamp the part to the wing and attach the other side.
Construction is quick (I made and painted the entire thing in less than a month), aided by the fact I exclusively used superglue for the major joints and as my filler. I do regret not fairing in the tailplanes; the joint line is too thick for my liking. The seat belts are a generic PE set by Eduard.
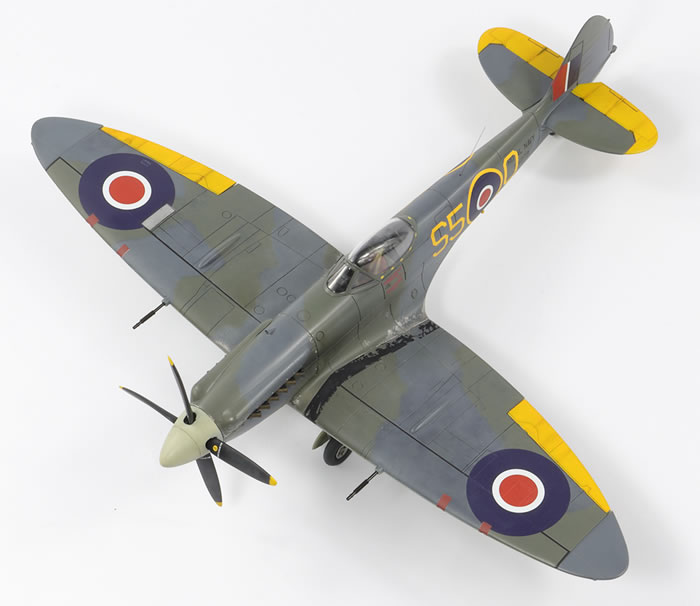
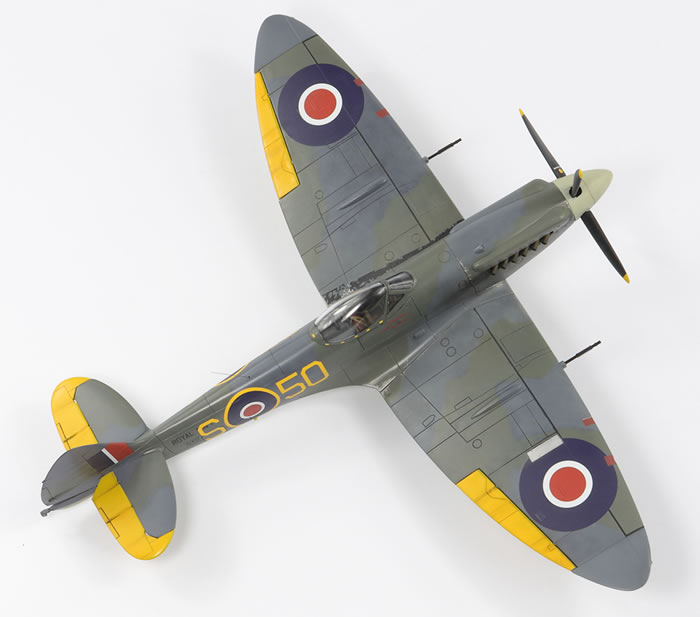
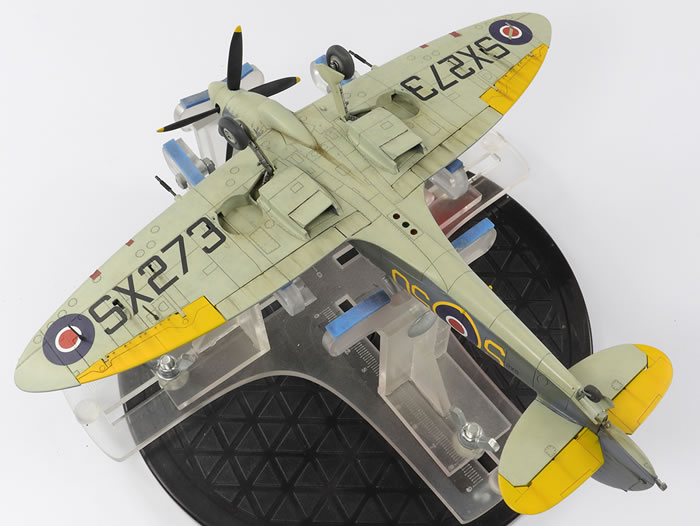
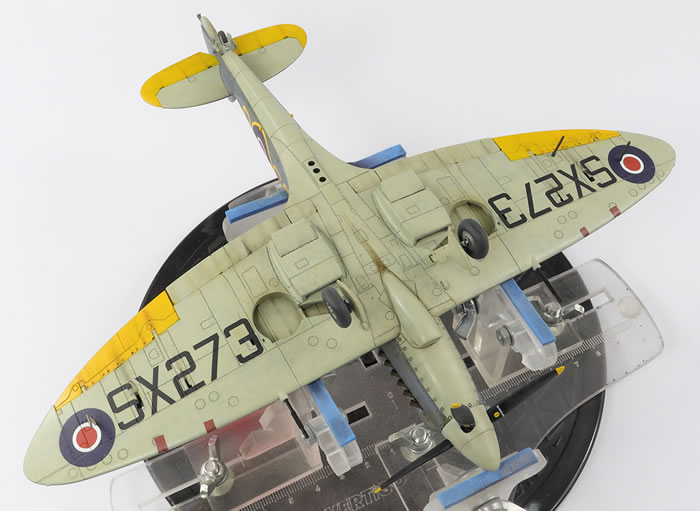
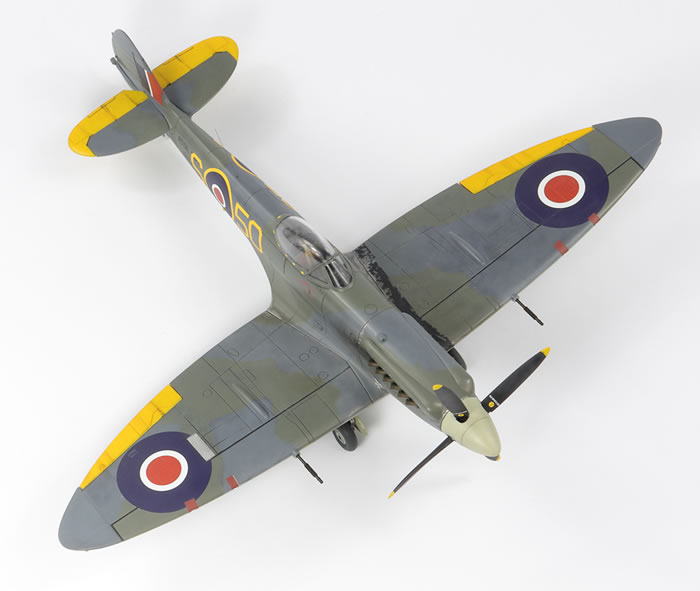
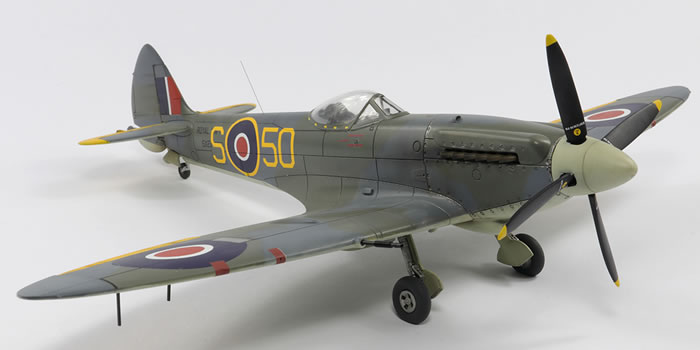
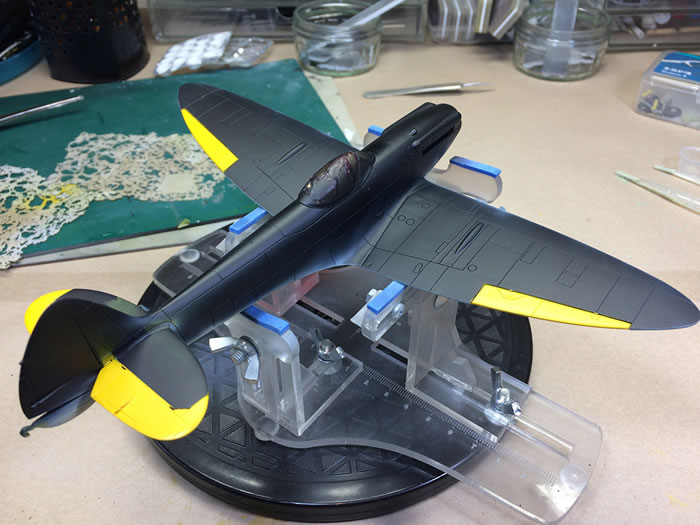
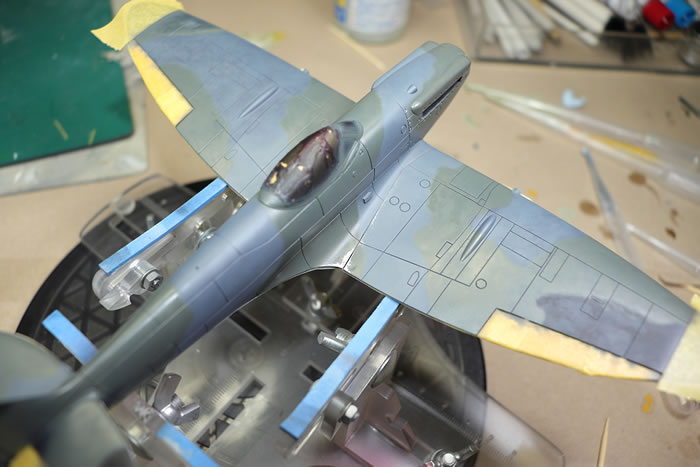
Airfix supplies three markings options. I believe the first is incorrect as it should be Extra Dark Sea Grey and Dark Slate Grey, not EDSG on its own. I was always going with the second option for two reasons: one, I never get to paint anything in Dark Slate Grey (and I really like that colour), and two, I love the yellow panels.
Some online searching threw up two photos of SX273:
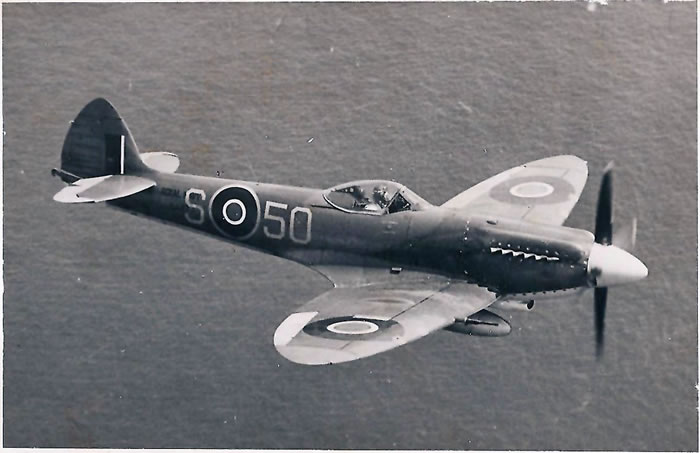
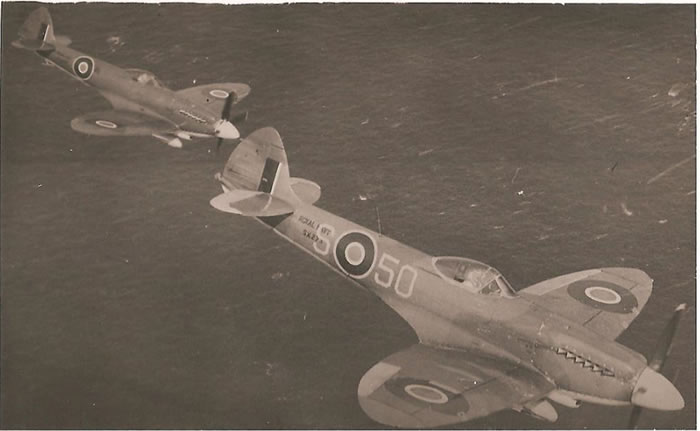
Compared to the Airfix schematics, a number of things become immediately apparent:
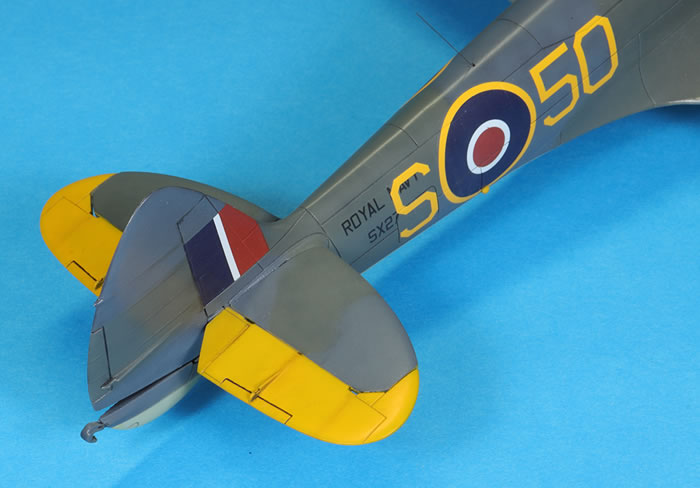
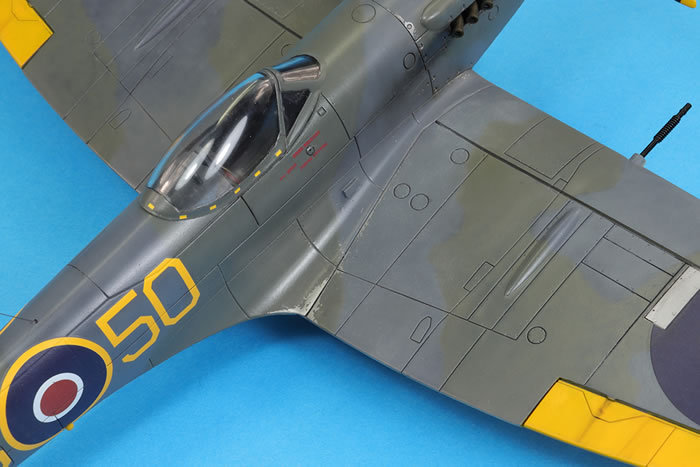
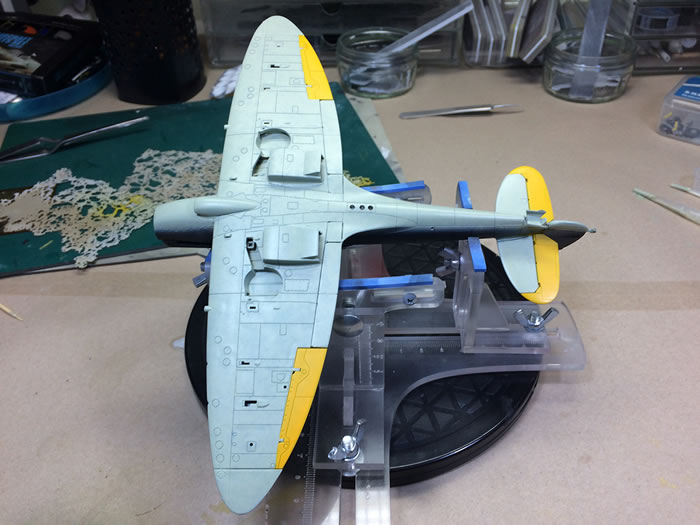
- Airfix want you to paint the wing tips yellow. They do not look yellow to me in the photographs, contrasting strongly with the yellow ailerons and elevators. I really wanted them to be red (I think the tone matches the roundel red) on the premise that if the control surfaces were a bright colour, why not the wing tips too? I posed the question on a few forums and no one could be definitive. In the end, I supposed the wing tips had been replaced from another aircraft (there’s a photo in the Crowood Seafire book of a similar Seafire, SX277, from the same squadron with wing tips removed) and went for a more solid shade of Extra Dark Sea Grey. I may well be wrong; every other illustration of SX273 has the wing tips in yellow and perhaps the wing tips were yellow at a different stage, or a substantially different shade of yellow. As an aside, it is irritating that profiles (such as those in the Seafire Warpaint book) are unreferenced. It would be nice to know why the artist thought it should look the way he drew it.
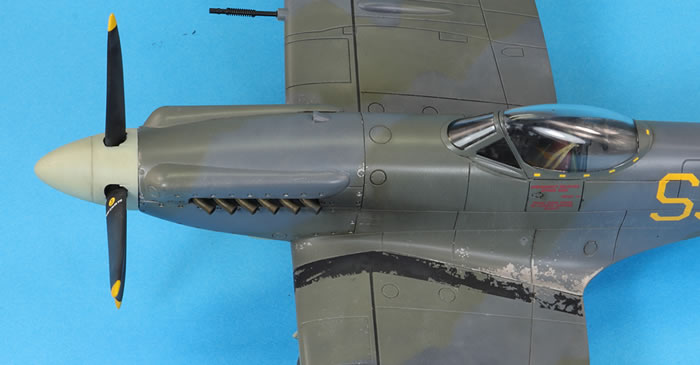
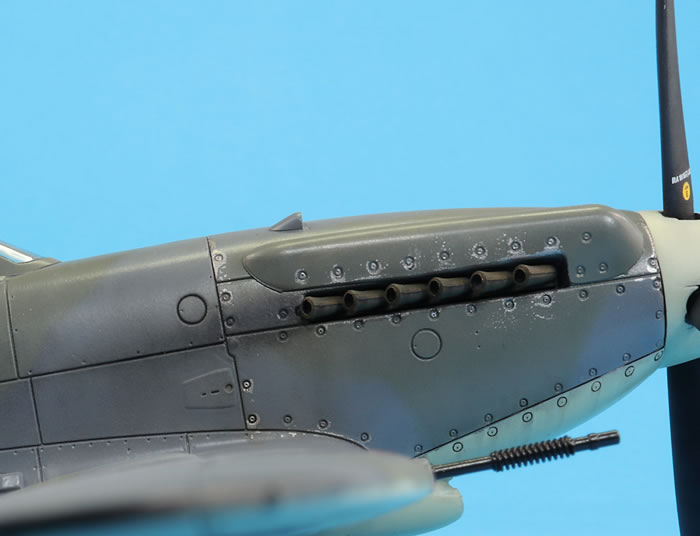
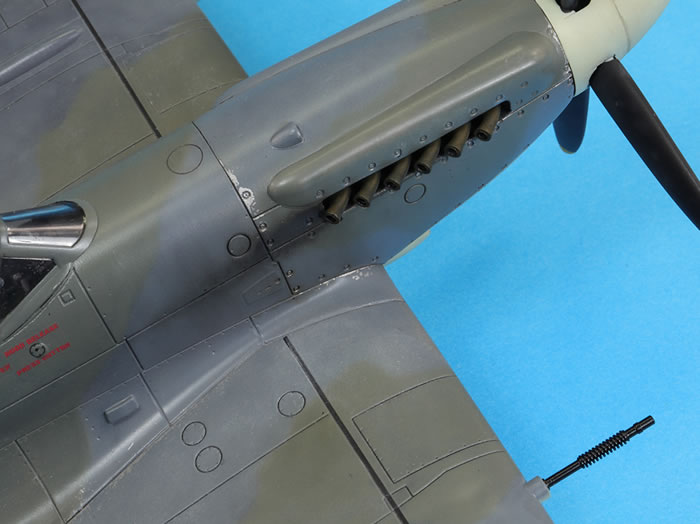
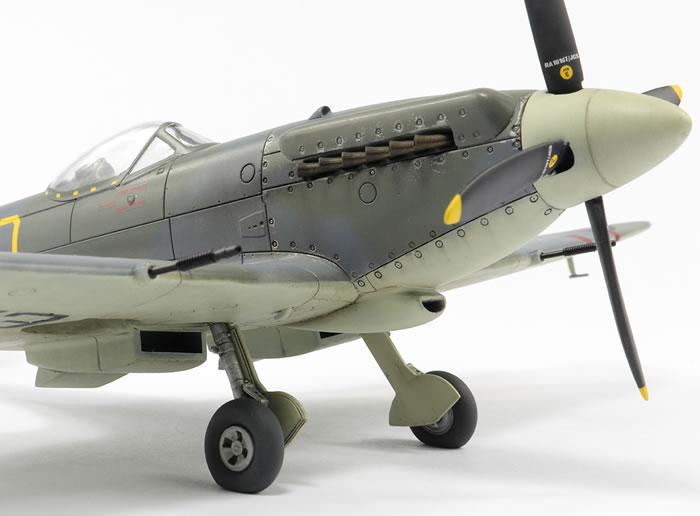
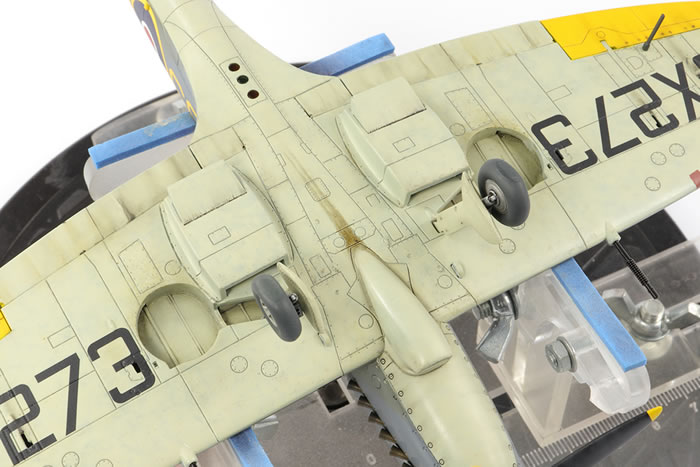
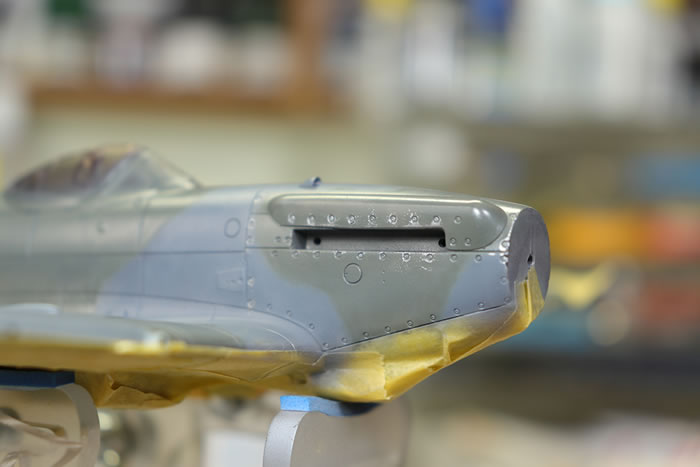
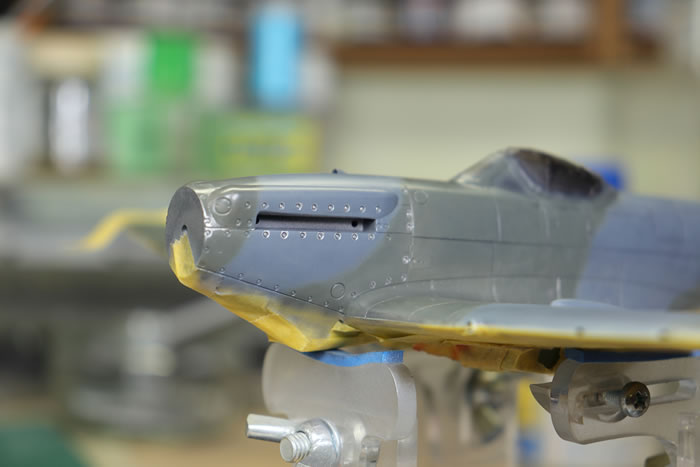
- The guns (well, the starboard one at least) are unfaired with the cannon exposed.
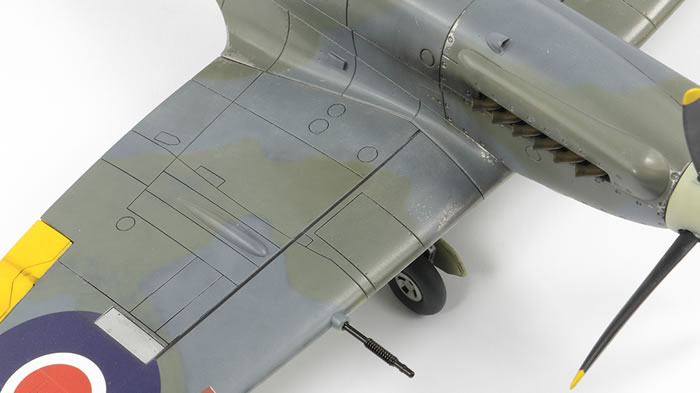
- There is no protector for the tailwheel – unsurprising as this was a land-based training aircraft. I also wondered if the catapult hooks would have been removed…
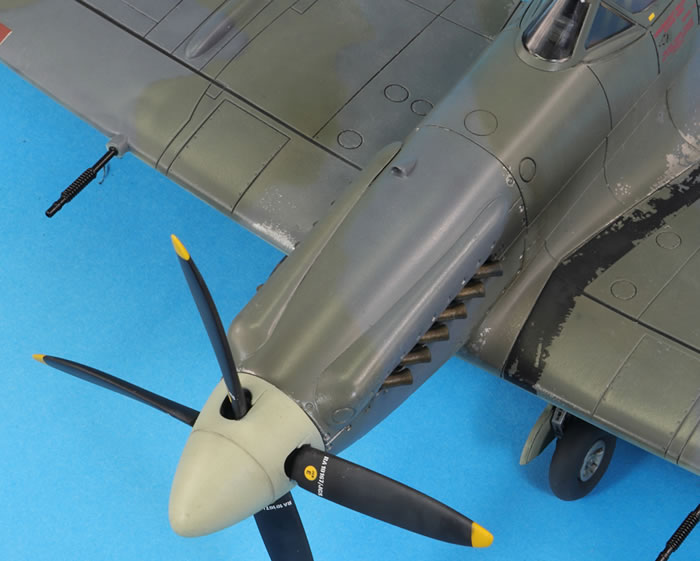
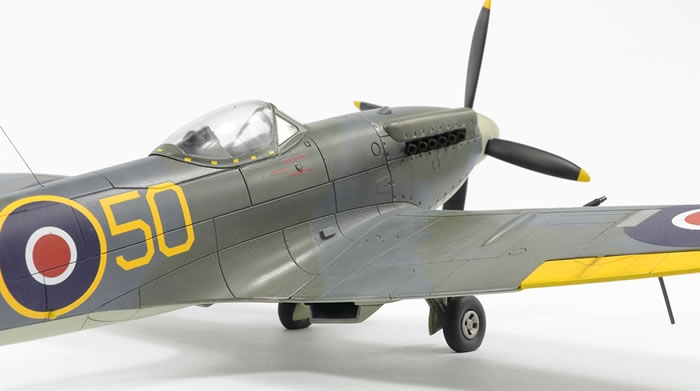
- The colour of the spinner is unclear. Airfix say Sky; CMK and Aeromaster say yellow. I wish it was yellow, but have gone with Sky.
- There is a ‘lump’ (I can’t think of another term for it) above the wingroot that isn’t moulded or provided in the kit. I added something from plastic.
- What colour should the canopy framing be? Yellow?
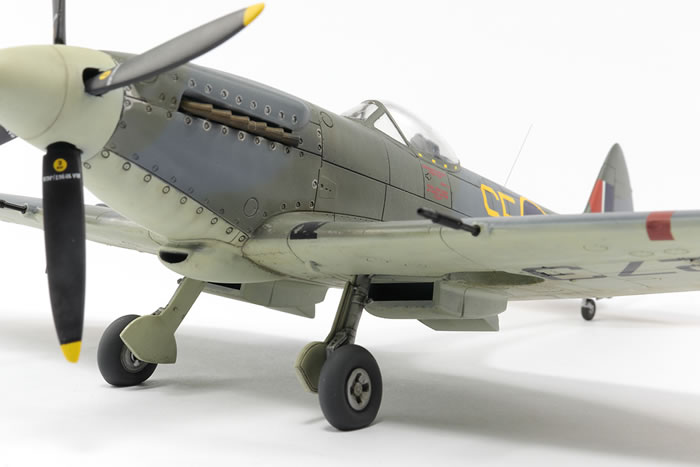
I purchased a set of Hispano II cannons with the round recoil springs made by Master and modified the kit cannon fairings to accept them. They are made to replace Hurricane guns and I know they are not right for a Seafire – the springs should be next to the fairing and the barrels correspondingly longer, but I’m pleased enough with the effect.
I’ve not much idea about the accuracy of this kit. It was well received at the time, but you can find a thread on Britmodeller where someone goes to some lengths to correct what a few people perceive to be problems with the shape of the nose, wings and prop. When it comes to Spitfires/Seafires it’s all too arcane for me and I just stuck with what comes in the box
I followed my fairly standard path through finishing this aircraft, which started with a generous coat of Mr Surfacer 1500 Black, heavily thinned with Mr Rapid Thinner. This was followed by a mottled coat of Mr Color 368 Sky, applied with a Custom Micron and using some of the stencils made by Artoolfx and Uschi van der Rosten.
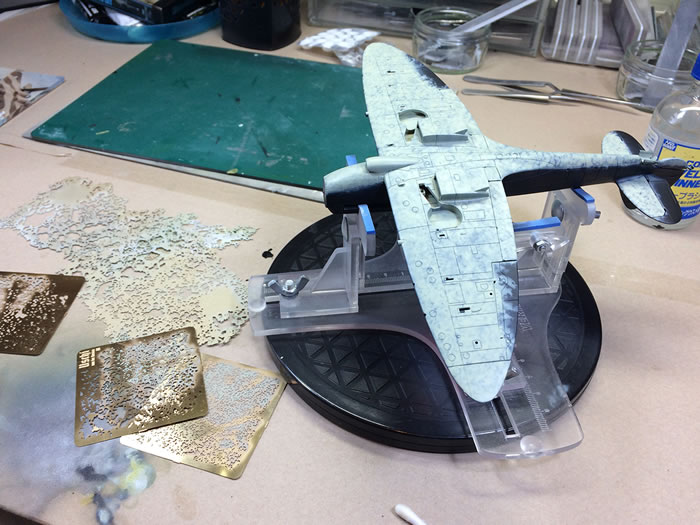
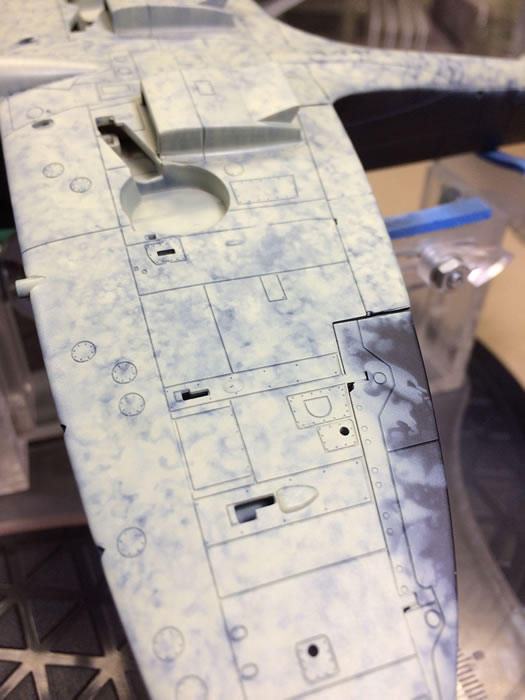
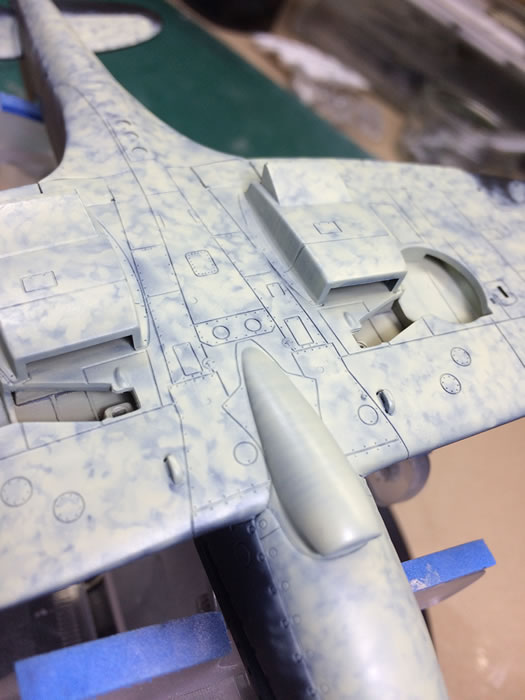
MRP RAF Marker Yellow provided the yellow control surfaces, mottled again over the black. This took a reasonable length of time, but left some nice tonal variation.
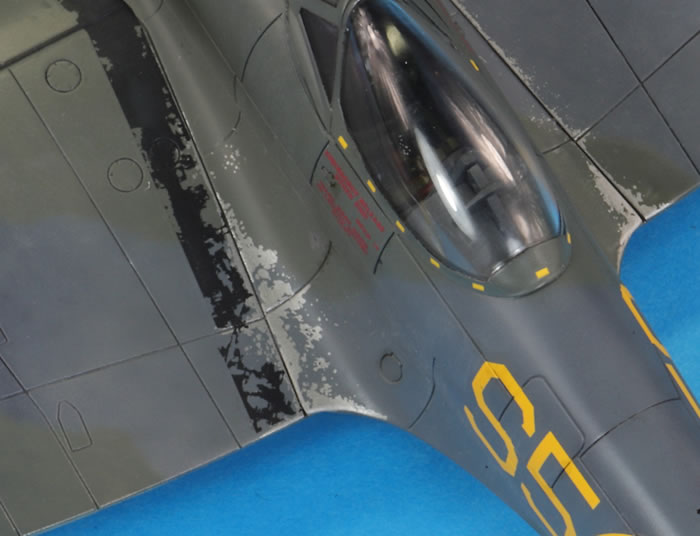
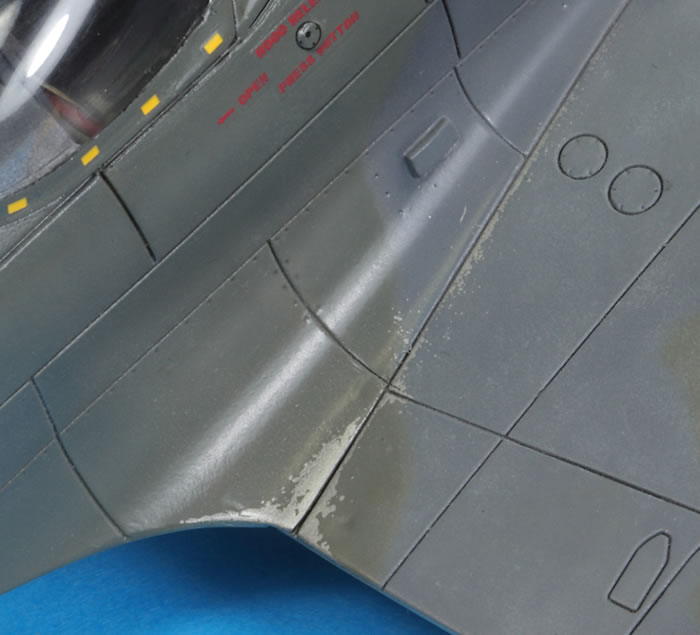
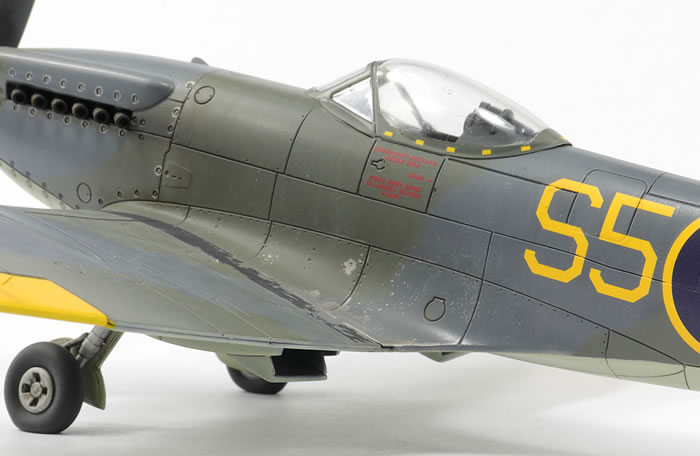
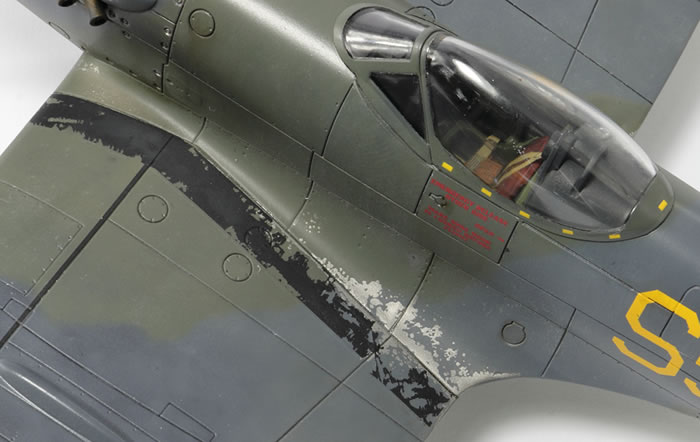
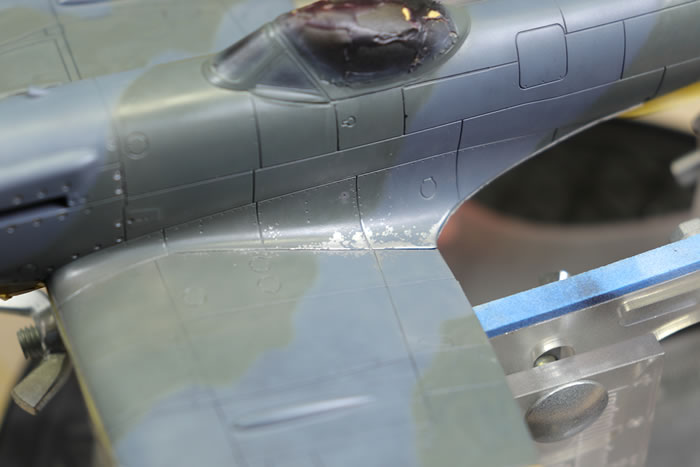
I usually try something new with each build these days, and for this model I wanted to try hairspray chipping for the first time. Will Pattison was my guide via his excellent Youtube video on chipping MRP and my plan of attack was this: Alclad White Aluminium mixed with Magnesium over the areas I wanted to chip, followed by a coat of Tamiya X-22 Gloss Clear, and then the hairspray. For the latter, I decanted some Tresemme #3 Firm Hold (this is the UK labelling) and airbrushed it neat though my H&S Evolution.
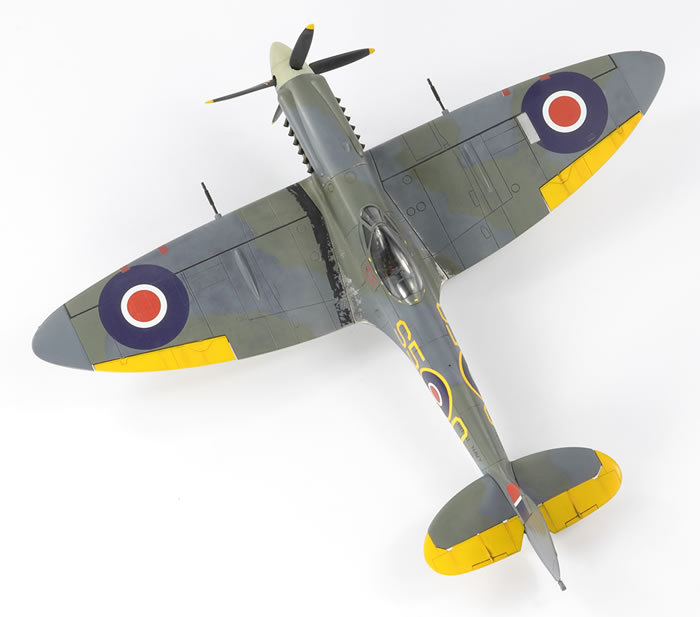
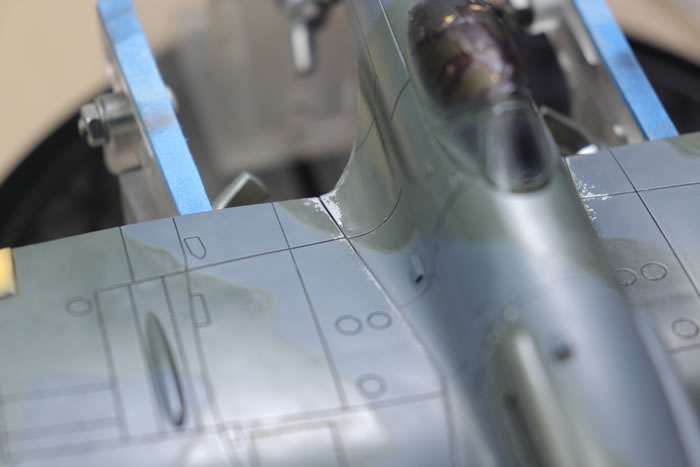
The two-tone camouflage (EDSG and Dark Slate Grey) are also MRP shades and I airbrushed them (unthinned) freehand over the masked Sky, Yellow and hairspray. I let a lot more of the black primer show than normal as my previous tonal variation has usually been washed out by the flat coat and I was interested to see what would happen if I amped up the contrast.
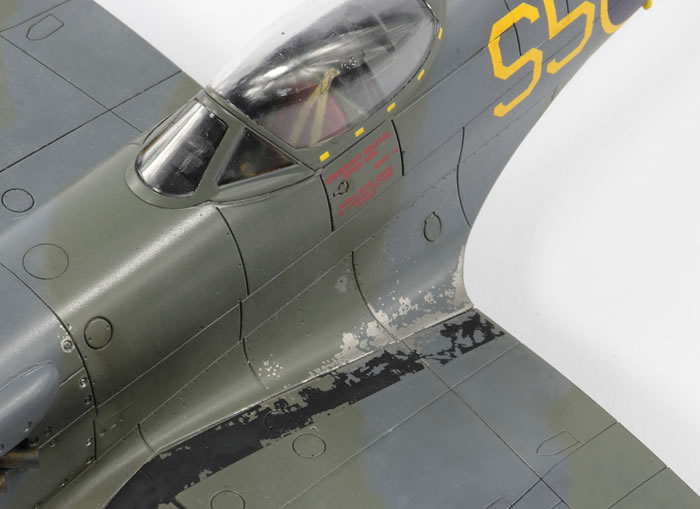
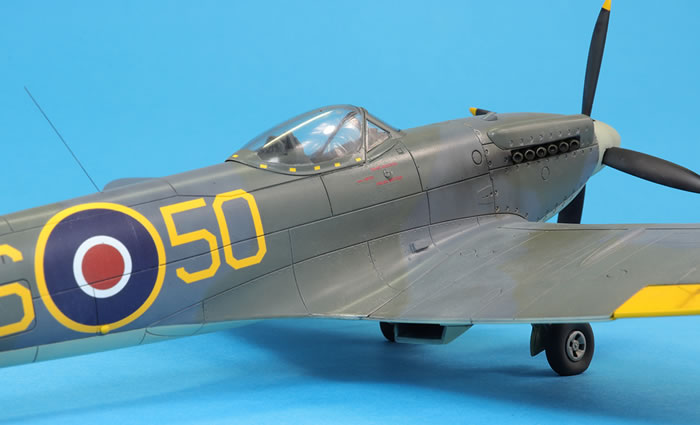
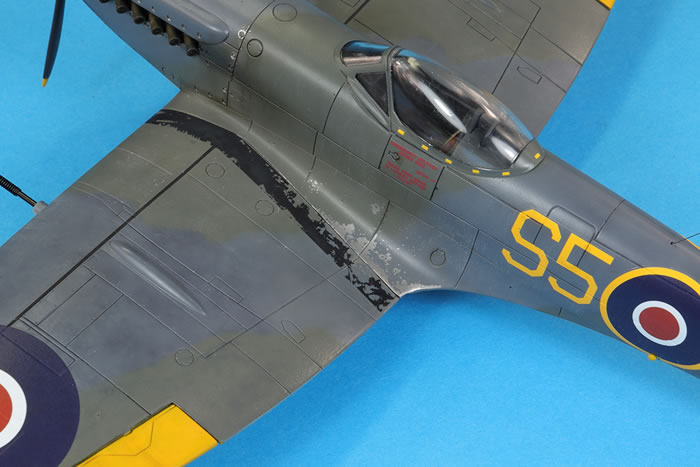
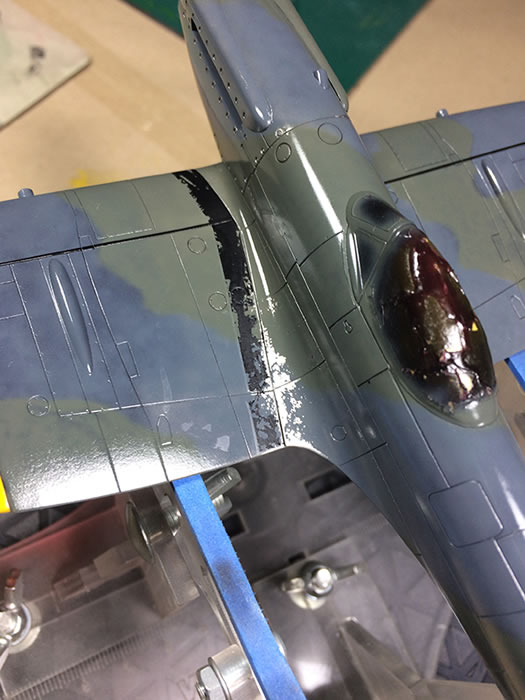
About 1 to 3 hours later (which is how long it took me to apply the whole camouflage scheme) I damped an old Tamiya flat brush in some water and started to rub it over the areas I wanted to chip. From the photos above, it seemed to me the chipping was focused around the fastners for the engine cowl panels and on the wing roots. Given that this was not a wartime machine, I wanted to keep it fairly restrained. I found the MRP began to chip very easily exactly where I wanted it to, and I did not need to use any stiffer tools to remove the paint. Some of the chips were a little spherical and required a little adjustment with a sharp cocktail stick. Overall, for a first effort, I was impressed.

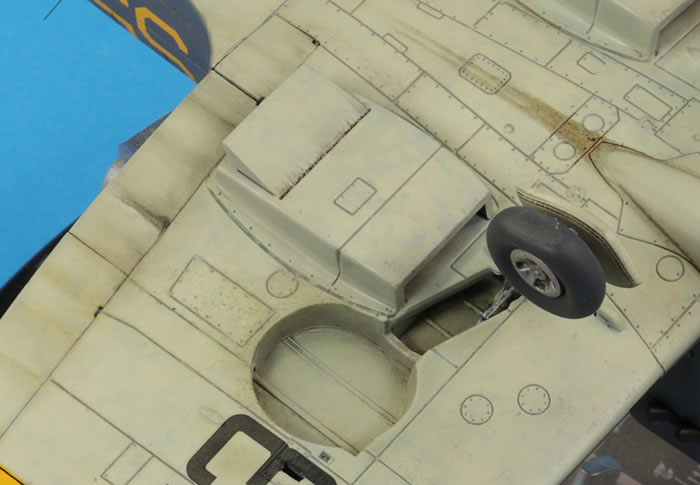
Once I was satisfied with the chipping, I coated the model with Tamiya X-22 thinned 50/50 with Mr Leveling Thinner. I did not bother with a wash on the upper surfaces due to the over-pronounced panel lines not needing any further emphasis, but did apply a pin wash of oil paint on the undersides that I mixed to a darkish Sky colour.
The decals are from the kit and are printed by Cartograf. The register and colour density are good; the price you pay is that they are quite stiff and have a very matt finish. I’m not sure why the latter – I assume it’s what Airfix prefer for some reason. As with most Cartograf decals I’ve used recently, there is minimal carrier film, but what is there is pretty thick. I’m still a much bigger fan of decals printed by Microscale; their carrier film just disappears under a matt coat.
Because of the hairspray layers, I did not have the nerve to mask and spray the walkway strip on the port wing (hairspray can weaken the bond of the overlying paint to the plastic). I therefore distressed the decal before applying it, which doesn’t look as good as chipped paint, but made for lower blood pressure.
To be honest, I’m not entirely sure that strip should be there at all. The photos show that most of the stencils appear to be missing from the real thing, with simplified walkway demarcation markings on the wings. I decided to only apply the stencils I could see (mainly limited to the rescue markings around the canopy and those on the propeller blades). Airfix do supply a complete set if you wish to apply all the stencils.
There is a printing error in the decals: the serial on one side is missing the ‘3’.
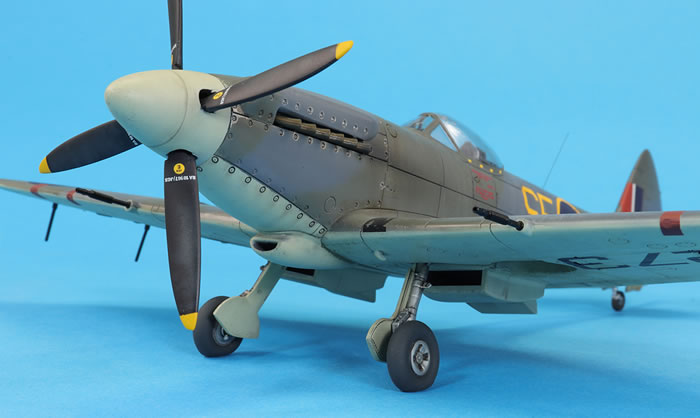
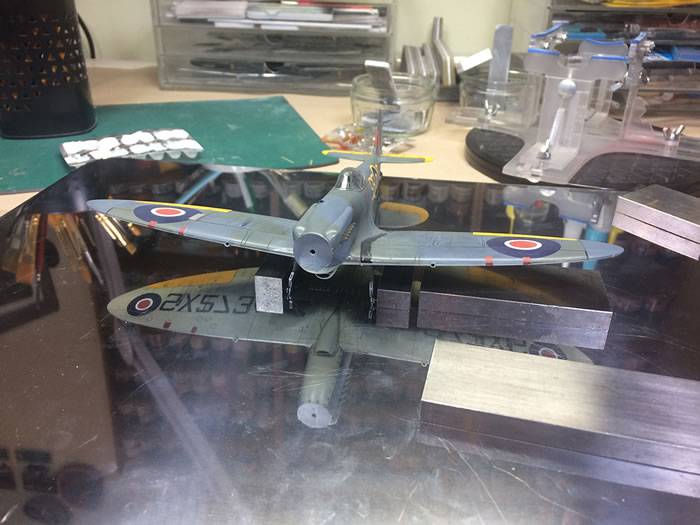
The real thing was rather glossy (see the reflection in the horizontal stabiliser) but I did not fancy polishing the finished model, and the very matt finish of the decals is difficult to get rid of. Initially I tried a generous coat of Tamiya X-35 Semi-Gloss Clear, but the matt decals stubbornly remained flatter than the paint. In the end, the final clear coat is highly-thinned Gunze GX113 Matt Clear, which is flatter than the real thing but does have a slight sheen (the tail flash can be seen reflected in the horizontal tailplane under the right circumstances). I find the flatter finish just photographs better. It also allows a decent amount of grip for the oil paints I used to add some more tonal variety to the paintwork and fairly subdued weathering – post-war Seafires seemed pretty clean. The oil paints are mostly Abteilung 501 Medium Grey, Snow White, Engine Oil, and Smoke, dabbed on with a small sponge and worked into the paint. On the underside I used some AK Interactive Streaking Grime and Engine Oil enamel. The streaks on the flaps and ailerons are a bit better than I normally manage, but still not quite as fine as I would like. The exhaust stains don’t look particularly prominent in photos of the real thing and I’ve added them using oil paints.
The final additions were the usual stress, especially around the floppy undercarriage and the wheels with the non-flat flats (I really need to start hollowing the flats out in cases like this to get the wheels to sit flat on the ground). I cobbled together a make-shift jig from a steel baking sheet, neodymium magnets and a set of steel gauges – in the photo below there are lots of magnets on the underneath of the tray to keep the gauges in place while the glue dries.
As mentioned above, the guns are not right, but they look the part. A whip antenna was made from stretched sprue and glued behind the canopy on the fuselage spine.
In summary, this was an enjoyable built completed rather rapidly. The only thing I’m really unhappy about are some imperfections on the inside of the canopy that I did not rectify. It served as a useful mule for some new techniques to me and the finished scheme is very striking. However, I cannot help but think how much better a kit it would be had Airfix stuck to their guns and moulded it to the same quality of what they were producing in the latter half of the 1990s.
For more articles like this, please visit my website www.jonbryon.com
Text and Images Copyright ©
2020 by Jon Bryon
Page Created 20 March, 2020
Last Updated
20 March, 2020
Back to
HyperScale Main Page

|
 Home
| What's New |
Features |
Gallery |
Reviews |
Reference |
Forum |
Search
Home
| What's New |
Features |
Gallery |
Reviews |
Reference |
Forum |
Search