Revell's 1/32 scale
Spitfire Mk.Ia Conversion
by Davide Montaldo
|
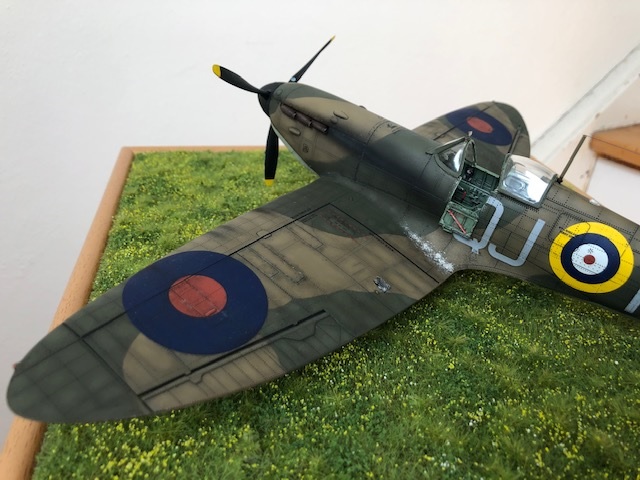
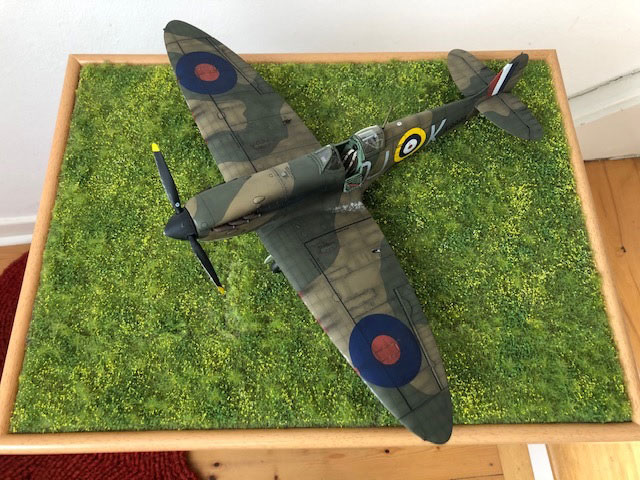
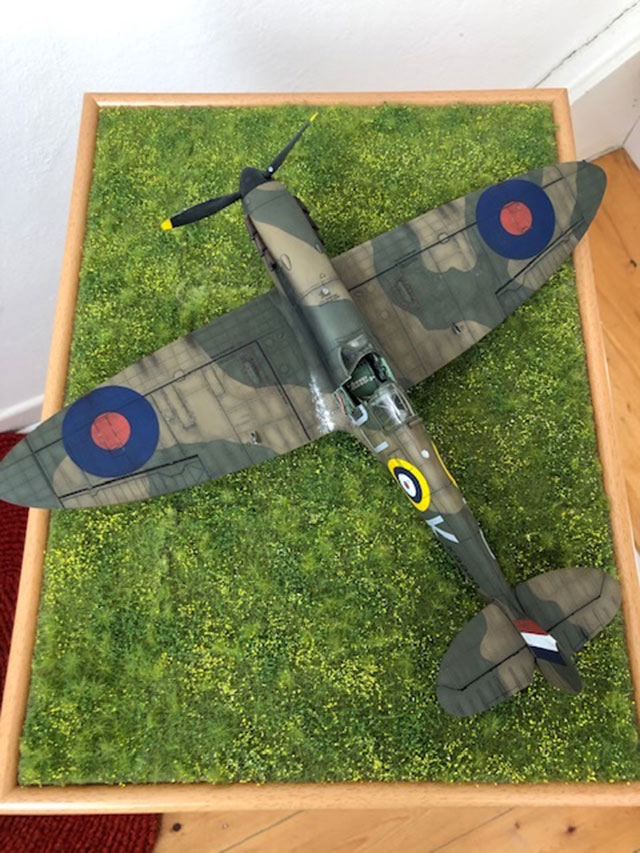
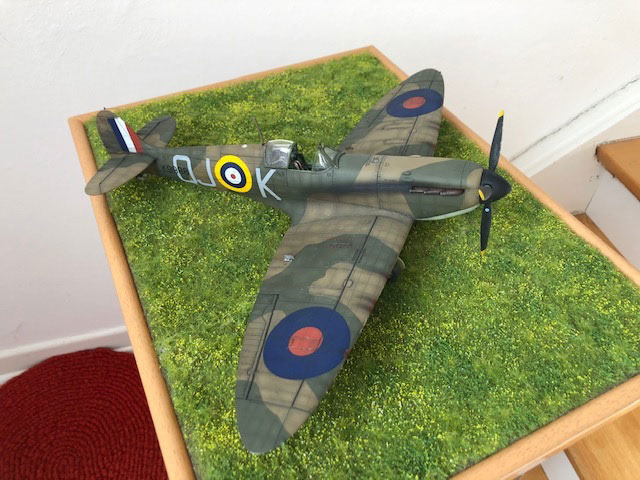
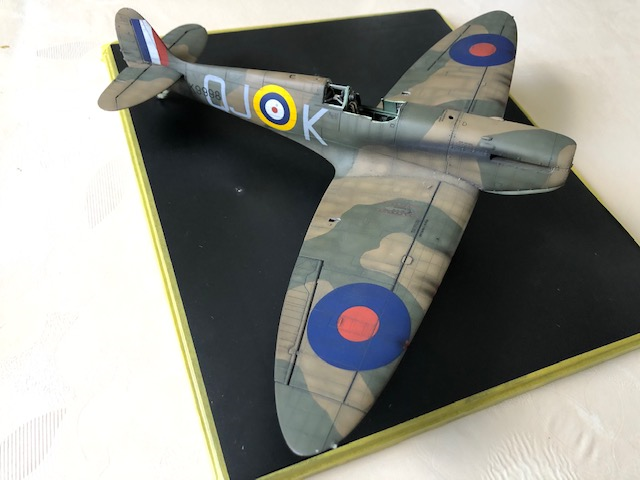
Supermarine Spitfire Mk.Ia
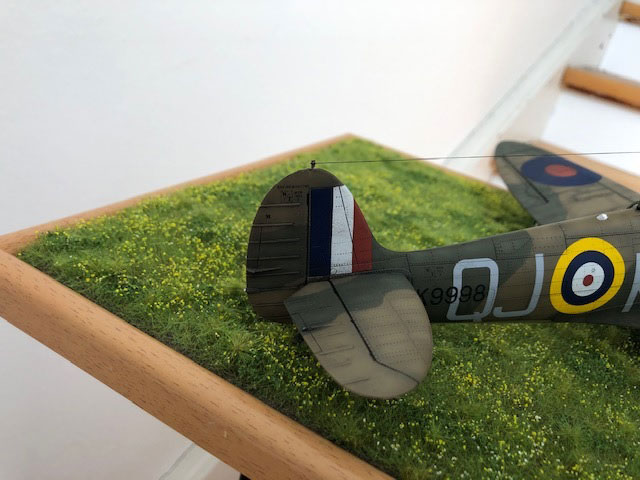
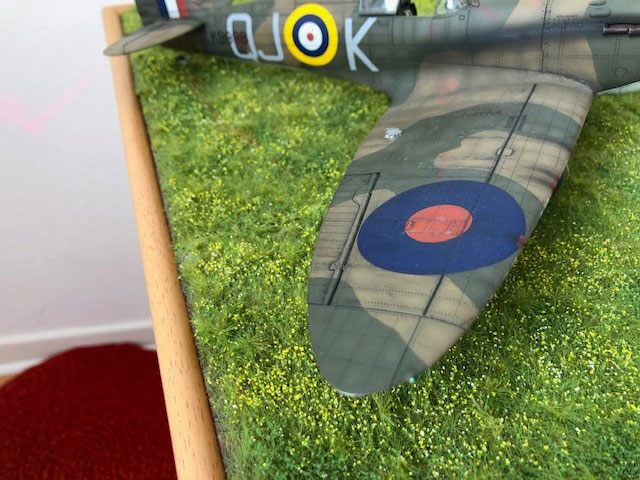
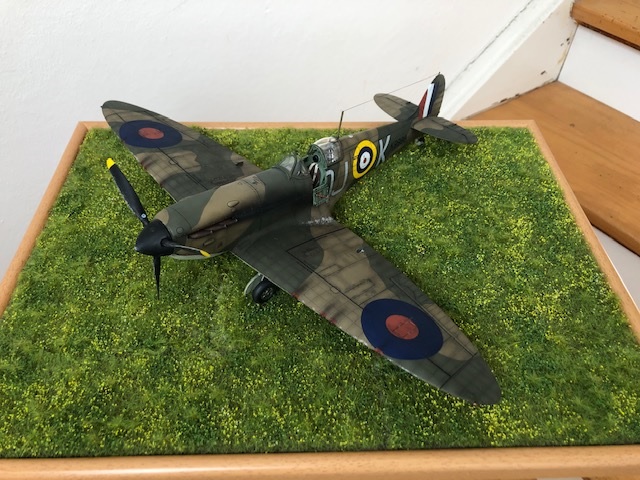
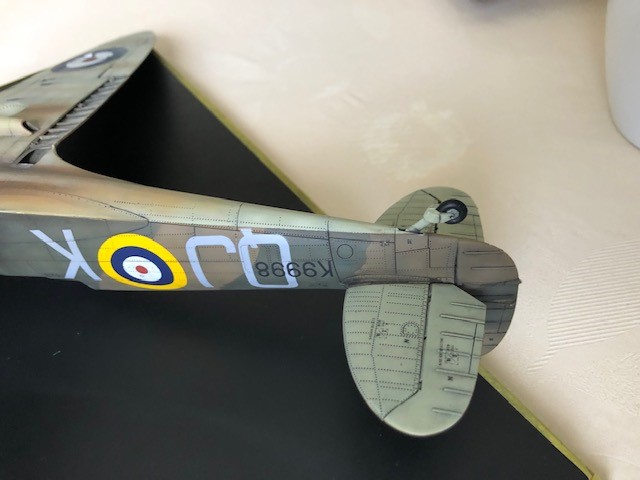
Geoffrey Wellum´s K9998, QJ-K, Biggin Hill, September 1940
80th anniversary of the Battle of Britain build
|

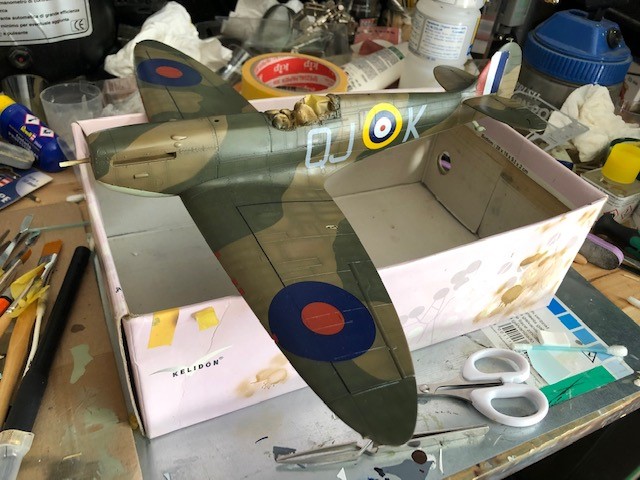
This was my 3rd build overall and represented a project that I had been planning for a long time; up to now I never found the time, nor the courage…nor the kit to embark on it with.
After my 2 first builds which have been armour subjects (a 1974 OOB M13/40 from Tamiya and another OOB Ariete C1 both 1/35 scale), both given away as presents, I took the challenge to confront myself with an airplane…and what an airplane indeed.
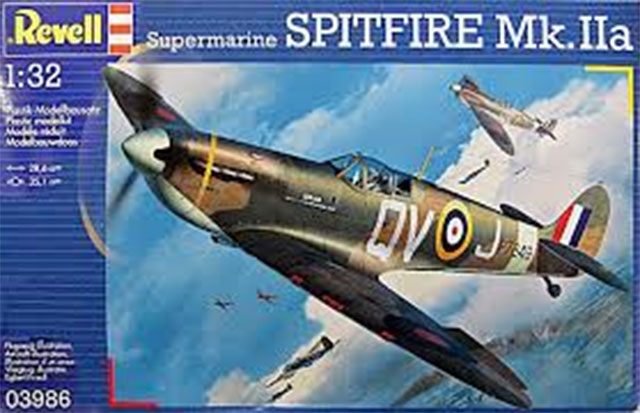
The chance came when I became aware that Revell had released the Spitfire MK II in 1/32 which is the appropriate scale in my view to depict this subject and the legend belonging to it.

Once I opened the box, I was pleased to see that the parts looked to be very much on the detailed side (some reviews criticize the fact that panel lines are over done, but I could live with that) but from a deeper analysis I soon realised that if I wanted to make a good replica of this icon (considering my learning skill limitations) I had to go along the road of PE aftermarkets and everything that this meant.
My wish was also to build a plane from the Battle of Britain, so went to seek what needed to be done to convert this kit into a Mk 1, without getting crazy on the rivet counter side of things. Aftermarket decals were therefore also ordered. I could have lengthened the list, with all sorts of resin accessories, but again, being my 3rd build overall and at the initial stages of my learning curve I decided to go along with this minimal set of modifications.
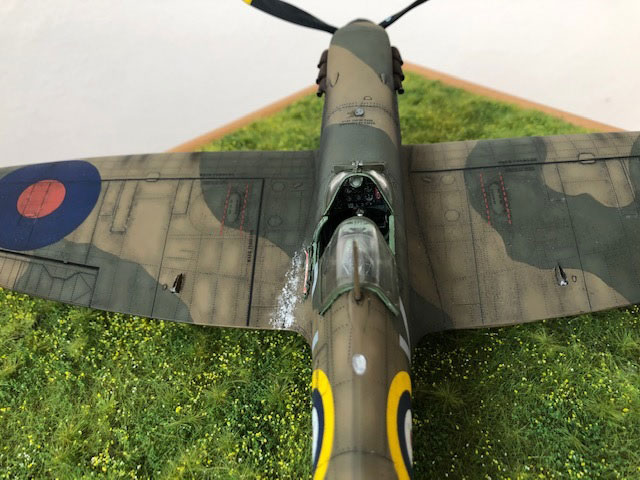
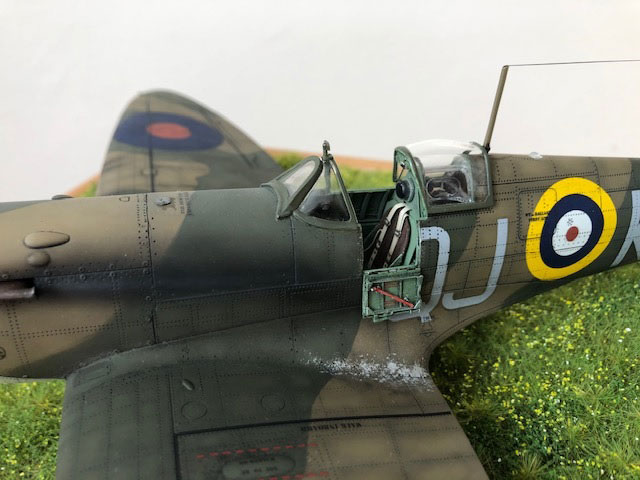
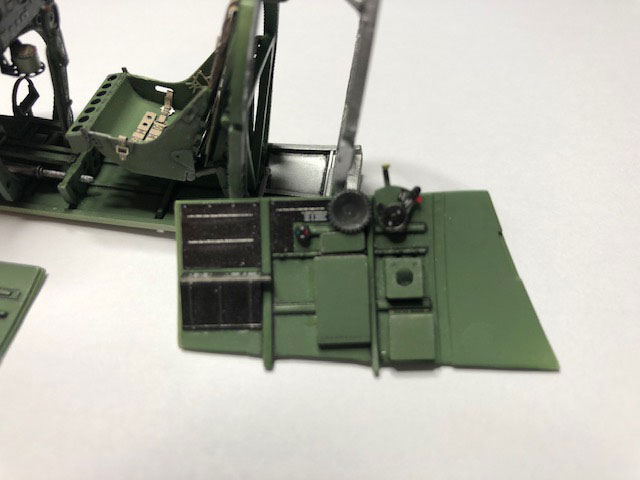
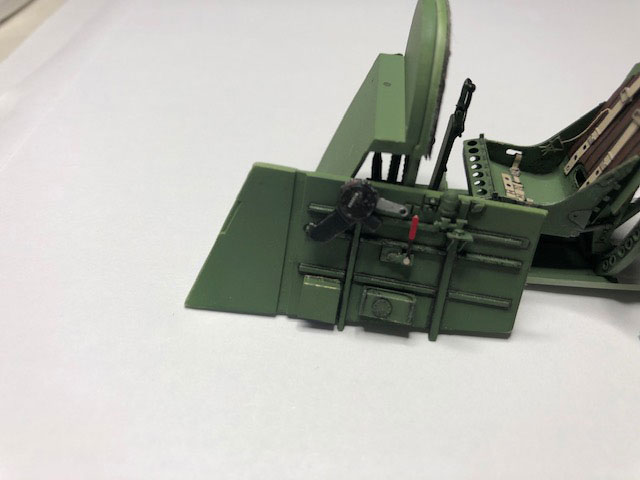
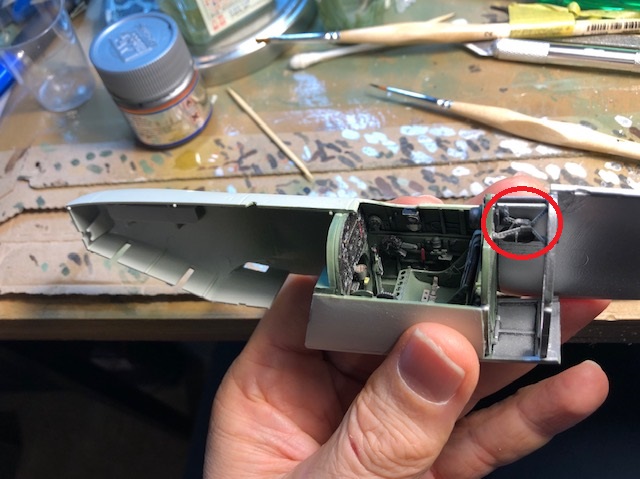
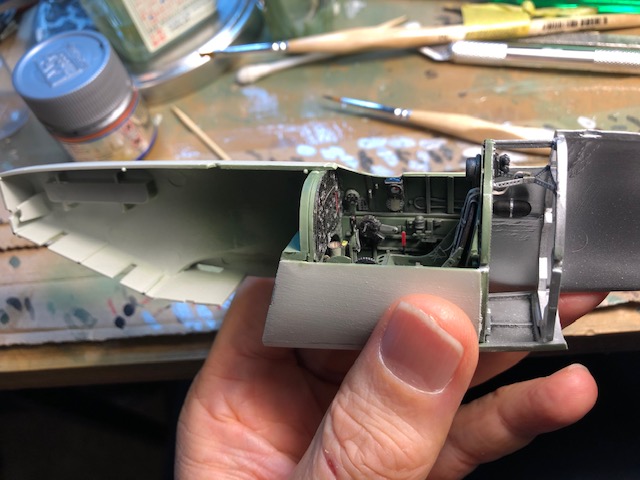
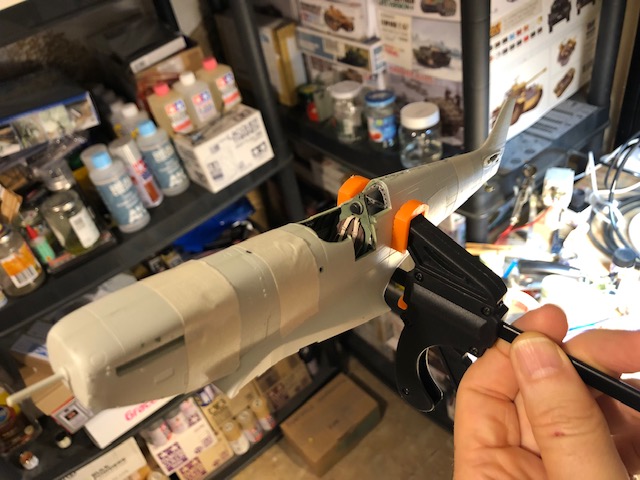
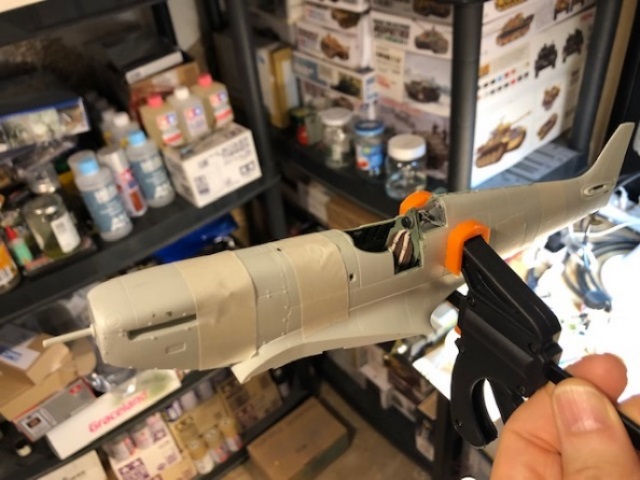
I got myself busy in starting with the cockpit, as per instruction orders and immediately got in the challenge of almost replacing half of what was offered by the kit with PE details from the Eduard set. I therefore decided to prime all PE parts whilst still attached on their metal frames with Tamiya grey surface primer in a rattle can and after drying, applied a coat of Tamiya Cockpit Green XF 71, diluted with Mr. Color Leveling thinner with my Iwata HP CS airbrush. I then sanded off the plastic parts of the kit (or portions of them, e.g. instrument panel) to be replaced with PE, which were then carefully cut from their metal frame, sanded off, bent (when this was necessary) and then glued into position using CA glue. This proved to be challenging since the CA glue was applied on the tip of a toothpick with no room for error, due to extreme fast drying time of the CA glue. The pilot chair was quite challenging on his own, as the bending into shape of the PE left some gaps, later to be filled with Mr. Dissolved putty and then sanded.
Once pre-painted, each sub-assembly was assembled to form the cockpit using either Polystyrene Cement and/or CA glue (depending on the circumstances). I painted the rear part of the cockpit in Aluminium using an AK rattle can and then applied all weathering, paying attention to weather the XF and acrylic painted details with enamel wash and the rear of the canopy and Aluminium (enamel) coated parts with Vallejo acrylic wash (very carefully not to overdo it, as this product is very hard to be cleaned off).
It took me a full month´s evening work after the office to get to cockpit done, ready to be inserted into the fuselage but was pleased with it in the end and full of high hopes for the next stages.
By the way…the x shaped spar must have broken off some 10 times in the process and eventually found the way to glue it stably into its own end position providing a good base of CA glue.


By the way…the x shaped spar must have broken off some 10 times in the process and eventually found the way to glue it stably into its own end position providing a good base of CA glue.
I then did some dry fitting of this sub-assembly into the fuselage and my word…only to find out that nothing was fitting….it was really impossible to fit the cockpit in the fuselage without thinking of getting the good old coarse sanding stick and possibly adopting even more medieval measures with a cutter.
I then spent evenings sanding off parts here and there and even cutting away some of the ribs to accommodate that cockpit into the fuselage….it was a challenge and had to ask for the Big clamps to succeed in doing so. Generous amounts of cement and filler were used for purpose.
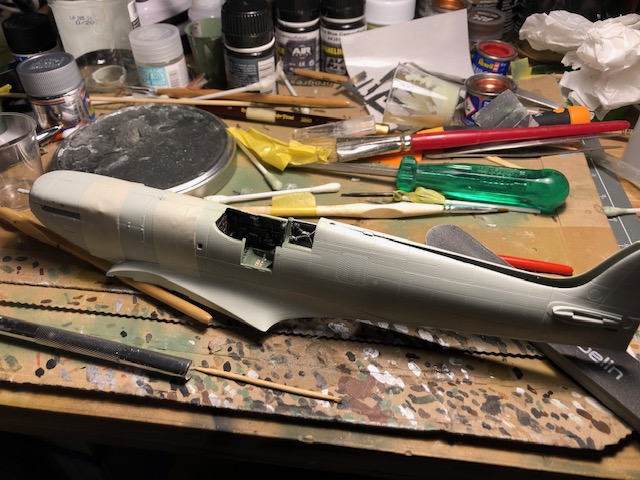
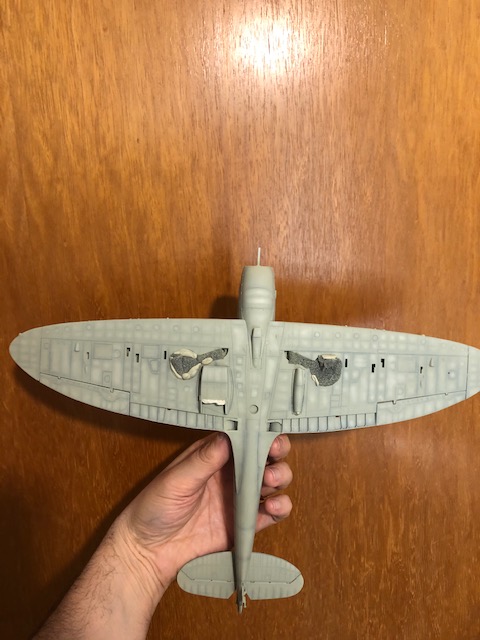
Once the fuselage was closed, I then filled and sanded wherever this was necessary and this took me some good evenings of work.
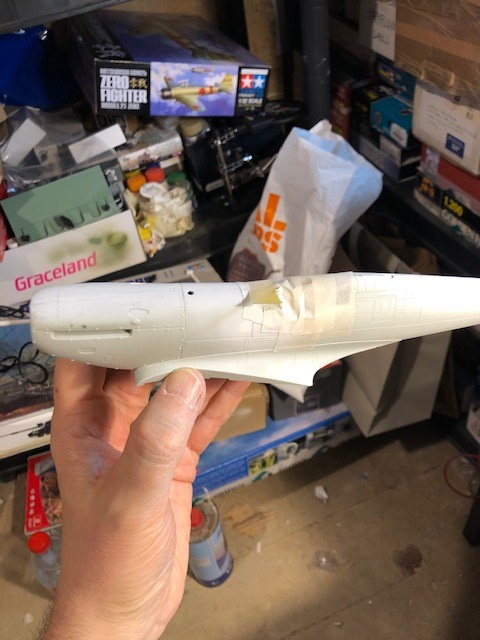
Of course also due to my inexperience some engraved detail did not survive this phase and had to be re-scribed with panel blade from Trumpeter.
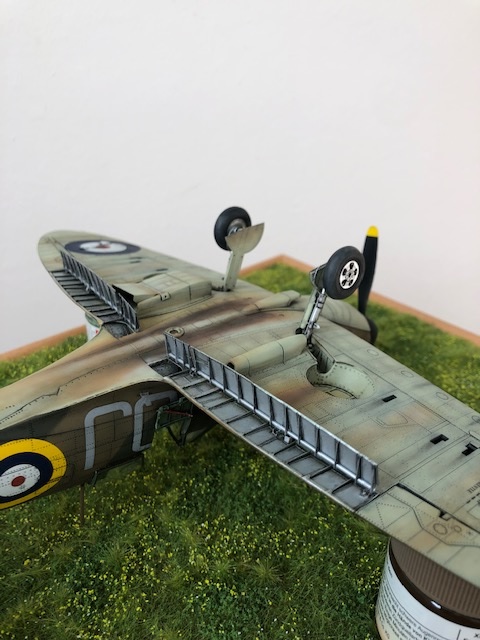
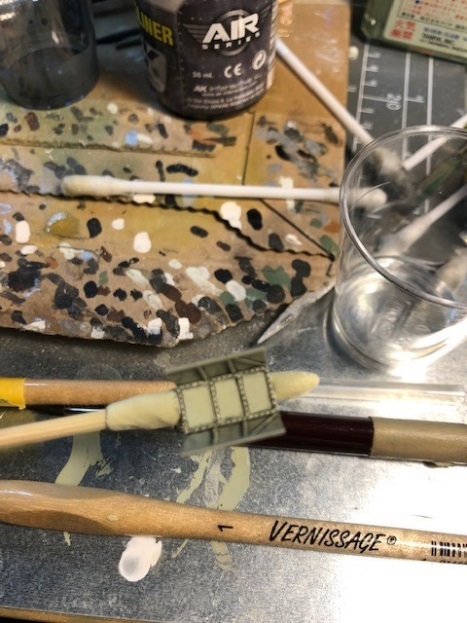
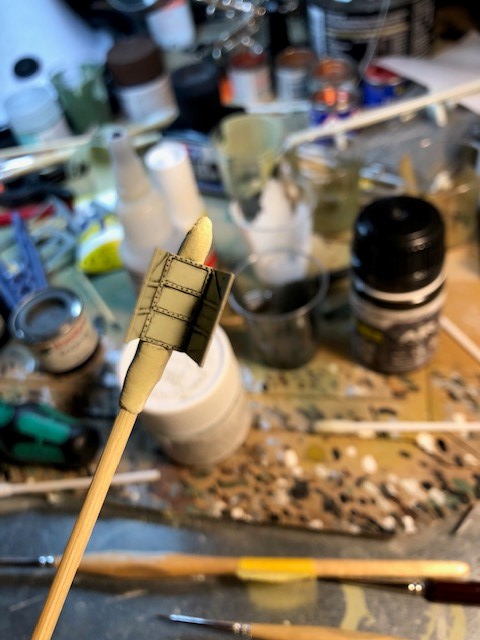
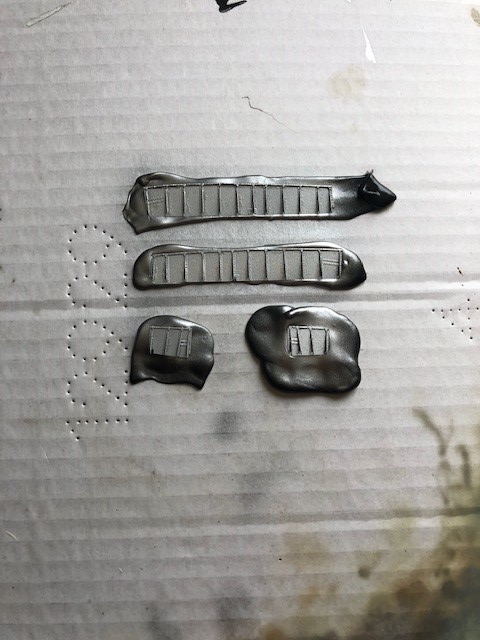
I then turned my attention to the wings and again I was presented with the challenge of seeking how to insert the PE detail not only in the wheel wells but also and most importantly, to insert the PE flaps (upper and lower part). At this stage I asked myself if I had not overstretched myself in getting this far in trying the PE way…but I took the challenge.
To accommodate the PE flaps I had first of all to cut away and sand off to the correct thickness both the wing sides and did a lot of dry fits. I then primed and assembled both inner and outer (movable) part of the flaps using CA glue and Mr Dissolved putty. Once dry and filled they were carefully sanded and set aside waiting to be painted and assembled.
I then worked on the PE details for the wheel wells and in the by now familiar sequence priming, cutting and sanding them off prior to assembly with CA glue.
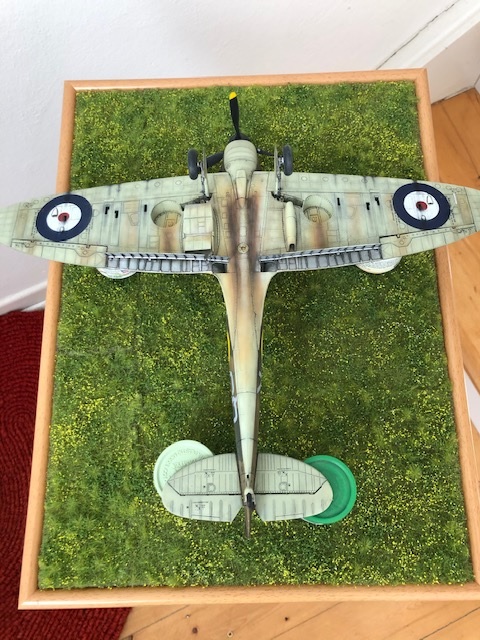
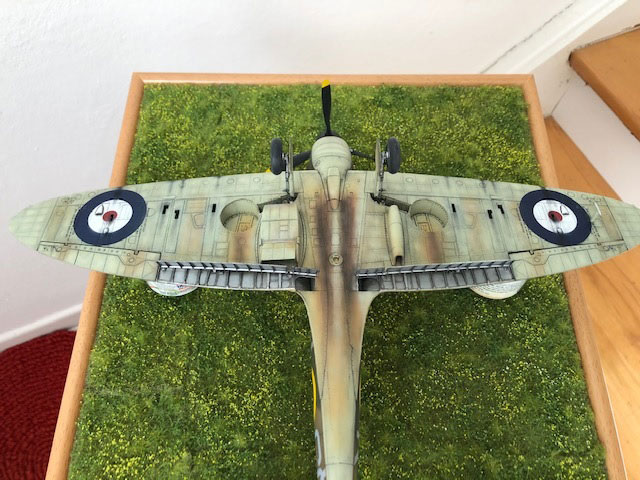
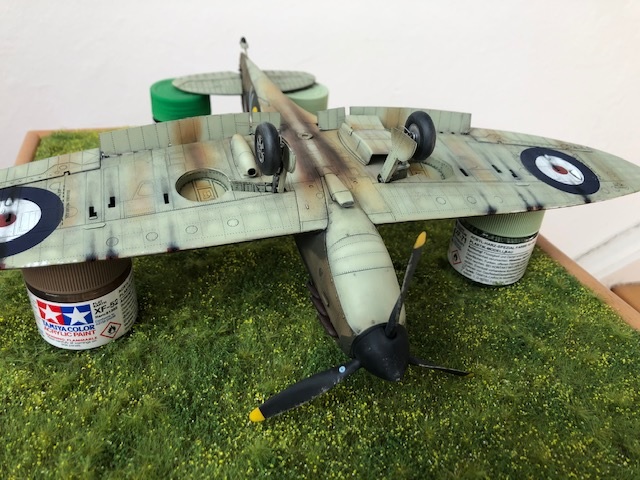
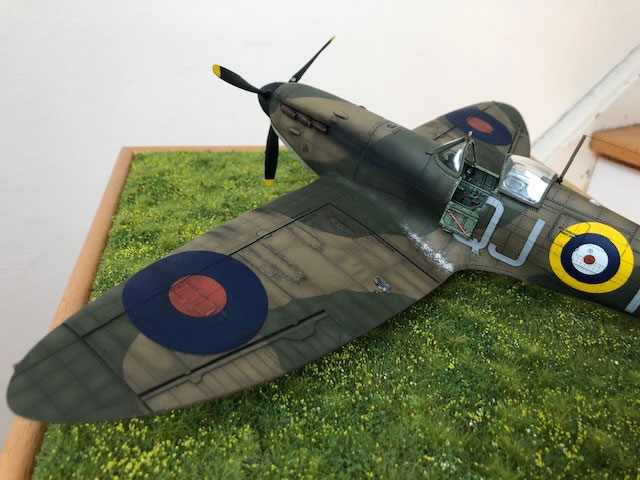
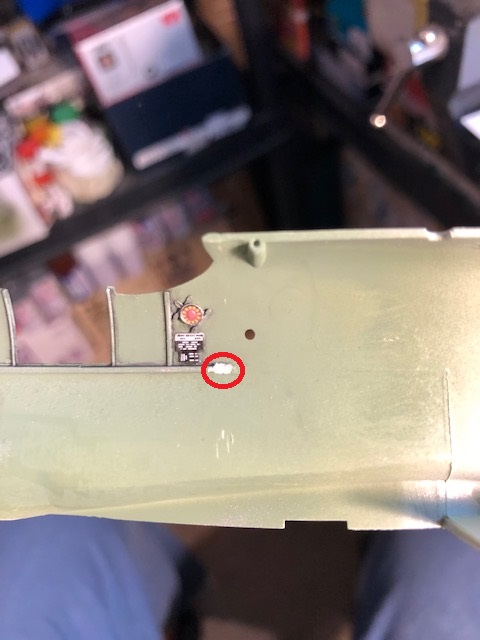
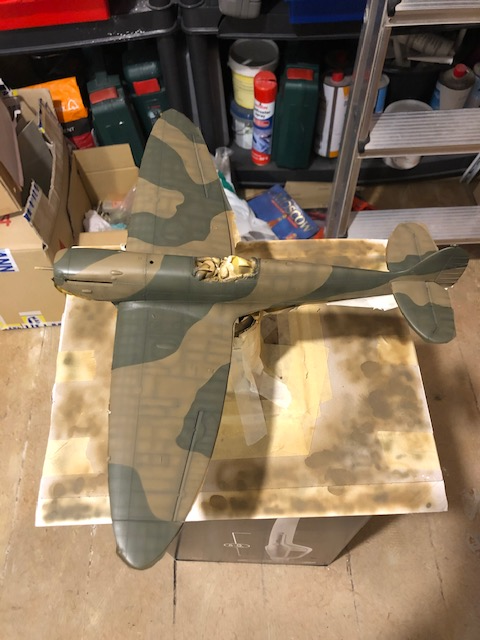
I then decided to paint them with SKY (Gunze Mr. color….) later to be masked off with foam. After painting, I applied weathering using AK enamel wash for NATO Tanks. I wanted to add detail in the weapons section therefore I added some 1/700 15 cm Fukuya Japanese naval barrels to replicate the Browning 7.7 mm machine guns. As a locator for the guns, I used dabs of Blue Tack and CA glue, after which proceeded in colouring them with enamel Gun metal. I then assembled the three parts of the wings together with the wheel wells…and spent a lot of time again filling the gaps with Vallejo water based putty and then sanding. This was probably another stage where due to savage …but likewise necessary sanding a lot of detail in the wing-fuselage junction area was lost, so had to re-scribe panel lines and rivet details. Indeed it was the most time consuming parts of the build so far.
After mounting elevators and rudder, I started to get ready for painting.
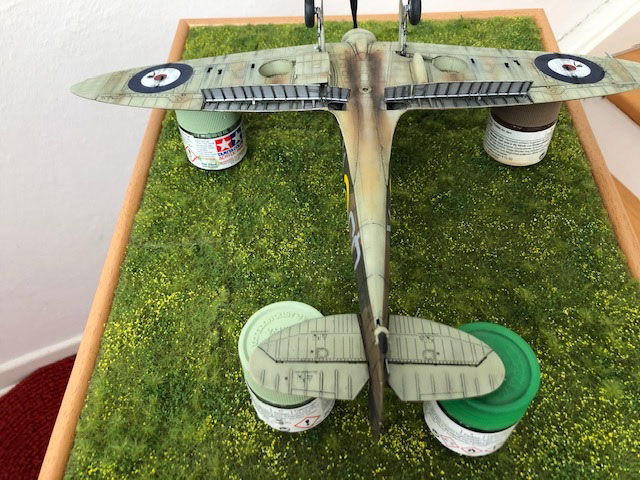
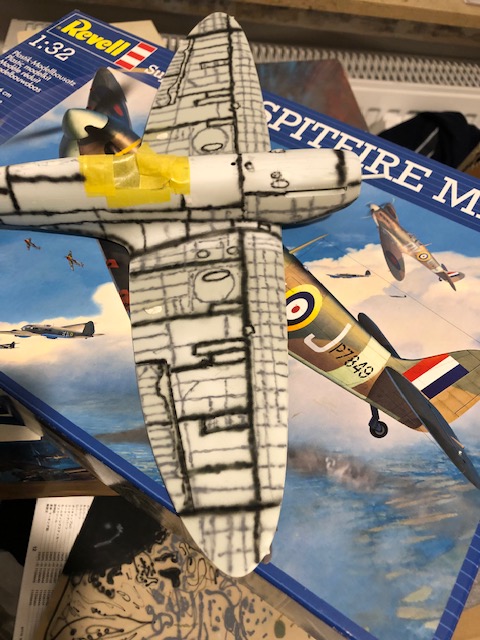
My first choice was to pre-shade and so started with the underside of the plane, using Tamiya matt black for the heavier recessed panel demarcation lines and dark grey for all other panel lines.
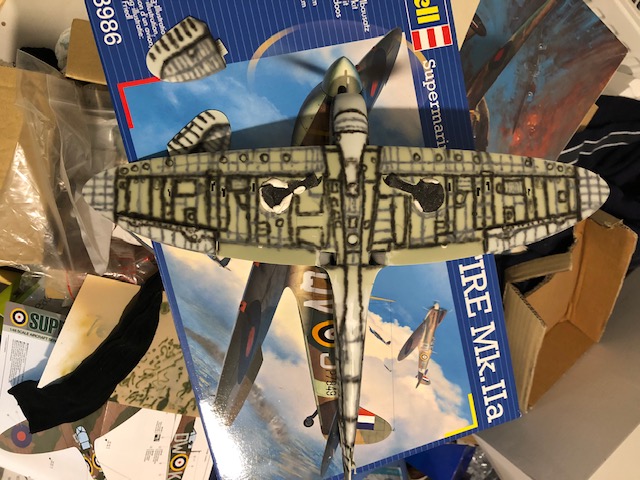
I then applied Gunze lacquer Sky colour # 368…. which gave in my view a very good finish, rather on the satin side.
After applying 3 thin coats I achieved the right degree of coverage, pleasing the eye with the pre-shading. I then proceeded with bleaching, i.e. high amount of thinner (75% at least and then a couple of drops of white to the colour) to highlight the centre of each panel and post shading the lines with same technique, using Tamiya LP Nato black drops (far less amount of this than white).
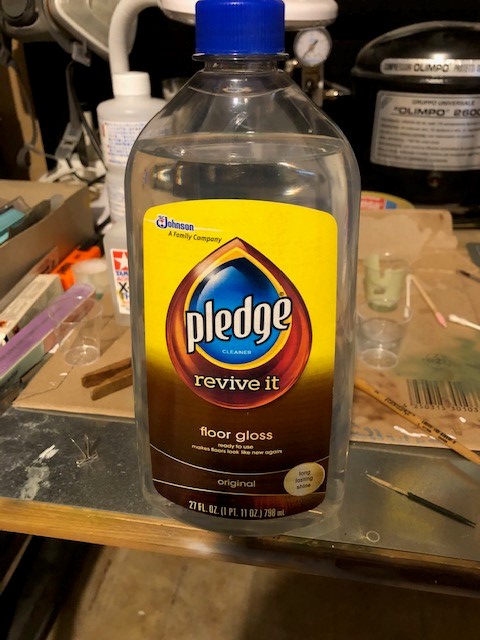
I then sealed everything with future floor care that a colleague of mine brought from Canada to me.
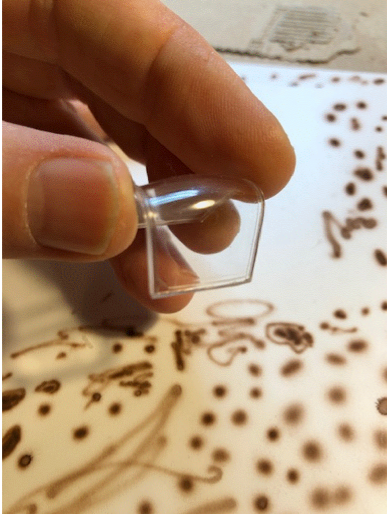
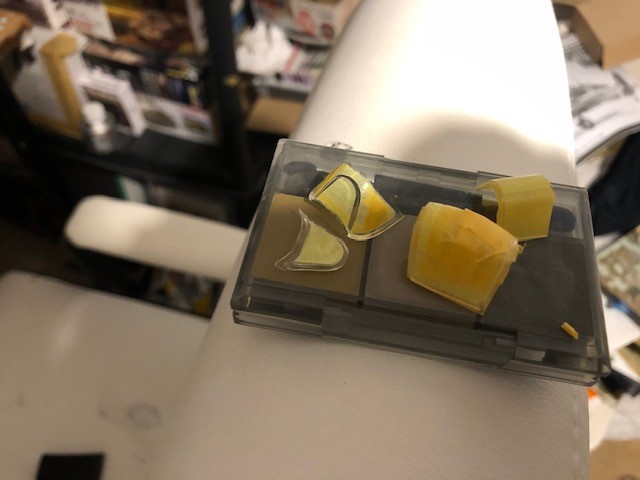
Whilst the Future flask was at hand I poured some in a little plastic cup and then dipped the 3 canopy sections, prior to a careful cleaning with Tamiya polishing pastes. This operation was quite fast, but it took a good 3-4 days for the Future to dry, in order to apply Eduard´s canopy masks to them.
This phase resulted to be particularly fiddly as the handling is problematic. Tweezers and toothpicks were used to purpose. The additional areas of the canopy were masked off with Revell masking tape, which included the inside of the canopies as well:
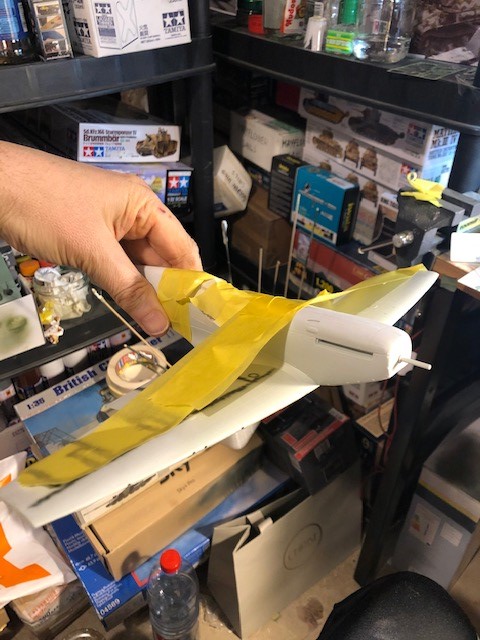
I then proceeded to mask the entire canopy with blue tack, and Revell tape, temporarily attaching the pilot´s door as to provide continuity to paintwork and decals. Alike the underside, I then pre-shaded using either black or grey.
I then applied 2-3 coats of the lightest colour - Lacquer Dark Earth # 369 from Gunze, thinned with Mr. Color Levelling Thinner with roughly 60/40 ratio and spraying at about 1 bar.
Once the right degree of coverage was achieved I went on with post shading alike I did on the Sky underneath. This post shading in my view resulted to be a bit on the chessboard style, I then went on applying an even very light coat of the Brown colour to act as a filter to reduce the contrast.
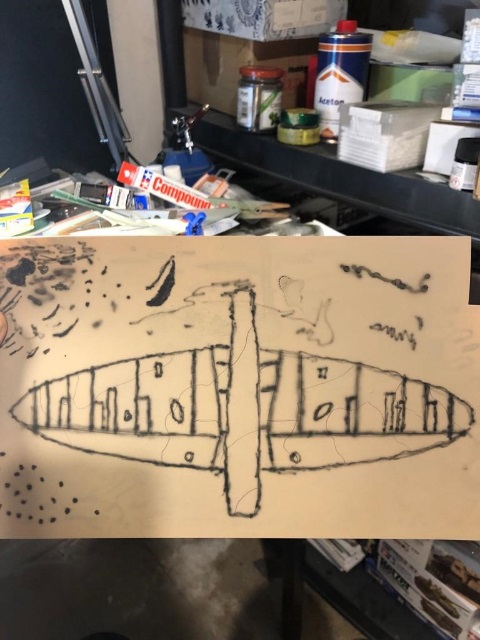
For the camo patter, I wanted to pre-shade, however was doubtful that the dark colour would have eventually covered the pre-shades, so therefore tried it first on a plasticard sheet:

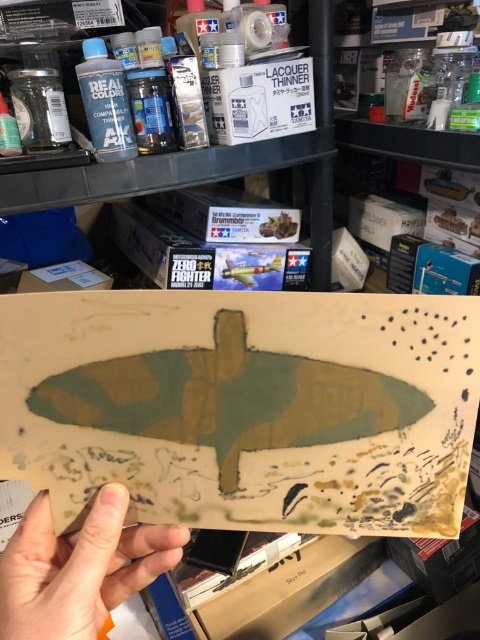
I therefore went for post-shading and to achieve the hard edge I applied clever putty to the whole upper surface to follow Camo pattern A and masked all the “not to be painted areas” also with Tamiya tape.
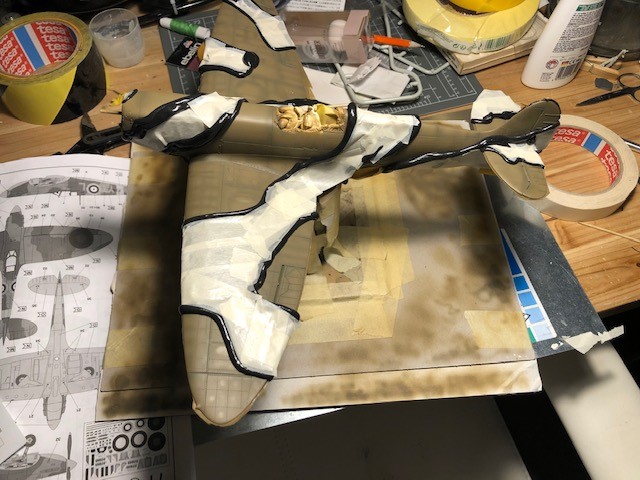
The post shading to the green was then applied in a likewise manner as to the Dark Earth.
Wing boards were necessarily masked with Revell tape. I used the Mr. Color Dark Green # 361 with same thinning and pressure ratio and after the usual 2 – 3 coats, proceeded likewise for the post-shading.
Once removed the excess, I proceeded with sealing with one coat of pledge and started with decaling.
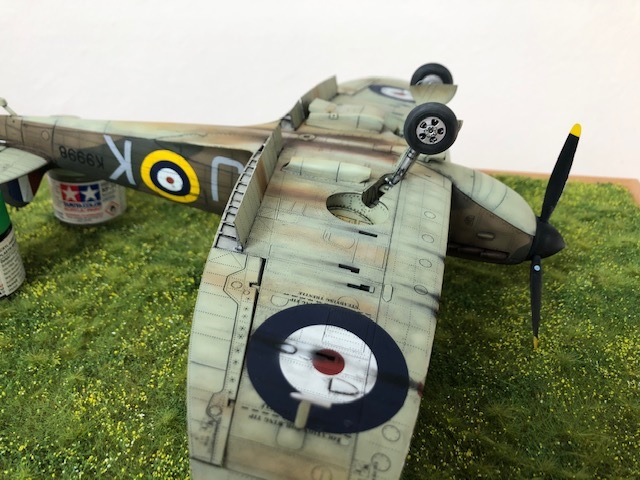
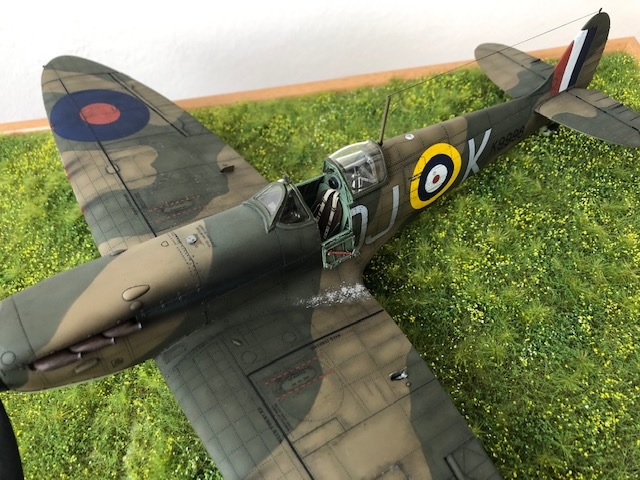
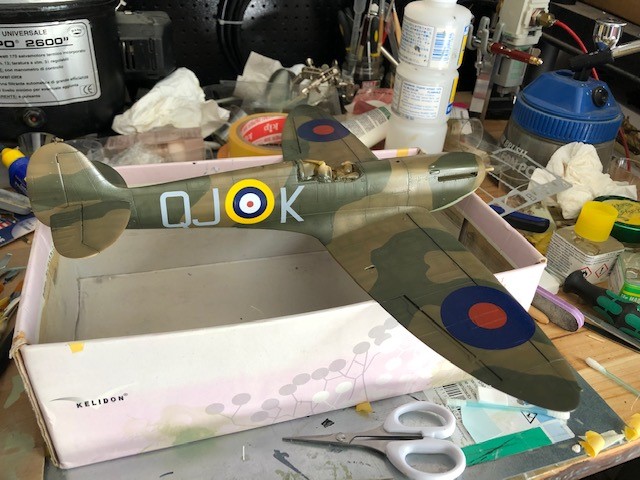
Since I had the desire to reproduce a Mk 1 from 92 Squadron (in particular Geoffrey Wellum´s QJ-K, K9998), I had to purchase separate aftermarket decal sheets with letters and the Techmod stencils, far richer and better than what supplied with the Kit. Techmod are great decals but totally unforgiving….so had to dip them in water for a very short time and for the application needed to have some water in place so that they could be moved about a little bit.
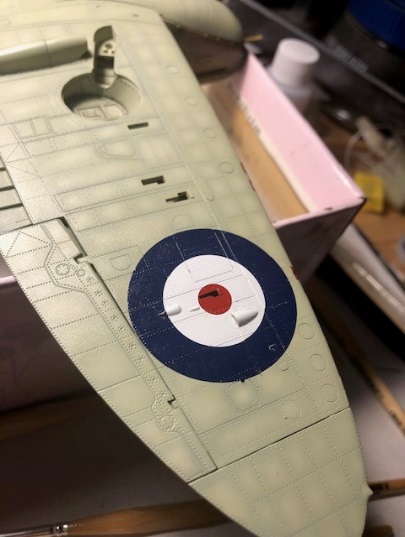
The underside proved to be the most challenging part for decaling, since I had to apply the roundels in such awkward position, covering a significantly raised detail from the wings of the kit. To my rescue came generous coats of Micro Sol, and I had to follow each of these roundels almost for a day, constantly applying Micro SOL to ease the adhesiveness of the decal to the raised detail. At the end decals adhered but paying the price of fractures, which were cured with selective patches of other decals of the same colour and were this was not enough or too noticeable. extremely thinned Schminke Oil paints were used for purpose.
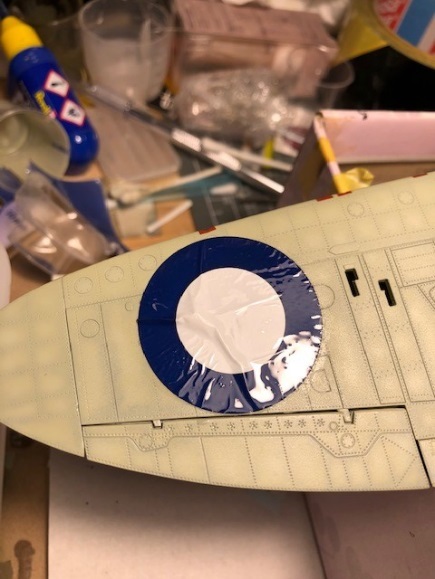
Once decal was matching the detail I then poked them with a Pin and engraved the panel lines with a new blade from a Tamiya cutter, to improve adhesiveness. More Micro SOL was applied afterwards.
I then proceeded applying Flory models clay wash to the entire undersurface and to the pieces which had not been mounted on yet such as air intake and filters. Drying time was about 15 minutes and then removed with a damp Cotton bud or a make-up sponge, which I found to be the ideal tool for purpose. Not applying Future gave me the possibility to have more texture to the wash and that level of weathering I was after.
Once decals were applied also on the upper side with the same procedure, I repeated weathering there also.
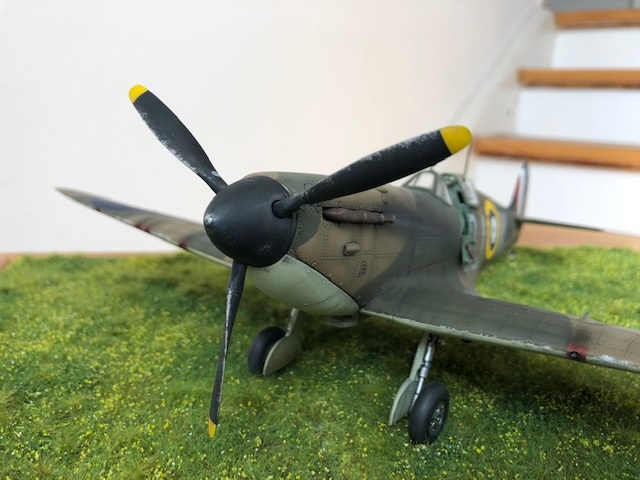
To replicate exhaust stains, I applied Tamiya smoke on both sides, with the inner trace caused by the tetraethylene additive in the fuel made from Tamiya pastels.

Getting towards the end of the build it was the turn of the flaps, which were made from a bespoke PE set from Eduard, which were primed, glued using CA glue, filled with Mr. Dissolved putty and then finally painted with Acrylic alluminium from AK Real colours …and finally washed with AK enamel thinner.
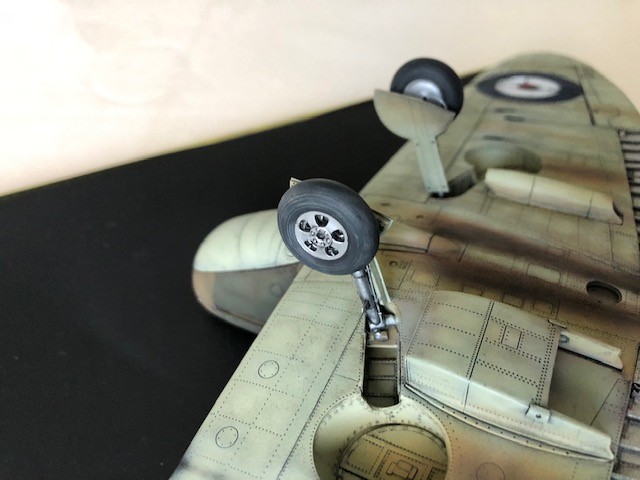
I then did the same with the undercarriage making sure to take all the burr away and following the acrylic Aluminium + enamel weathering process.
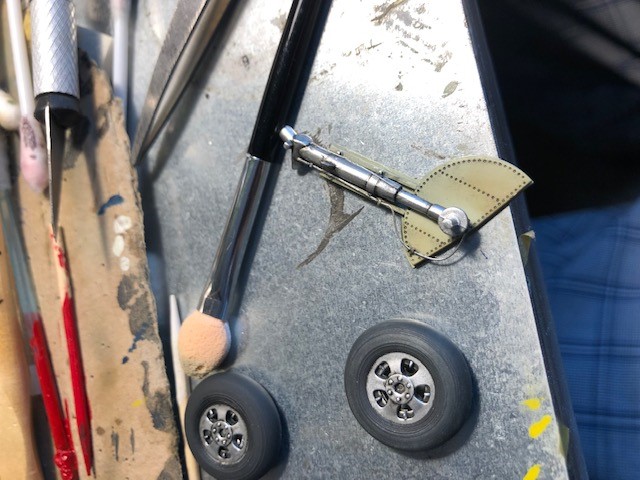
Prior attaching the undercarriage, I proceeded in making oil streaks from the engine and grime coming from wheel and wheel wells, using Light rust colour of AMMO and then Tamiya Brown applied with airbursh. I then added with a brush the thin streak of engine oil streak from AK engine oil streak.
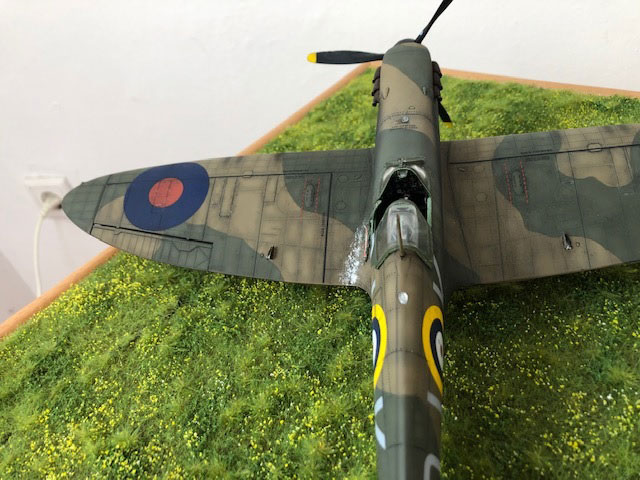
It was finally the turn of the canopy which I painted in Dark Green gunze and followed basically the same stages I did for the upper part of the fuselage to avoid any colour mis-alignment.
After peeling off the masks I positioned them using Micro Kristal Clear. This is a wonderful product since it can be used also as a filler and in fact used it to attach also the PE pilot door from Eduard, that replaced the one from the kit that was in the meantime removed.
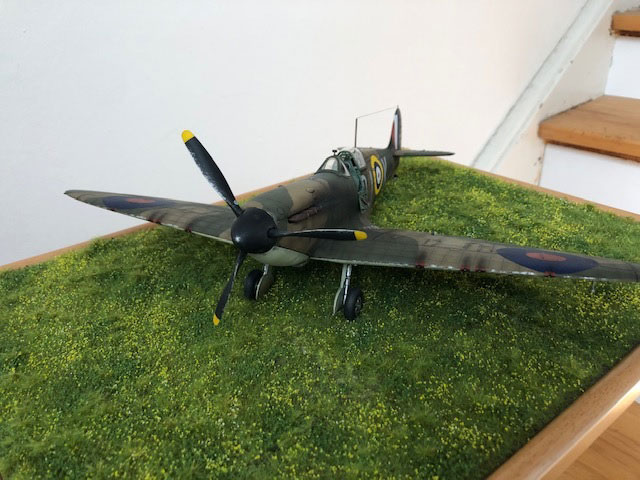
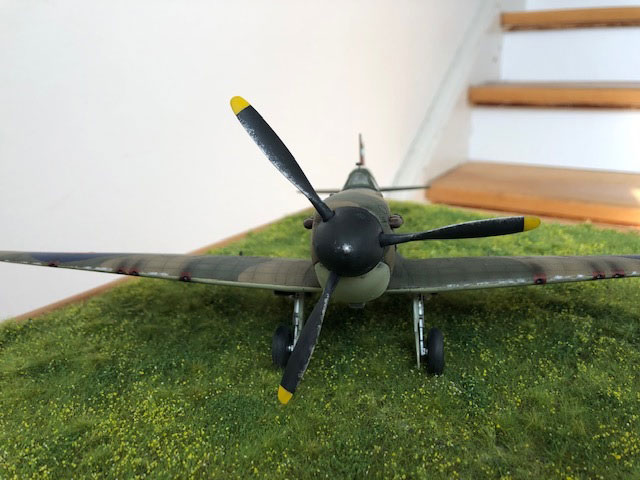
The propeller was painted in Tamiya X18 semi-gloss black and tips with Tamiya Yellow. The pre-assembly was then submitted to weathering using, pencil tapping, application of Tamiya grey and soot pastels and finally application of aluminium to the edges of the blades and to the tip of the spinner with a sponge which was also applied to the pilot´s walkway and randomly to wing bards.
A small research highlighted that the aircraft was equipped with a pole-style antenna, which I re-created using a Plasticard sheet and then sanded to right dimension and shape, eventually equipped with copper wire in its base and painted also in Gunze Dark Earth.
EZ line (fine) black was used for the antenna.
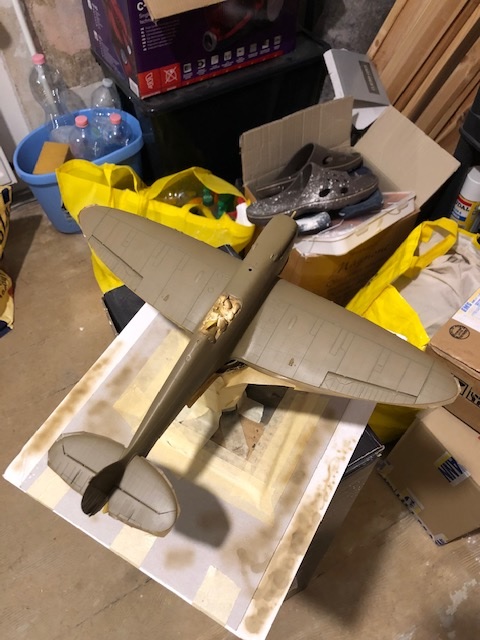
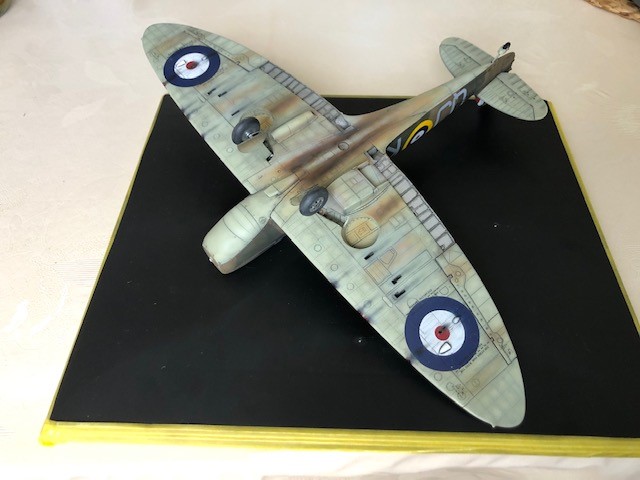
The model was finally placed on a picture frame bought at a local DIY and grass using AMMO by Mig grass mats.
This build proved to be challenging under all perspectives, but being my 3rd build overall, I was very pleased with the result.
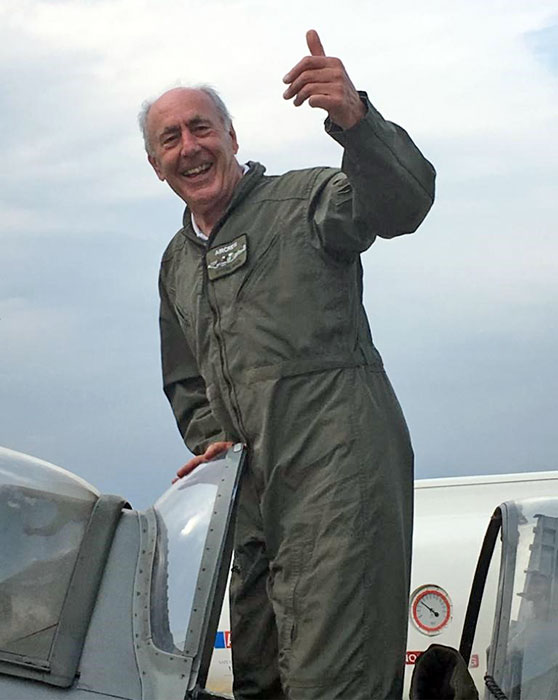
I will be very pleased to donate it to my Uncle who lives in Chislehurst (UK)….on the doorstep of Biggin Hill and who flew in a Spitfire himself as a gift for his 80th Birthday 2 years ago.
Detmold, Germany, October 2020
Text and Images Copyright ©
2020 by Davide Montaldo
Page Created 18 November, 2020
Last Updated
19 November, 2020
Back to
HyperScale Main Page
|
 Home
| What's New |
Features |
Gallery |
Reviews |
Reference |
Forum |
Search
Home
| What's New |
Features |
Gallery |
Reviews |
Reference |
Forum |
Search