Sky Model's 1/48 scale
Beechcraft T-34C
Turbo Mentor

|
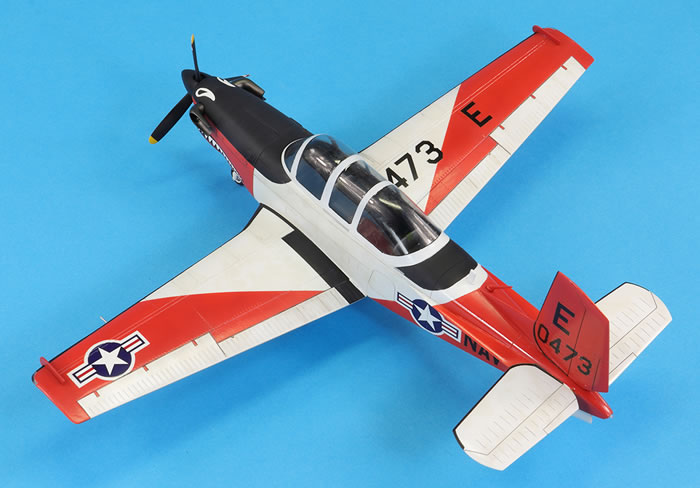
Beechcraft T-34C Turbo Mentor
TAW-5, US Navy, USA 1986
|
by Jon Bryon

Hobby Boss's 1/48 F4U-7 Corsair is available online from Squadron.com
Well, here’s a kit I never expected to actually build.
I got it because it was cheap. Hannants reduced it from £40 to £10, which in 2003 was a good deal, and so I could not resist and bought it. It’s the first resin kit I bought and the first I have built and it came with one problem: no decals. This is odd, because Sky Models are mainly known as a producer of (very crammed) decal sheets, and yet they never bothered to make any for their own kit. I assumed this would be a minor problem: surely someone would produce a sheet for a US Navy T-34C, wouldn’t they?
As it turns out, no, they wouldn’t. The Turbo Mentor is mysteriously poorly served in 1/48 scale. Collectaire made one, and a few years after Sky Models, Czech Model made an injection-moulded one…and that’s it! For a trainer that has been so ubiquitous in US service for decades, I’m puzzled, but then the T-37 Tweet has suffered a similar fate. In any case, no one has made any decals for a US T-34C and so I was stuck.
Fortunately, I joined an excellent Facebook group set up to facilitate trading of decals, and I put a post up on the off-chance someone had a spare option from the Czech Model kit. I expected nothing, but amazingly a gentleman replied saying he had a spare decal sheet, which he very kindly sent me all the way from the USA. Thank you Mr Butry; this kit was now going to get built!
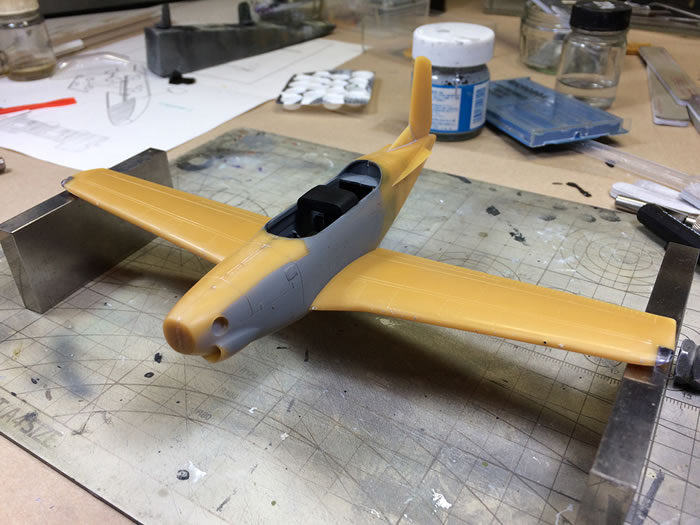
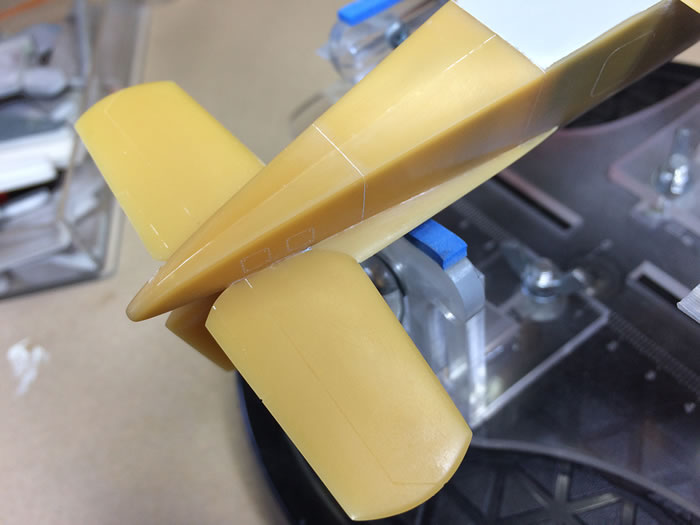
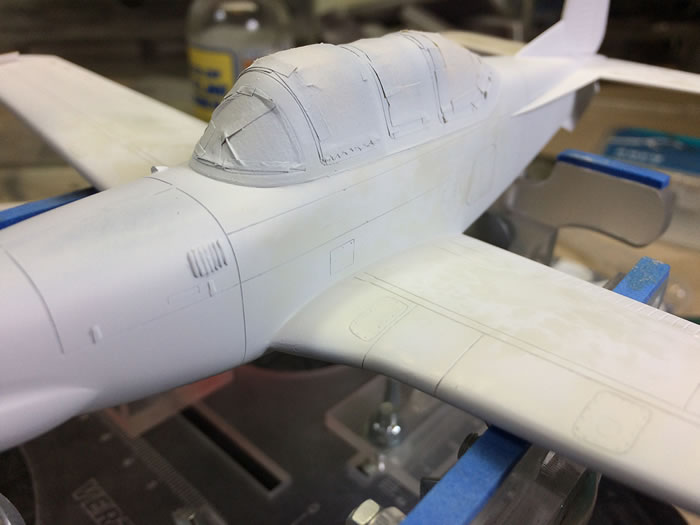
Sky Models produced this model in 1999 and it’s old school. I’ve only ever seen one built in a magazine (in SAM in 2002) and one built on the internet, and neither were done in US markings. The resin is yellow and hard, but quite strong. I actually really enjoyed working with it – it sanded beautifully. Everything is in resin (except the canopy); there’s no PE or metal. The instructions are woeful (in that to all intents and purposes they are non-existent) and two vac-formed canopies are provided as well as a resin master if you fancy plunging your own. One canopy was worse that the other, but both are poor, with no definition to where the rear of the canopy needs to be cut and plenty of blemishes on the glass portions. The clear plastic is also extremely thin. Fitting the canopy was definitely going to be the major challenge of this project.
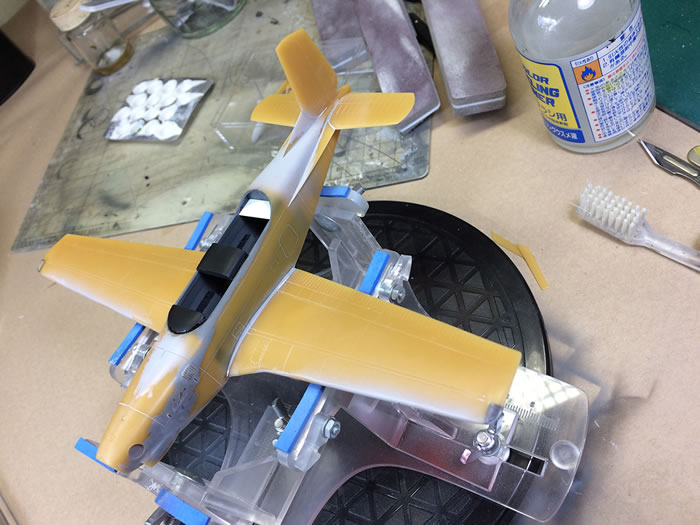
The resin undercarriage is adequate. There are ejector pin marks on the legs and wheels, which makes me think they are made from injection-moulded parts nicked from some other kit. The front wheel was poorly moulded and I replaced it with a spare wheel from an Italeri OH-13 kit. The main wheels have hubs that are too small in diameter, but I could not find suitable replacements in my spares box. The cockpit detail is basic and I added some etched seat belts from a Eduard set.
The resin is generally very nicely moulded and a test-fit was encouraging. The parts count is quite small (the entire wing is a single piece, for example) but the main difficulties would be the strakes in front of the tailplanes and vertical stabiliser. The horizontal stabilisers were a butt-join, but the fit of all these parts was actually pretty good. The surface details are nicely scribed in, but I think rather simplified compared to the real thing.
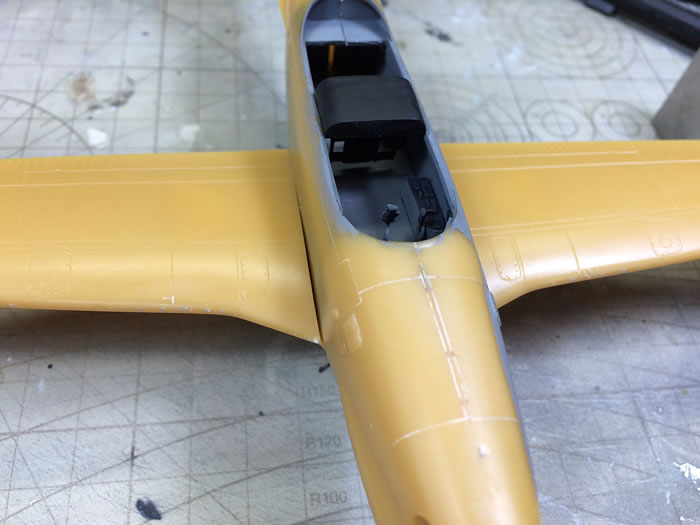
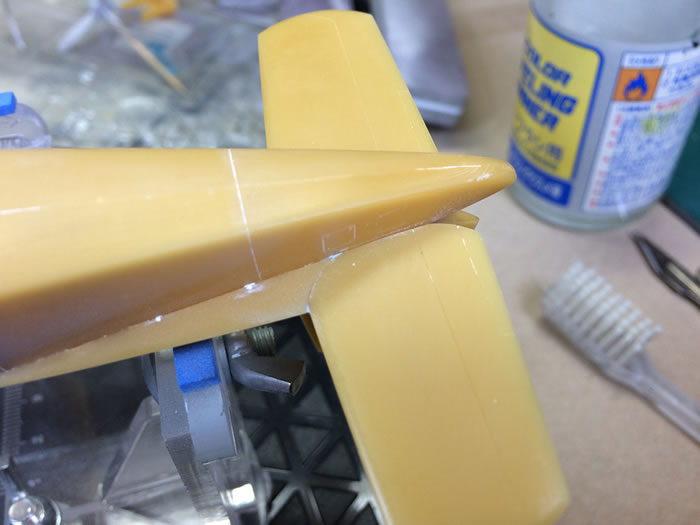
My main issue with construction was pinholes. There were plenty on the leading edge of the wing and they were small. The problem is, as soon as some were fixed, others would appear during sanding. In the end I got most of them with a combination of Mr Surfacer, super glue and Milliput superfine white, but some dimples are still visible. I hate pin holes. They also threatened to appear where the fuselage halves join under the fuselage and a lot of judicious sanding followed by some very thick coats of Mr Primer Surfacer 1000 had to be employed to get rid of the seams without further holes appearing near the seam.
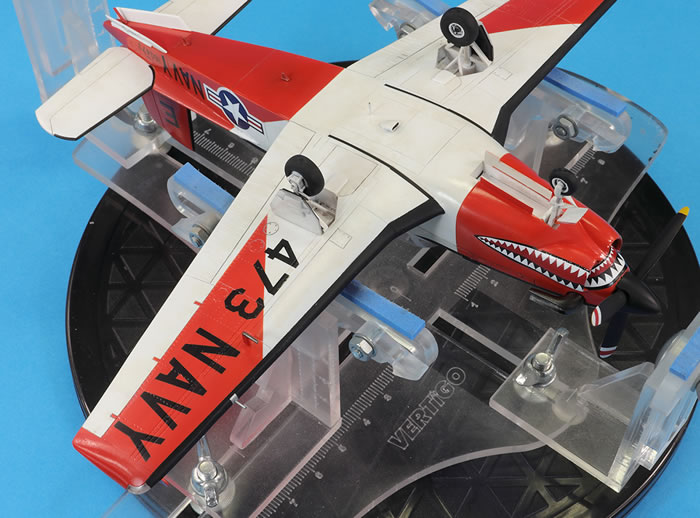
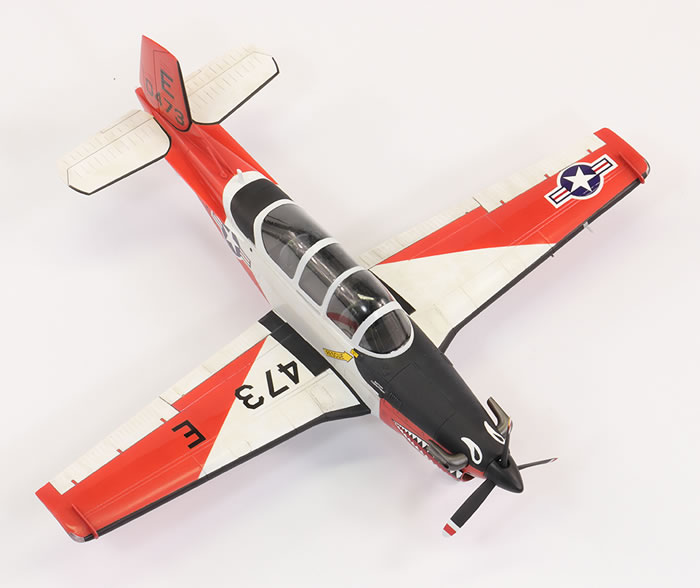
One characteristic feature of the T-34C is the large clear navigation light lenses at the wing tips. These were moulded in solid resin as part of the wing. I chopped the corners off and glued in some blocks of clear plastic, which were then shaped and polished. I rescribed the somewhat complex join between the lenses and the wing and then masked them with Bare Metal Foil for painting.
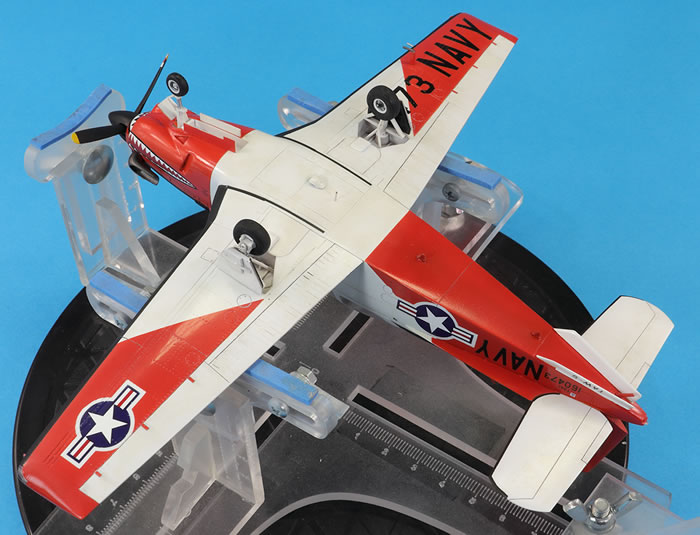
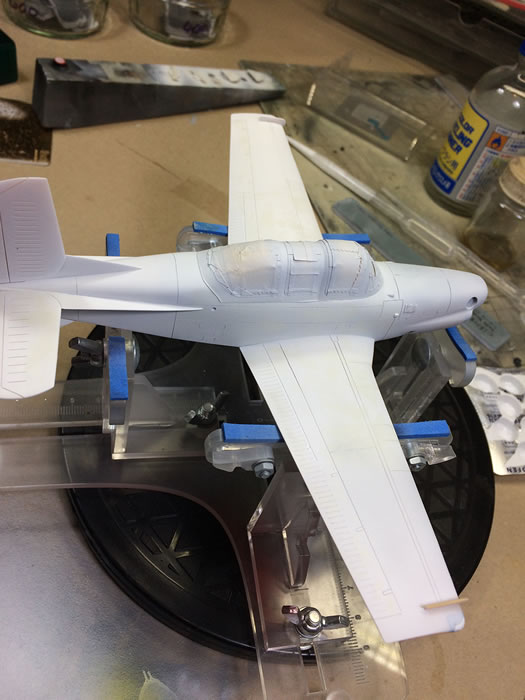
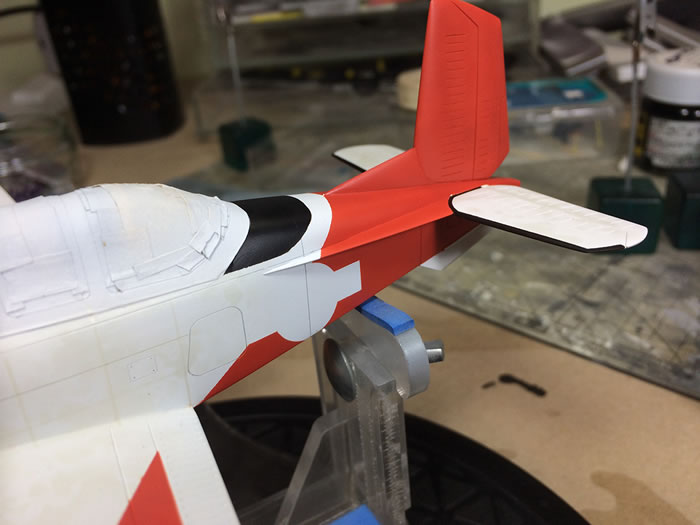
I found several decent photos of the Turbo Mentor online, but not as many as I would have liked. Some omissions became clear: there is a missing intake of some kind under the fuselage in the centre of the wing. I had no good photos and butchered something I found in my spares box to stand in as a fairly poor copy of what it should look like. There seem to be quite a few blade aerials along the centreline under the fuselage, which I used some Eduard MiG-21 spare parts for, and some kind of white pole antenna near the aforementioned intake. The blade aerial between the tail and the canopy was not in the kit, and another is missing between the ventral strakes. These, again, were made using spares and I claim no great resemblance to the real thing. I know I have missed many other small protrusions off, but I had intended for this to be a relatively quick build.
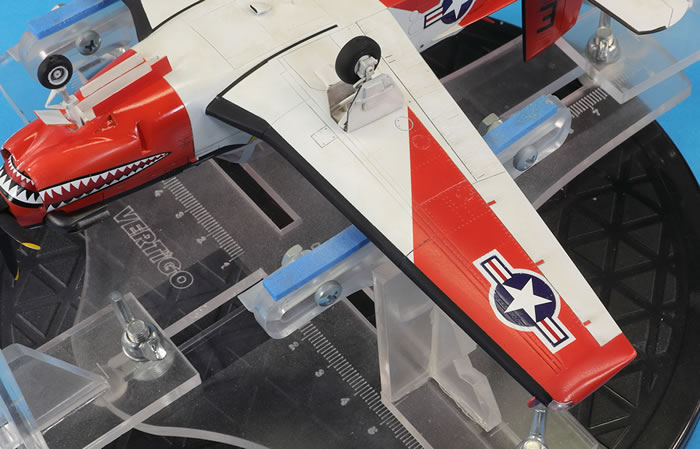
The ventral strakes were also a butt-join to the lower fuselage. I could not get them to match reality – they should meet at the rear. This, combined with the inaccurate tail tip (should be blunted off) makes me wonder if the rear fuselage is too wide.
The wing leading edge pitot was made from Albion Alloys tubing. The one under the wing comes in resin with the kit.
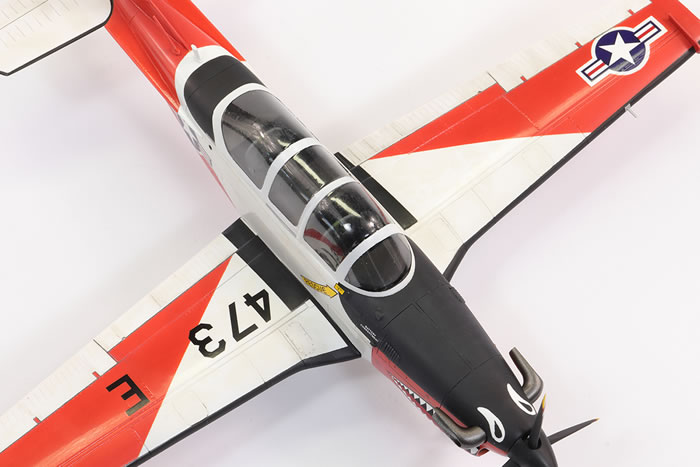
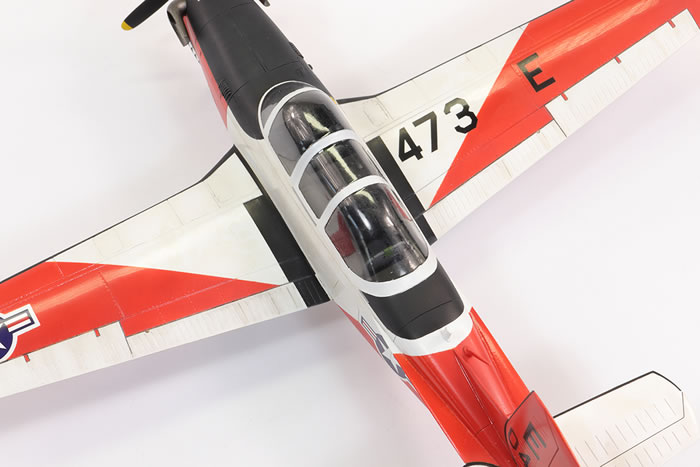
Without a doubt the major headache (and eyesore) with this model is the canopy. It’s just not great and compounded by the challenge of attaching it to the fuselage. I’ve used vacform canopies plenty of times in the past and find liquid cement to be the best method of attaching them. Of course, with resin, that was not an option. Neither was CA as I was not prepared to risk fogging; that left epoxy. The problem with epoxy is the clean up. In order to avoid too much seeping out, I masked the resin/plastic join where the canopy sat on the fuselage. I then applied the epoxy to the exposed resin, stuck the canopy on, let the glue seep out over the masking tape, and removed the tape. This left a pretty good join. The glue only really worked on the back half of the canopy as there was so little contact surface for the front half. Once the epoxy was set, some PVA was used for the front sections.
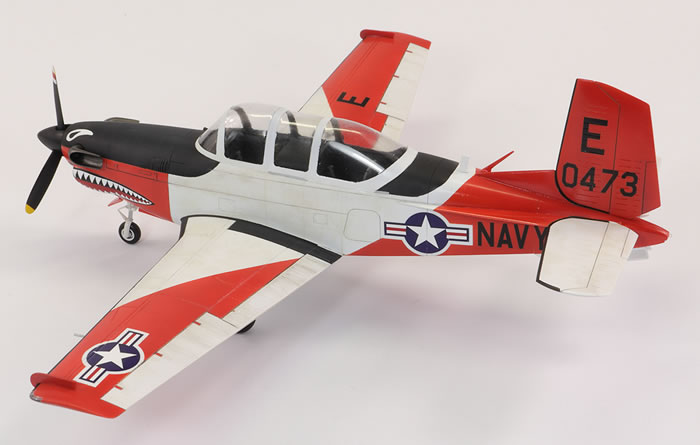
The finished canopy has two major problems: 1. The line at the base is indistinct, which means it flares out where it should not. This is most glaring in the centre, non-sliding section. 2. The canopy frame is not particularly well moulded and there are no shut lines present. This model could have been so much better with a decent canopy.
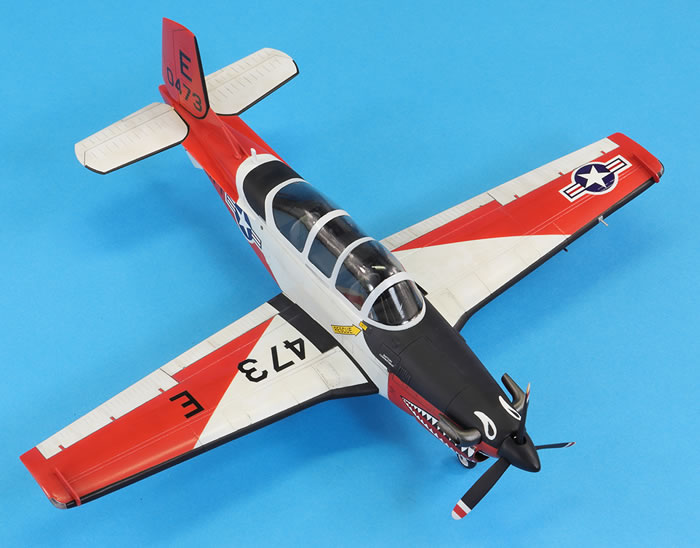
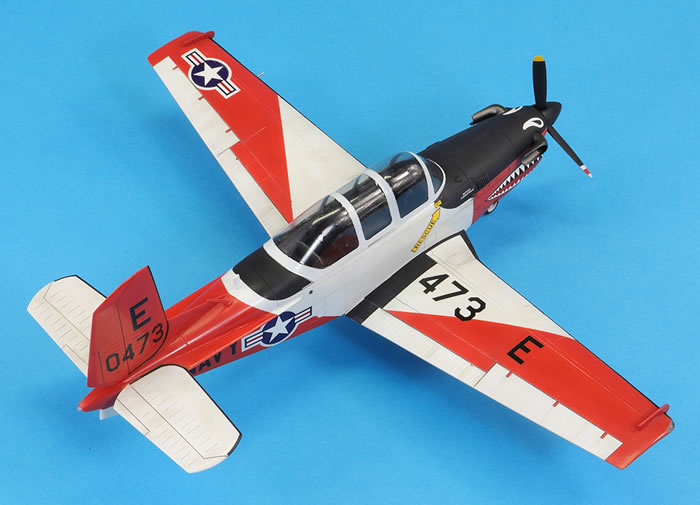
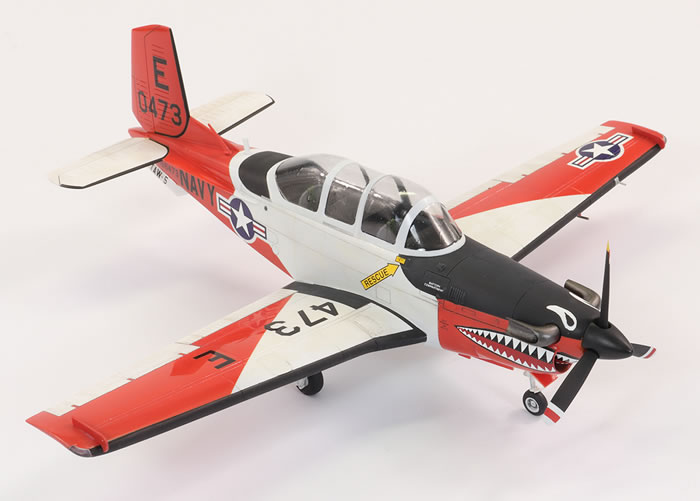
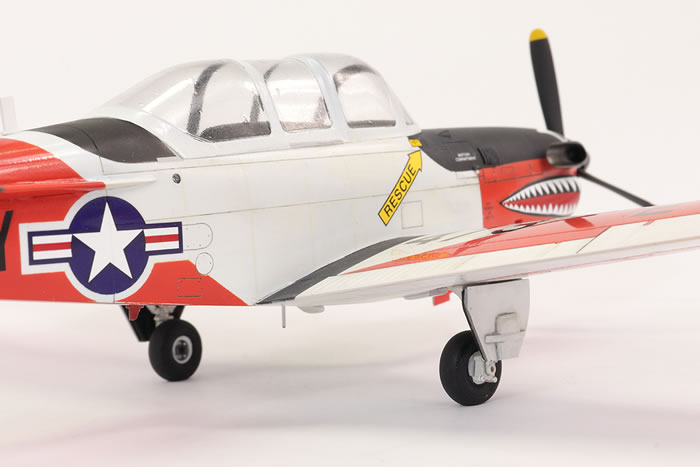
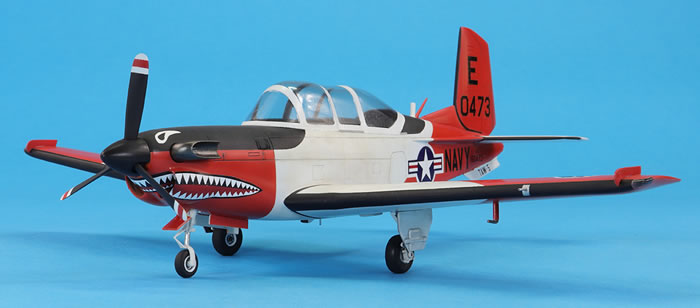
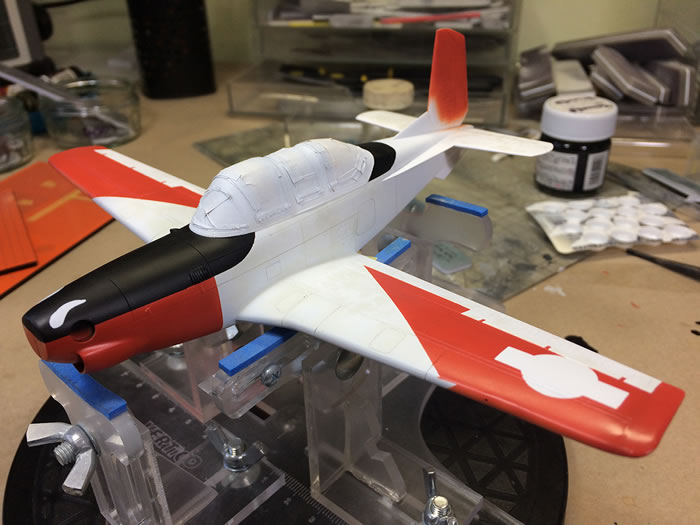
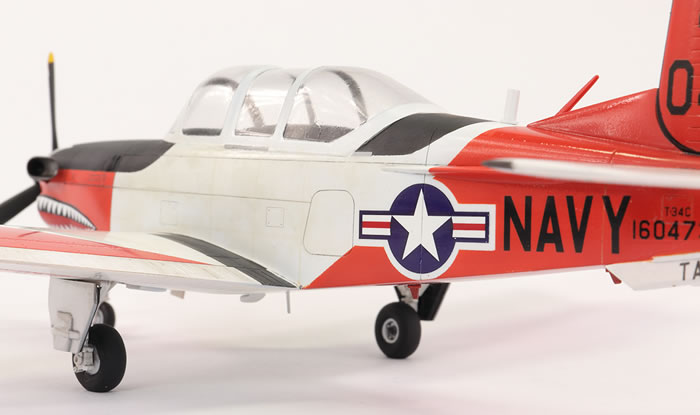
Czech Model provides two options in their decal sheet, and I wanted to use the one with the shark mouth because I really like the larger red areas. Some internet research threw up three photos of the starboard side in 1986 and a single photo of the port side in 1988, all with the shark mouth.
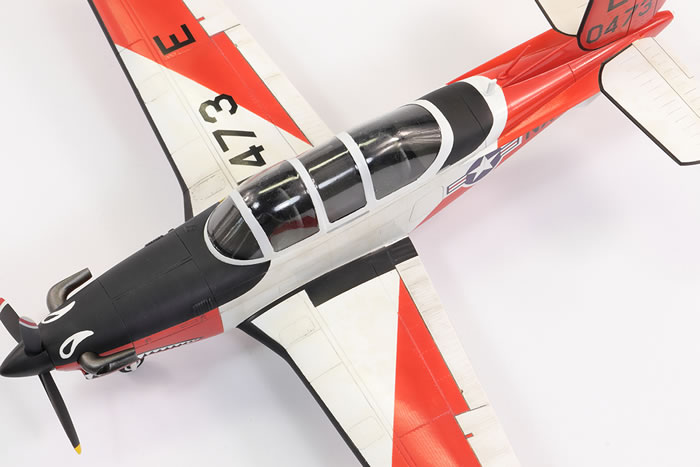
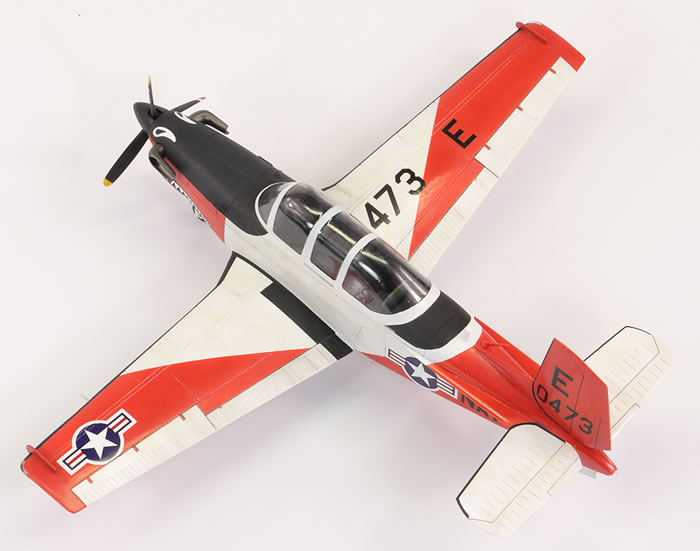
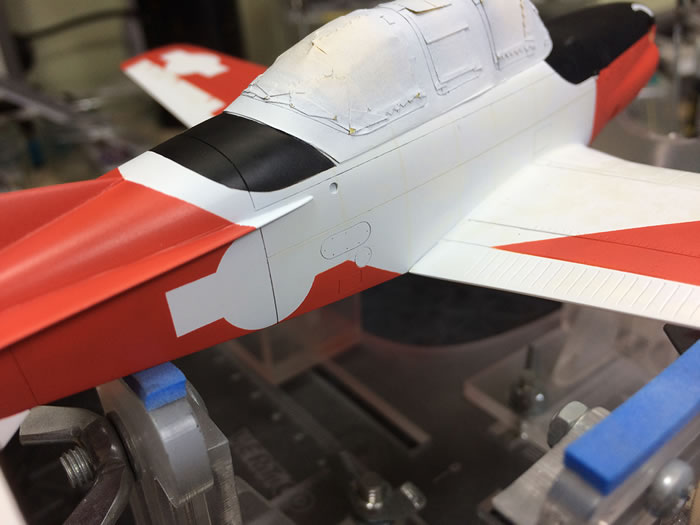
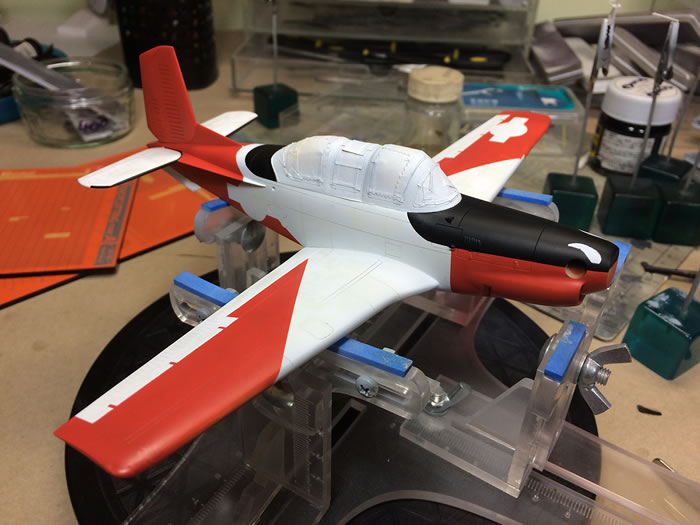
In order to unify the finish over the nasty yellow colour of the resin, Mr Primer Surfacer 1000 was used. Over this I airbrushed Mr Base White 1000 thinned with Mr Rapid Thinner for the underlying white. This was then overcoated with Mr White Finishing Surfacer 1500, resulting in a solid, durable white. To discolour it a bit, for photos did show a fair amount of discolouration, I used some Artool FX and Uschi van der Rosten stencils and Mr Color 69 Off White for some tonal variation. I may have used some Mr Color 311 as well. The photos showed some discolouration in panel lines not moulded on the kit’s fuselage sides, so this was airbrushed in using some masking tape.
I then considered the red. Initially I had assumed this was just Insignia Red, but clearly I was wrong as the red in the shark mouth and national insignia was darker. International Orange was the oft-recommended colour, but looked far too orange compared to the photos I had. In the end, I compromised, and bought some Hataka lacquer Insignia Red and International Orange and mixed it at about a 1:2 ratio. This was close enough for me.
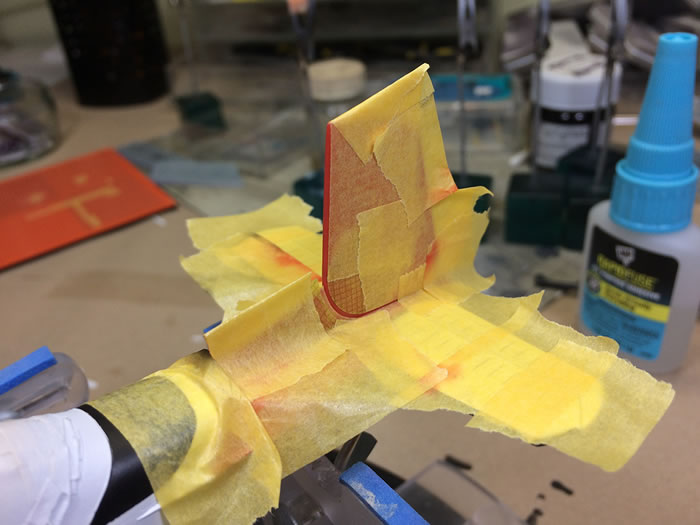
The paint scheme is deceptively complex, possibly the most complex I’ve ever attempted. The orange and black areas are difficult to mask, especially the black leading edges to the flying surfaces, particularly as the Hataka paint was very translucent and so I could not over-spray anything that was black. The national insignia sit inside a white-bordered area, which I also needed to spray. To do this, I employed my Silhouette cutter and Tamiya masking sheet. The masking came out okay. It could definitely have been better in some areas, but as I said, this was meant to be a quick build!

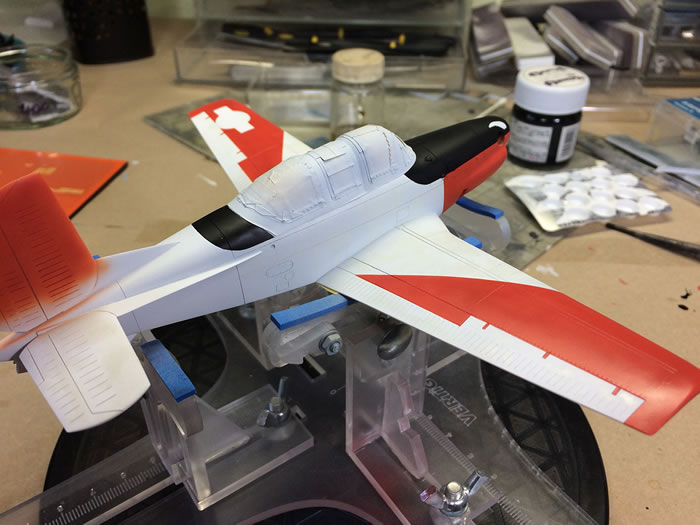
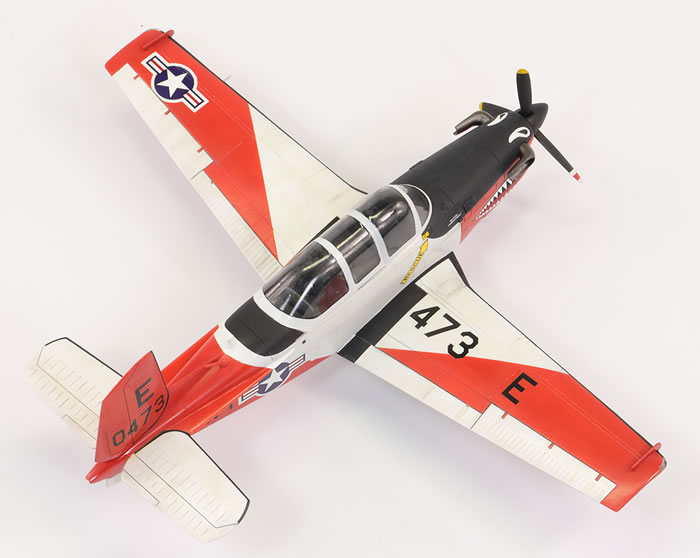
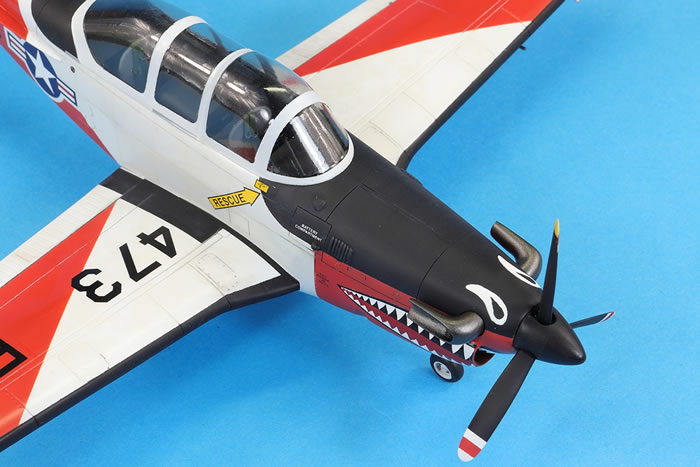
The decals were essential, but had a lot of mistakes. The national insignia are not a great shape and I replaced them with some generic ones by Furball Decals. I think those provided for the wings are also too small, but I fear I may have used markings that are too big. The decal eyes for the anti-glare panel are completely different to those on the real thing, and the shark mouth is also wrong: the black outline is in the wrong place. I trimmed the black outline of the mouth to make it more accurate, undersprayed the decal with Insignia Red, as it’s different to the orange panels, and had to mask and airbrush the eyes, which were less of a success. The photo from 1988 shows some kind of blue diamond marking on the port side. I’ve been unable to replicate this and I hope that it was not applied in 1986. The ‘0473’ on the tail is the wrong font, the ‘RESCUE’ lettering in the arrow is in the incorrect place and the marking it points to is not supplied. The BuNo is not placed correctly relative to the ‘T-34C’ lettering (I realised too late) and the relationship between the fuselage NAVY, national insignia marking, ventral strakes and empennage does not match photos. I can’t decide if this is the fault of the decals (NAVY font too narrow?) or if the horizontal stabilisers are too far forward. There’s definitely something wrong around the rear end, but I can’t put my finger on what. I also think the NAVY marking under the wing is too narrow. Various stencils on the real thing are missing from the sheet. All in all, the decal design is poor, although the printing quality is excellent and they went down without any problems over Mr Mark Setter and under Micro Sol.
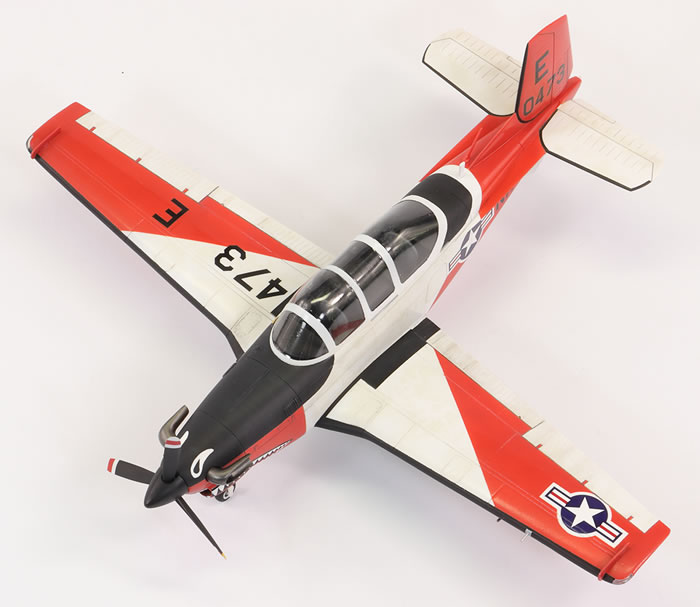
The prop is equally complex to mask, with yellow tips on the rear side, and red and white stripes on the front. The whole lot is butt-joined resin, although I pinned the blades to the spinner for strength.
USN Turbo Mentors are pretty glossy, but not car-showroom glossy. I applied a decent coat of Mr Color GX100 Gloss Varnish, followed by the decals and then more GX100. The wing and fuselage were then polished with an Infini 2500 sanding sponge and buffed with a 4000 grit Infini buffer. This left a suitably muted glossy finish that I was pretty happy with aside from some burn-through on the starboard lower fuselage. The main problem is that I could not polish out and empennage and strakes as they were all butt-joined with superglue and would not withstand the pressure. This means the finish of the tail surfaces is not nearly as smooth as it should be. The black areas were all airbrushed with Mr Color GX113 Matt Coat thinned with Mr Rapid Thinner.
After the canopy, the second area that I am really dissatisfied with is the undercarriage. In addition to being pretty inaccurate and very crude, I failed to get the nose leg straight and the front door has nothing to attach to and cannot be attached square. Other inaccuracies are the overscale aerial and pitot supplied in the kit and the omission of the whip antennae that protrude from the vertical tail. The wing strakes had been fitted early on in construction but I kept snapping them off. They were also a challenge to paint as it kept being scratched off. In the end, they were attached during final construction, and consequently they are not nearly as well integrated into the finish as I would like.
I feel ambivalent about the finished product. It certainly has novelty value and I appreciate the colour scheme more in 3D than I thought I would, but it’s never going to win any contests, especially with that canopy and undercarriage. On the other hand, at least I have a Turbo Mentor in my collection for ten quid, and I had the added bonus of making my first resin kit. I look forward to adding the TA-4J, T-2C, T-28C and T-45C from my stash in similar colours over the coming years. Now, if only someone would make a T-39…
For more articles like this, please visit my website www.jonbryon.com
Text and Images Copyright ©
2020 by Jon Bryon
Page Created 30 January, 2020
Last Updated
30 January, 2020
Back to
HyperScale Main Page

|
 Home
| What's New |
Features |
Gallery |
Reviews |
Reference |
Forum |
Search
Home
| What's New |
Features |
Gallery |
Reviews |
Reference |
Forum |
Search