Building Tujunga!
Turning Monogram’s Classic 1/48 B-17G into a Tribute to One of the Greatest Generation
by Rafe Morrissey
|
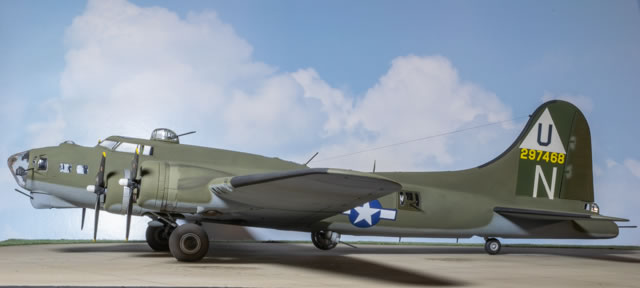
Boeing B-17G Flying Fortress
|

Dusty photos hanging on the wall. Yellowed papers and curled up photos in a box on a closet shelf. As the inexorable march of time continues, these are the only reminders for many families of the contributions and sacrifices their ancestors made in World War II. Thankfully, some are making efforts to keep the service of their family members front of mind.
The connection to history is one of the major drivers behind my interest in modeling. Every once in a while, a project comes along that really amplifies that connection. Such was the case when I was offered the opportunity to build Monogram’s (now Revell) classic 1:48 B-17G as a tribute for the brother of an 8th Air Force veteran.
Winfred Kincaid was assigned to the 457th Bomb group and his crew was the most decorated in the 8th Air Force. Kincaid was awarded the Distinguished Flying Cross, European, African, and Middle Eastern Service Medal, and three Oak-Leaf Clusters. He flew as an engineer/top turret gunner and his crew was the first in the group to complete 25 missions, including raids on Berlin, in a B-17G named Tujunga! from their base at Glatton. He was an original crew member for this aircraft and flew it from the training base in Wendover, UT to England in January 1944.
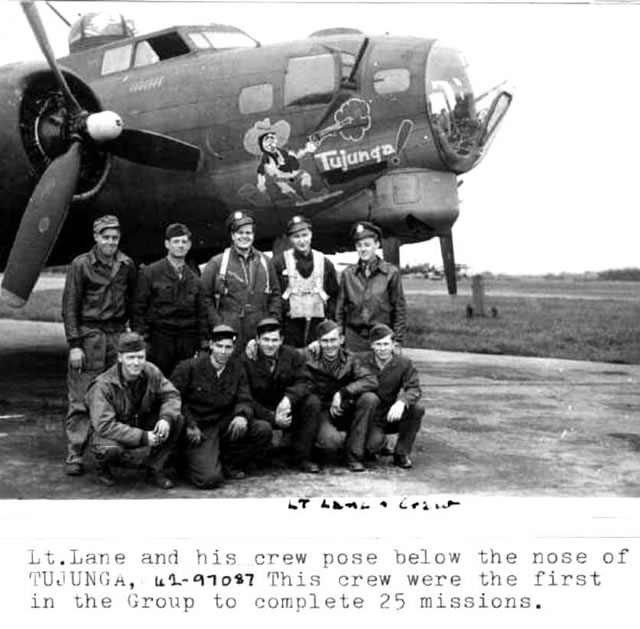
The Tujunga! Crew. Winfred Kincaid is in the front row center. Source: Bryant Kincaid
Kincaid’s nephew contacted IPMS NOVA seeking someone to build the kit as a gift for his father and when the opportunity was offered, I was eager to take it on. I have always liked the B-17 as a subject and have fond memories of building the Monogram Visible B-17 when I was a kid. I have long had an interest in doing one of the venerable Monogram kits with my adult skill set and this was the perfect opportunity to do one with a touchpoint to a specific person who served in one. I have also had the opportunity to read a diary of the missions Mr. Kincaid flew which really cemented the connection between plastic and history for me. It is also an interesting coincidence that the airplane on the classic Monogram/Revell box top (El Lobo II) is from the same bomb group.
Fortunately, Tujunga! Is well-documented although there are some interesting discrepancies in the historical record. On the 457th Bomb Group Association Website, there is a great photo archive with shots of many of the aircraft. As it turns out, there were two Tujungas. The first was the aircraft that the original crew flew to England and was the first to complete 25 missions. That aircraft was later shot down and a second B-17 was transferred from another group to take its place and named Tujunga III.
The discrepancy is that the picture above of Tujunga! shows it to have been a camouflaged aircraft. Photos identified as Tujunga III indicate an aircraft in natural metal finish, yet the Website lists the serial numbers as applying to the opposite aircraft based on their color schemes. This is one of the interesting aspects of historical research that requires some educated guesswork. Since Mr. Kincaid’s uncle’s diary specifically references 42-97468 and the photos all show that to be a camouflaged B-17, we believe the references inverted the serial numbers of the two aircraft.
This may be because the later aircraft actually had a lower serial number (42-97087) having come in from the 379th Bomb Group. The Website also indicates that 42-97468 was among the original B-17s assigned to the group at Wendover which tracks with the diary as well.
The good news is that some good pictures exist of the aircraft that will help in producing the replica. It is also helpful that the configuration of the aircraft reflects the sub-type Monogram kitted with the early style tail gun and unstaggered waist positions. Supplied with custom nose art and an extensive set of aftermarket items, I was eager to get started.
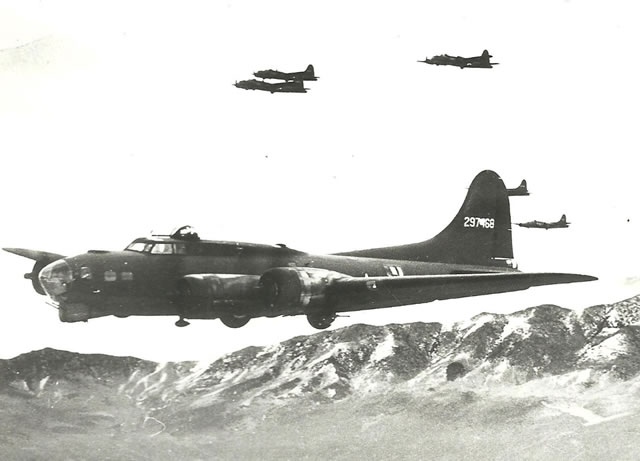
Source: 457th Bomb Group Association Website
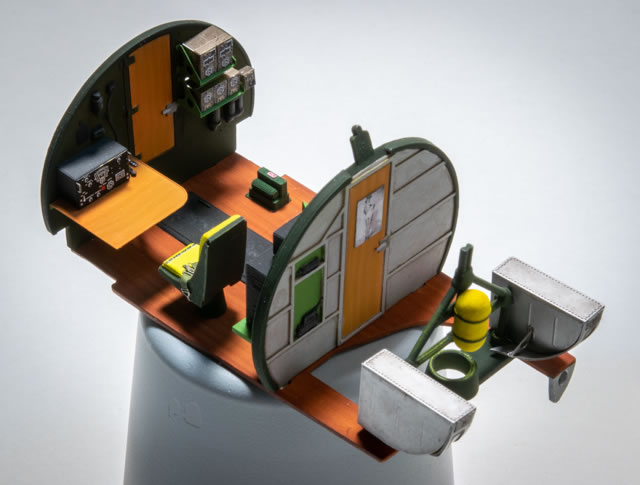
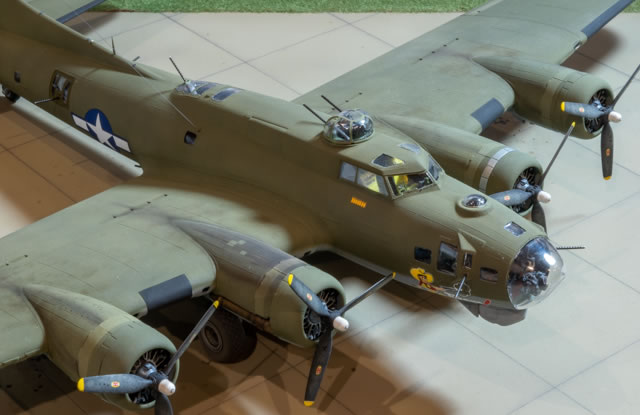
The Monogram kit includes a very respectable level of detail, especially given when it was originally produced but the client supplied a wide assortment of photo-etch and after-market enhancements. The challenge with the B-17 is that much of the interior detail will be invisible, so I added details that will hopefully stand out including some marvelous feed chutes from a company called Mini-World from Ukraine and many details from the Eduard color photo-etch sets with an emphasis on the instrument panel and throttle assembly. Eduard’s throttle quadrant contains 25 parts alone while the entire Monogram kit only has 79!

I have also used oil paint over a light tan undercoat to replicate the various wooden elements that were common in war-time B-17s. I used Tamiya XF-55 Deck Tan and XF-78 for undercoats with burnt sienna and raw umber to reflect the varied materials from different subcontractors that were used in the production process.
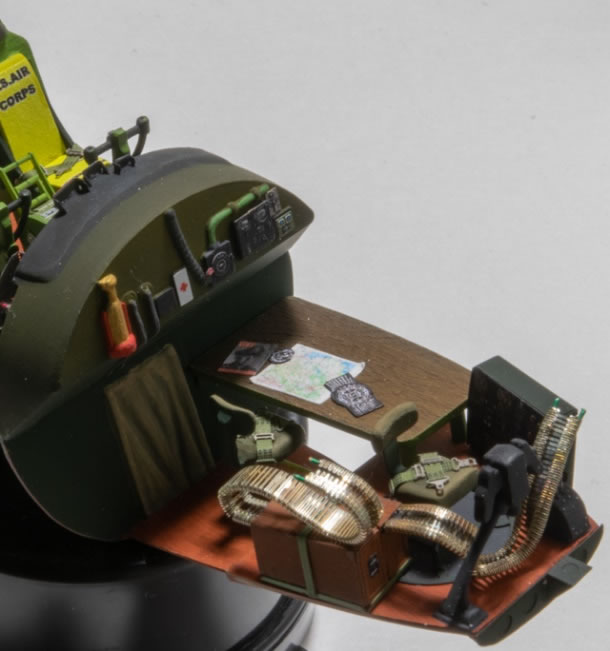
The map is an image of an actual 8th AF combat map for Berlin. The magazine is the November 29, 1943 issue of Life Magazine with Ira Eaker on the cover. Note that different wood finishes can be simulated with oil paint streaked over an acrylic undercoat.
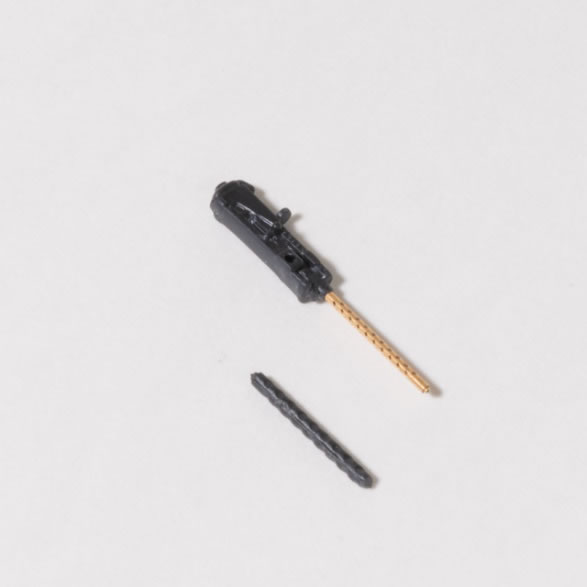
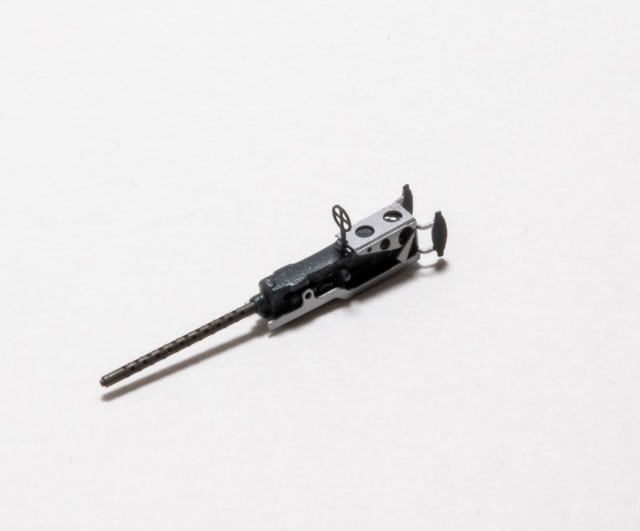
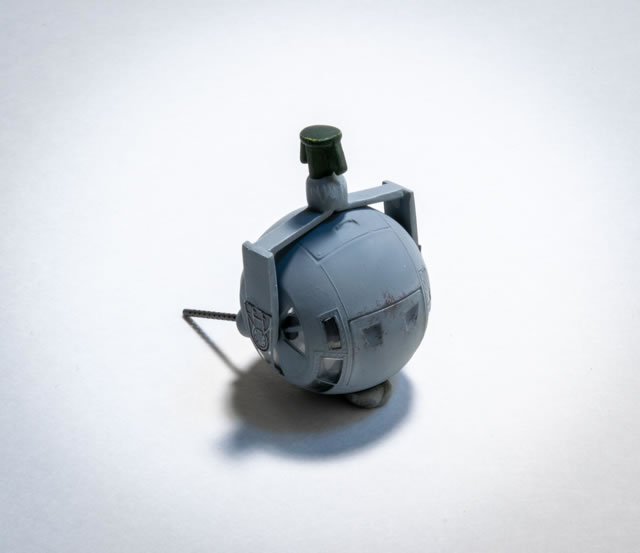
Flightpath makes a nice set for the Monogram kit including some great enhancements for the machine gun carriages with sights.
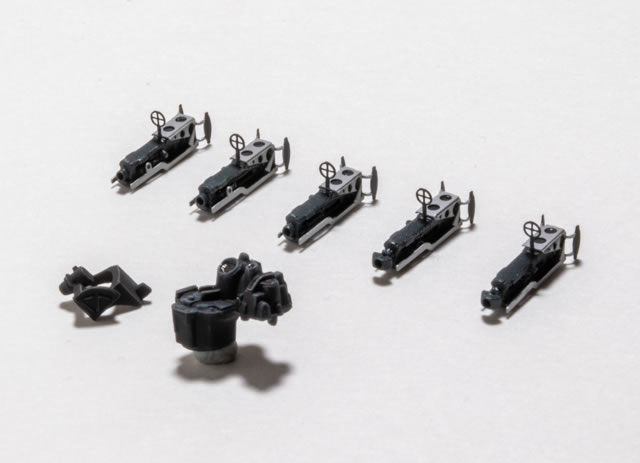
Another impressive upgrade is two-piece brass barrels from Master. These include turned barrels and jackets with hollow cooling openings that are a marvel of mini-engineering.


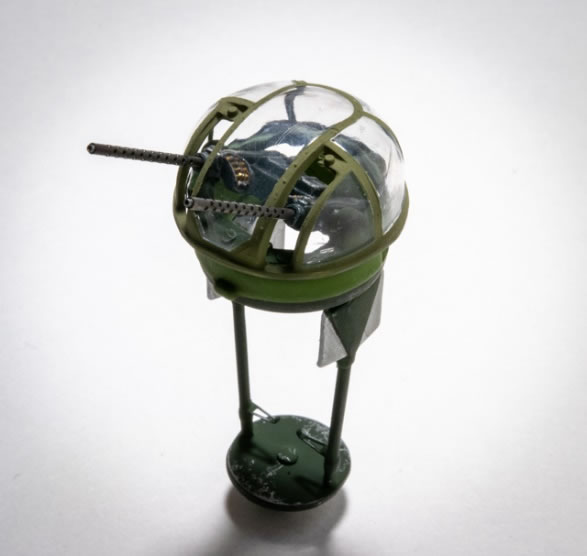
The combination of kit detail and after-market enhancement makes for a detailed interior.
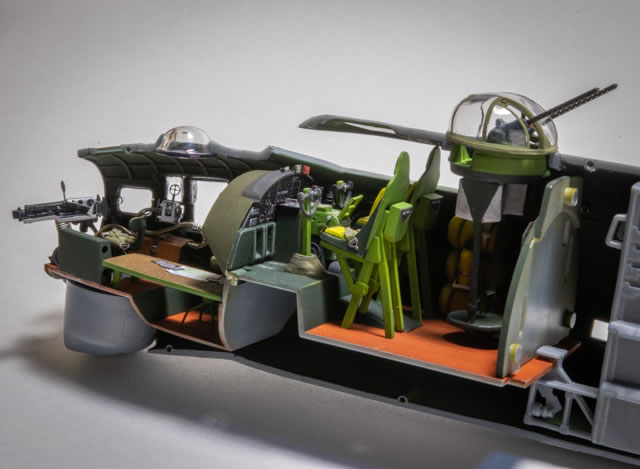
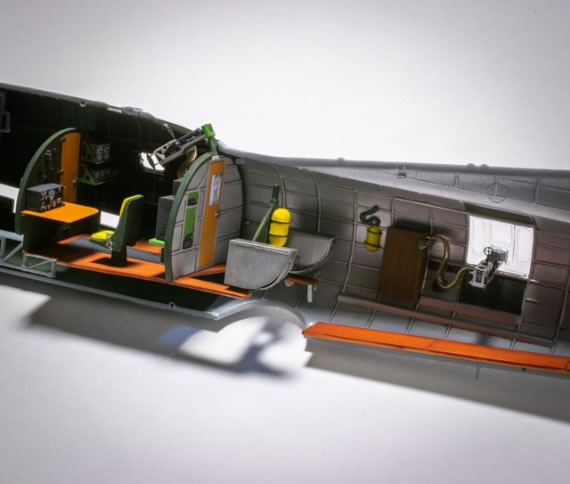
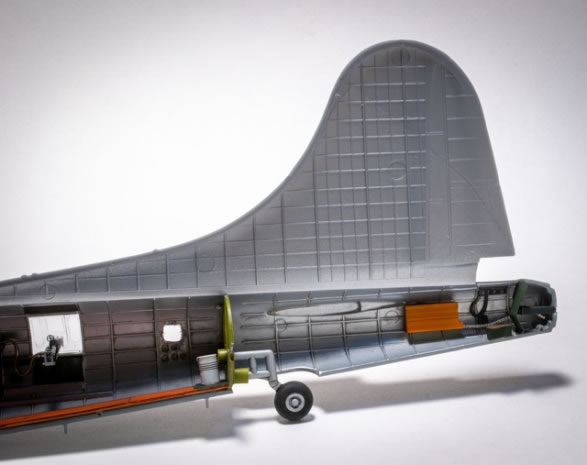
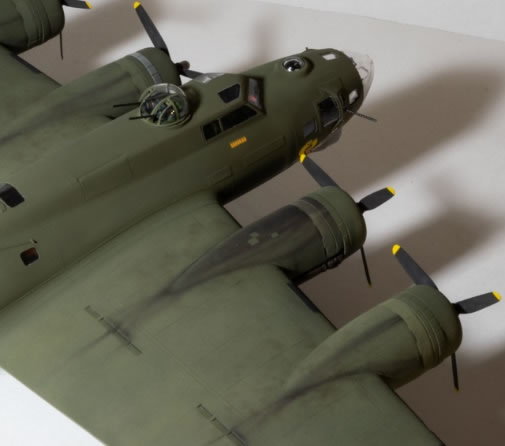
The painted fuselage interiors. B-17s were painted with a variety of colors in the forward crew areas. I used Tamiya XF-11 J.N. Green which is a good match for bronze-green. The rear fuselages were unpainted. I added a MIG Neutral Wash to bring out the molded detail.
Airframe Assembly and Painting |
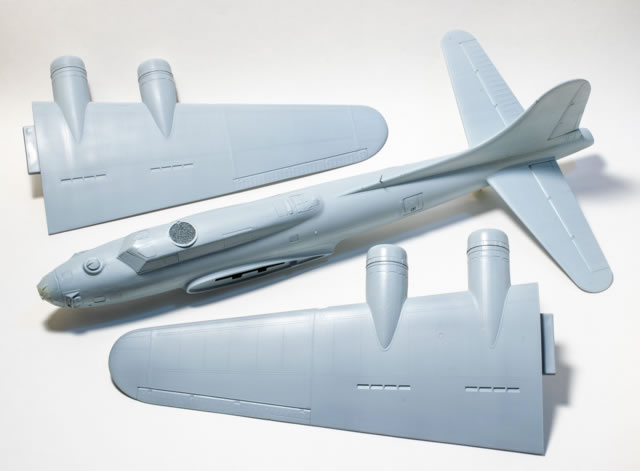
I decided it would be easiest to work the model in three separate sections, the fuselage and two wings. It definitely makes the camouflage painting around the nacelles easier and the whole airframe is big! I used Alclad II primer to prep the subassemblies after using the technique of sanding back raised panel lines going across the fuselage and making a single firm scribe against a tape guide. When buffed with a piece of t-shirt, the resulting line blends in with the other raised lines very well.
I used AK Flexible Airbrush Stencils to create a varied undercoat and applied thin coats of O.D. Green and Neutral Gray mixed from Tamiya paints.

The resulting effect produces a patina finish that is hard to see in photos but is really pleasing as a pre-weathering step to add variety to the large areas of single colors.
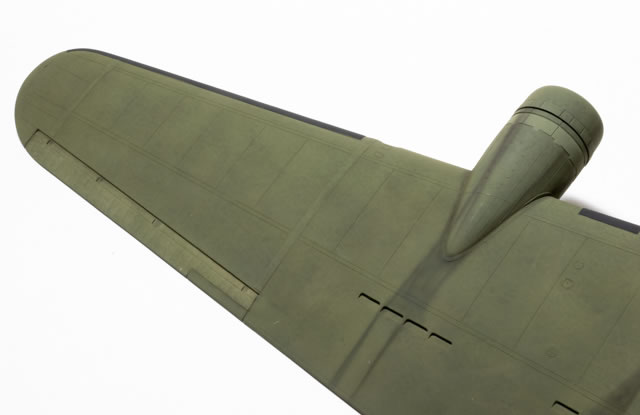
I lightened the O.D. base color to lighten the fabric areas of the control surfaces that are clear in reference photos and used a thin mix of Tamiya XF-1 Flat Black and XF-64 Red Brown to airbrush the oil stains and streaks from the engines. I had to paint out and rework these several times to get an appearance I liked. The mission diary also noted that the #3 engine was disabled due to damage to an oil line, so I replicated this with heavier staining and streaking and then added small O.D. patches to suggest repairs.
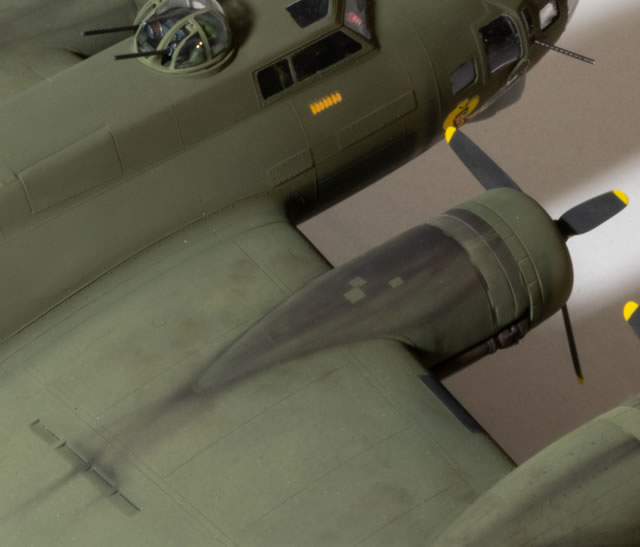
Engines, Props & Wheels
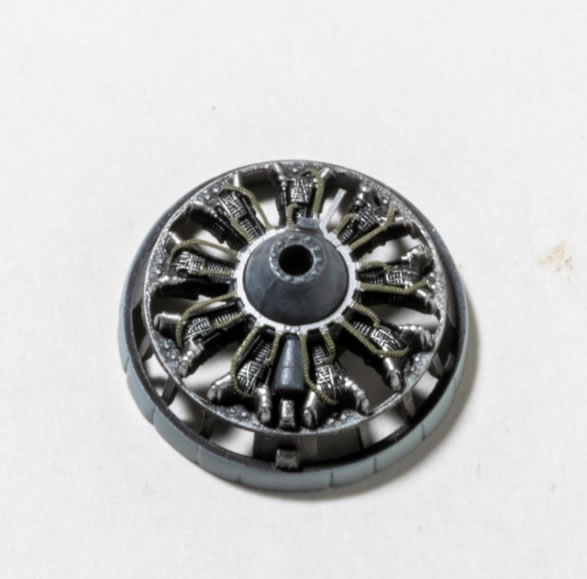
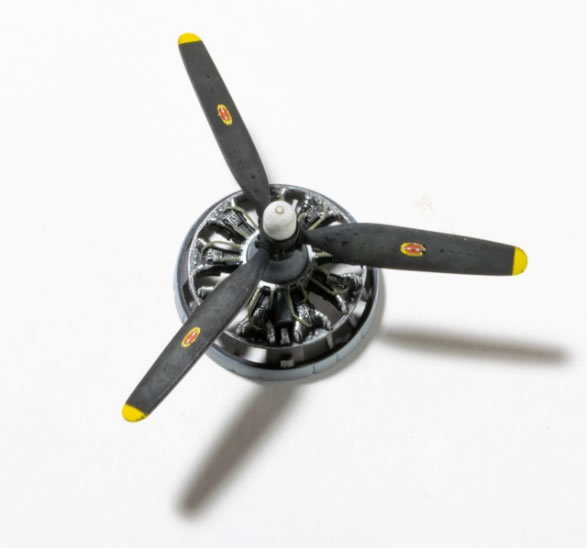
I debated using aftermarket engines but the Flightpath set included photo-etch ignition harnesses and the kit engines are pretty effective for what remains visible under the cowlings. I have been experimenting with different methods for painting radial engines and in this case dry brushed Testors aluminum metallizer over a dark brown base color and used an AK silver pencil to hit the cooling fins the dry brushing missed.
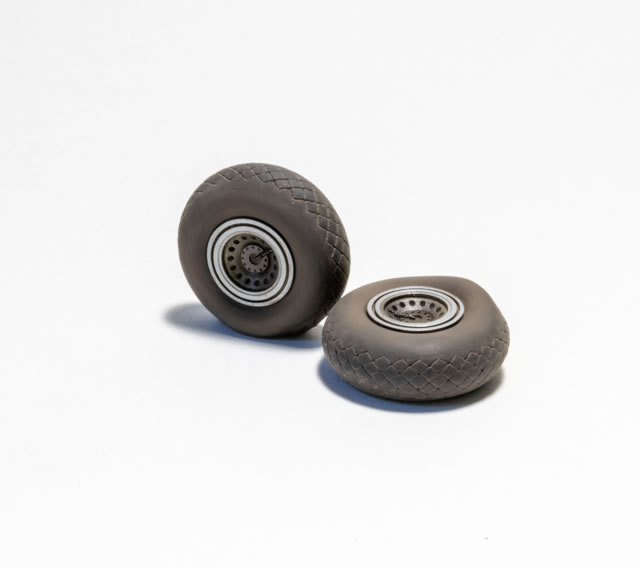
I used True Details weighted wheels and applied an oil wash to accent the hubs over a combination of Alclad II dark aluminum and steel and used MIG Europe Dust pigments over a light coat of Tamiya Flat Earth on the sidewalls to add weathering to the tires.
I.D. Lights
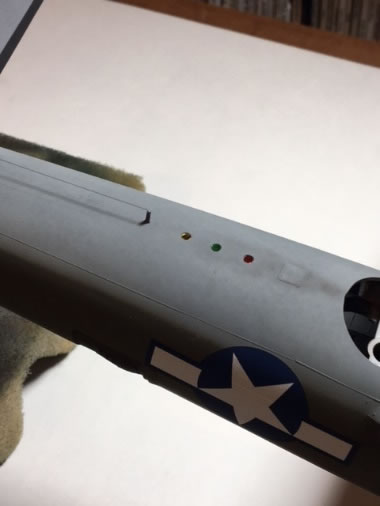
There is a technique I like to use for I.D. lights. First, I drill countersunk holes the size of the lights and then add discs punched from red, green, and yellow party confetti. This provides a realistic-looking set of lights but from certain angles, they appear to “turn on.” It is a neat effect.

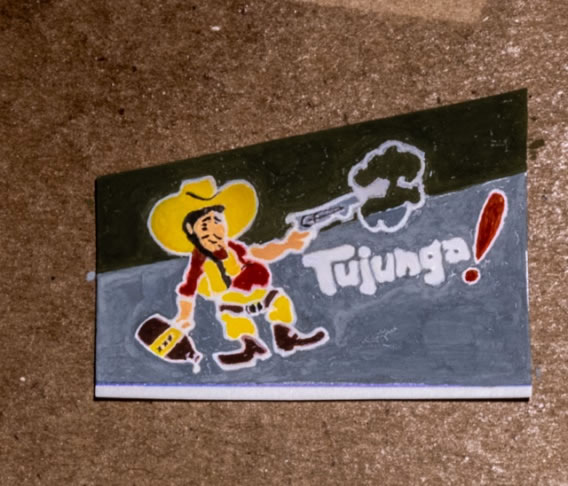
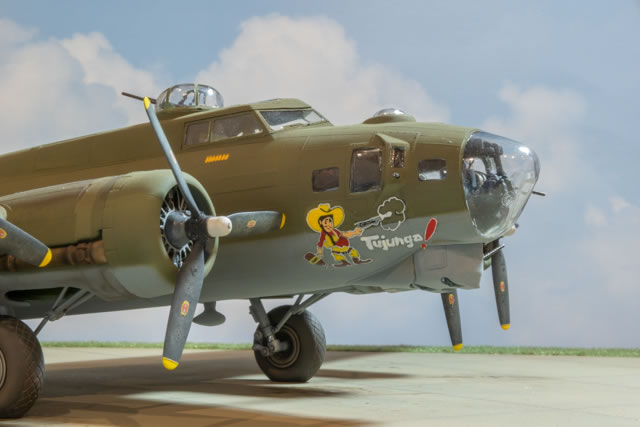
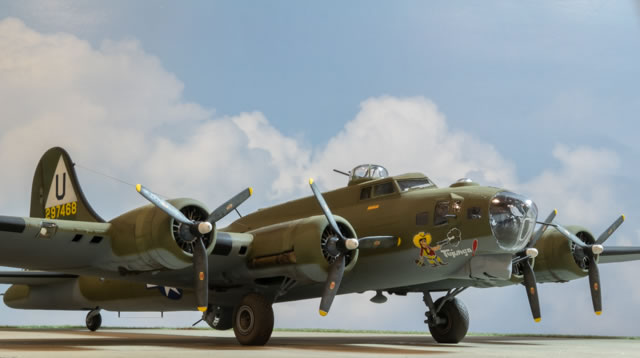
Custom Nose Art
The client provided a custom nose art decal but I found out that it assumed the nose are was all in the O.D. Green area whereas in reality, it straddled the demarcation between the green and the gray. This required painting the camouflage colors around the design by hand. When I applied the decal, it became apparent that it was printed on clear decal film so there was no white and the other colors were not opaque enough. Consequently, I had to basically paint the artwork and surrounding camouflage colors over the decal and then sealed it with a clear lacquer overcoat and applied it to the model. Other markings were a combination of KitsWorld, Superscale decals and custom masks cut from tape.
Tujunga! 1944-2021
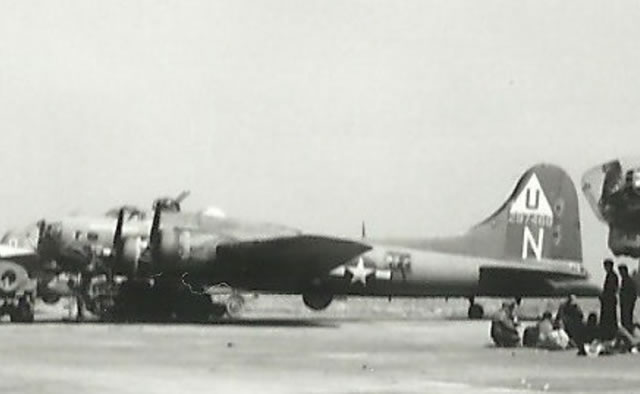
Source: 457th Bomb Group Association Website (enlarged from original image)
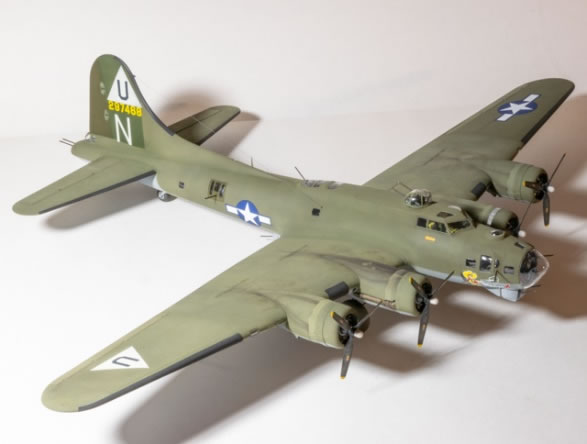
The Monogram kit is now more than 40 years old and HK has released both the G and F models, but those kits have their own challenges and the Monogram kit still builds up into an impressive representation of the venerable B-17. The model will be a fitting tribute to Mr. Kinkaid and add a unique context and perspective for younger generations of his family.
Text and Images Copyright ©
2021 by Rafe Morrissey
Page Created 5 October, 2021
Last Updated
5 October, 2021
Back to
HyperScale Main Page
|
 Home
| What's New |
Features |
Gallery |
Reviews |
Reference |
Forum |
Search
Home
| What's New |
Features |
Gallery |
Reviews |
Reference |
Forum |
Search