Hobby Boss 1/48 scale
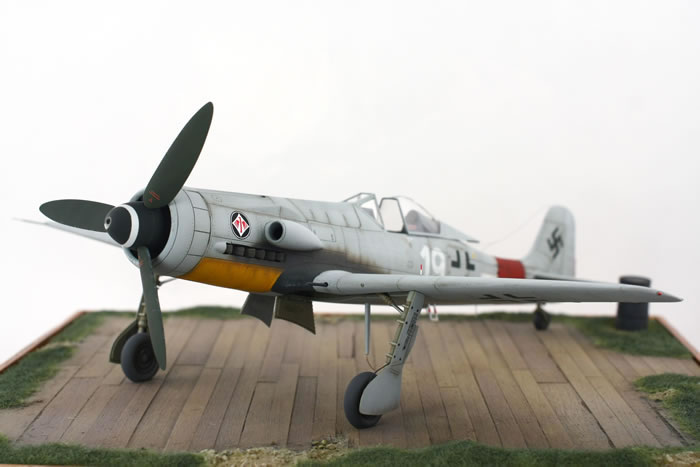
Focke Wulf Ta 152C-11
by Jason Brewer

The Focke Wulf Ta 152C was a further developement of the venerable Fw190 and designed for medium-altitude operations and ground attack. It was unique in the "langnasen" Fw family as the only version powered by a Daimler-Benz DB 603 instead of the Jumo 213 used in the Fw190D and Ta152H. While there are no records of of the Ta 152C being used in combat, it is possible that few did see action. However, that's not the case for this particular variant, the C-11, which was a proposed variant that never made it to the prototype phase.
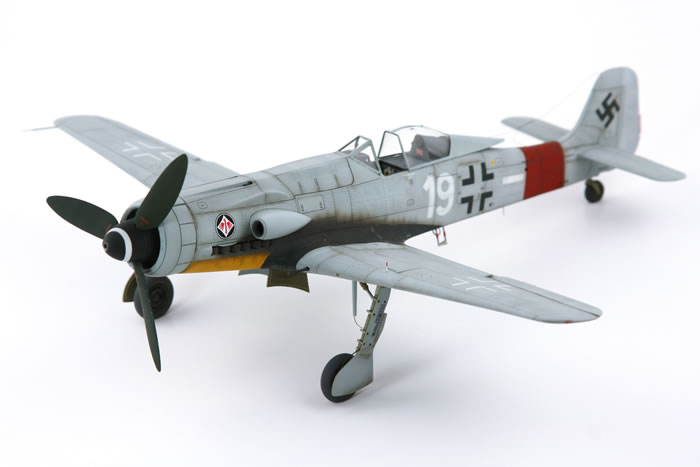
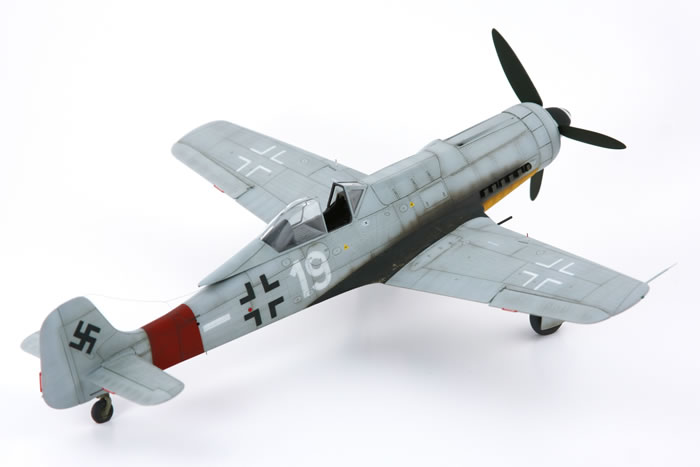
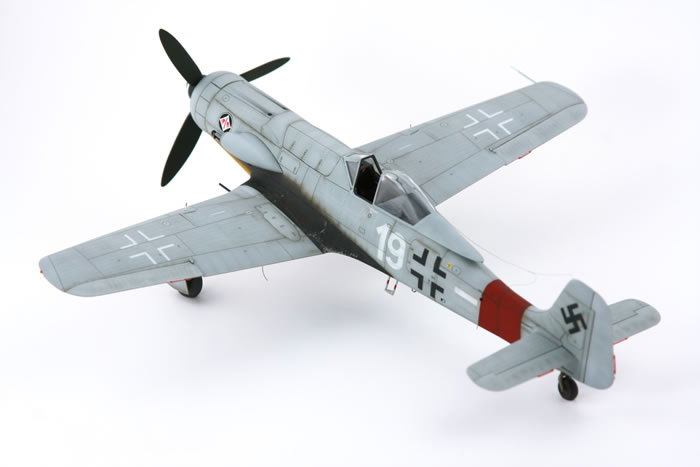
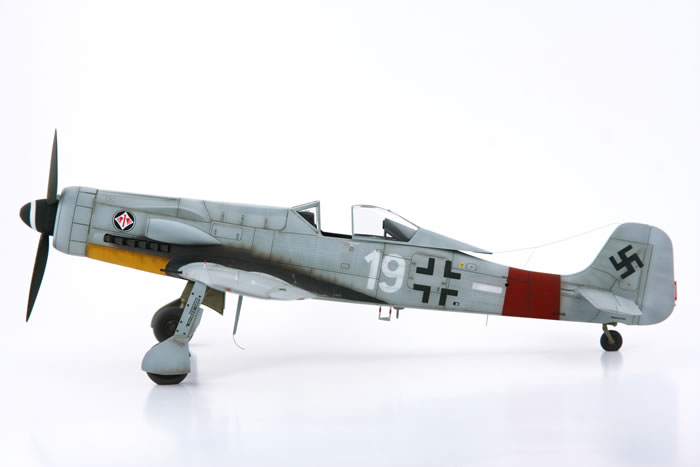
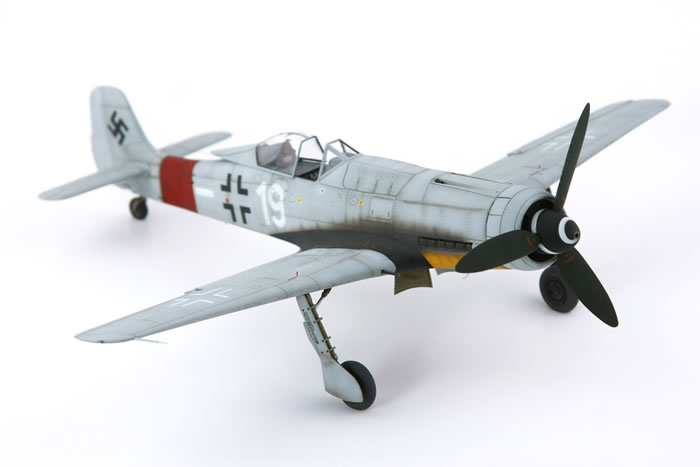
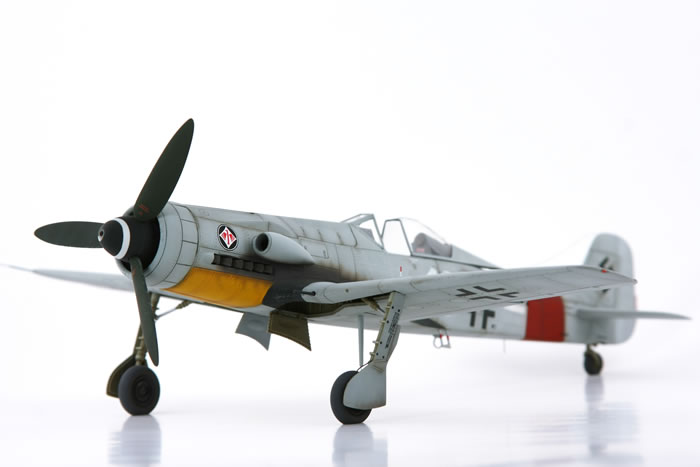
Kurt Tank originally designed the Ta 152 using the Daimler-Benz DB 603 engine as it offered better high-altitude performance and also a greater developmental potential. The plane was armed with four MG151s in the wings and upper cowl and one MK108 Motorkanone. With this in mind, I set out to choose a speculative scheme. I didn't want to use the suggested (and typical) JG 301 scheme of RLM 82/83/76 with the signature red/yellow tail bands, so I started looking for other options. I've always loved the look of the JG 1 Bf 109G-6/AS birds in overall RLM 76 with their red RVD band, yellow lower cowling, and black wing roots. These were in service at the end of 1944 around the same time the Ta 152C's were being produced, so I thought it would be a fairly plausible "what-if" scheme for my build.
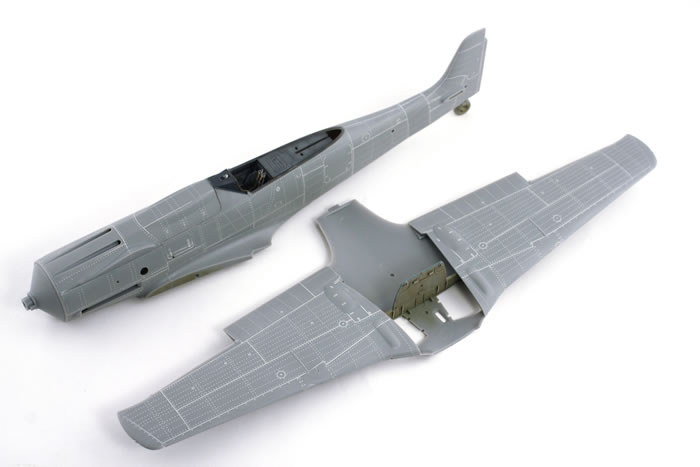
Before the release of HobbyBoss' Ta 152C kits, the only game in town for 1/48 scale was the old Trimaster/Dragon kit. Essentially it was the Ta 152H fuselage with shorter C wings and separeate parts for the DB 603 nose that required sugery to cut off the H nose and install the C nose. There was also the excellent Fusion Models conversion for the same kit which yielded the most accurate model of the plane, but still required much extra work and lots of money invested. HobbyBoss released the first specific Ta 152C kit that could be built straight out of the box with no surgery required, more refined surface detail, and outstanding fit of all the parts. A quick mockup of the major parts showed a nearly flawless fit all around, especially the unique wing root of the Ta152 airframe which HobbyBoss has molded with the seams along panel lines unlike the Trimaster/Dragon kit.
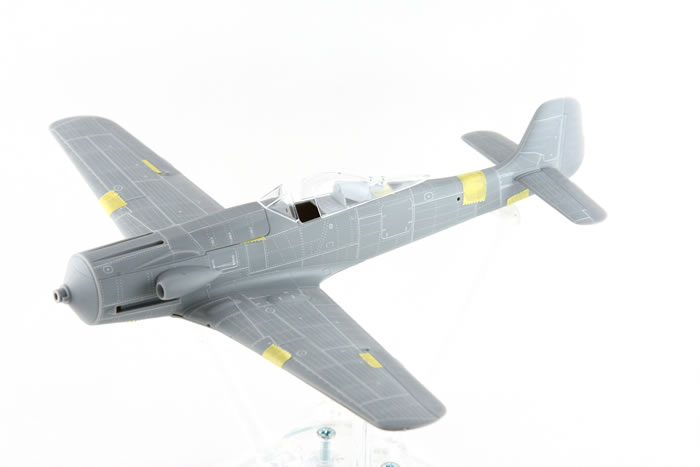
I started off the build by riveting the airframe and lightly scribing the panel lines. I find it easier to do this step first thing so I can lay each part flat on the bench and be sure to get straight rows of rivets, as opposed to attempting the same after parts have been assembled. I used 4+ Publication's book on the Ta 152 for rivet plans, and made the initial pattern using RB Productions' Rivet-R Mini. After making the initial pattern with the rivet tool, I go back and deepen each rivet with a needle point which creates a small ridge around each hole which is later sanded flush. While the panel lines on this kit are nice, I went over them lightly with a needle point to ensure everything was crisp and uniform.
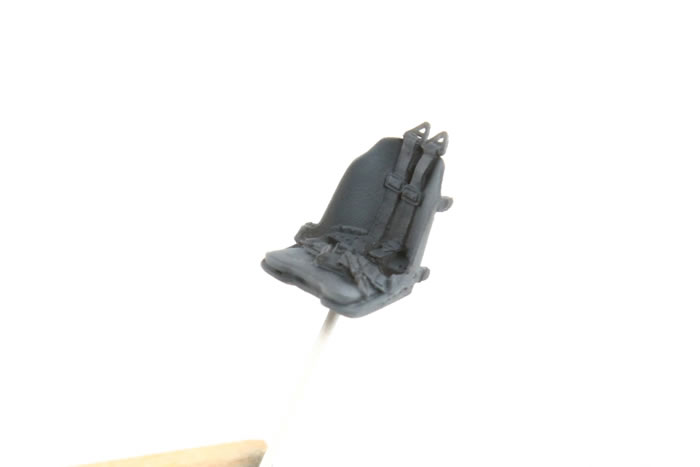
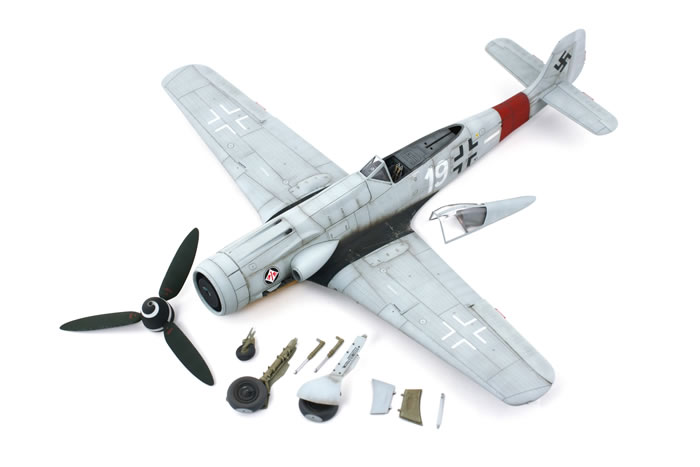
I originally intended for this to be a quick build with just the minor correction sets from Quickboost to fix the improper radiator cowl and spinner/propeller provided in the kit along with a few extra detail parts like Quickboost hollow exhausts and a resin seat for the cockpit, but that plan quickly went out the window! Starting with the cockpit, I had a resin seat from TMD in the spares box but test fitting this seat and several others revealed that the cockpit floor was far too shallow. No matter which seat I chose aside from the undersized kit part, the top of the seat protruded out of the cockpit - time again to dig through the spares box.
I found an Aires cockpit tub for a Tamiya Fw190A-8 left over from an abandoned build and gave it a quick test fit - success!
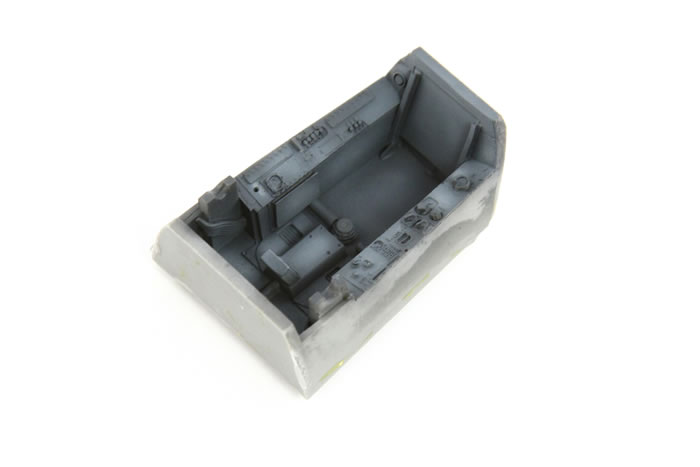
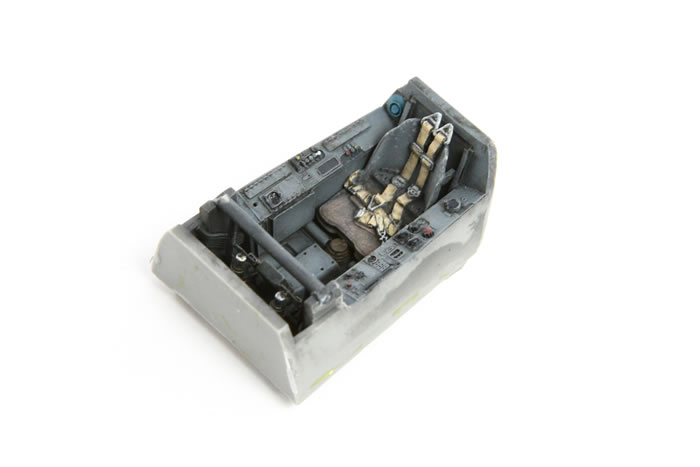
The tooling of the HobbyBoss kit seems to be a combination of the Dragon Ta152, Tamiya Fw190, and Eduard Fw190D, and as luck should have it the Aires tub for the Tamiya kit was a drop fit replacement. The A-8 tub isn't accurate for the Ta 152, but since the differences wouldn't be visible on the finished model I felt it was good enough. I also made use of the Aires rudder pedal assembly and control column, and opted to use the kit instrument panel which required no modification to work with the Aires tub.
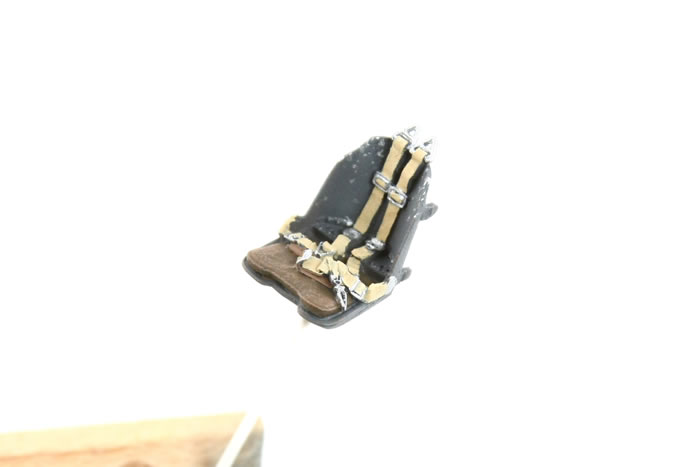

The office was given a base coat of Tamiya XF-63 German Grey for RLM 66 followed by some fading using the base color with a drop of Tamiya XF-1 Flat White added. I did some minor dry-brushing with Vallejo Neutral Grey and details were picked out using various other Vallejo acrylics, then the entire subassembly was given a sealing coat of Future in preparation for washes.
In the past I have always used oils for my washes, but this time around I decided to give AK's enamel washes a try. I used their Dark Wash for Green Vehicles for the cockpit and was quite pleased with the results. Essentially the AK wash performed exactly how I always wished my oils would: easy to use, easy to clean up, and most importantly - consistent. I don't think I'll be going back to oils. Everything was then finished with AK's Ultra Matte Varnish.
The kit decals were used for the instrument panel, punched out with my Waldron punch set, and each dial given a drop of Micro Kristal Clear to simulate glass.
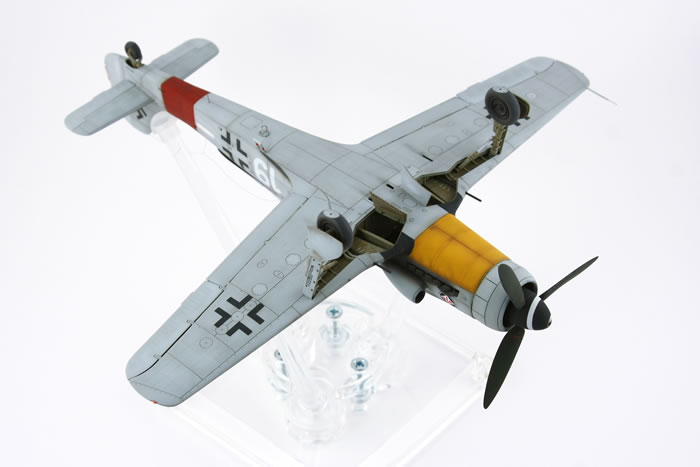
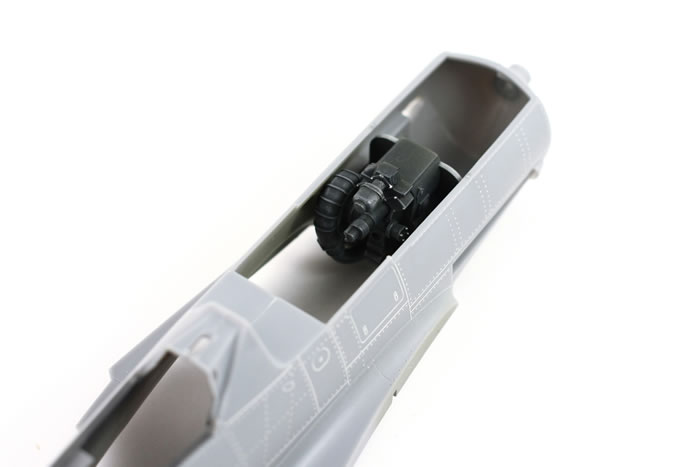
With the cockpit sorted, I moved on to the engine plug and gear bays. These assemblies were very reminiscent of Eduard's Fw190D kit design, only with much improved locator pins for all of the parts. The engine plug fit so well that the two fuselage halves were held together and perfectly aligned simply by dry fitting the engine parts - kudos HobbyBoss.
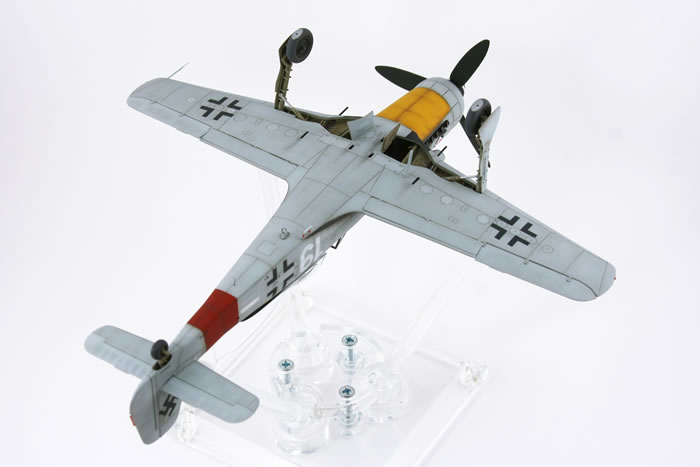
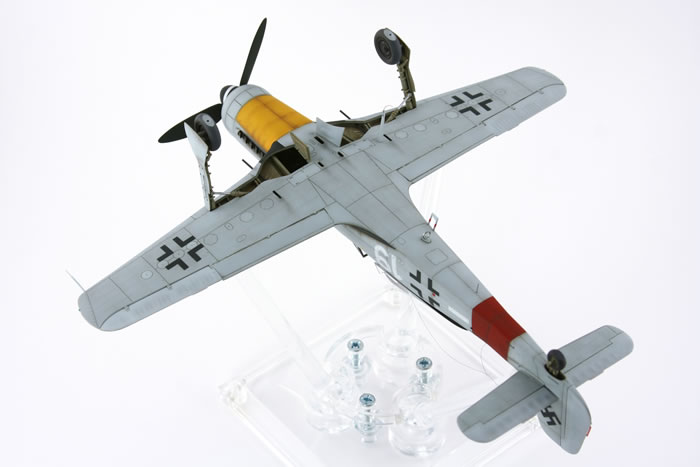
Again similar to Eduard, the gear bay is engineered with a long spar for the rear wall of the bay and inserts with braces as separate parts for the main bay assembly. All of this went together quickly and easily, with the only downside being the lack of a rear bulkhead which leaves the fuselage hollow and the cockpit tub visible from the underside of the model. I robbed a firewall piece from an Eduard Fw190A-5 kit and with some minor trimming it fixed the problem. The engine plug was painted with Tamiya XF-69 NATO Black and given the same dry-brush and wash treatment as the cockpit. The gear bays were airbrushed with AK-Interactive's RLM 02, then I mixed the base color with Vallejo white to lighten it and pick out some details by brush. The whole assembly was given a treatment of AK's Dark Wash, cleared with Ultra Matte Varnish, and the major components were ready for assembly. The gear legs and doors were painted at this time as well just to save time, and received the same attention.
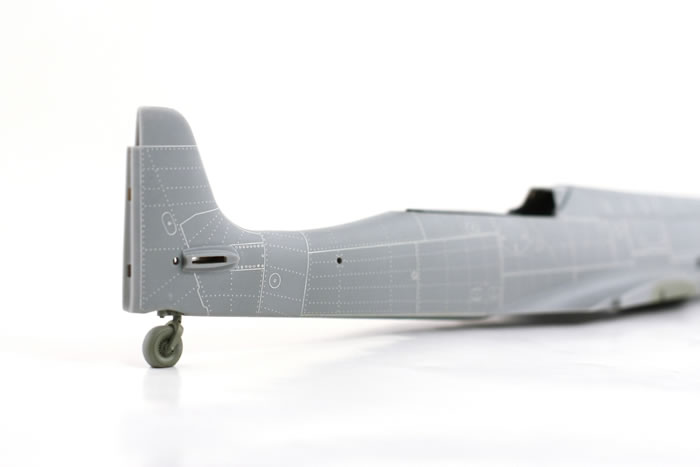
Before closing up the fuselage, the tail wheel needed to be installed. According to my reference photos, the tail wheel was far too tall so I cut out a few mm of the strut until it looked right, and drilled and pinned it.
The upper cowl gun barrels needed to be installed at this time as well, and I found some resin MG151 barrels in the spares box to replace the less detailed kit parts. The fuselage and wings were joined with Tamiya Extra Thin Cement, squeezed to give the "bead" of plastic at the seam, and then the bead was sanded away - not a bit of filler needed anywhere.
The kit gun camera was just a poorly shaped hole, so I fabbed a better one with a short bit of styrene rod drilled out at the end. The kit doesn't depict the hinges for the wing root gun bay doors, so I dug through the spares box again and found some PE hinges left over from an Eduard Fw190.
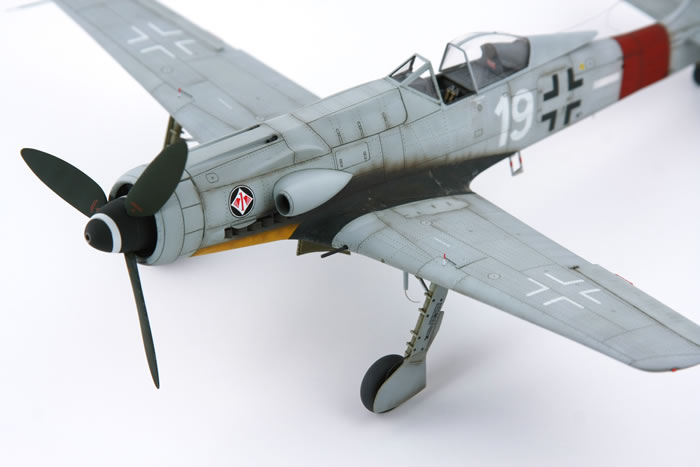
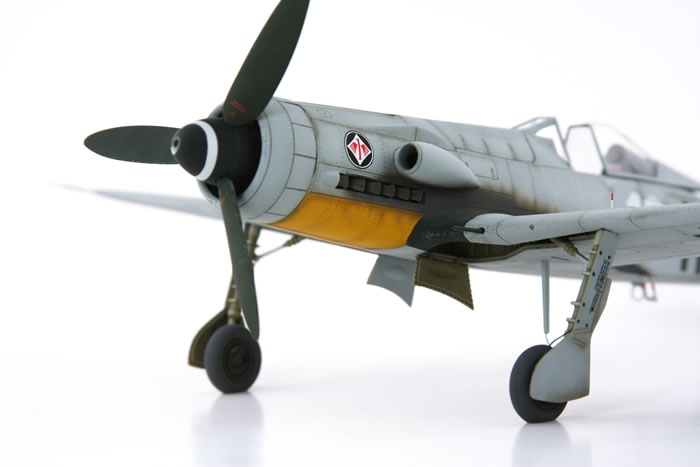
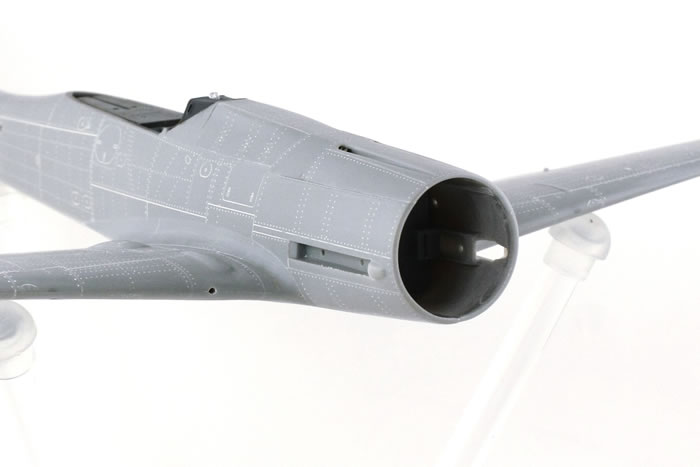
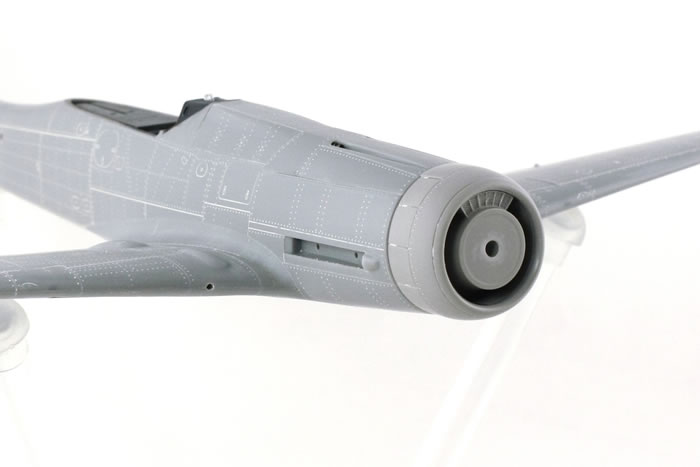
With the airframe together, it was time for surgery to install the corrected radiator cowling from Quickboost. This is a fairly simple affair only requiring sawing off the very front of the fuselage and inserting the resin replacement. The kit part depicts the solid radiator style of the Fw190D instead fo the partially open design unique to the Ta 152C.
After using a razor saw to remove the bulk of the nose, I used sand paper to slowly open up the hole until the resin replacement slid into place and I secured it with CA.
I attached the windscreen, masked off the cockpit and gear bays.
Time for paint!
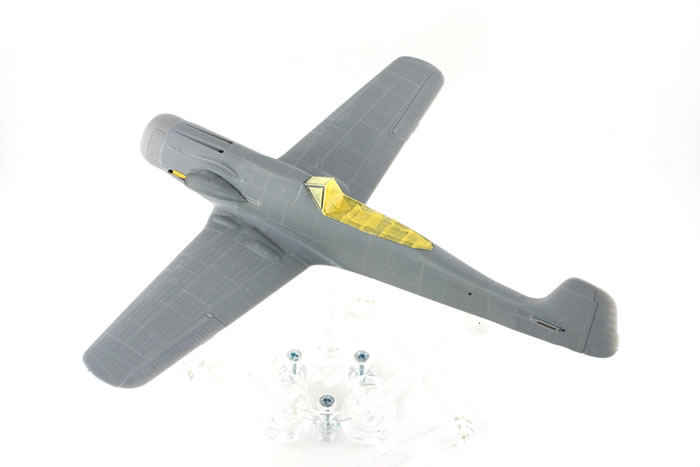
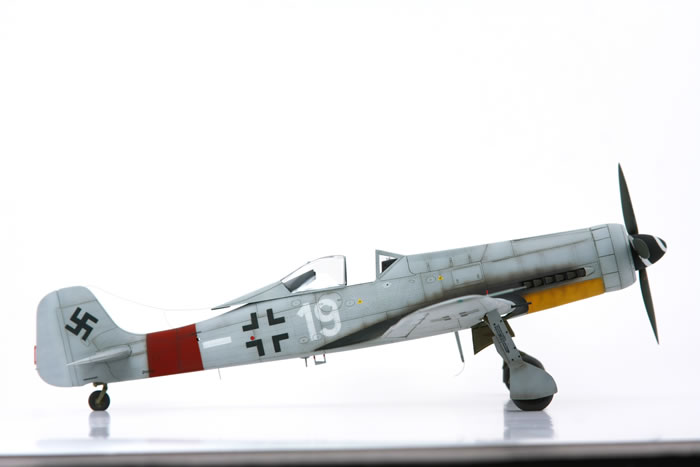
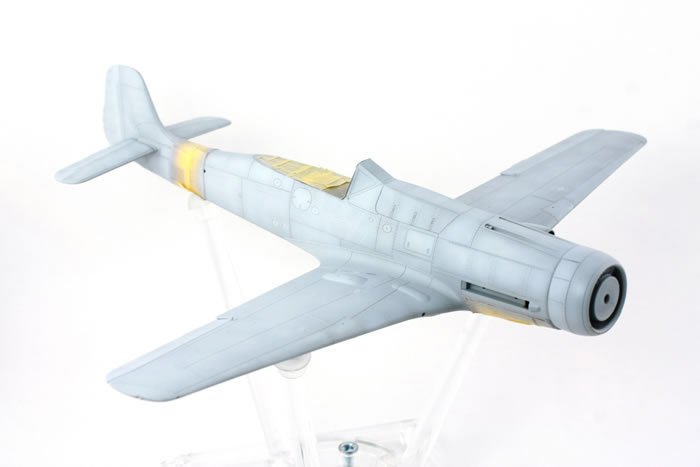
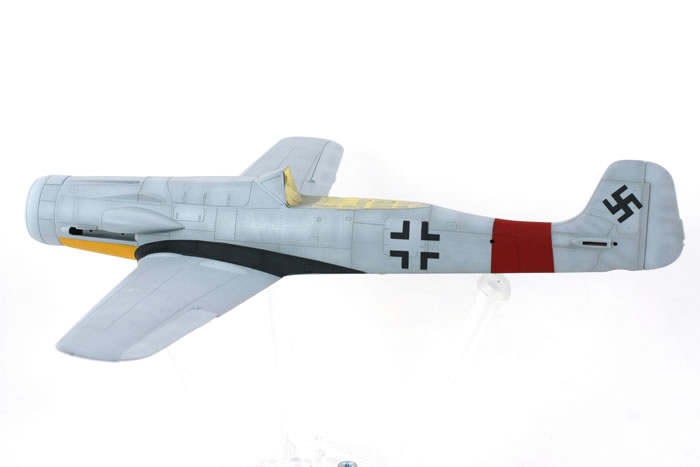
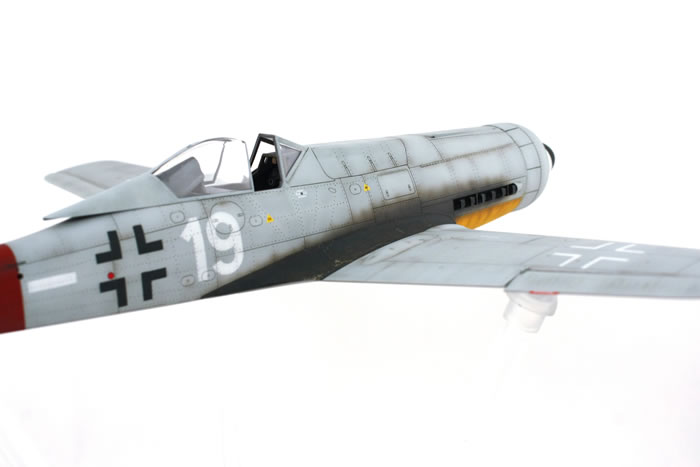
The overall RLM 76 scheme is a simple one, but it needs to be broken up to add some interest. I don't necessarily use a "primer", per se, but I do give my models a light coat of Tamiya XF-19 Sky Gray to check for errors and provide a uniform base.
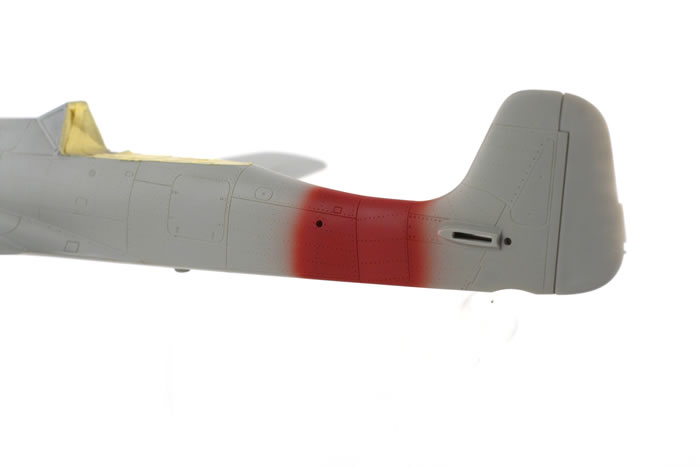
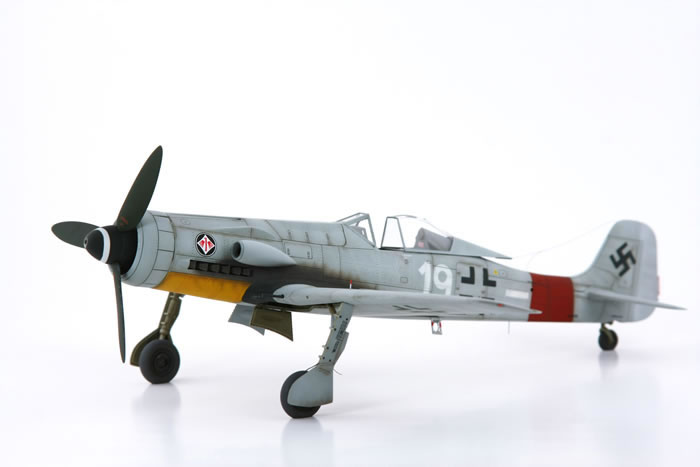
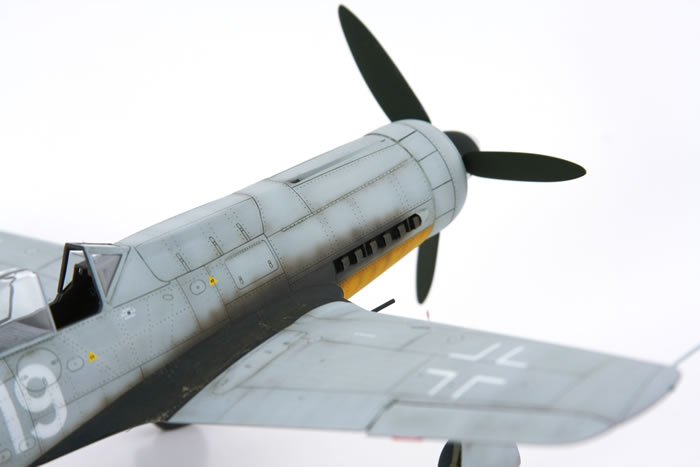
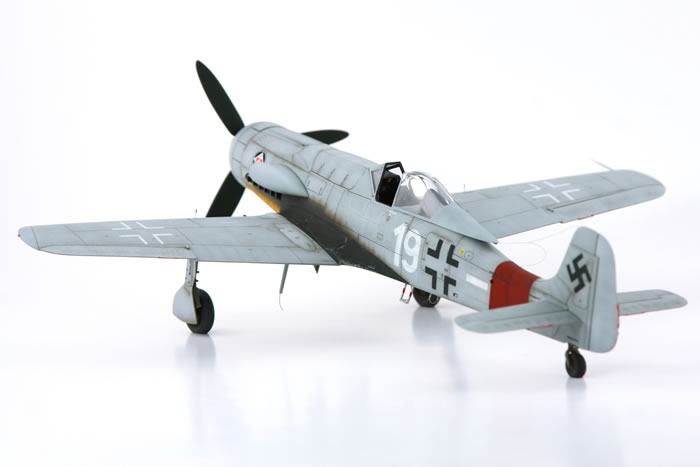
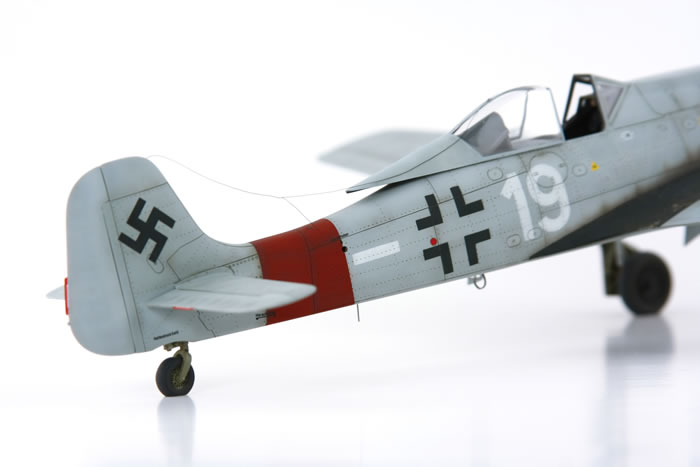
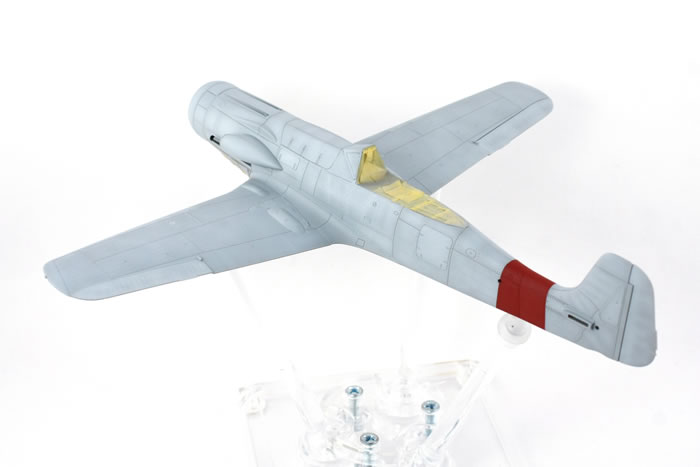
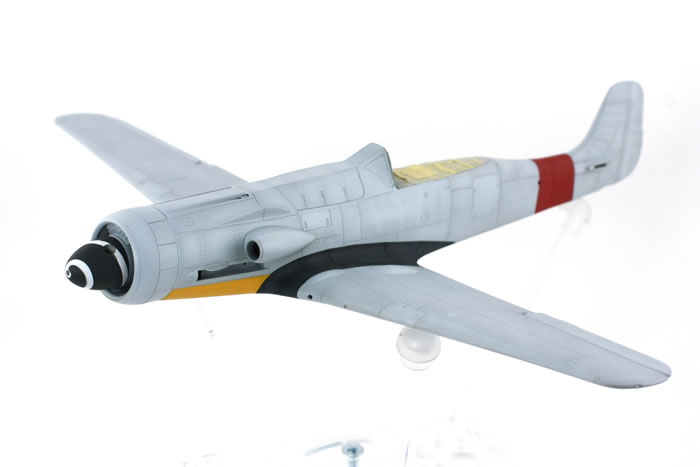
Before spraying the RLM 76 I painted the RLM 23 RVD band with a 9:1 mix of Tamiya colors XF-7 Flat Red and XF-10 Flat Brown to dull the red, and the RLM 04 lower cowl with a similar 9:1 mix of Tamiya XF-3 Flat Yellow and XF-7 Flat Red to warm the yellow.
These areas were masked off with Tamiya masking tape and then the entire airframe was airbrushed with AK-Interactive's AK 2009 RLM 76.
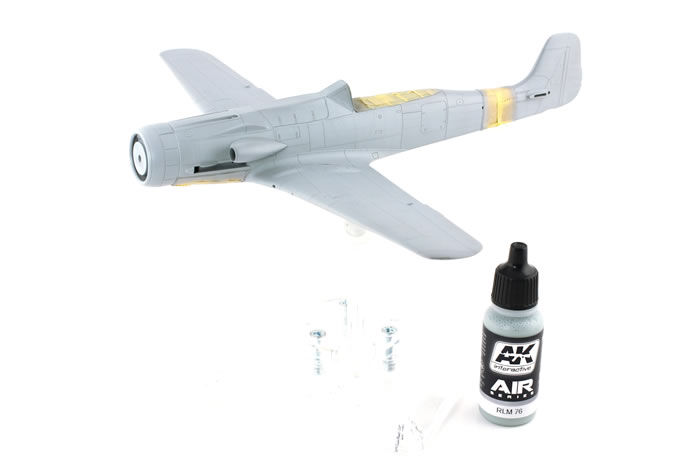
This was my first time using AK paints and I was pleased with how it laid down using AK's acrylic thinner. The RLM 76 was then lightened with a drop of Tamiya XF-1 Flat White and some random patchy fading was applied.
I try to avoid being too predictable with my fading when it comes to the overall surfaces of the wings and fuselage, but I do like to pick out some random panels, hatches, and select rows of rivets to highlight. The fabric control surfaces were masked and sprayed entirely with the lightened color.
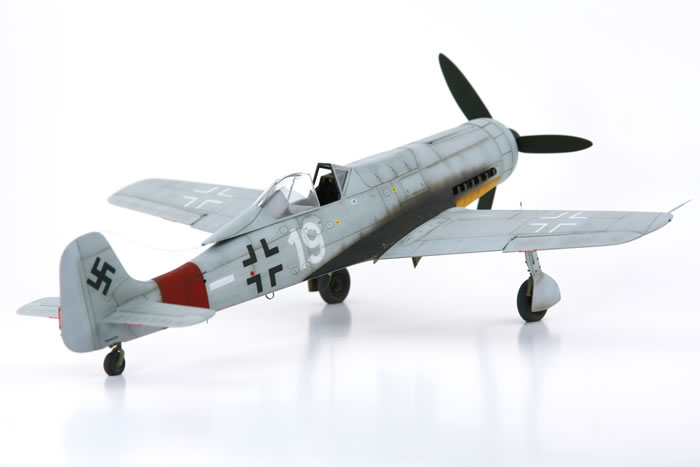
I always get anxious to unmask areas to get an idea of how things are looking, so I took the opportunity to pull the tape off of the tail band before continuing - looking good!
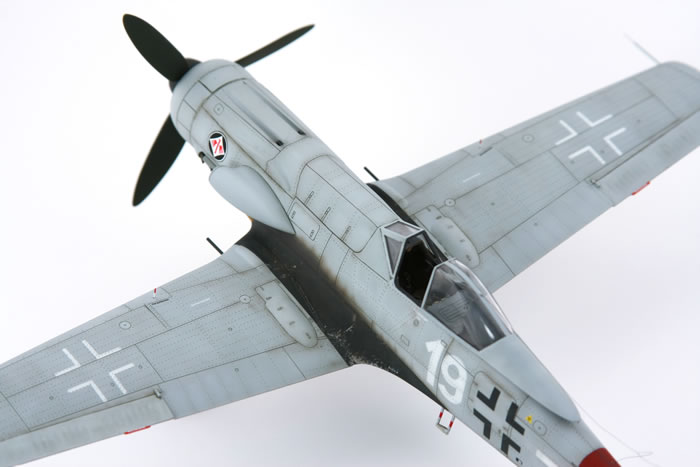
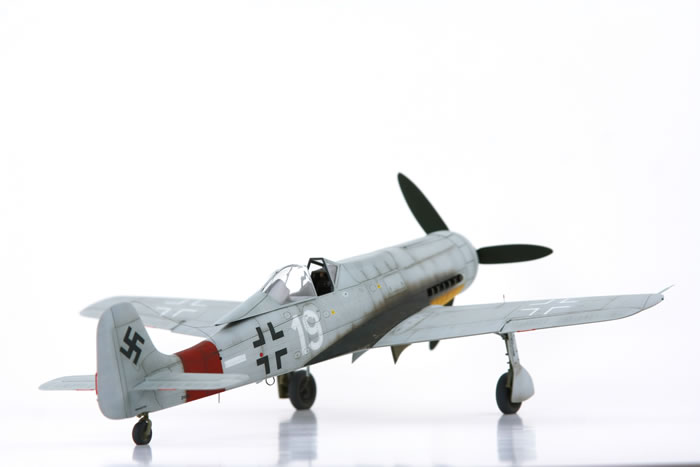
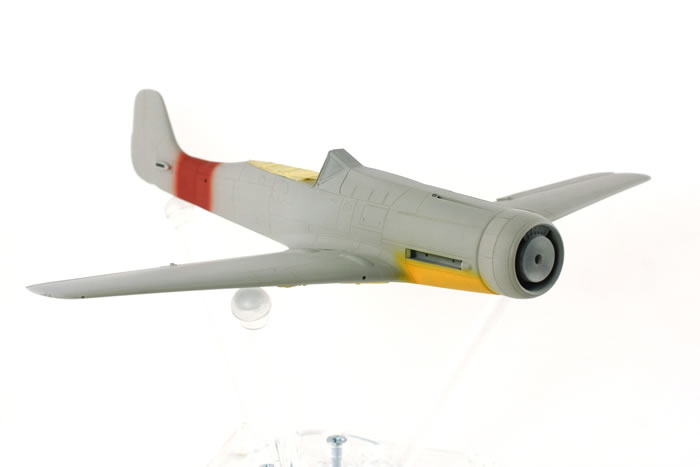
I left the lower cowl taped up as I still needed to paint the black wing roots. I taped off the roots and sprayed them with Tamiya NATO Black which is my go-to "scale black". Some XF-53 Neutral Grey was added to the airbush cup for some minor fading that doesn't really show up in the photos, but is just enough to break up the color in person. Now it was finally time to pull off all of the Tamiya tape and get a feel for the scheme, certainly a different look for a Ta 152!
I am a huge fan of using paint masks instead of decals, especially considering how picky I am about surface detail and rivets - I don't want decals covering up any of my time-consuming work! In the past I used Montex Masks which aren't a bad option, but lately I've been using Miracle Paint Masks for custom markings not available from other manufacturers. For this build I actually used some leftover masks from a previous build for the insignia, it's quite handy that these are reusable.
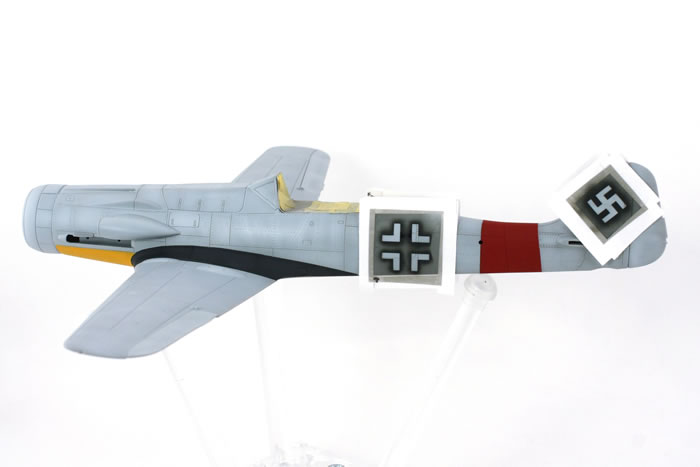
I like to cut small strips of paper to put around the edges of the masks to make them easier to handle and reduce the amount of adhesive touching the paint - only the edges surrounding the area to be painted need to be stuck down tight. The paper strips give me something to hold that isn't sticky while I position the masks. Once the masks were in place I airbrushed the black markings with the same NATO Black and Neutral Grey treatment as the wing roots, while the white markings were simply sprayed with Tamiya XF-2 Flat White.
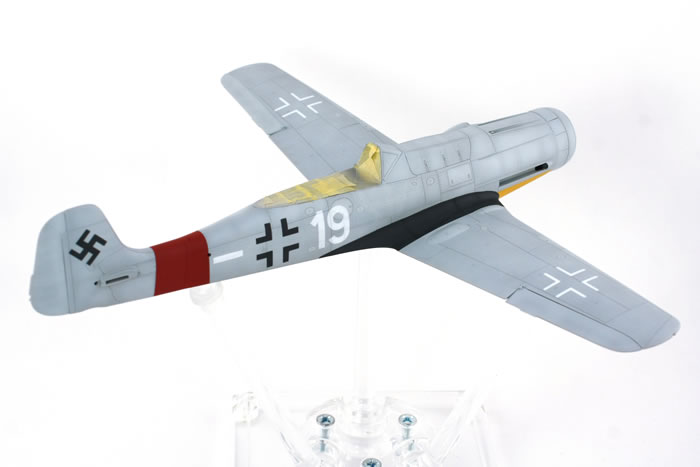
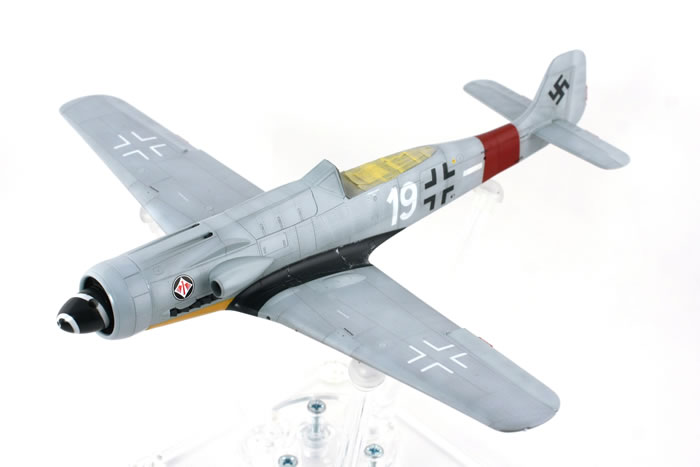
The trim tabs were masked and sprayed with Tamiya XF-7 Flat Red, some minor wear and chipping was added to the wing roots with Vallejo Neutral Grey and Citadel Mythril Silver applied by brush, along with chipping on the leading edges of the wings, cowl, and intake using Vallejo Neutral Grey applied with a sponge. To protect the paint and prepare for the stencil decals I gave the whole model two coats of Future floor polish applied with a wide flat brush. The EagleCals performed flawlessly as they always do, and snuggled down perfectly with an application of Solvaset setting solution. I also sourced a JG 1 emblem for the cowl to complete the "what if" scheme. Once these dried they were sealed in another coat of Future and it was time to get to weathering!
Since my speculative Ta 152 would have been a brand new aircraft in the field, weathering was kept to a minimum. I had already done some minor chipping and I didn't add any more at this stage. I recently picked up some Panel Line Wash sets from AMMO of Mig Jimenez and this was the perfect opportunity to try them out.
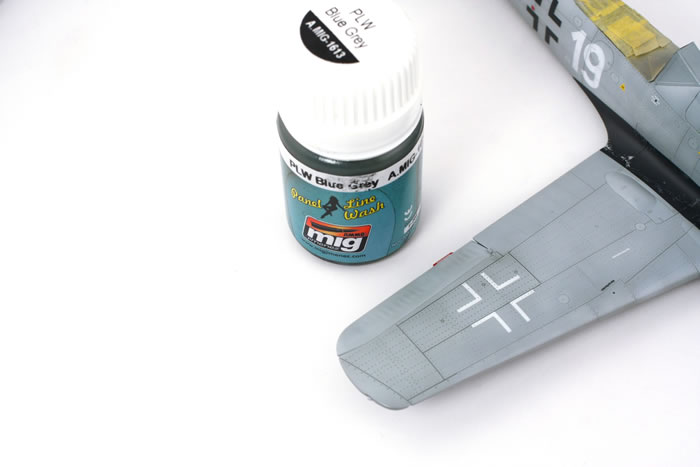
Again this was a task usually handled with oil washes, and again I was more than pleased with the enamel washes. The AMMO washes are very similar to AK's, but a thinner consistency and available in colors specifically designed for RLM camo colors. I stuck to AMMO's recommended colors for the RLM 76 and 04, and used 1610 Tan Grey for the black wing roots and insignia for better contrast. These washes are very forgiving and give you plenty of time to work, capillary action takes care of most of the work, and excess can simply be wiped away with a Qtip or cloth.
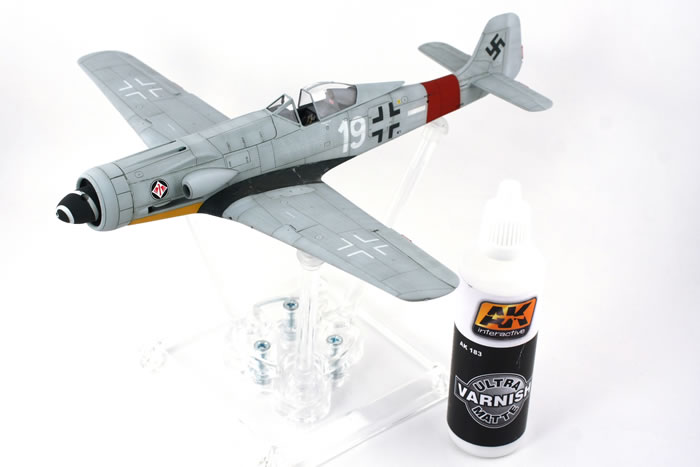
At this point I gave the model a coat of AK-Interactive's Ultra Matte Varnish - at long last I have found a replacement for my long lost old-formula Polly Scale flat clear! Over the years I have tried almost every other flat coat on the market trying to find something comparable and this one fits the bill, perhaps even superior to Polly Scale.
With the model flat coated, I pulled all of the masking tape (my favorite step of the entire build) and got started of the exhaust stain and other grime.
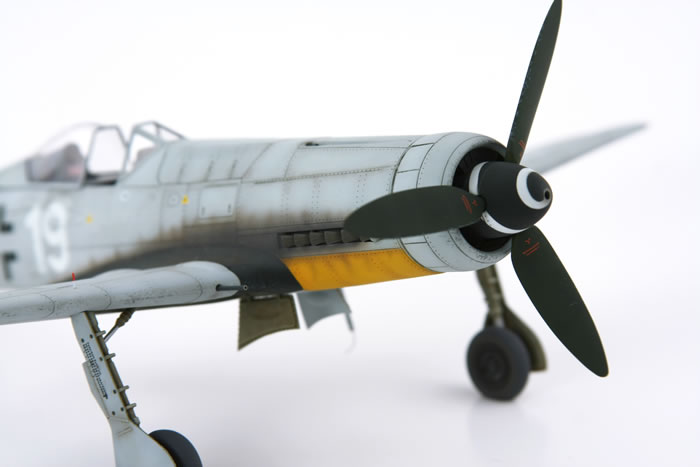
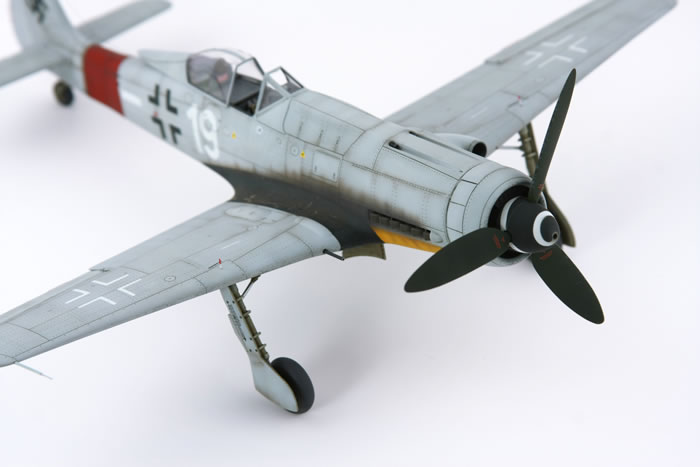
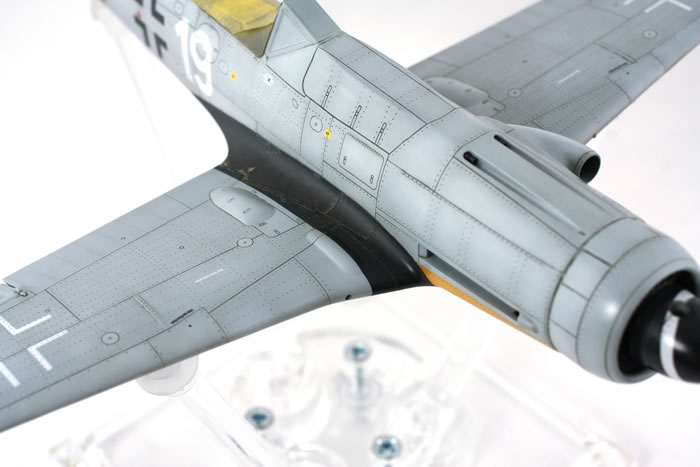
For the exhaust stain I used Tamiya acrylics thinned with 91% isopropyl alcohol. It would be more appropriate to refer to it as tinted alcohol, as the ratio is at least 10:1 alcohol to paint. I start out with Tamiya XF-64 Red Brown to make the initial outline of the stain, slowly building up the effect. I incrementally add small amounts of XF-63 German Grey as I move toward the heavier part of the stain. The heavily thinned mix provides lots of control over the effect. When the Red Brown and German Grey mix is about 50/50, I airbrush random spots on the airframe to simulate some dirt and grime, mostly around the engine and the wing roots.
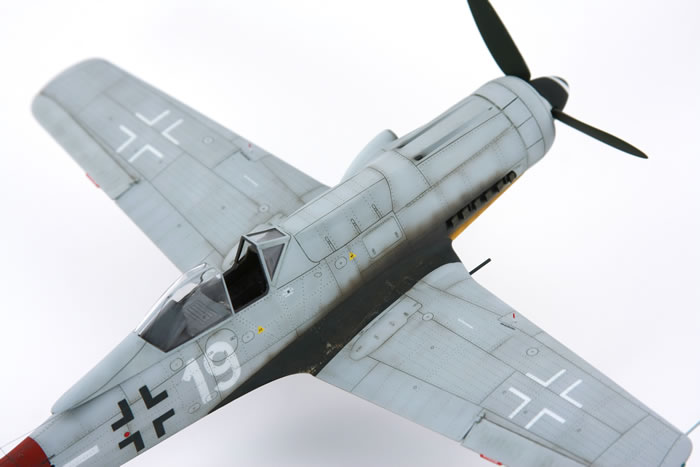
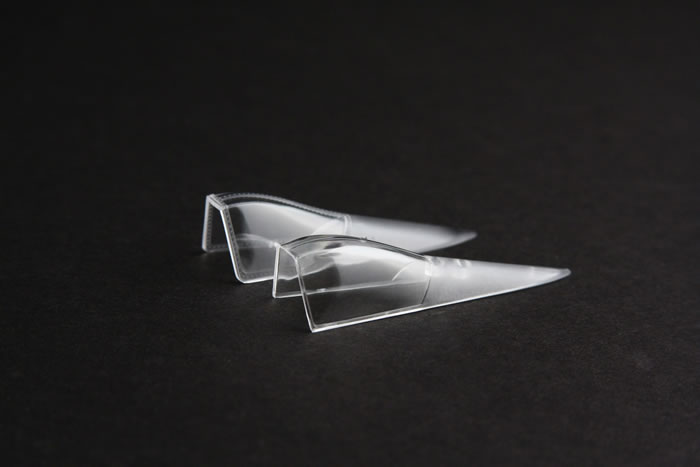
The fiddly bits are all that remain now, most of which I had painted along the way with the rest of the model to avoid loading the airbrush with the same color more times than necessary. The kit-provided canopy has a poor "blown" shape and depicts the thicker-framed piece from the Ta 152H, so I robbed the canopy and headrest from a Tamiya Fw190 kit.
I also robbed the morane antenna from the same kit, simply because I think it looks better.
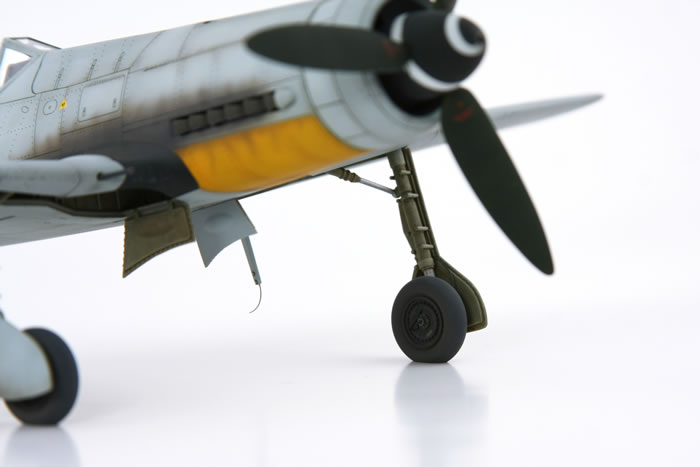
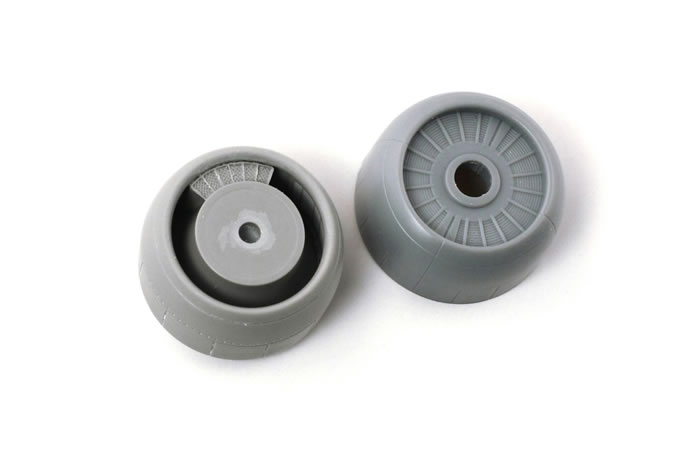
The HobbyBoss kit wheels are oversized and have a strange tread pattern, so I used the wheels from a Dragon Ta 152 with air fill lines added from copper wire.
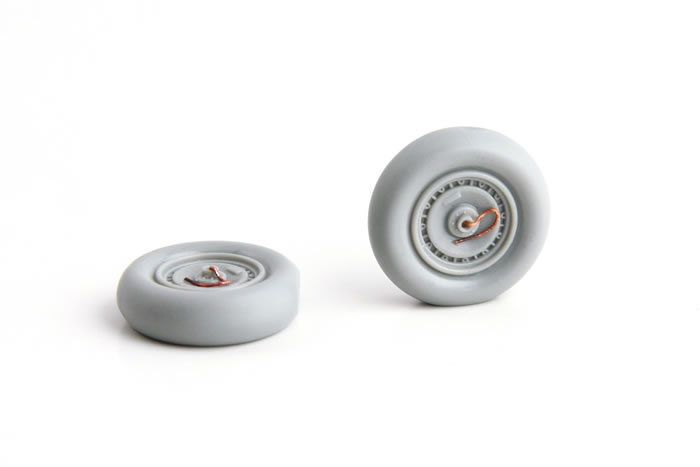
These were airbrushed XF-63 German Grey, then the hubs were hand painted with Vallejo Black and details picked out with Vallejo Neutral Grey. After a coat of Future, the wheels were given thin washes of various Vallejo acrylic earth tones.
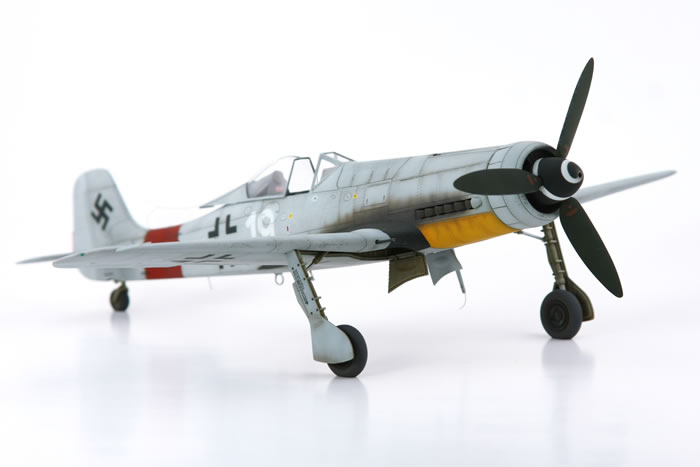
Quickboost's resin hollow exhausts were used to replace the kit parts, and were given a similar treatment as the wheels: base coat of Tamiya XF-63 German Grey followed by washes of Vallejo Leather Brown and Black and a light dry-brushing of Neutral Grey to emphasize the hollowed openings. Quickboost's spinner and propeller blades were direct replacements for the kit parts - the blades were painted with Tamiya XF-27 Black Green and got some light chipping with sponge-applied Vallejo Neutral Grey, while the spinner was painted Tamiya XF-2 Flat White, the spiral masked, and painted again with Tamiya XF-69 NATO Black.
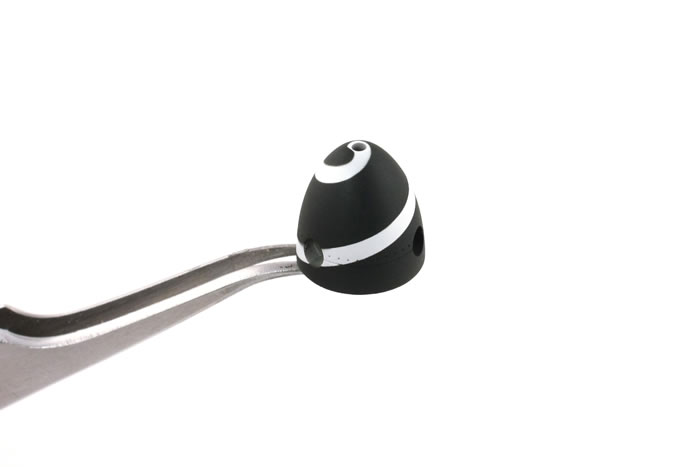
Painting the spiral may seem tedious, but it's certainly much easier than dealing with the often finicky spiral decal and if you screw up you can always start over!
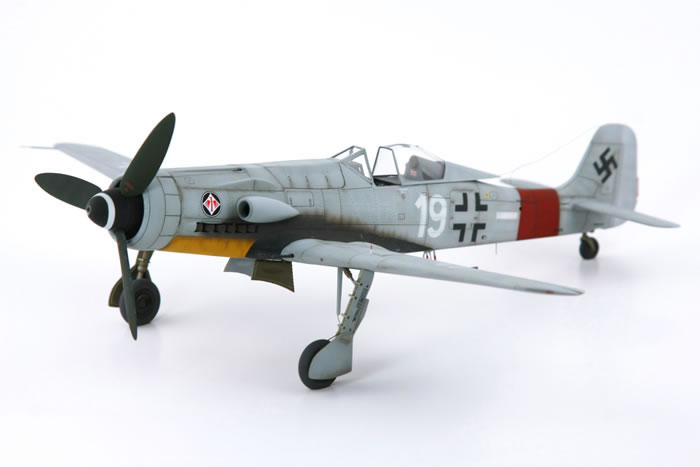
Having seen other builds of this kit, I noticed that the landing gear always seemed too vertical for a Focke Wulf. Consulting my references again confirmed my suspicions. Fortunately (or unfortunately) there was a fair amount of play in the fit of the main gear legs. To set the legs at the correct angle, I lightly tweaked the locator pins of the retraction arms by hand to hold the legs as far forward as the play would allow. This combined with the shortened tail wheel resulted in a proper stance for the Ta 152C. With the bird on her feet, completion was a matter of attaching all of the fiddly bits. I build a lot of Focke Wulfs, so I had several of Quickboosts sets of multiple pitot tubes for the 190 - one was grabbed, trimmed to the proper length, painted and installed.
The wing root gun barrels were replaced with hypodermic tubing, the thick plastic DF loop was replaced with a metal staple, and all underside antenna were replaced with various thicknesses of wire for better scale appearance. Gear position indicators were also fabbed from bits of wire, installed, and painted with Vallejo White and Red.
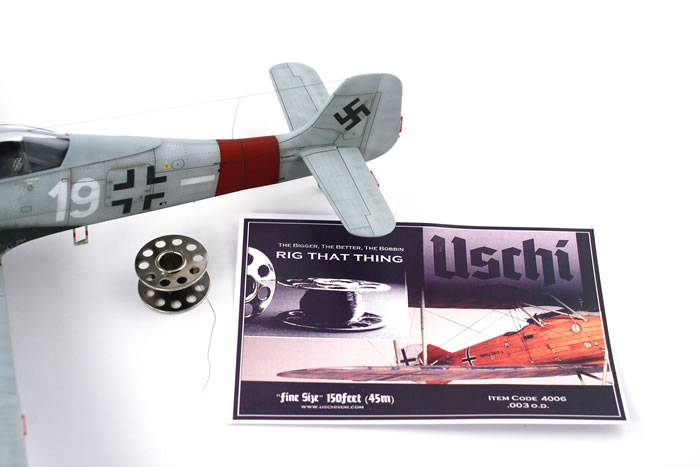
I used AMMO's Crystal Colors for the navigation lights, a brush-friendly alternative to the Tamiya paints I've used in the past. The final touch was the aerial antenna for which I used Uschi's Fine rigging line, which did the job perfectly.
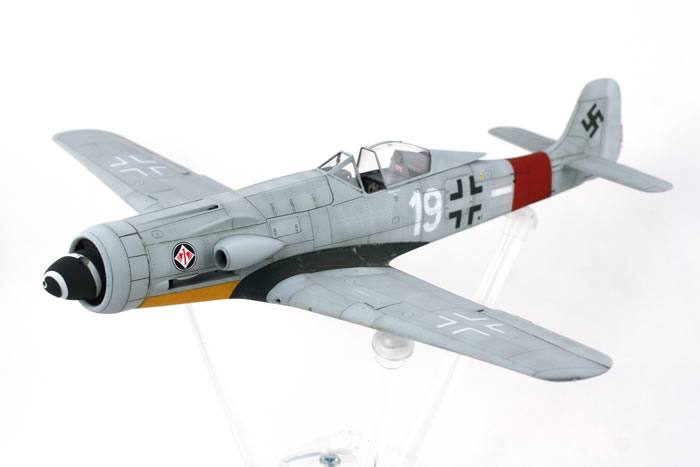
The HobbyBoss kit may have some minor accuracy issues, but these are easily correect and HB more than makes up for it with excellent molding and fit. This is by far the easiest option for building a Ta 152C in 1:48 scale. The speculative C-11 boxing provides a great canvas for "Luft46" and "what if" builders to have fun with markings, and I certainly enjoyed doing the same with mine. Now where is that HobbyBoss Ta 152H?
Model, Images and Text Copyright ©
2022 by Jason Brewer
Page Created 14 March, 2022
Last Updated
14 March, 2022
Back to HyperScale Main Page

|
 Home
| What's New | Features | Gallery | Reviews | Reference | Resource Guides | Forum |
Home
| What's New | Features | Gallery | Reviews | Reference | Resource Guides | Forum |