Matchbox 1/72 scale
Heinkel He 115 B-1

by Steven Hustad

Description:
Winter Scene with the Matchbox He 115 B-1
Scale:
1/72
Kit:
Matchbox #40405-0389
Review Type:
Build
Introduction
Let’s start with the bad news. There’s no decent model of the He 115 in The One True Scale other than the now quite ancient Matchbox tooling first released in 1975 - YIKES! (Note that this kit has also been released under the Revell label).

But this review/build isn’t going to concentrate too much on the problems & needs with this very old kit (Matchbox #40405-0389) but will instead focus on the weathering and painting aspects of the build. Might even delve into the base/groundwork/water portions for some added fun as well. And if we’re not having fun with this hobby then why are we doing this, right?
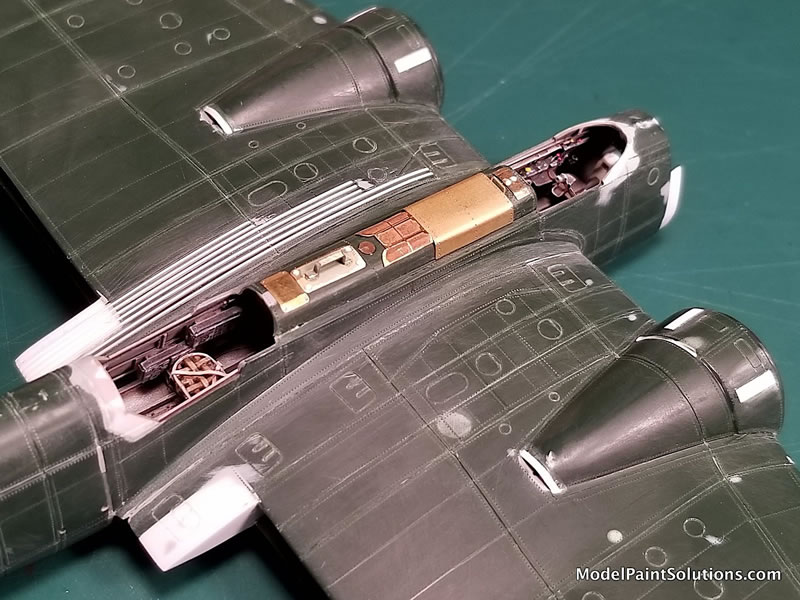
Right from the start I knew this project was going to require a lot of help in the form of aftermarket detail and canopy sets. Fortunately, Xtratec made a very nice (but now also old and OOP) photo etch detail set #EX72094. But Bregun happily has now re-released this same set under their own label. (I of course didn’t discover it was the same set until purchasing both naturally!). Also available is the very nice vacuform canopy replacement set made for this Matchbox kit by Falcon of New Zealand. This canopy set is ESSENTIAL because the kit’s clear parts are so thick that they really can’t be described as “Clear parts!” These replacements can be found in Falcon’s still available canopy set #42 (Luftwaffe set #7). Also replaced were the kit’s BMW 132 engines – with resin items from ‘Engines & Things’, #72054, but with A LOT of extra refinement and detail added, as these, well, they sure needed it. Note that a far better resin & PE option for the BMW 132 is now available by “Small Stuff Models” of Israel. A related replacement was the propellors and spinners - which were replaced with two Quickboost #72-431 aftermarkets (intended for the Ar 196, but the He-115 conveniently used the same props).
The interior detail was helped with much extra scratch building using plastic strip stock, sheet, rod, and wire. Many extra PE bits were from the PE bits spares box (yes, I maintain one of those, one I’ve labeled ‘small PE parts’, the other ‘large PE parts’) were also used to flush out the cockpit and MG positions to match the photos I could find as closely as possible.
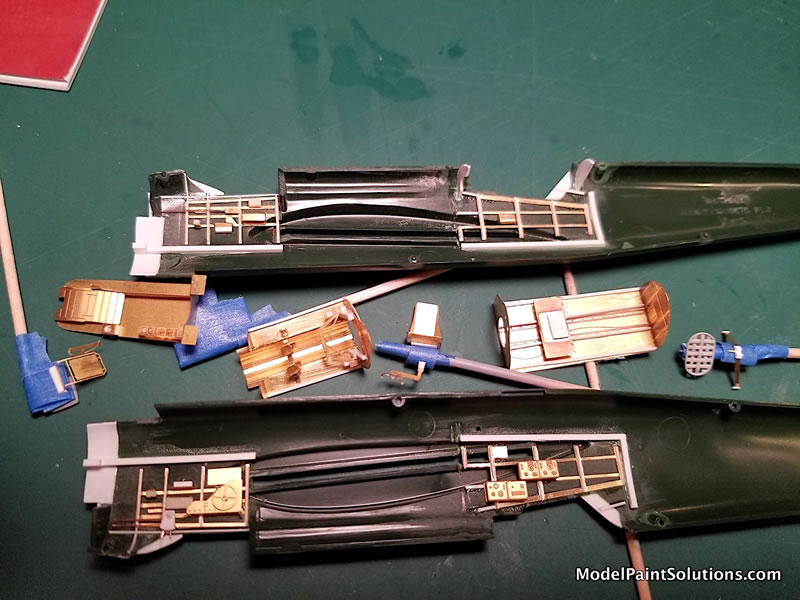
Other “help” was provided in the form of elbow grease - sanding off all the panel lines, re-scribing them back in (accurately this time) by using those wonderful UMM scribers. That followed by a full riveting treatment using the “Rosie the Riveter” .040 (thank you Barry N.!). Extra exterior detailing was done using Evergreen and Plastruct styrene to add details missing in the very over-simplified Matchbox kit.
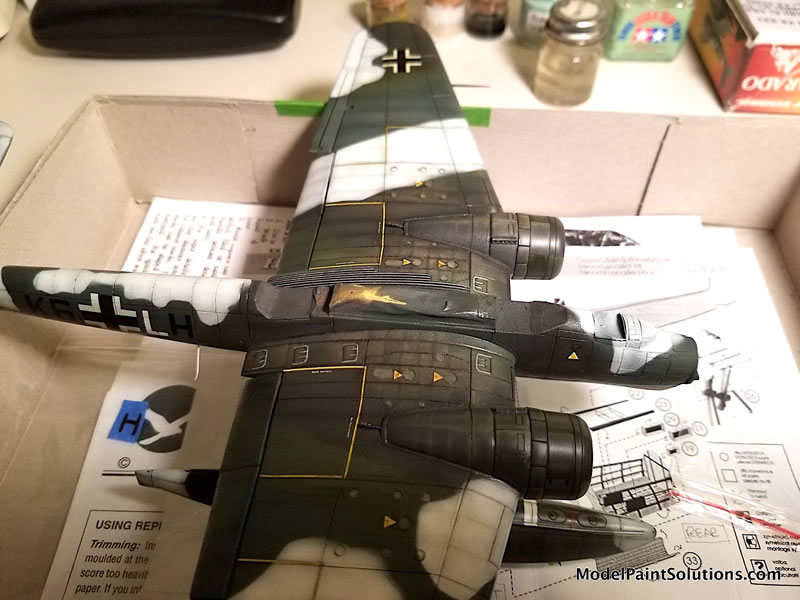
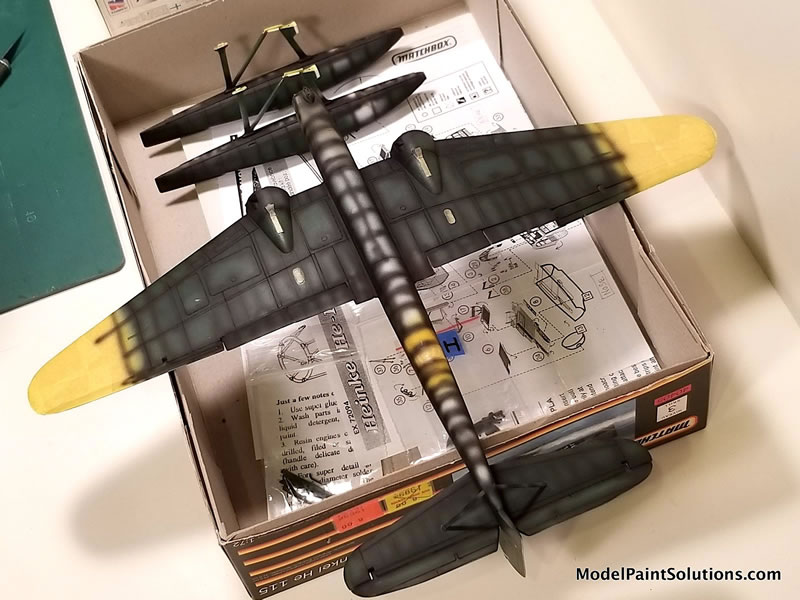
After a quick surface clean up with alcohol swabs to remove finger grease, mold release deposits, spilled coffee, drool, and miscellaneous floor sweepings we can proceed. Let the painting begin! I start with enamels (old Testors Model Master & Humbrols) to paint markings that I’ll need to mask over – like the yellow fuselage band, wing-walk markings, and the underside of both wing tips. These were airbrushed white, and then yellow atop that, masked after at least 24 hours drying. Following this is an overall primer coat using Mr. Surfacer 1500 black (thinned about 1/3rd using Mr. Color Leveling thinner – aka “Unicorn Tears”). This was airbrushed onto/into all panel lines, edges, creases, and recesses at about 12psi.

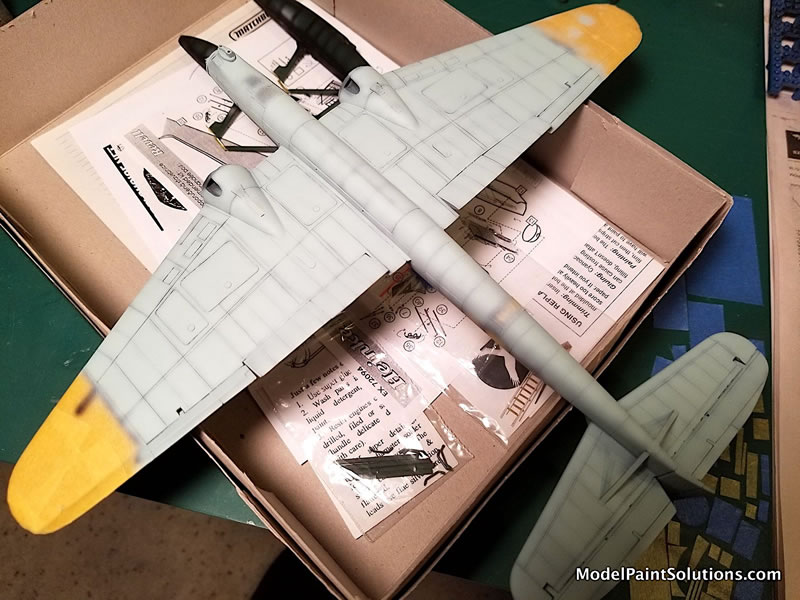
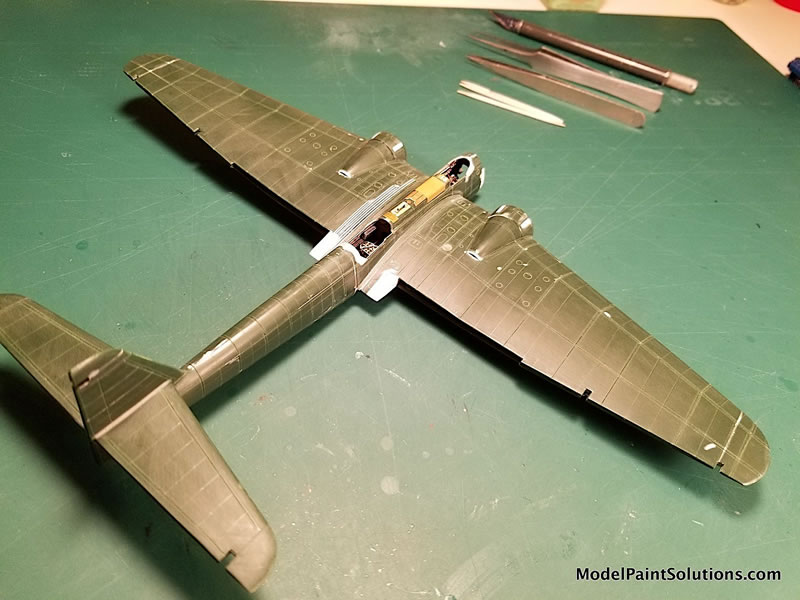
I previously shadowed the panel lines for this following step – the application of the underside color RLM-65 Light Blue. Again, since I will be masking over this (and because I’m a big chicken and don’t like to take chances with ‘paint pull-up’) I used a custom mix using Humbrol enamels: #65 (light blue, 65%), #34 (white to 30% of total), and a bit of olive green #98, 5%. The white to lighten the color and the green to tint it in that direction because RLM 65 had a slight, but definite greenish tint to it. This color was airbrushed using an Iwata HPS-C at about 15-17psi. The paint was thinned using about 60% VMS Enamel thinner with a leveling agent in it, not sure what that agent is though... This concoction was airbrushed into the center of each wing panel area working toward the outside of each. This leaves an attractive slight shadow effect around each panel-lined area. Be careful not to overdo this because there is a point where it starts to look clownish if you don’t get enough coverage.

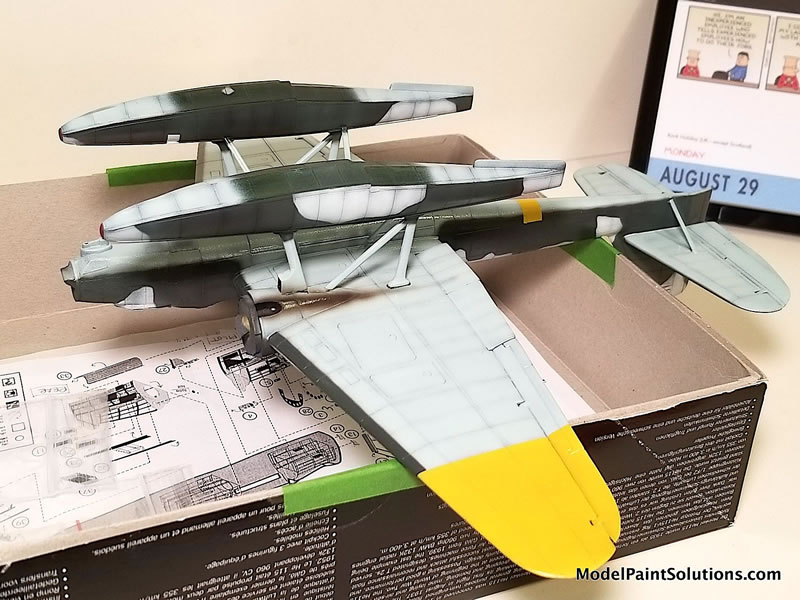
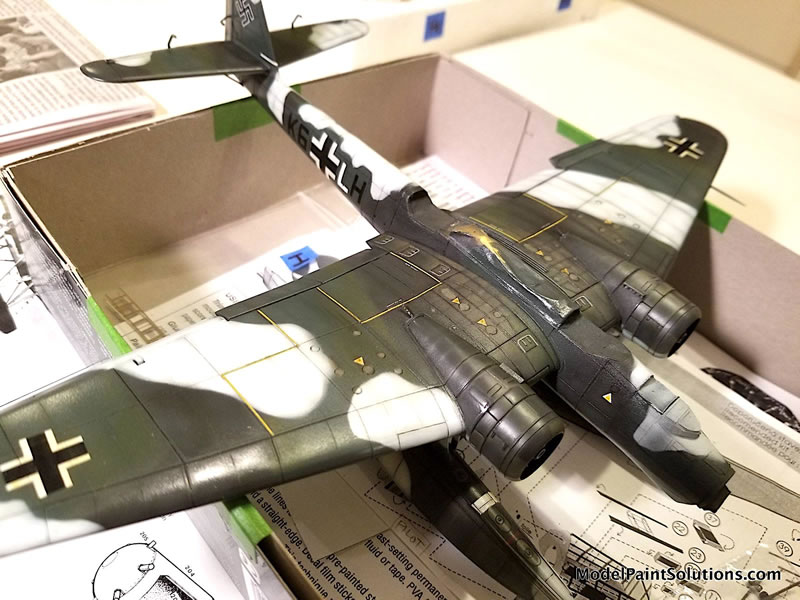
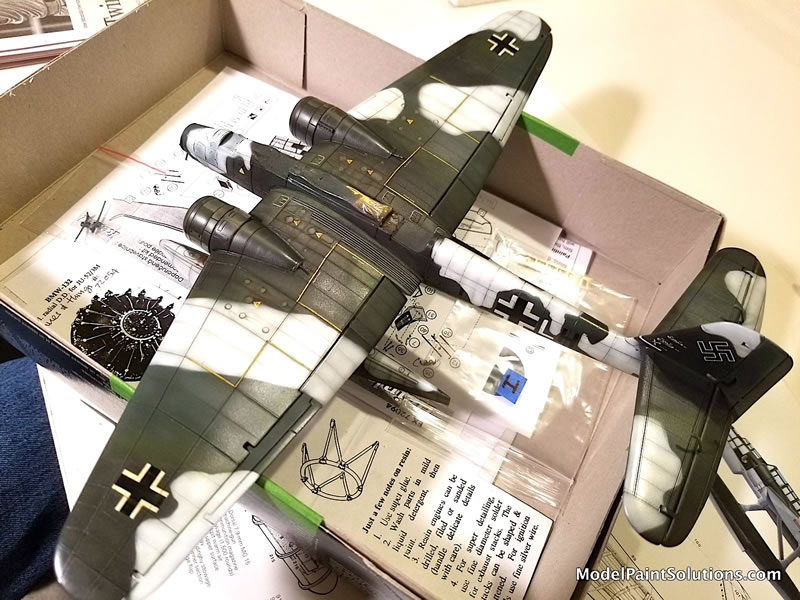
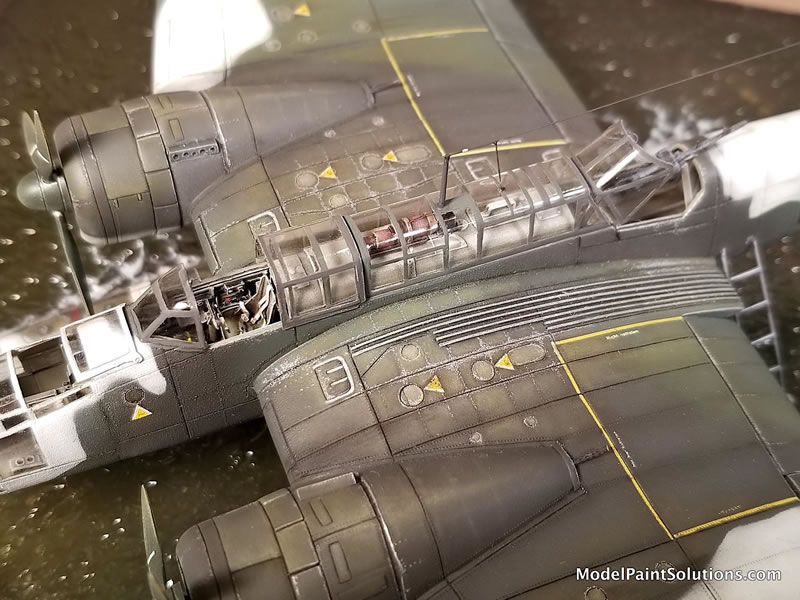
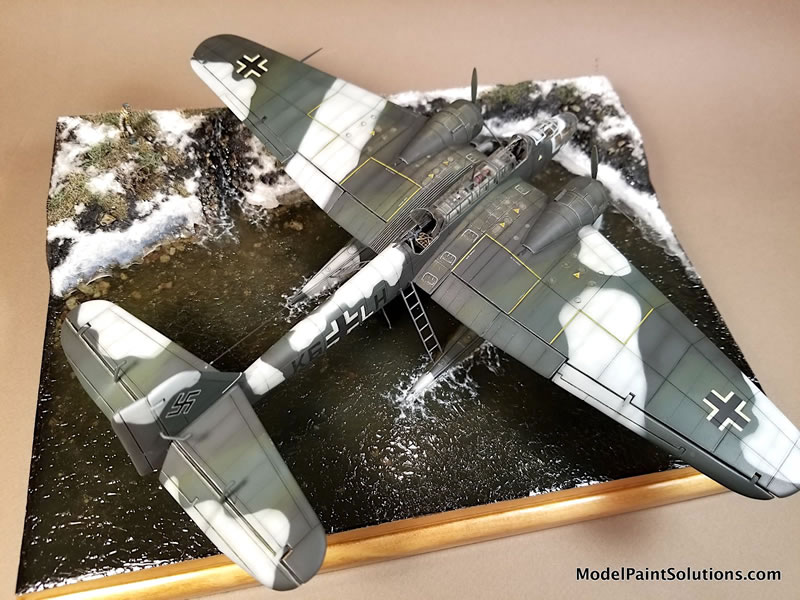
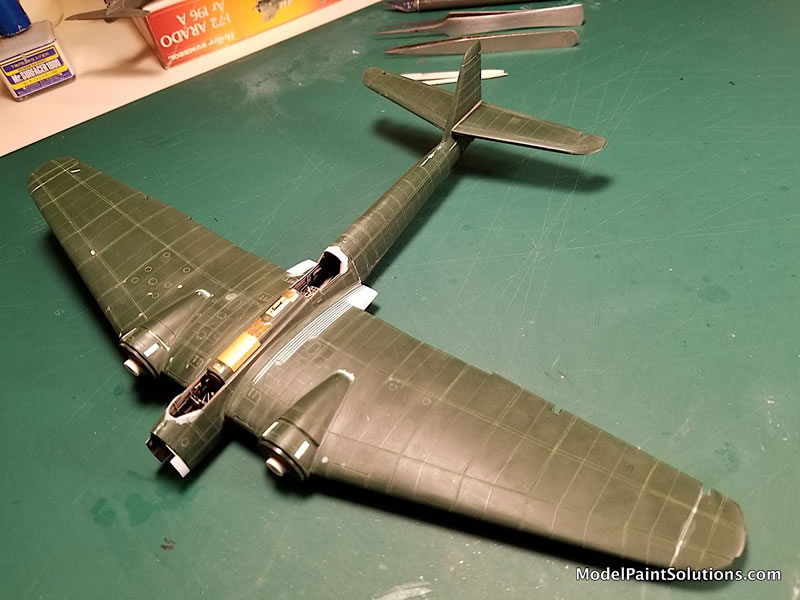
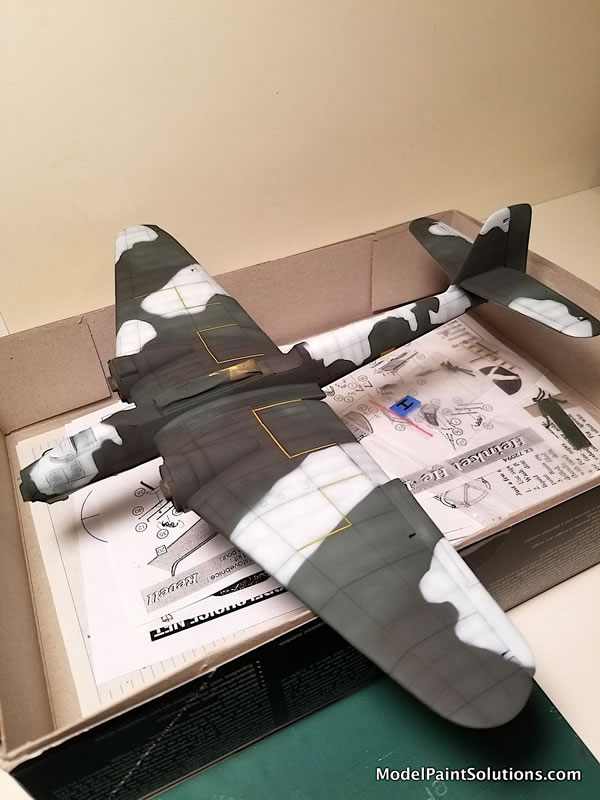
Topside colors for the He-115 were the Luftwaffe’s maritime shades of RLM-72, a very dark grayish green & RLM-73 dark green. While at a local hobby shop in St. Paul (‘Scale Model Supplies’, but affectionately known as “The Dungeon” by ‘the locals’) I came across an impressive stock of an old enamel line called Floquil Military Colors’. I hadn’t seen these in years and since I’d started this project with enamels, I thought I might as well finish it in the same way, so bought a couple jars of each – RLM-72 & -73. The aircraft I wanted to model was “K6+LH” with 1./Kü.FlGr 406 based near Sorreisa Norway in the winter of 1942/43. It also called for large patches of white ‘snow’ camouflage added over the standard 72/73 topside scheme.
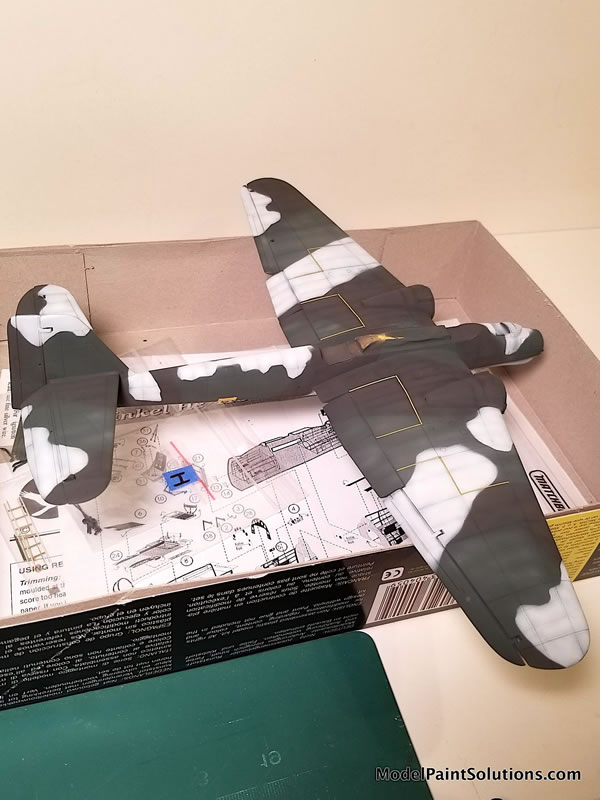
The lighter of the two RLM-72/73 shades was laid down first, the second shade was airbrushed over the masked off lighter areas keeping the masks about 1/16th an inch above the surface. This is to give a very slight soft edge to this “splinter” camo scheme. Yes Virginia, 70/71 and 72/73 schemes actually DO have a very slight – but noticeable - softness between these colors that otherwise looks like sharp edged camo – a detail missed by almost all modelers, but it’s quite apparent when missed (IMO of course!). The white camo patches were airbrushed over the two color “splinter” scheme in the same manner (also allowing for a slight soft edges). Also this white was airbrushed just like the underside RLM 65 – in other words, airbrushing from the center of panel-lined areas outward toward the edges leaving a very slight panel line shading effect. I didn’t worry about tinting down the white knowing that the following weathering would sufficiently darken it naturally.
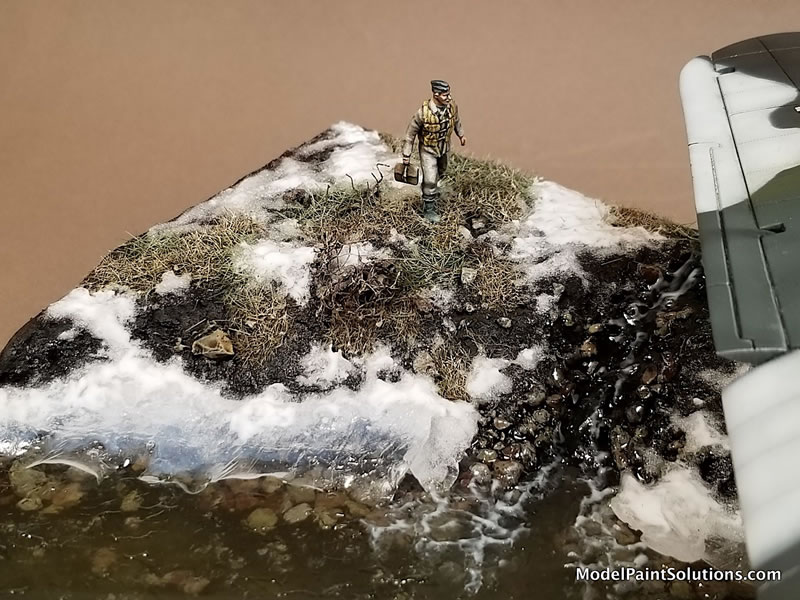
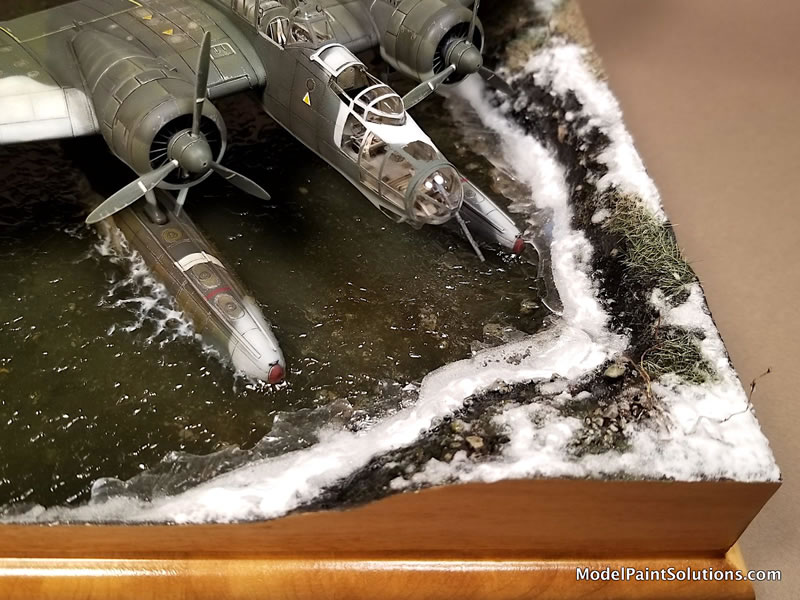
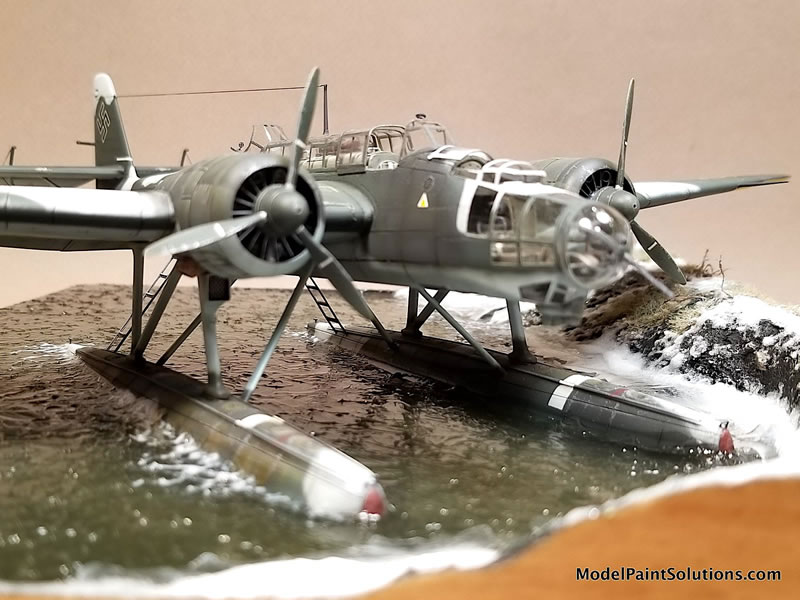
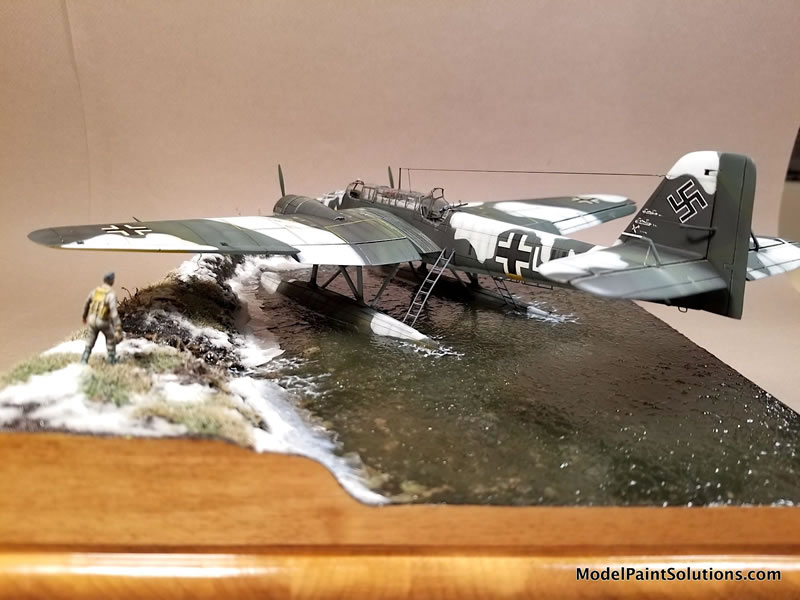
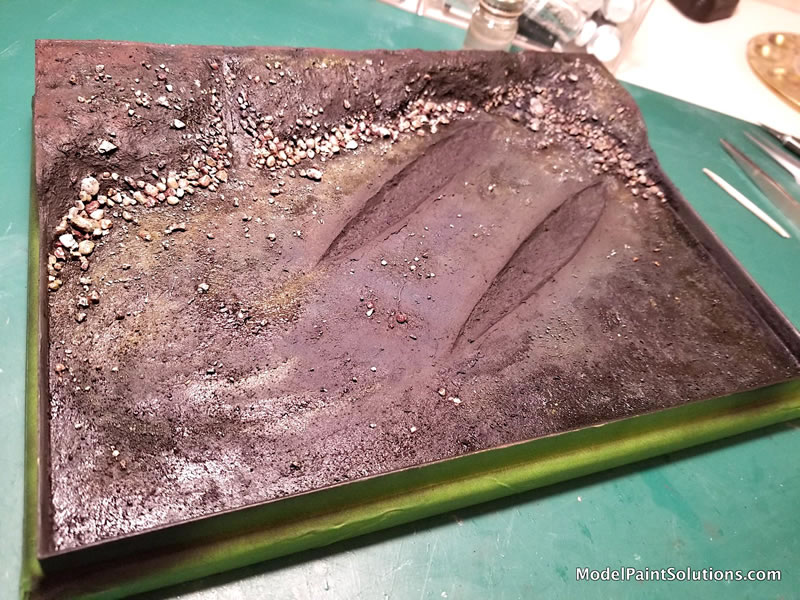
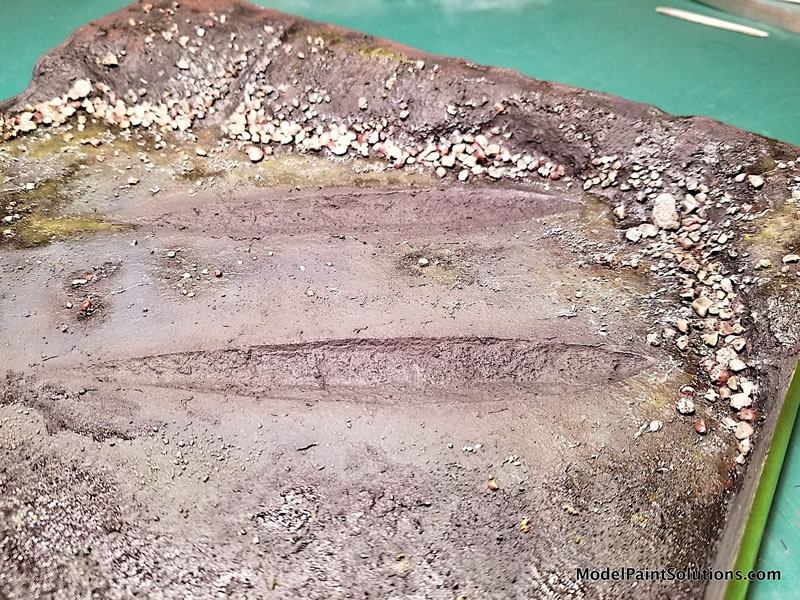
While waiting for the enamel paints to fully cure before overcoating with a clear acrylic, I turned to the base for this model. I wanted a moored aircraft in a late winter scene amidst a spring thaw in Norway, and to also try a couple of new techniques – shoreline ice sheets and slushy melting snow. So the base was selected, and the composition was finalized (via a lot of sketches and trials with the model in place). Once settled, I carved out places in the wood base for the bottoms of the floats. I then set the model in place so that the water level could be correctly determined between the shore and the aircraft which also dictates how to configure the base’s varying border heights – made with 1/8” basswood. I don’t like “sidewater” either (a nod to Mike B. of Plastic Model Mojo fame), but I do have some diorama base proclivities of my own as well…namely that one of my (many) base modeling pet peeves is that too many modelers don’t bring the groundwork (or water) right up to the very edge of the base all around. When a base is ‘framed’, or the horizontal top edge of the base is visible right next to where the groundwork should continue I think it distracts from the scene and is best avoided. Using picture frames distracts the worst I think, but that’s just me, your mileage may vary…
Continuing on with the He 115 itself. As a clear acrylic clear coat, I’m still using ‘Future’ as I have a large supply of it, and I know it works well. I understand there are several excellent “modern” alternatives ‘out there’ now, but I used ‘Future’ – or ‘Pledge with Future’ (as my bottle says) on this project, but I think it’s entirely discontinued now…? In any case, an acrylic layer/barrier is essential to protect the paint from the weathering techniques that now follow. These are tricks I’ve learned primarily from the armor modeling guys, armor modeling books - and “Night Shift” YouTube videos. We can certainly learn from other modeling genres’. The first layer of ‘Future’ is in preparation for the decals. Once the decals are in place and fully dried, I apply a second coat to seal and protect them. Let this cure for at least 24 hours before diving into the weathering layers.
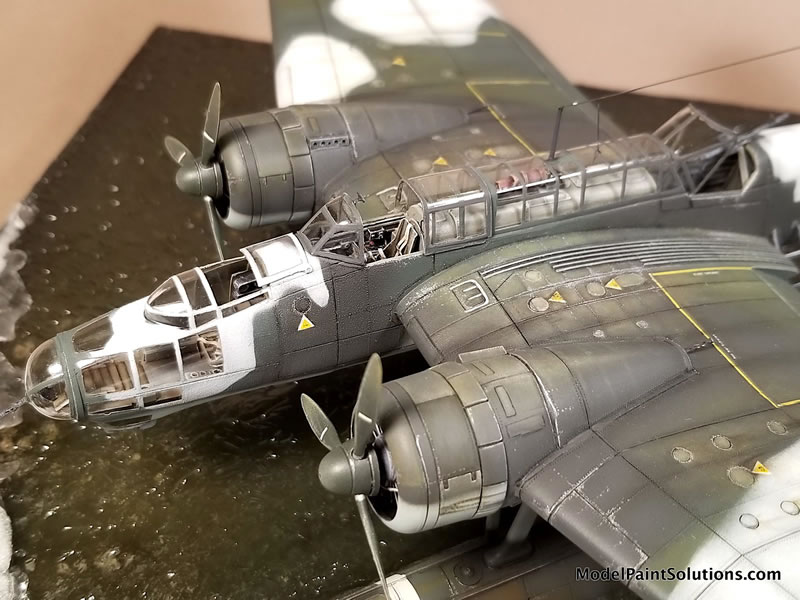
My first weathering step is almost always a general oil paint ‘pin-wash’ applied into all panel lines - and in this case, also rivet lines. This is a mixture of about 90% mineral spirits and 10% black + burnt umber oil paint to get a nice blackish/brown mix for the topside. (I’ll use a Payne’s gray + burnt umber for the pale blue undersides). Apply this and let it dry for 15 minutes. I then use fragments of a cut up old T-shirt ever so slightly dampened with mineral spirits and wipe in the direction of air flow. Wipe until satisfied with the results. The beauty of oil paints is that if the effect is overdone (or entirely wiped away!) it can be removed with a thinner dampened brush and just re-apply. Or use that same brush to refine the effects around the nooks & crannies with a fresh pin wash selectively located. Repeat to desired outcome. This technique should leave a slight ‘shadow’ in and around all panel lines setting off the detail much better. For riveted areas, the individual rivets will pop out visually – especially on lighter camouflaged areas.
Second up involves oil paints again, but this time with a different and more deliberate application technique. I wanted to show wear on the upper wings where crewmen and maintenance personnel walked. With the He-115 these areas were confined primarily to the areas between the fuselage and the engines, and a bit just outboard of the engines. Also extra attention is needed where the maintenance men climb onto the wings, which in this case is the rear/inboard spots near the access ladders up from the floats. So pay attention to logical progressions like this when planning where to concentrate your efforts. Worn and weathered paint appears lighter on flat areas whereas it will appear soiled and darker around any raised areas or small obstructions. The He-115’s topsides were painted in RLM-72 & 73 which are both very dark greens, and one is noticeably grayer than the other. So I mixed oil paint colors close to each of those base shades. Each of these were in turn lightened and darkened so I ended up with four colors on the palate to work with. These were sparingly applied panel by panel, or around access hatches, and again, the beauty of oil paints is that they blend so easily and well. Apply very small quantities and blend with the brush. Add white or ochre to lighten, or dark brown and dark olive to darken. ‘Blend to taste’ and follow your photo references! Since oil paints dry slowly, you’ll need to wait 24 hours before adding a second or third layer to intensify the targeted weathering effects. Building them up so to speak.
Oil paints were also used to replicate engine oil stains and fuel leaks from fuel fill points. These work nicely because, again, you can blend them out with a slightly thinner-dampened brush and create them as dark and as large or small as the subject warrants.
After these oil paint stages, I applied a flat coat using Testors Dullcote (a lacquer) thinned one third to one half with lacquer thinner. This was airbrushed overall in a semi-wet coat. By thinning it this much and applying it semi-wet, I never get chalky build-ups and also avoid dead-flat finishes. What it does result in is a nice sort of smooth flat to satin finish. Atop this I applied Prismacolor Silver colored pencil paint chipping and scuffed areas which can be done with great control over this very receptive flat/satin finish. This was followed by pigments (ground pastels) application for exhaust stains, softening shadows, augmenting fuel & oil stains and highlighting various panels.
From this point it was onto things that aren’t the focus of this article like installing the Falcon vac canopy replacements, adding the resin (Quickboost) props, stretched sprue aerials, and so on. Finally groundwork/base completion; the single pilot figure added to the base (a Preiser conversion), water (Enviro-Tex Lite), shoreline ice (AK’s Still water applied atop glass, peeled off, cut, and glued in place), slushy snow – AK’s “Snow”, and waves (Liquitex Gel medium overall, with final bits tinted with a flat white acrylic).
That’s all folks!
Steve “The Mad Norseman” Hustad
For more on this build visit Modelpaintsolutions.com
https://modelpaintsol.com/builds/matchbox-heinkel-he-115
Text and Images Copyright © 2023 by Steven Hustad
Page Created 22 December, 2023
Last updated
22 December, 2023
Back to HyperScale Main Page
Back to Reviews Page

|
 Home
| What's New |
Features |
Gallery |
Reviews |
Reference |
Forum |
Search
Home
| What's New |
Features |
Gallery |
Reviews |
Reference |
Forum |
Search