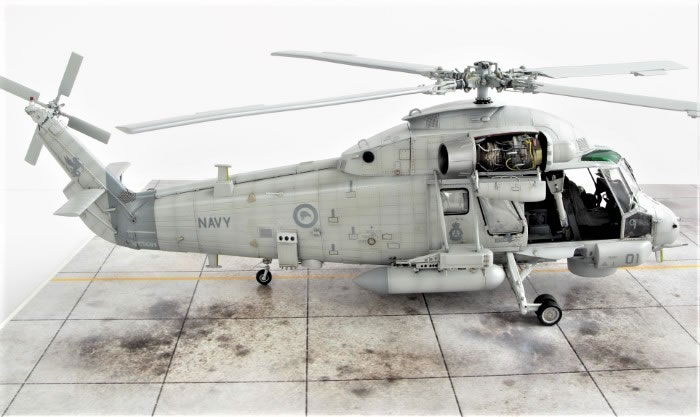
Kitty Hawk's 1/48 scale
SH-2G Super Seasprite
by Steve Pritchard

Kit
Kittyhawk 1/48 SH-2G Super Seasprite (Item No. KH80126)
Accessories Used
Eduard Mask for Super Seasprite (EX 554)
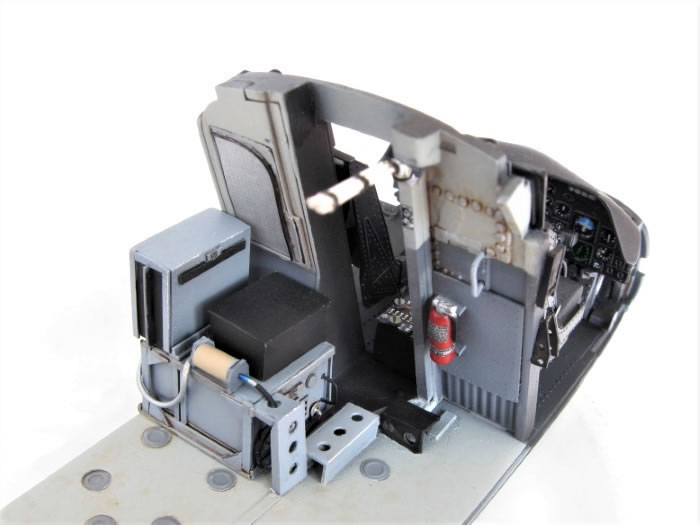
Eduard Super Seasprite Interior (49 834)
Paints Used
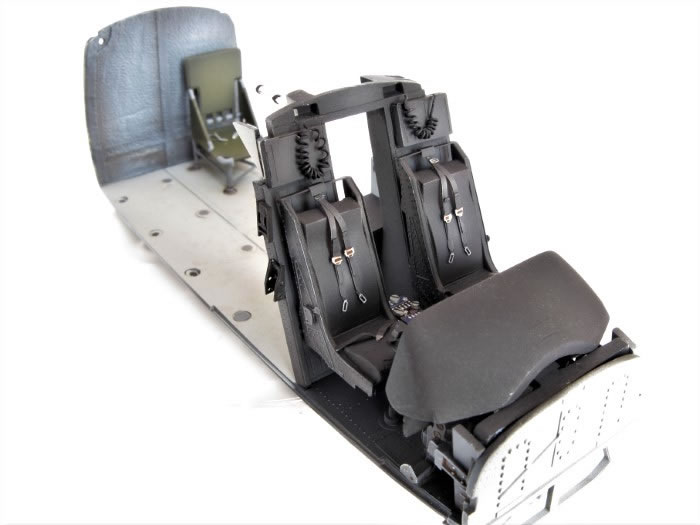
Mr. Color C315 for the exterior grey, C337 for the tail stripe, C332 Light Aircraft Grey for the rear cabin floor. Tamiya LP-3 Flat Black and LP-5 Semi-Gloss for the cockpit. LP-29 Olive Drab for the rear seats. Rear cabin interior walls in a mix of Tamiya XF-63 German Grey and XF-53 Neutral Grey. Alcad II Exhaust Manifold, Magnesium and Duraluminum for the engine and exhausts. Finish coat was Tamiya LP-24 Semi-Gloss Clear. The Tamiya and Mr. Color paints were thinned with Mr. Color Levelling Thinner.
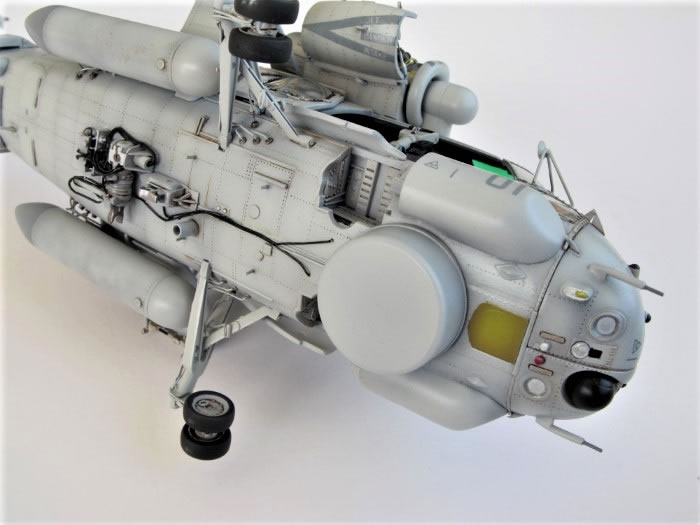
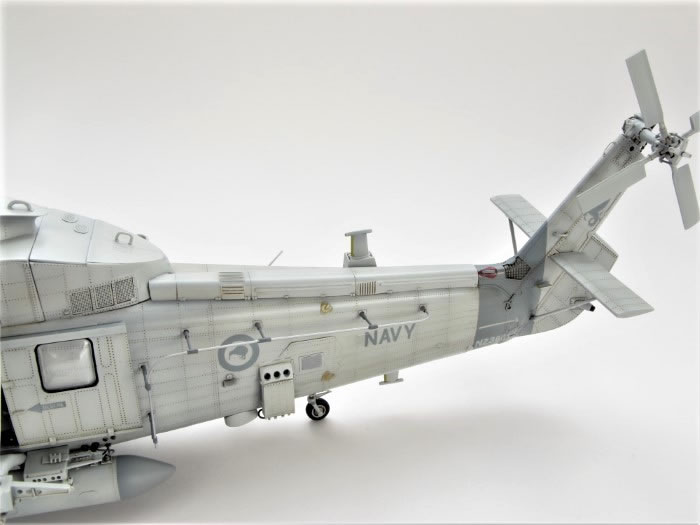
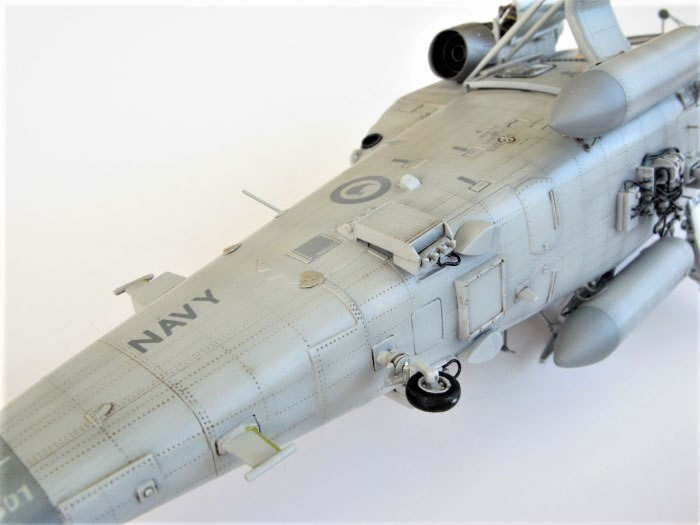
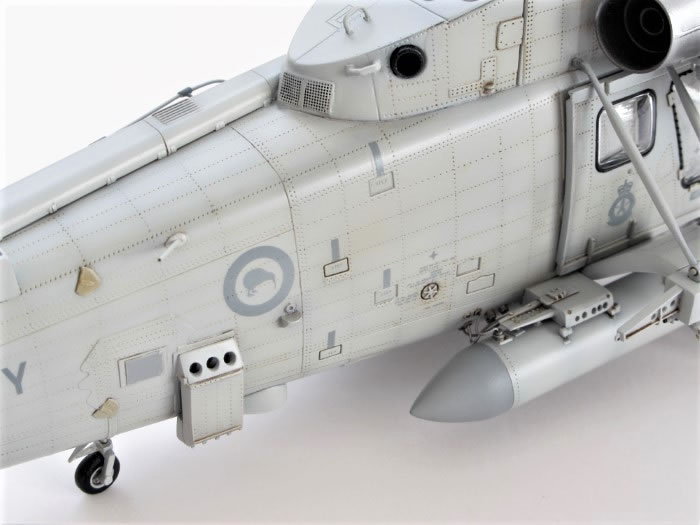
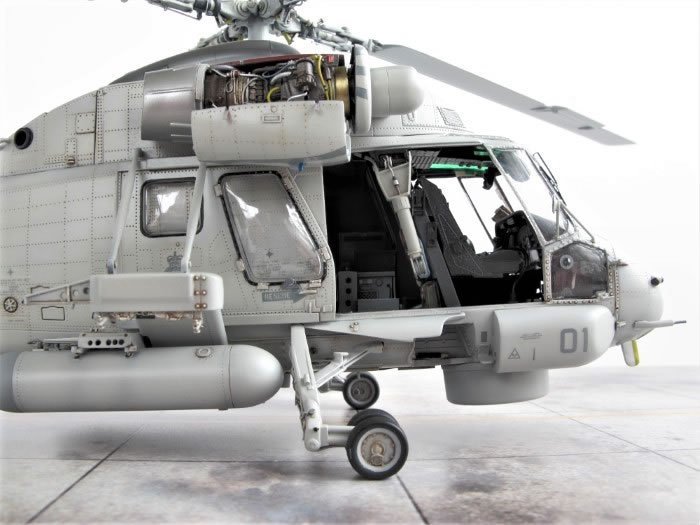
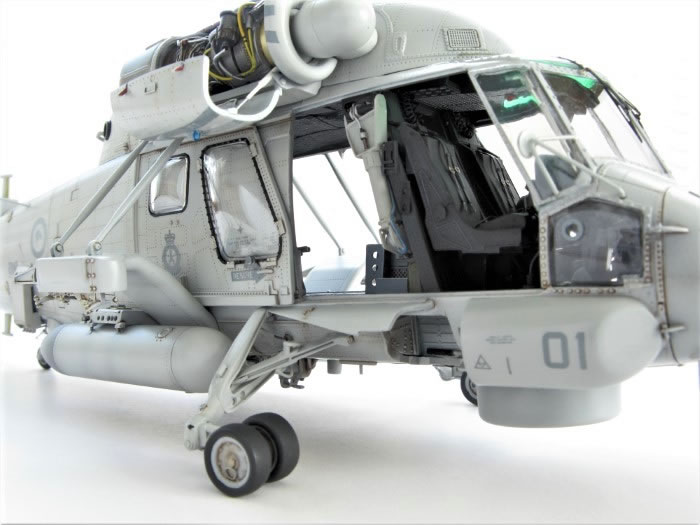
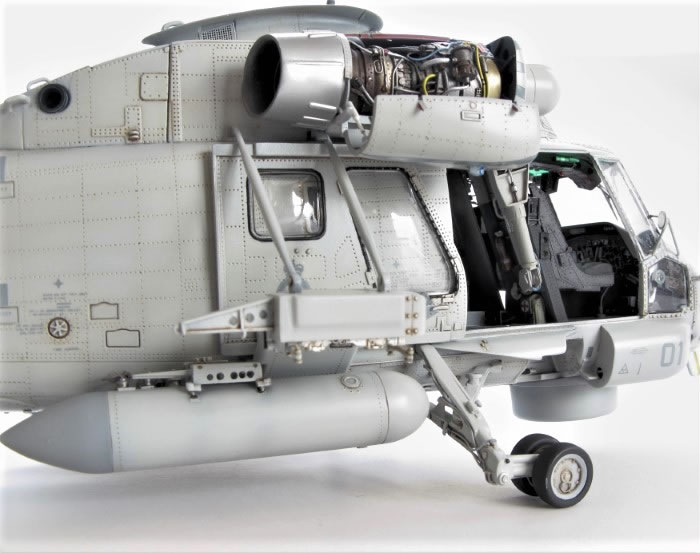
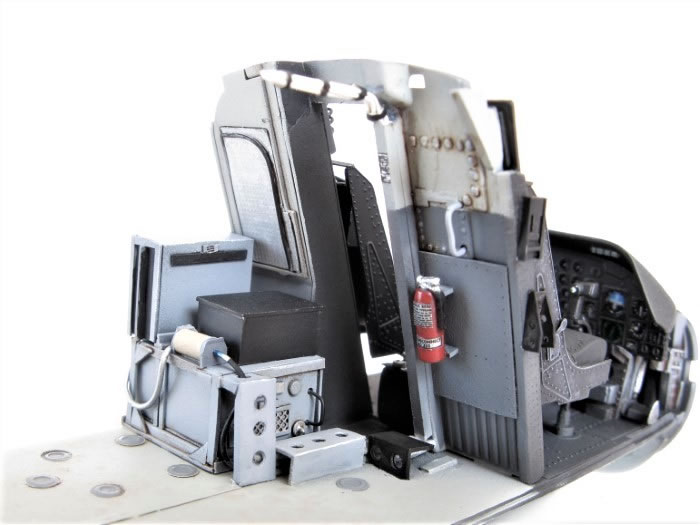
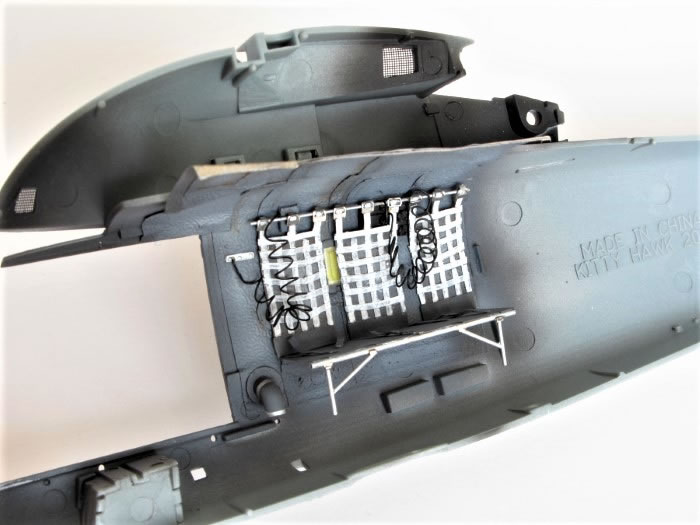
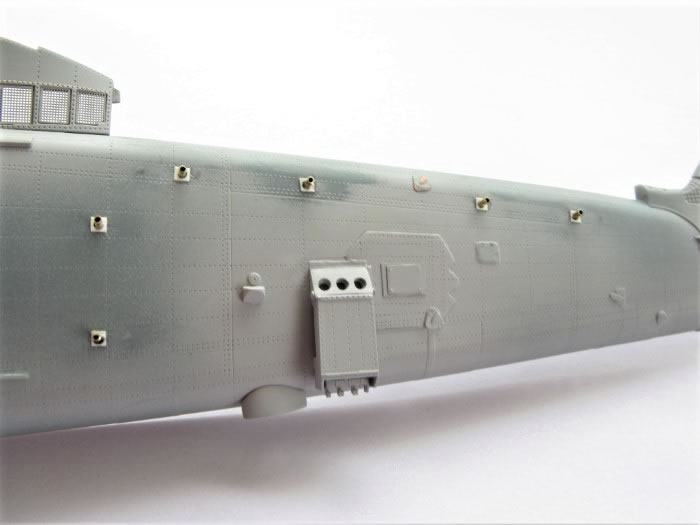
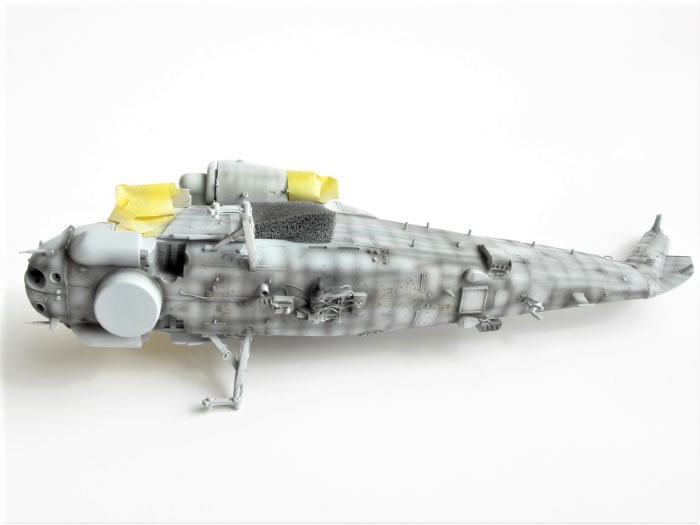
The kit contains markings for one of the five SH-2G(NZ) aircraft operated by New Zealand between 2001 and 2016. In order to make it more closely resemble a NZ machine, I added some extra details not included in the kit. This was mainly the radar equipment in the rear cabin, the bench seat, a beefed up cargo hook, winch, additions to the weapons pylon structure, HF aerial tubing on the port side (Albion Alloys Brass tubing was used for this) and a deck lock mechanism.

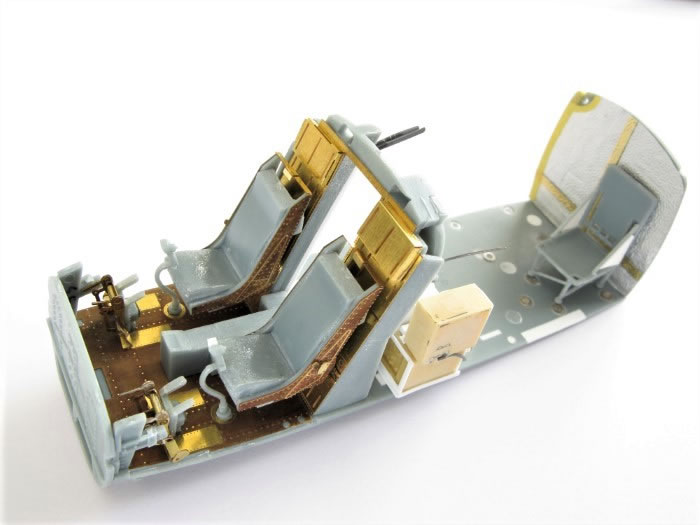
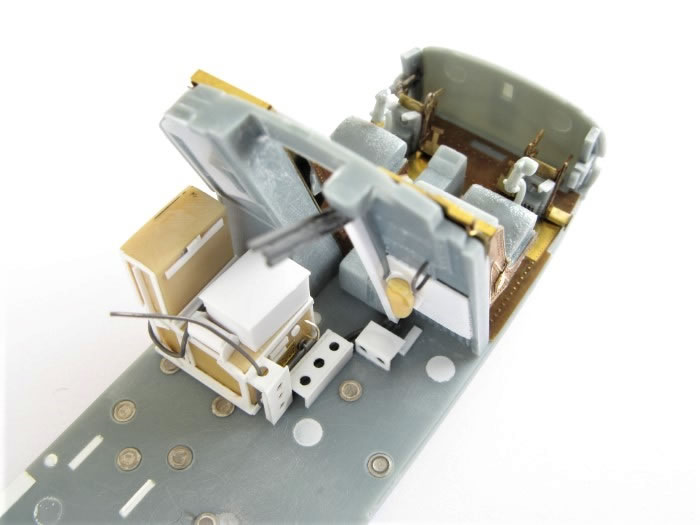
I relied on photographs to construct the details, consequently no claim to accuracy is made – the winch is too large, but it was so fiddly to make I decided not to attempt another. Also, the shape of the deck lock mechanism is quite hard to determine – it appears to be a mass of hydraulic pipes and various bits of hardware. I think my attempt looks okay, especially with the Seasprite sitting firmly on its wheels.

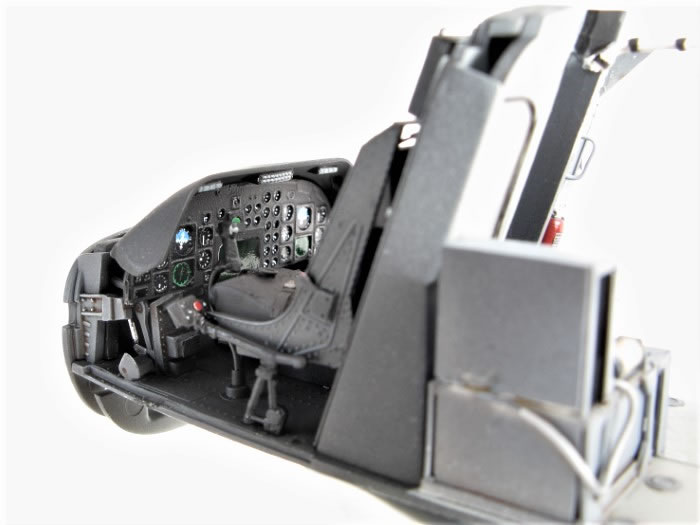
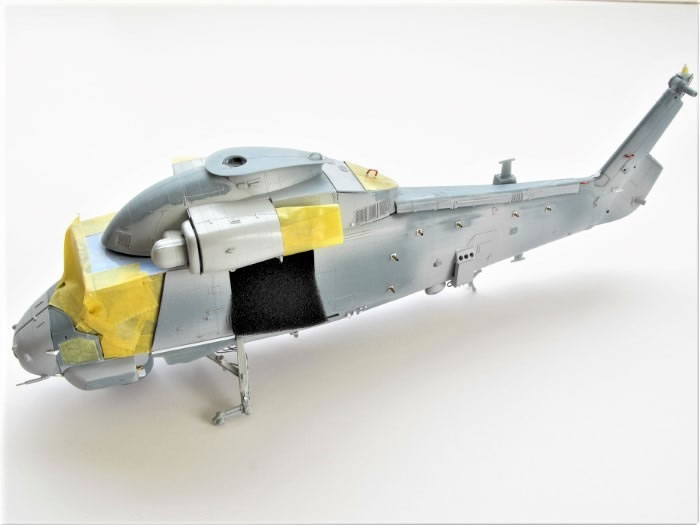
The kit itself had some construction issues. I found the alignment of the two main halves to be a little uneven – drilling out the location holes and removing some of the pegs helped here. I also added extra pieces of Evergreen sheet plastic to strengthen the fuselage join. Adding the Eduard cockpit details complicated the build, it was quite difficult to get the fuselage closed around the various bulkheads without disturbing the details already added. The fabric sound proofing material in the rear cabin is foil from a tub of margarine.
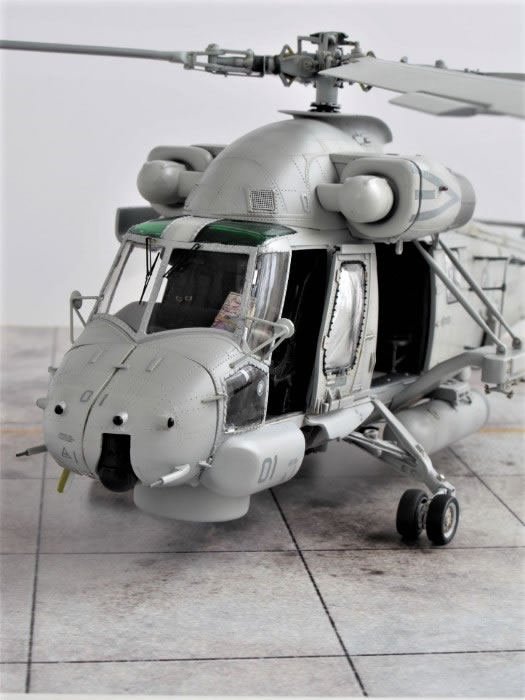
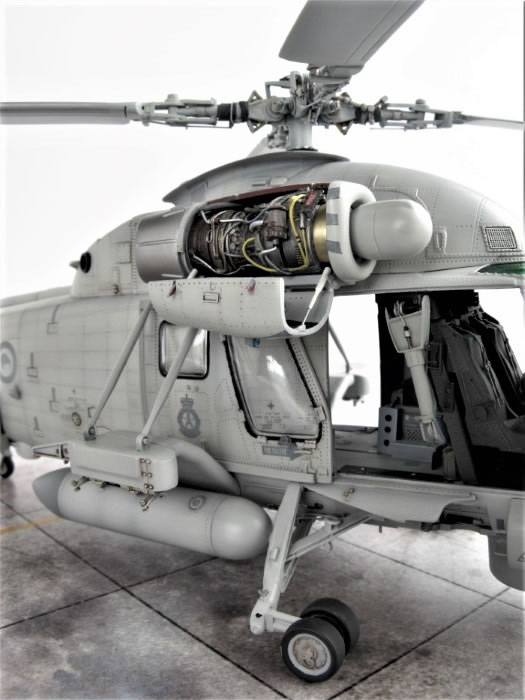
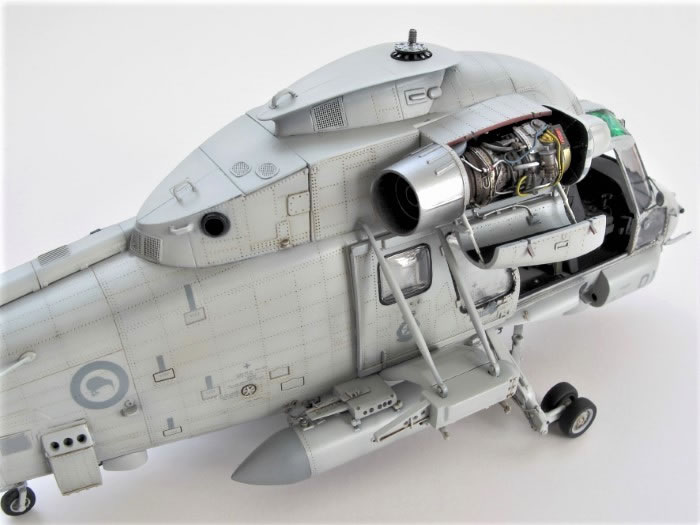
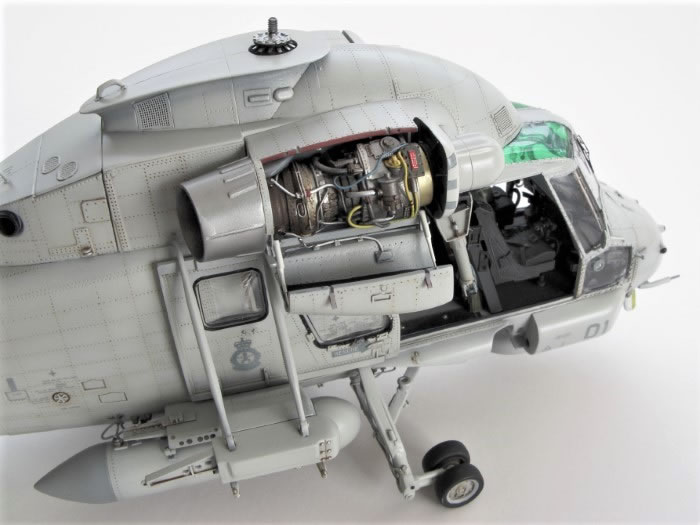
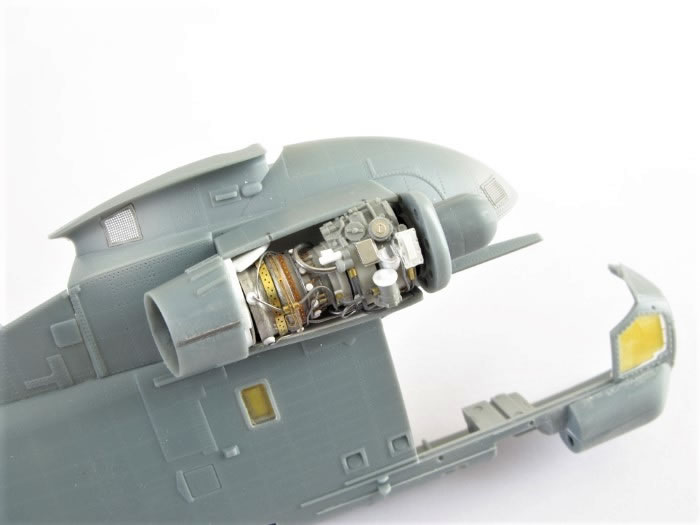
To further complicate the build, I also decided to add an engine. It is assembled from various wheels and tyres found in the spares box, plus a bit of lead wire and photoetch odds and ends. I would say it looks interesting, though not strictly accurate, at least from a distance! The open engine access door was carefully cut out from the nacelle, and a bit of interior detail added.
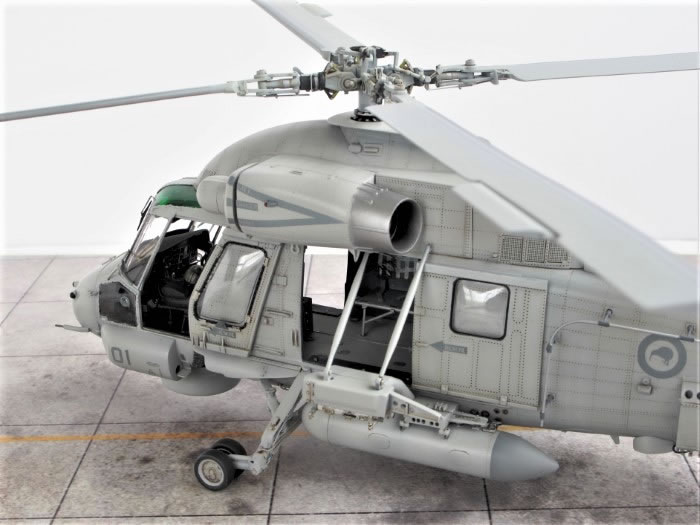
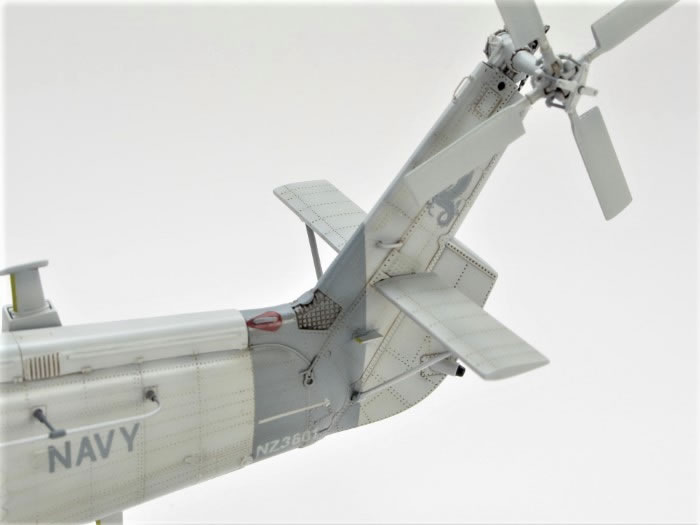
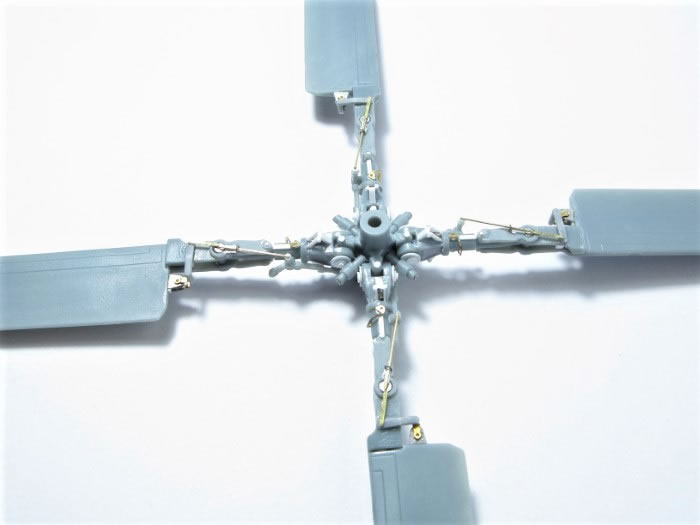
The rotor head also received some extra details – when I first saw one of these aircraft close-up in 2007, at an open day at Wigram, I was amazed at how complicated this area looked - the kit does simplify this considerably. If I was to have another go, I would also try to adjust the angle of the blades so the leading edge sits a bit higher than the trailing edge.
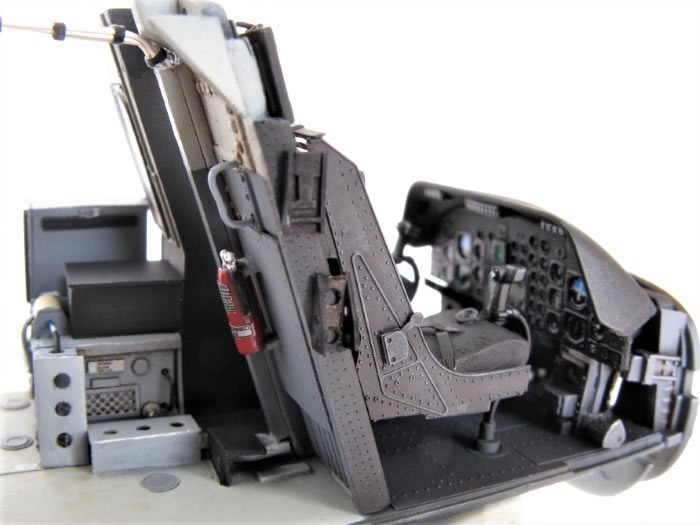
Various connections to the fuel tank pylons and hydraulic lines for the undercarriage were made with different thicknesses of lead wire. The mounts for the rear view mirrors were replaced with brass rod. A pilot’s helmet and map were added to the cockpit to add some interest. Quite why the pilot needed a map of northern France is anyone’s guess.
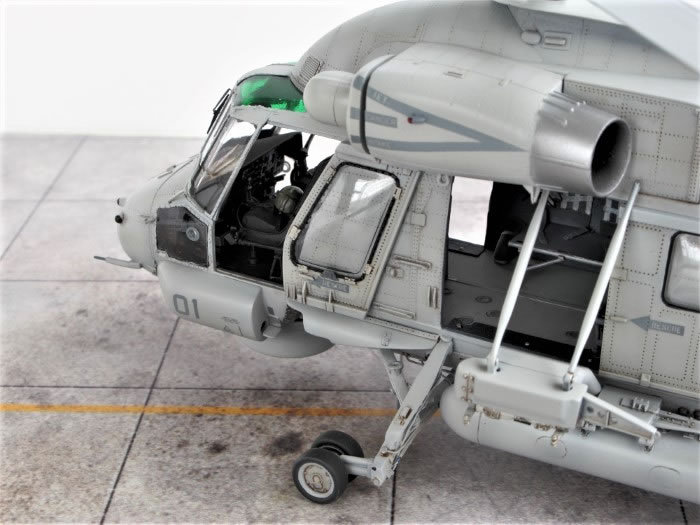
Disaster was revealed when removing the masking tape from the port side window near the nose – the clear plastic had crazed badly, probably from squeezing the fuselage halves together tightly during assembly. To recover, I carefully ground out the window with my Dremel tool and replaced it with a piece of a vac-form canopy (I think it was a two seat Vampire canopy). The colour painting guide is at 1/48 scale, so a template was cut out from this and the vac-form carefully cut up. I was quite pleased, a little Kristal Klear took care of the small gaps. Incidentally, the shape of these windows isn’t quite right – they seem to have a step that is not present on the actual aircraft.
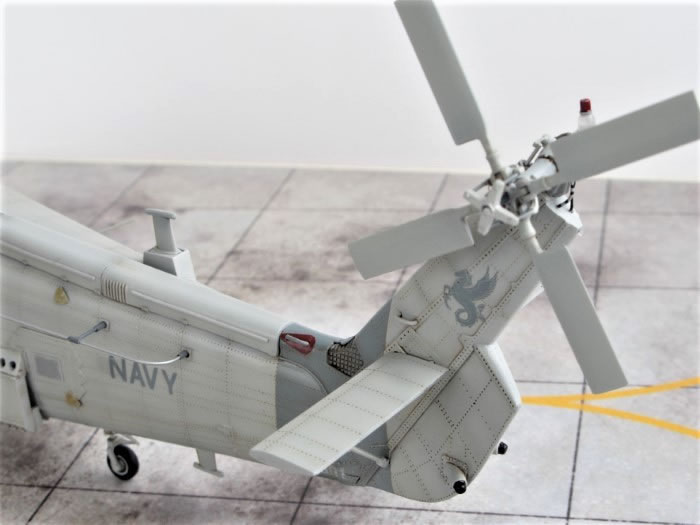
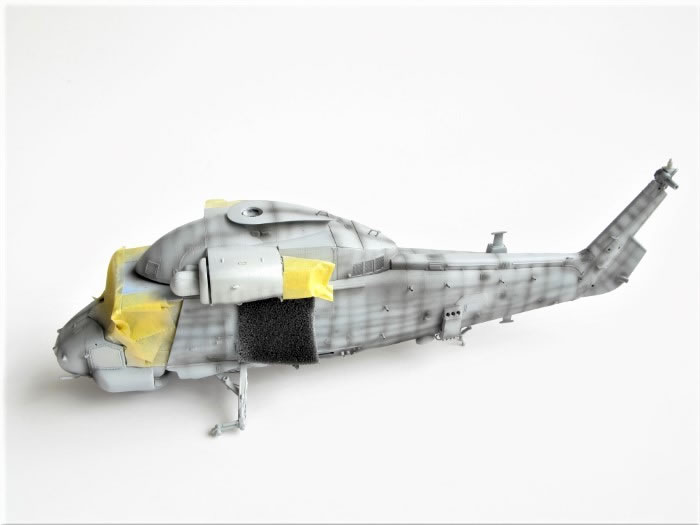
The instructions include lovely coloured illustrations of the various aircraft schemes, but the colour callouts for the NZ machine at least, appear to be in error. Initially, I applied pre-shading with a thin matt black mix and a bit of mottling with oil paints. Then Mr. Color C315 (FS16440 Light Gull Grey) for the overall finish and C337 for the tail stripe. This latter colour matched the colours of the decal sheet national markings and stencils quite closely, but to me still looked a little too grey. The actual shade appears more of a blue-grey.

I over-sprayed the decals and tail stripe with a very thin mix of C315 and this toned the markings down and warmed up the colour slightly. The main and tail rotors were left largely in Tamiya Grey Primer, with an overspray of the C315 to break up the finish a bit.
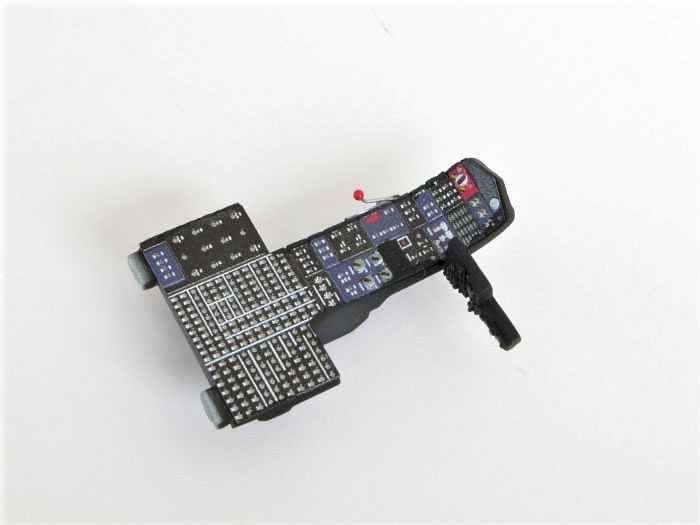
The pre-painted grey Eduard instrument panel was over-painted black and the screens picked out with Tamiya clear green enamel.

A light wash of raw umber oil paint was applied, mainly to panel lines and around raised detail – I didn’t want the rivet details to be overdone as they are quite visible anyway. Finally, a semi-gloss clear finish was applied.
Overall, an enjoyable build. The kit simplifies some details and excludes others needed for an NZ aircraft, but with a little extra effort a more accurate model can result.
Model, Images and Text Copyright ©
2022 by Steve Pritchard
Page Created 14 March, 2023
Last Updated
14 March, 2023
Back to HyperScale Main Page

|
 Home
| What's New | Features | Gallery | Reviews | Reference | Resource Guides | Forum |
Home
| What's New | Features | Gallery | Reviews | Reference | Resource Guides | Forum |