Halberd Models' 1/48 scale
P-47H Thunderbolt

Text & Pictures by John Miller

Description:
Halberd Models/Tamiya Republic P-47H Thunderbolt
Kit #:
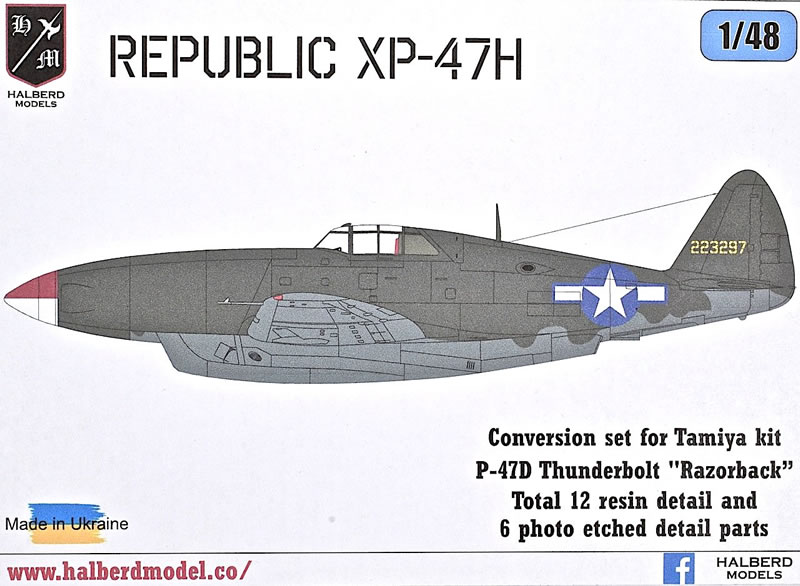
Conversion Kit: Halberd Models 1/48 P-47H
Donor Kit: Tamiya P-47D “Razorback” No. 86
Scale:
1/48
Review Type:
Build
Conclusion:
Above all else, this was a very fun build. The fit of the resin parts is excellent and when paired with the tried and true Tamiya P-47 Razorback, the result is an easy and truly enjoyable build experience. That said, the build was not without its moments—mostly self-inflicted. I’d build another without a moments hesitation :) Thanks Halberd! Keep ‘em Coming!
—————————————————————————————————————————————————————————
In an attempt to improve the performance of the Thunderbolt, Republic began a project to install a 2,300hp Chrysler XIV-2220-1 16-cylinder inverted-V engines into two P-47D-15-RE airframes in August of 1943. The resulting XP-47H had a new streamlined nose with a large chin intake and was expected to have a maximum speed of 490 mph. While sources do not agree whether the aircraft met the speed expectations or fell short, by the time the aircraft were modified in 1945, the Jet Age was beginning and the USAAF was losing interest in piston-engined fighters leading to the cancelation of the XP-47H project.
Edited from Wikipedia
To say I’m a fan of the Republic P-47 T’Bolt doesn’t do justice to my ~50 year love affair with this airplane. I luvs me some P-47. And yes, the D-20 Razorback was the prettiest of the stable. Sorry, bubble-top guys ;) Being a T’Bolt fanatic, my bookshelf is filled with material on Kartvellis’ masterpiece. So too is my stash of -47 kits in 72nd, 48th, and of course 1/32—for when my eyes begin to fail... As is usually the case, the one, true scale of 1/72nd has been kind to the P-47 with most of the experimental variants covered. This is not the case in 1/48th scale, within which few of these variants have been kitted.
Enter the Ukrainian company, Halberd Models, which specializes in producing conversions and complete kits of rare or experimental aircraft. Their conversions often incorporate parts from mainstream, injected molded “donor kits” as with this -47H conversion, which relies on parts from the tried and true Tamiya P-47D Razorback. The largest part of this conversion, the fuselage, is beautifully cast and fits perfectly with parts from the Tamiya kit. This was one of the more enjoyable builds I’ve experienced in the last few years and I recommend it without reservation to those with a little experience with resin conversions.
Note: Most of the paint used on this build was AK Real Colors. AK has stopped making this version but have no fear, a new version of Real Colors with the same chemistry but different bottles is inbound and should be available soon.
The Build In Summary
As I do with all my builds, the resin and styrene parts were soaked for ~2hrs in a 1:1 solution of Windex (with ammonia) and Denatured Alcohol (DA). Note that the DA must say for “Cleaning glass” not “For Fuel” on the label; this is very important. After a good soak in the Windex/DA, the parts were rinsed in warm water and set aside to dry.
In general, standard building techniques were used throughout. Parts were removed from sprues with God Hand nippers (Oh my, do I like this tool). Parts were prepped with sheets of 400 and 600 grit Alpha Abrasives as well as 3600 and 4000 grit Micromesh Pads. Where resin parts were glued to styrene parts thick CA Glue (Bob Smith Industries) was used. The bulk of the styrene parts were affixed with Tamiya Thin Cement.
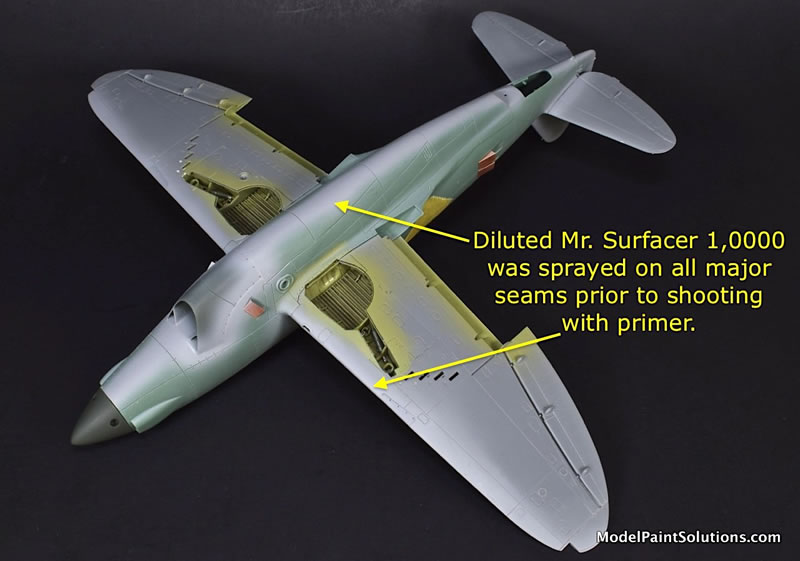
Most seams were filled with Mr. Surfacer 500 or 1,000 applied with a micro brush. Prior to priming, all seams were sprayed with Mr. Surfacer 1,000 diluted to ~30% with Mr. Color Thinner. The thinner had Mr. Hobby Mr. Retarder added to 10% by volume. This was applied at ~15psi with an H-S Evolution-2024 fitted with a 0.28mm tip. Seams on curved parts (ex. fuselage seam, wing leading edges) were sanded with a Flexi-File sander (another handy tool). This was usually followed by blending and smoothing with 4,000, 6,000, or 8,000 grit Micromesh Pads or 600 and 1,000 grit Alpha Abrasives sand paper.
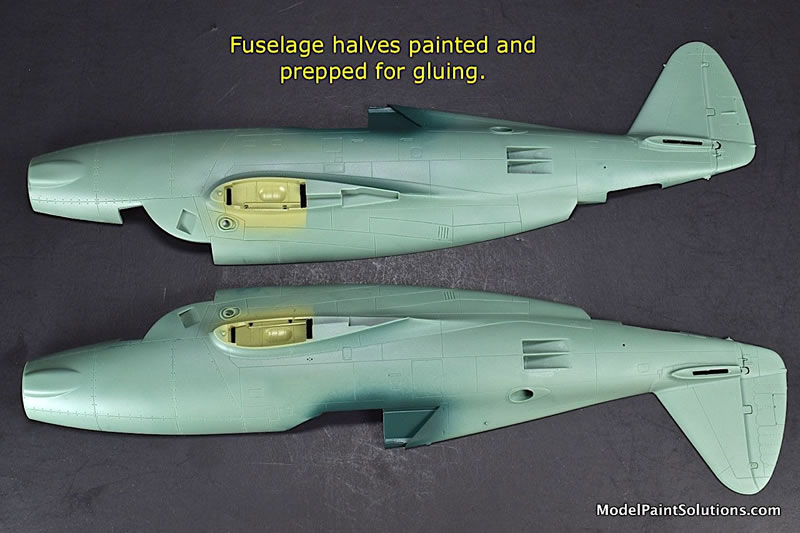
Notable Steps
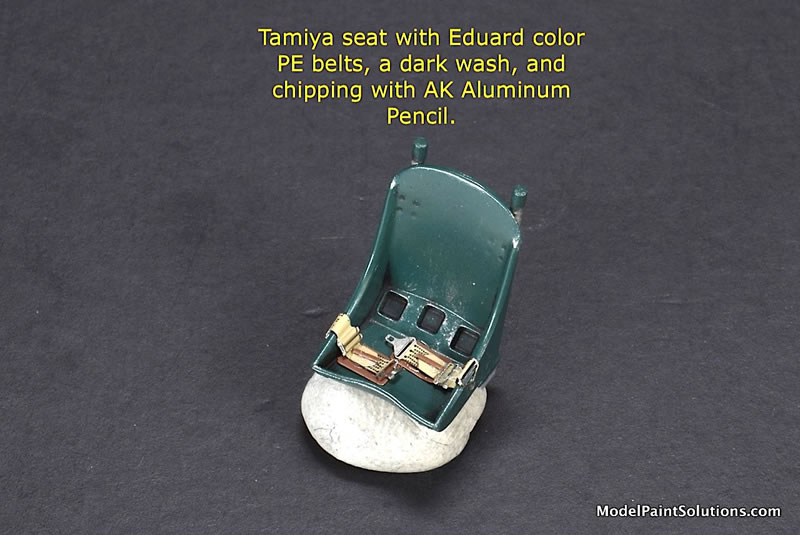
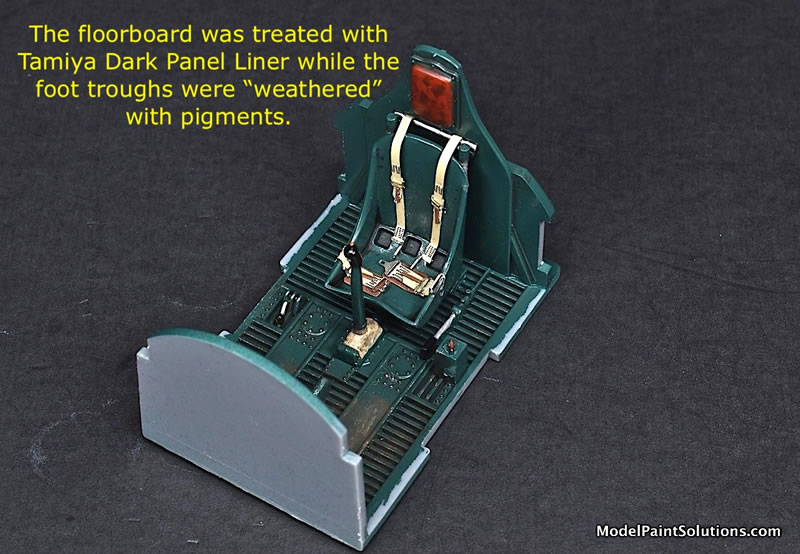
Once the fuselage halves were prepped for gluing, the cockpit area and associated parts were sprayed a custom mix of AK Real Colors Bronze Green (RC264) with a few drops of AK Pure Blue (RC010), and AK White (RC013). I was going for the “Republic Dark Green” as discussed on-line and in some publications. But, in retrospect, I wish I’d gone with a mix of Yellow and Green Zinc Chromate, ah well. Once dry, cockpit details were picked out using Mission Models Yellow, White, and Red. Parts were then given a light wash of Dark Brown Tamiya Panel Liner followed by a little chipping with an AK Aluminum Pencil. The cockpit assembly was then glued into the left fuselage halve before the halves were joined with CA glue but not before I made a lot of work for myself…….
The Self-Inflicted Seam….
When I first test fit the resin fuselage halves there was little-to-no seams to be seen. Now, being picky, I noticed the tiniest of seams on the upper cowl that could be seen only when using magnification under bright light. Moreover, this seam disappeared completely with the slightest of pressure, meaning a well placed clamp during gluing would have done the trick. However, in a moment of monumental modeling hubris, I decided that a few moments with a quality abrasive, wielded by my overly-skilled hands, would make this tiny seam disappear…..
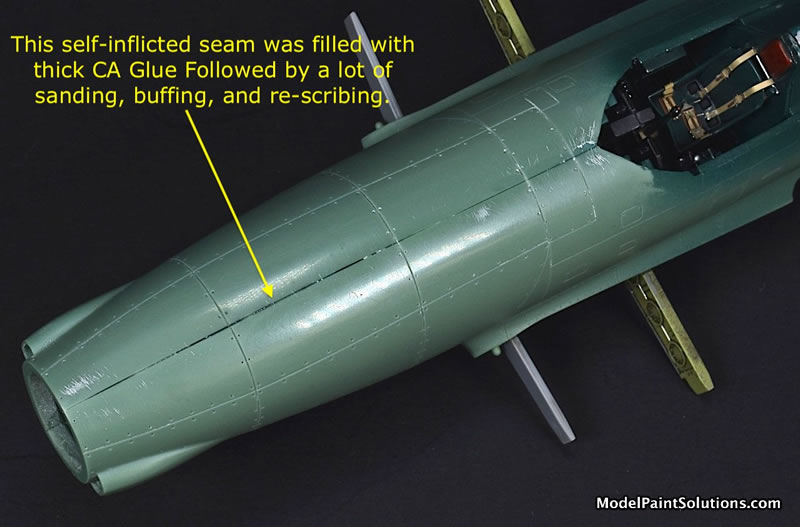
Do you see it coming across the bridge?
With each well planned swipe of my Alpha 600 sand paper, this tiny seam seemed to widen by a fraction of a millimeter. How can this happen? Clearly, a few more swipes with more pressure will do the trick…..and the seam grew and grew… In addition, other seams that were perfectly acceptable before became increasingly wide to the point of requiring filling. Unfortunately, by the time I came to my senses, the tiniest of seams, visible only when using magnification and bright light, had grown into a seam that would require filling, sanding, blending, and cursing.
Res ipsa loquitur….
Once the fuselage halves were glued together and the self-inflicted seams were filled, sanded, and blended, the intercooler exhaust doors (provided in photo-etch) were prepped and glued in place with thick CA.
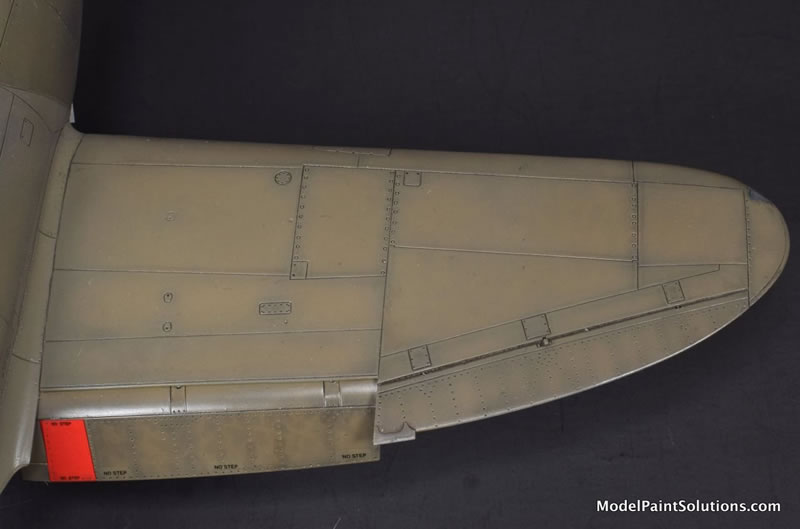
The wings from the Tamiya donor kit were assembled and offered up to the resin fuselage where a perfect fit was found. The wing gun ports, which were faired over on the P-47H, were replaced with perfectly fitting single-piece, resin plugs. As with the wings, the horizontal stabilizers from the Tamiya kit fit perfectly to the Halberd Models fuselage. With the addition of the stabilizers, the airframe was largely complete.
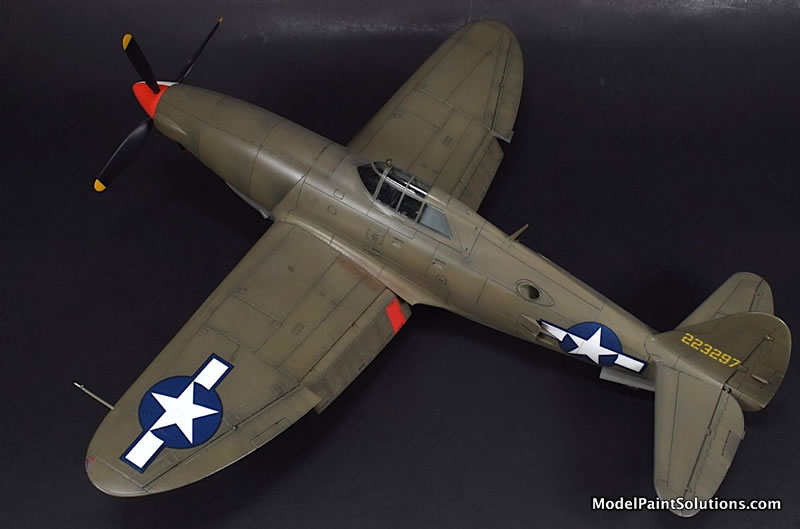
There were two P-47H airframes produced, serials 223297 and 223298. The most noticeable differences between the two are the external air intakes aft of the cockpit and the Olive Drab propeller hub of the latter aircraft (298). Although the intakes provided by Halberd are beautifully cast, I preferred the cleaner lines and red/white propeller hub of the first prototype (297). What can I say, I’m a sucker for a cool looking propeller hub…

Prior to priming, Eduard canopy masks were applied and us usual, these went on with little trouble. The canopy frames were shot interior green prior to priming. The model was then sprayed AK XTreme Aluminum diluted to ~70% with AK Xtreme Thinner. This was applied at ~12psi with an Evolution-2024 fitted with a 0.40mm tip. I started using AK Aluminum as a primer a few years ago on an Eduard Me-109G-6 and find it does a better job than conventional primers of revealing badly filled seams and other imperfections. It also seems to make an overlying paint seem a bit more vibrant.
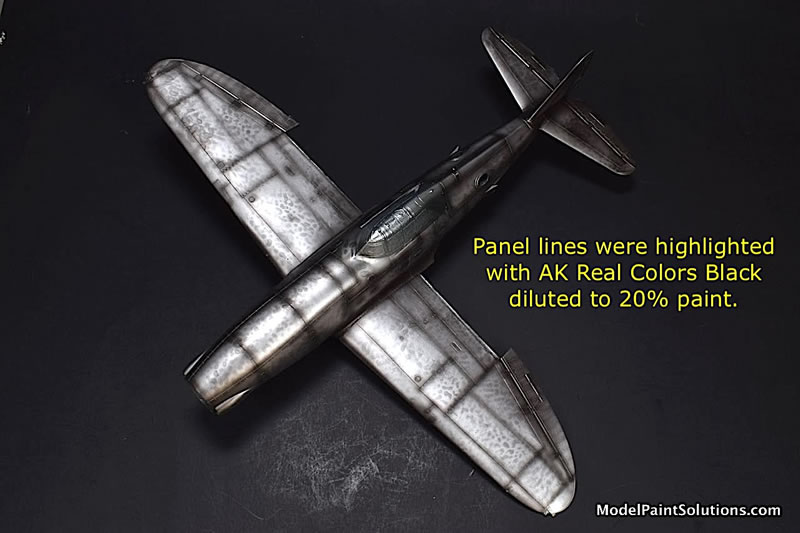
Panel lines and other surface details were then shot with AK Real Colors Black diluted to ~20% paint with AK High Compatibility Thinner containing 10% Mr. Hobby Mr. Retarder Mild. This was applied with an Infinity at ~10psi with a 0.15mm tip. To add depth to the finish, random mottling was applied to various panels using a stencil (Galaxy Models, #L00004 ) and the same paint mix, and pressure as was used for the panel lines.
To add some variability to the finish, ventral fuselage panels just behind the chin intake were painted AK Real Colors Medium Grey (RC249) to which a few drops of AK White was added. Once this was masked, the undersurfaces were sprayed AK Real Colors Medium Grey (RC249). This was applied as a tacky coat followed by a wet coat at ~12psi with a 0.45mm tip.
Once the grey on the belly was shot, the upper and lower nose cowls that had been replaced during the engine change were painted AK Real Colors Dark Olive Drab #41 (RC259) to which AK Black was added to ~2% by volume. The paint was diluted and applied as described above for the AK Medium Grey. Once the darkened Olive Drab was dry (~24hrs) the nose cowls were masked in preparation for the next color.
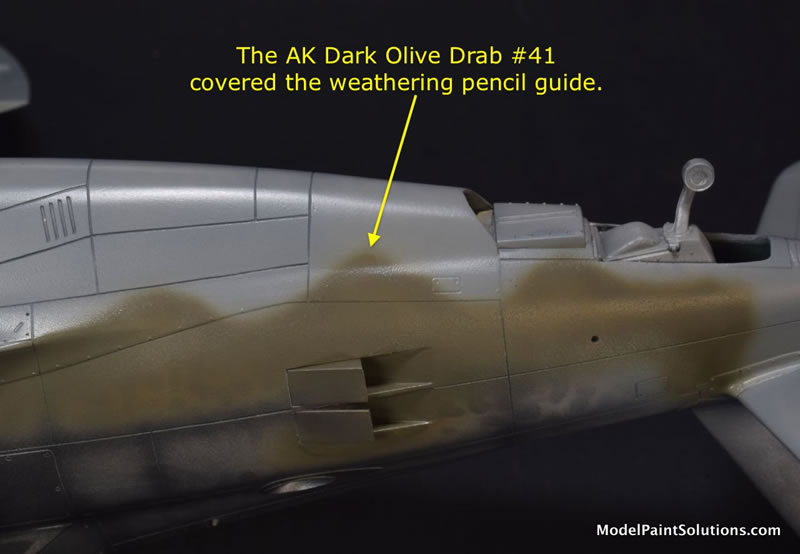
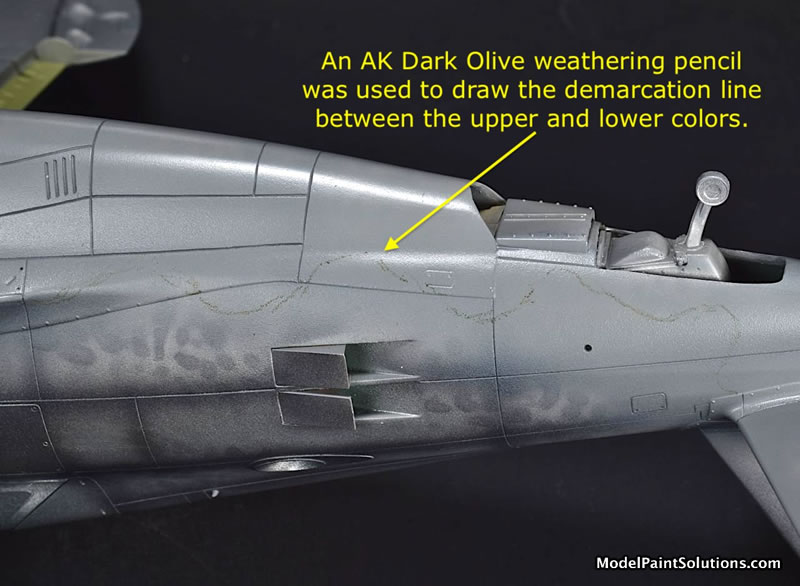
To facilitate spraying the soft, wavy demarcation between the upper Olive Drab and the lower Medium Grey, an AK Dark Olive Weathering Pencil (10006) was used to lightly mark the location and shape of the line. This served to guide my hand while spraying the AK Real Colors Dark Olive Drab #41 that had been lightened with ~10% White and diluted to ~30% paint with AK High Compatibility Thinner with 10% Mr. Hobby Mr. Retarder Mild. My intention was to lighten the Olive Drab #41 on the rest of the airframe to replicate oxidation and wear versus the newly manufactured nose cowls.
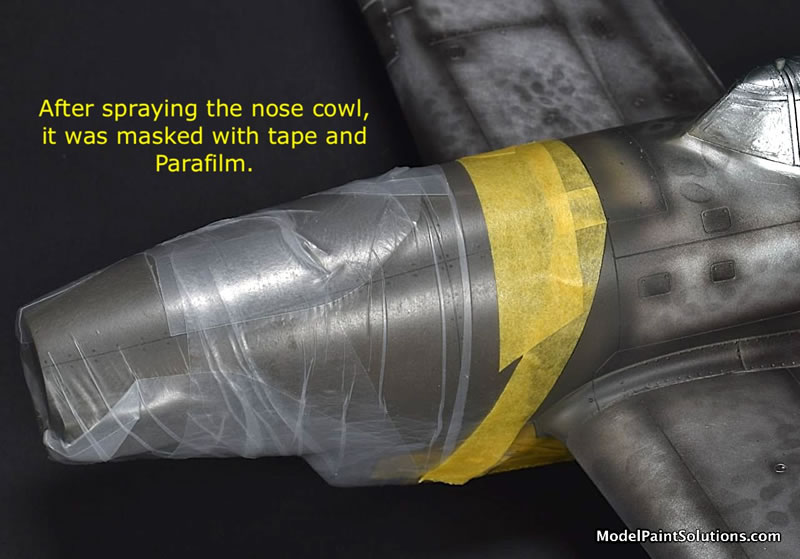
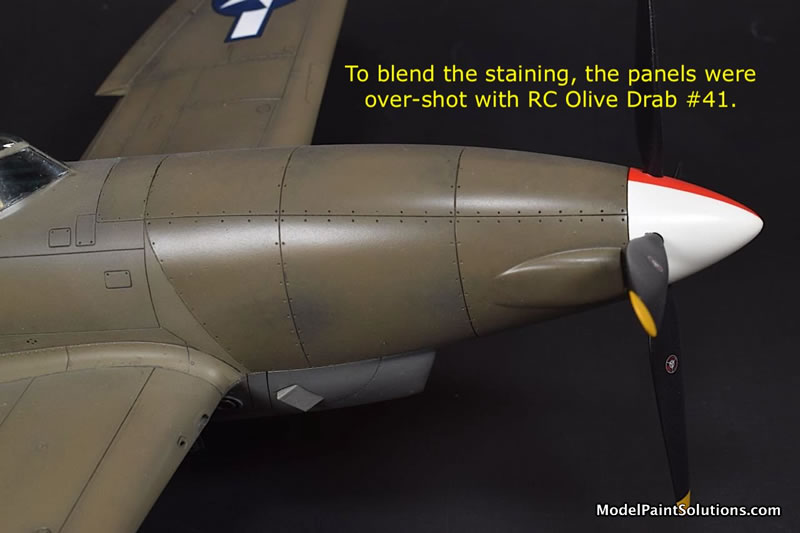
To add more depth and wear to the “new” nose cowl panels, the surrounding areas were masked with tape and ParaFilm and AK Real Colors Black was sprayed through a stencil onto the trailing sections of each panel. Once dry, Real Colors Dark Olive Drab #41 (diluted and sprayed as described above) was applied over the black mottling to blend and soften the “wear.” To simulate a lack of oxidation on the “new” cowl versus the rest of the airframe, the cowl was shot with AK Gloss diluted to ~30% in AK High Compatibility Thinner with 10% Mr. Retarder Mild. This was applied at ~12psi with a 0.28mm tip.
The Decal Disaster
The yellow aircraft identification numbers, provided on the small Halberd decal sheet, were applied with Micro-Set and -Sol and went down perfectly. I didn’t want to use the national insignia from the Tamiya donor kit and opted to use insignia from an old Aeroscale sheet (#48-842, 1/48th P-47D Razorbacks). These were applied with -Set and -Sol and worked beautifully. “Beautifully” until the model was shot with ~30% AK Gloss, at which time the port insignia reacted to the Gloss coat and crinkled badly. Ugh…..
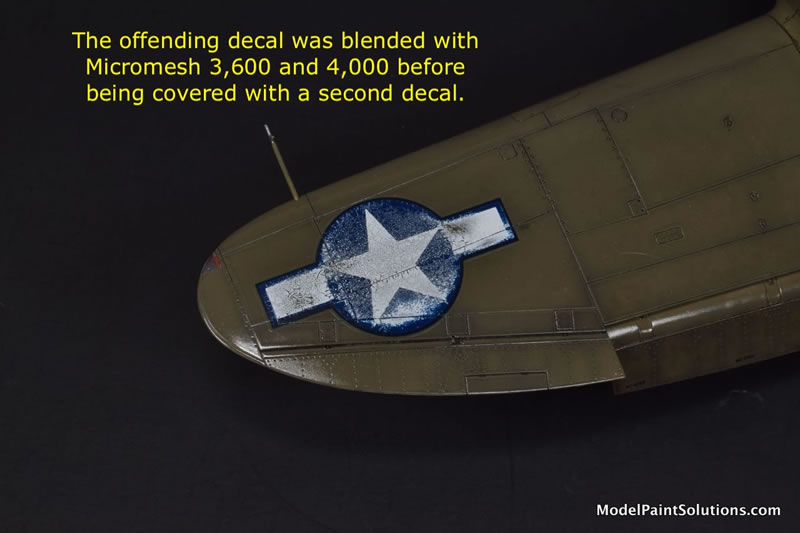
This was allowed to dry for ~24hrs. Then, the decal was sanded and blended with Micromesh 3,600 and 4,000 grit pads used with soapy water. Not having any insignia of the same size or color of blue in my decal stash (of course I didn’t), I purchased the same sheet off Ebay and simply applied a new decal over the previous one. Luckily, the new insignia behaved perfectly and did not react to a coat of AK Gloss as did the previous one.
Whew……….bullet dodged.
Finishing Up
The landing gear and wheels/tires were sprayed AK XTreme Aluminum diluted to ~70% with AK Xtreme Thinner and applied as described above. Details were enhanced on the gear legs by a wash of Dark Brown Tamiya Panel Liner. The tires were shot Mission Tire Black. The gear doors were primed with XTreme Aluminum and the inner faces of each were painted AK Real Colors Chromate Yellow with ~35% AK Real Colors Interior Green added. After drying and masking, the outer faces of the doors were shot with AK RC Medium Grey. Gear door details were brought out with a wash of Dark Brown Tamiya Panel Liner.
The propeller tips were first shot Pink using a custom mix of AK Real Colors White and Red. Pink is a good color to overshoot with Yellow, in this case AK Real Colors Maize Yellow, as it produces a deep color without using a lot of paint. Once the tips were dry, they were masked and the blades shot AK Real Colors Black with a little AK Grey added.
To replicate the distinctive red/white propeller hub, the part was first shot AK Real Colors White. After drying (24hrs), the demarcation between the Red and White sections was delineated using Aizu 0.40mm masking tape. I find it easier to ensure masking tape is lined up correctly if the tape is thin versus wide (ex. 5mm). Once the thin tapes were applied correctly, wider tape (1.5mm) was added followed by 3mm masking tape to cover the white section. AK Real Colors Red, diluted to ~30% in AK High Compatibility Thinner containing 10% Mr. Retarder Mild, was then shot at 12psi with an Evolution-2024 fitted with a 0.15mm tip.
And with that, we’ll call ‘er done!
What a blast! This was one of the easiest and enjoyable builds I’ve ever experienced in a long time. The resin parts by Halberd are beautifully cast and fit perfectly. Since a lot of the model is based on the Tamiya Razorback, it is a joy to assemble. The result is a real head-turner that makes most long-time P-47 fans do a double-take when they first see it.
Highly recommended!
Keep your airbrush wet!
—John
For more on this review visit Modelpaintsolutions.com.
Text and images copyright ©2024 by John Miller/Model Paint Solutions.
Text and Images Copyright © 2024 by John Miller / Model Paint Solutions
Page Created 19 April, 2024
Last updated
19 April, 2024
Back to HyperScale Main Page
Back to Reviews Page

|
 Home
| What's New |
Features |
Gallery |
Reviews |
Reference |
Forum |
Search
Home
| What's New |
Features |
Gallery |
Reviews |
Reference |
Forum |
Search