|
120mm
Figures
by
Federico Kereki
|
|
120mm
Stosstrup |
I am building a collection of World War One 120mm figures, and these were my
first three attempts.
The Red Baron is from MODEL CELLAR, and both the American BAR gunner and the
German Stosstrupp are from VERLINDEN. The detail on all figures is outstanding,
and they aren't hard to build.
Assembly
Parts preparation is the first step. Removing the pouring blocks of resin can
be long and boring. My original technique was to remove the blocks with a saw
but it was hard, slow work, and left lots of dust in the air. I started using
the "scribe and snap" method, which is quicker and cleaner. Now, if
only I could find a way to avoid sanding afterwards!
I assemble the whole figure before painting, leaving only accessories and
weapons (and sometimes heads and hands) out. I start with a base coat of a
sand-like color (done with enamels), which doubles as a flesh base. My painting
technique is a mix of many methods (such as Sheperd Paine's, Verlinden's, and
others) and thus can hardly be called original -- but it works for me!
Painting
Technique
 I
use oils for the final painting. I
use oils for the final painting.
I mix of titanium white, raw sienna and cadmium yellow, for a flesh
color, and apply it as a first coat.
Next comes some raw sienna in the middle shadow areas (the sides of the
nose, the ear, under the lip), and afterwards burnt umber in the dark
shadow areas (the eyes, behind the ears, the hair border).
Finally, a small red dot (blended carefully) on the cheeks, and dabs of
pure white on the tip of the nose and the chin, bring the face to
life.
The eyes are last; I use black acrylic paint or indian ink, I pick out
the corners of the eye with some off-white color, and I finish with a
small drop of gloss varnish. Eyebrows and hair are easier: I use just a
dark base coat and some drybrushing for contrast and highlights.
Now to the figures. |
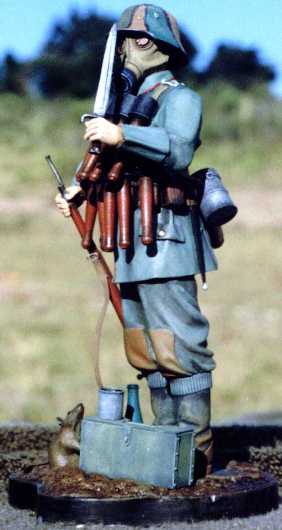
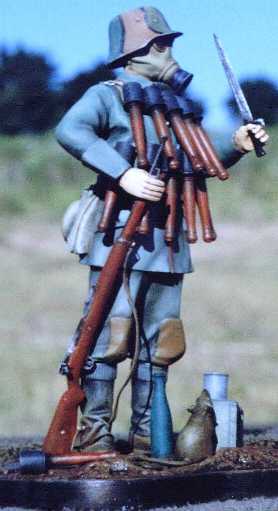
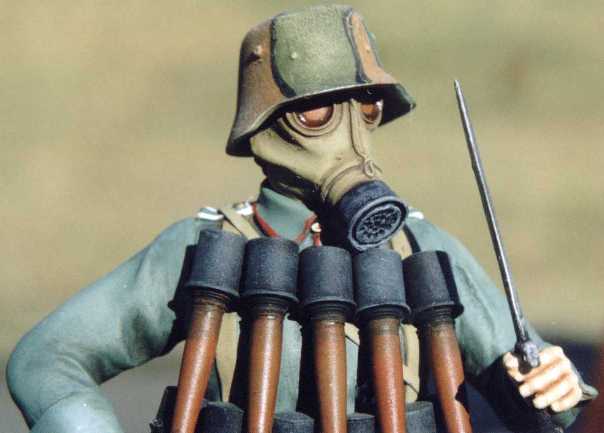
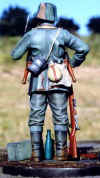
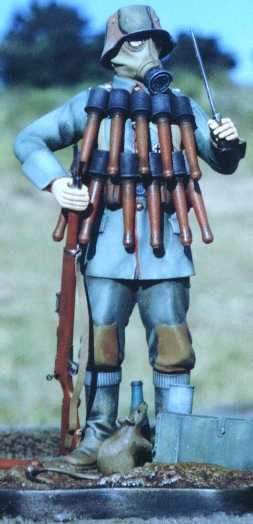 The
assault trooper went together easily, but I had to leave off many
accessory parts including all of the grenades (eleven of them!) and some
accessories like the gas mask container or the canteen. The
assault trooper went together easily, but I had to leave off many
accessory parts including all of the grenades (eleven of them!) and some
accessories like the gas mask container or the canteen.
For the uniform, I started with a slate gray base coat, and then
managed to mix Feldgrau for the blouse and Steingrau for the trousers. I
will probably never manage to get the same mixes again, but since WWI
uniforms show plenty of variations in shades, I won't worry too
much.
I painted the buttons and medals black, and finished them with Humbrol
metallics; the black provides a "shadow" which suggests a three
dimensional look.
The boots were black, heavily drybrushed with khaki drill. The
camouflaged helmet also got some drybrushing, as well as some aluminum on
the edges. The rifle sling was scratchbuilt out of lead foil and thin
wire. The rifle itself was painted with oils (sienna, yellow, burnt umber)
and the metal parts were drybrushed with some dull silver over a black
coat.
Finally, for the mask I used some washes and drybrushing (I usually
avoid washes, for I generally manage to foul things up, but this time they
went on fine), and a drop of clear gloss varnish provided the lenses. |
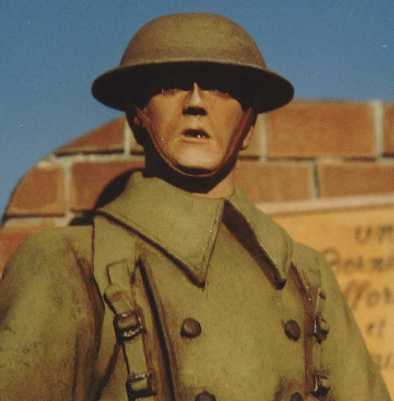
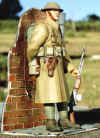
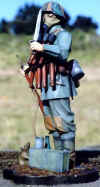
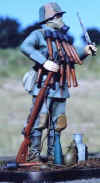
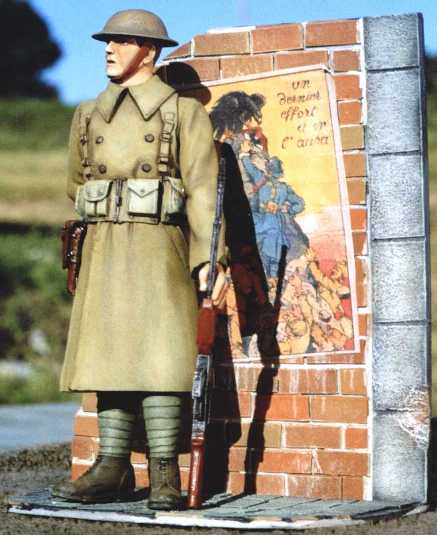 The
American BAR gunner was somewhat more complicated to build, and some
filler was needed. The
American BAR gunner was somewhat more complicated to build, and some
filler was needed.
After painting the figure (more or less like the other two) I used thin
burnt umber oil washes applied with a 000 brush to highlight the edges of
belts, the canteen cover, the ammo pouches, and so on. This wash simulated
shadows.
The puttees were easy enough. I simply drybrushed olive drab over a
dark brown base. The dark brown stays in the "shadows" and the
results are speedy and nice. I also used this method for the pouches
(khaki drill drybrushing over dark grey) and the helmet (dark earth over
black).
I added some color variations to the helmet with pastels, which also
gave a more matte finish.
The base was scratchbuilt. I used cardboard of different thicknesses,
cutting stones and bricks of the right sizes, gluing them on to the
"wall" and "ground", and finishing with a
acetone-diluted putty coat. I stippled the result with an old brush for a
more realistic finish - check the cobblestones. Finally, I got the poster
from the web (just don't ask where; I surfed around until I found it!) and
printed it out on a inkjet printer: a cheap and easy way to get posters
for dioramas or vignettes! |
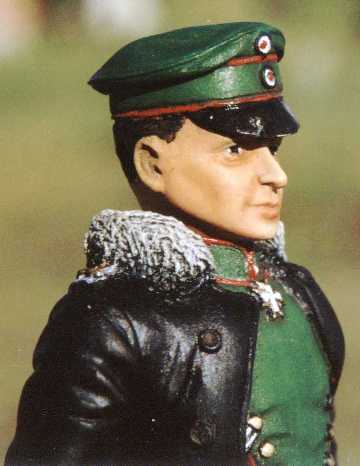
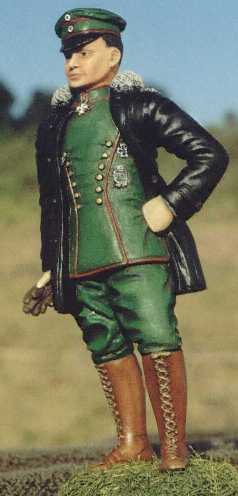
Baron
Manfred von Richthofen |
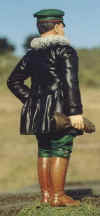
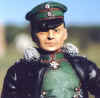
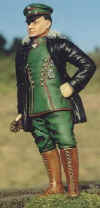
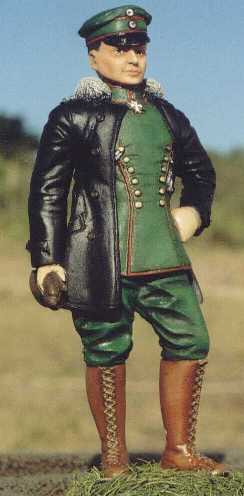 The
Red Baron, Manfred von Richthofen, was originally a cavalry (Ulan)
officer. Mixing the right shade of green (or at least, the right shade
according to some references I found, but I refuse to be dogmatic about
it) required plenty experimentation. The
Red Baron, Manfred von Richthofen, was originally a cavalry (Ulan)
officer. Mixing the right shade of green (or at least, the right shade
according to some references I found, but I refuse to be dogmatic about
it) required plenty experimentation.
The buttons and medals got the same treatment as the Red Baron.
I really enjoy painting leather or wood with oils. I find that a raw
sienna base, shaded with browns, yellows, or black acheivess a very
authentic look. The black leather jacket was easy, but the epaulettes
stumped me; what color were them?
The kit includes no instructions (as usual) and the box photo didn't
help either, but I got lucky at the Track-Link newsgroups when someone
told me how to paint them. They look very much like the ones of the
Luftwaffe in World War Two.
After gluing the left aside parts, I finished with a matt coat and
brushed the jacket and boots semi-gloss. The grass on the base is finely
cut hemp rope, painted green and drybrushed with yellow tones. |
|
A d d i t i o n a l
I m a g e s |
Click the thumbnails below
to view images full-sized.
Click the "Back" arrow on your browser to return to this page.


Article, Images and Model Copyright © 2000 by Federico
Kereki
Page Created 16 April, 2000
Last updated 26 July, 2007
Back to HyperScale Main Page
Back to Features Page
|
 Home
| What's New |
Features |
Gallery |
Reviews |
Reference |
Forum |
Search
Home
| What's New |
Features |
Gallery |
Reviews |
Reference |
Forum |
Search