![]()
FiSk
199
Converting the
Hasegawa Bf 109G-2
by Henri Vanderstraeten
|
FiSk 199 |
Background |
One of many experiments with
the Bf 109 airframe was the attempt to make it carry (and deliver) a 500 kg
bomb. Fieseler in Kassel did the design work and Skoda (in Bohemia
& Moravia) built the prototype which was designated FiSk 199.
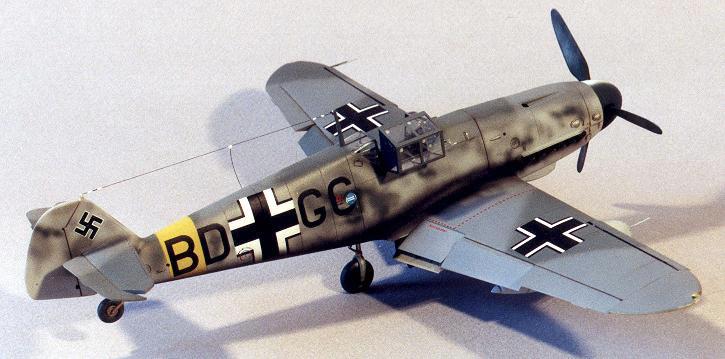
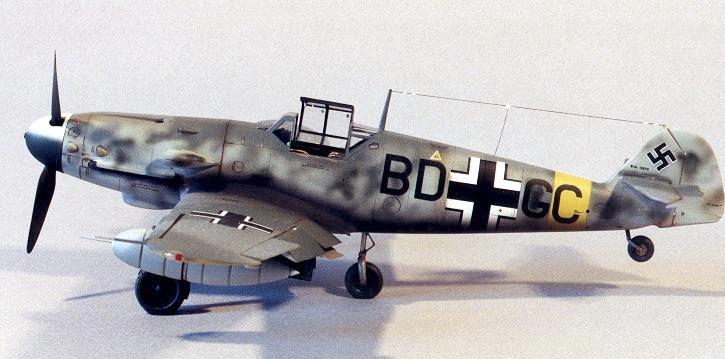
A Bf 109 G-0, BD + GC, was converted to test the development potential. The DB601 was replaced by a DB 605, one R4 drop tank was added beneath each wing, as well as an ETC500 bomb rack under the fuselage. To clear the large 500kg bomb from the ground during take off, a third main landing gear leg and wheel was plugged in a middle position in the fuselage, right behind the pilot’s seat. After take off, the supplementary wheel was jettisoned back to earth with a parachute. Some tests were made but didn’t lead to production.
Construction |
To make
my model, I choose Hasegawa’s beautiful 1/48
scale Bf 109 G-2 kit. I really like this kit, as it is simple, accurate
and easy to convert to a multitude of versions. There are also plenty of decals
and after market detail sets available.
The
cockpit was detailed with the set from Cooper Details, one of the best on the
market in my opinion. All moving surfaces were cut and replaced at an angle, for
added realism. To make the wingtip lights, I drilled a tiny hole in a piece of
clear acrylic and I filled it with the according clear red or green paint. It
was then glued in place, filed to form the wingtip contour and polished.
The third landing leg was made from aluminium tubing and plastic card, and the wheel came from the spares box. The large 500 kg bomb came from the old Fujimi Bf 109 G/K kit and was detailed with new fins from plastic card.
The
cockpit was pressurised and the moving part of the canopy was therefore modified
accordingly by adding a plate behind the pilot’s head. I used a piece of clear
plastic, where the two small triangular windows were masked before painting RLM
66 as the rest of the cockpit.
The rest
of the kit was built as per the instructions, and the camouflage painted with
Aeromaster acrylics. I usally used as few decals as possible, I thus painted the
crosses directly onto the model, using frisket paper masks. I would have done
the same with the codes, but three sets of « rounded » letters were
too much for my patience at the time ! I confess I used decals…
This was
a pleasant and quite easy conversion to make and I hope you enjoy the result as
much as I did the work.

Back to HyperScale Main Page
Back to Features Page
