|
North
American B-25D
Mitchell
by
Ian Robertson
|
|
North American B-25D
Mitchell
"Hell's Belles" |
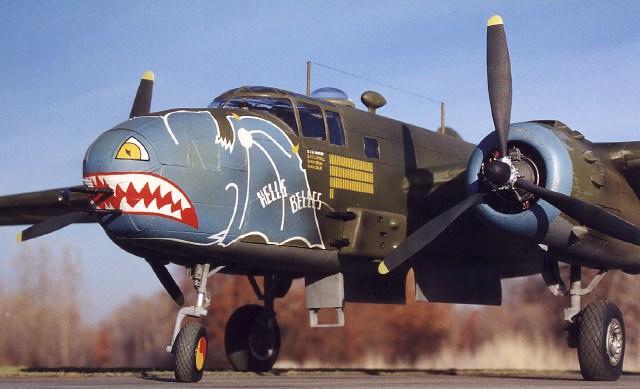
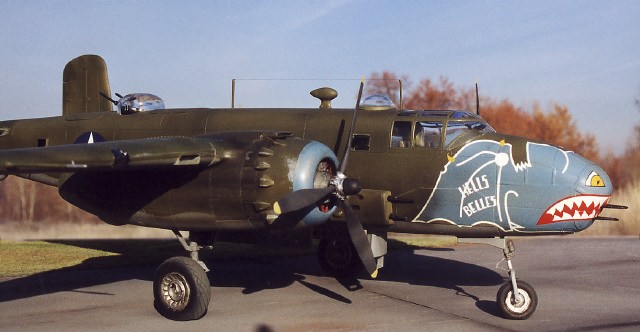
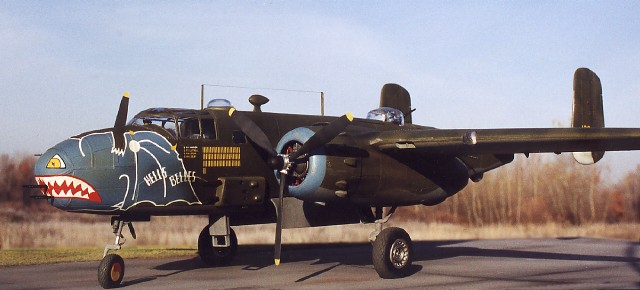
This is Accurate Miniatures 1/48 B-25C/D Mitchell with AeroMaster decals
(Mitchell Collection Pt.IV), True Details weighted resin tires, and Reheat brass
seatbelts (lap belts only).
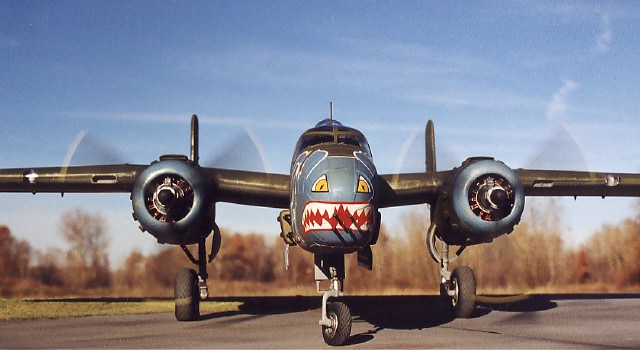
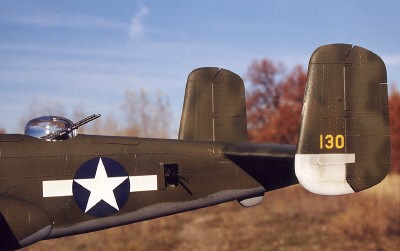
The aircraft is presented in the marking of Hell's Belles, a B-25D bomber of
the 345th Bomb Group, Port Moresby, November 1943.
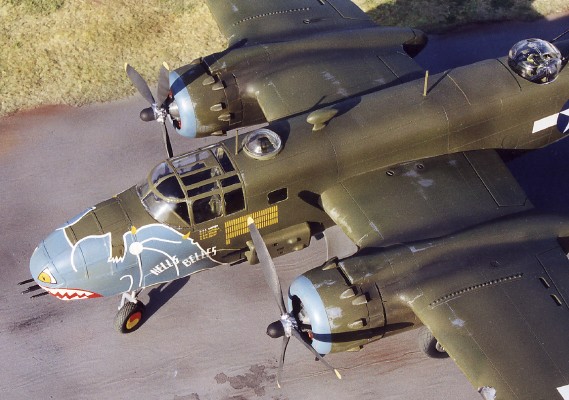
The large size and stunning detail in this model made for a longer than
average build. Overall fit was excellent with only minor problems experienced
attaching the engine nacelles and horizontal stabilizer. I did not correct the
shape of the engine cowls (a hot topic in discussion galleries) - they may not
be perfect but they were completely acceptable to me.
Although the instructions were clear, the suggested order of attachment for a
few parts was poorly conceived in my opinion. For example, the front landing
strut is supposed to be added to the underside of the cockpit/bombardier's
tunnel in step 9 (prior to bonding the fuselage halves together), much sooner
than is usual during model construction. Despite some misgivings I followed the
instructions diligently, only to break the strut a short time later while
working on the fuselage seam. In retrospect, the strut could have (and should
have) been added towards the end of construction. I think Accurate Miniatures
was concerned that the strut would be difficult to attach later if the brass
nose weights, which are inserted adjacent to the strut in step 11, shifted
position. However, with some careful attention this won't be a problem.
Another instruction folly is the suggestion that the completed upper turret
be attached during fuselage assembly prior to painting. At this point I decided
to refer to Accurate Miniatures' on-line build for their B-25B (essentially the
same model as the B-25C/D) for additional advice. I was relieved to find out
that with a simple manipulation the upper turret could be added as a last step
in model construction. Also, to my amusement, it was noted that addition of the
front landing strut could be delayed until late in construction to avoid
breakage! Oh well, I got to test my skills using wires and aluminum tubing to
repair the broken strut.
I first painted the model with SNJ aluminum Metallizer, primarily over the
leading surfaces of the wings, engines and tail. I then sprayed white on the
lower vertical tails and light blue over the engine cowls and nose.
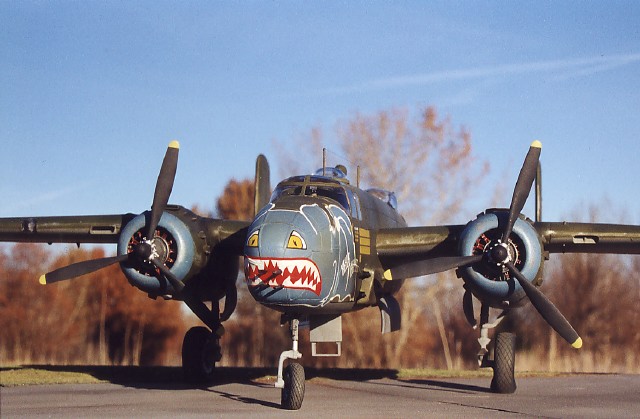
The bat motif was masked using the template provided by AeroMaster along with
their decals. I placed Tamiya tape over the paper template, cut the outline of
the bat, peeled the tape from the template and applied it to the model. The
trick was getting the bat symmetric on both sides of the nose, although with a
little fiddling it wasn't too much of a problem - Tamiya tape performs superbly
for this kind of work.
The engine cowls were also masked with tape.
 I
painted the model olive drab over neutral gray using Polly Scale acrylics
after preshading the underside with black. The olive drab in the bottle
was too brown for my liking so I added 30% US Tac Green and 10% Desert
Storm Sand (to lighten it up). The painting instructions called for
patches of dark green on the tail and wing surfaces, which I applied using
RAF Green. Various shades of olive drab and thinned black paint were
applied afterward to weather the surfaces, create exhaust stains etc.
Using sandpaper I scuffed the leading edges of the wings and engine
nacelle to expose areas of the aluminum underneath. The wheels were
painted dark gray (scale black) and then weathered using a thinned mixture
of light brown and neutral gray paint. I
painted the model olive drab over neutral gray using Polly Scale acrylics
after preshading the underside with black. The olive drab in the bottle
was too brown for my liking so I added 30% US Tac Green and 10% Desert
Storm Sand (to lighten it up). The painting instructions called for
patches of dark green on the tail and wing surfaces, which I applied using
RAF Green. Various shades of olive drab and thinned black paint were
applied afterward to weather the surfaces, create exhaust stains etc.
Using sandpaper I scuffed the leading edges of the wings and engine
nacelle to expose areas of the aluminum underneath. The wheels were
painted dark gray (scale black) and then weathered using a thinned mixture
of light brown and neutral gray paint. |
Before applying the decals I sprayed the model with two coats of Future for a
glossy surface. The bat decal, which came in two halves (left and right), was a
bit problematic to apply because it refused to slide once it touched the model;
accurate positioning is critical because of the light blue was masked to fit the
decal precisely. After some small tears (rips, not crying) on the left side I
feared disaster so I put the decal back in water and returned it to the backing
paper. I then cut the decal into manageable sections (removing a lot of the
large clear portions), took some deep breaths, and carefully reapplied it to the
model. No problem this time - the smaller pieces could be moved around without
tearing. A mild decal solvent solution snuggled the decal nicely against the
nose framework. The right side went on without a hitch once the decal was cut
into pieces.
The mouth decals were tricky to apply around the nose guns (which were added
early in construction but did not suffer the same fate as the landing strut). I
used white paint and "Fire Engine Red" paint to patch up imperfections
in the mouth decal at the base of the guns. Once all decals were applied I
coated the model again with Future, followed by Model Master dull coat lacquer.
I thoroughly enjoyed building this model and can't wait to build the B-25G
(the conversion parts were included in my kit, so all I need is a B-25B).
The fit problems with the nacelles are easily corrected using basic modeling
skills. A model of this size and complexity presents more challenges than a
single engine fighter, but it's well worth the effort.
Model, Text and Images Copyright © 2000 by Ian
Robertson
Page Created 07 December, 2000
Last Updated 26 July, 2007
Back to HyperScale
Main Page
Back to Features Index
|
 Home
| What's New |
Features |
Gallery |
Reviews |
Reference |
Forum |
Search
Home
| What's New |
Features |
Gallery |
Reviews |
Reference |
Forum |
Search