![]()
DAP
Beaufighter 21
by Chuck Zellmer
|
CAC Beaufighter 21 |
| Introduction |
This is Tamiya's beautiful 1/48 scale Beaufighter. Construction of this model has been pretty well covered elsewhere on HyperScale so I'll concentrate on the details and painting.
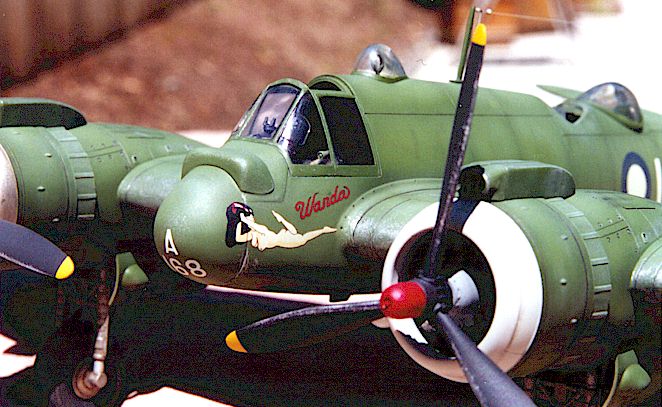
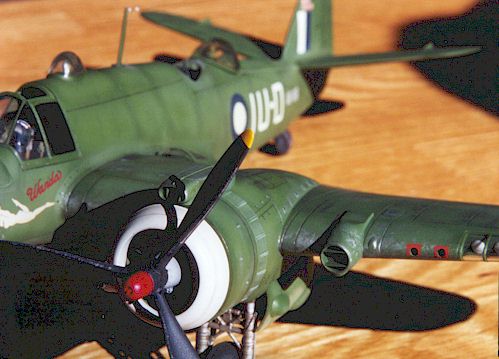
I was careful to make sure that the Beaufighter I built was fictional, so I "made up" the codes and serials. There wasn't a IU-D. The nose art is also fictional - just wanted to spice things up a bit with the girl.
| P a i n t i n g, D e c a l s a n d D e c a l i n g |
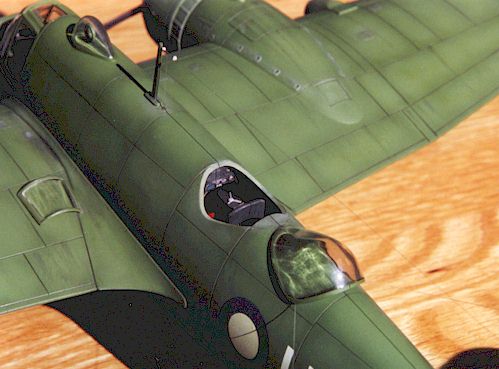
For the canopy sections, I covered the entire surface with bare-metal foil, and then used an exacto knife to follow the framing thereby cutting away the foil covering the frames. I tried to use "black magic" masks from Cutting Edge, but I didn't care for it much, except for "bubble" canopy sections (cover for antennae behind cockpit for example).
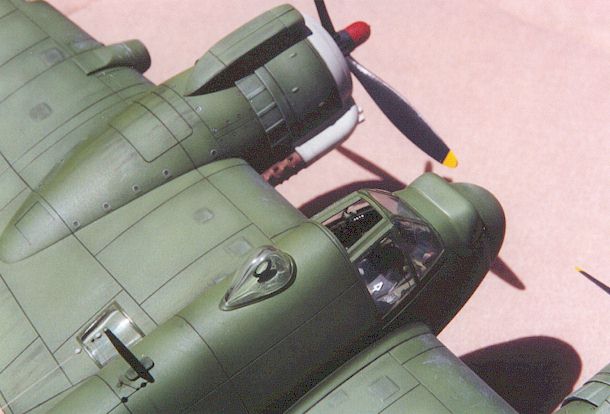
I used diluted micro-crystal clear to glue the canopies and to fill in gaps on all clear parts to painted plastic gaps.
I decided to remove the pilot's and observer's escape hatch's such that the interior detail could be viewed.
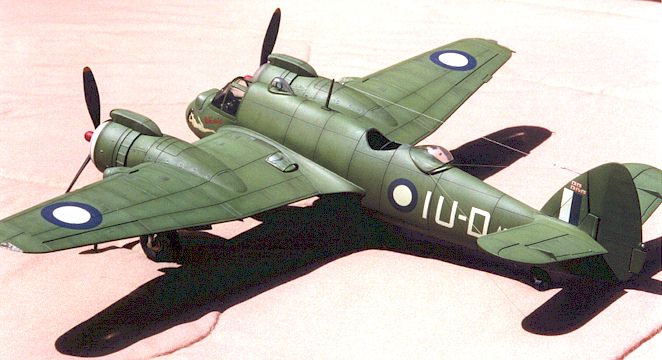
The interior was detailed with Eduard's and Cutting Edge's detail sets, plus quite a bit of scratch-building. Tamiya colors were used on the interior. Testor Model-Master enamels were used on the exterior. I like to use enamels because they can be sanded to rework seam areas that were missed etc. After the interior was finished, I painted the entire exterior flat medium-green.
After reworking the seam/sanding issues, I repainted again using the same color. Light-grey was added to the medium-green to lighten it up. This was sprayed between panel lines to simulate faded paint in those areas. When I was satisfied with the faded paint job, Model-Master clear gloss lacquer was used cover the entire surface prior to decal work.
Aeromaster decals were used in conjunction with Gunze's Mr. Mark Softer (this stuff is the best! Try to get some!).
The panel lines were highlighted using a heavily diluted water-based wash resembling raw-umber in color. This wash was carefully painted in the panel lines. After drying for just a minute or two, I used a cotton swab (q-tip) dipped into an ammonia based window cleaner solution (Windex), to rub over the painted surface.This removed any excess wash not in the panel line itself. You must make sure to use fresh Windex, as the ammonia evaporates after being exposed to the air for a couple hours. About 3" square was done at a time. It took roughly 2 days to do this!
 Model-Master
clear flat lacquer was used as the final flat coat. I used Cutting-Edge decal
covers for the gun ports. Once they dried, a can of compressed air was used to
blast away the decal and expose the gun port. This creates a realistic
"frayed" appearance, especially on the 20mm covers.
Model-Master
clear flat lacquer was used as the final flat coat. I used Cutting-Edge decal
covers for the gun ports. Once they dried, a can of compressed air was used to
blast away the decal and expose the gun port. This creates a realistic
"frayed" appearance, especially on the 20mm covers.
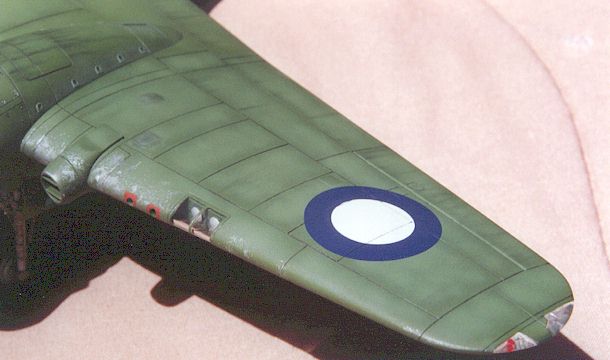
The Aussies used both heat-reflective white paint and stainless steel on the leading edges of the engine cowl. I decided to do one of each!
The IFF and Aerial antennae were made from very thin fishing line, plus white glue for insulators. The port and starboard running lights were enhanced by drilling out the clear plastic and painting inside the remaining hole.
I wanted the Beau to have a well-weathered beaten-up look. The paint chipping was achieved using a combination of dry-brushing and a silver pencil.
Other weathering effects, such as the fluid streamers on the wing, were done using pastels.\
| Additional Images |
Click on the thumbnail to view the
images full sized.
To return to this page click on your browser's "back arrow" key.


Back to HyperScale Main Page
Back to Feature Articles Index