![]()
Messerschmitt
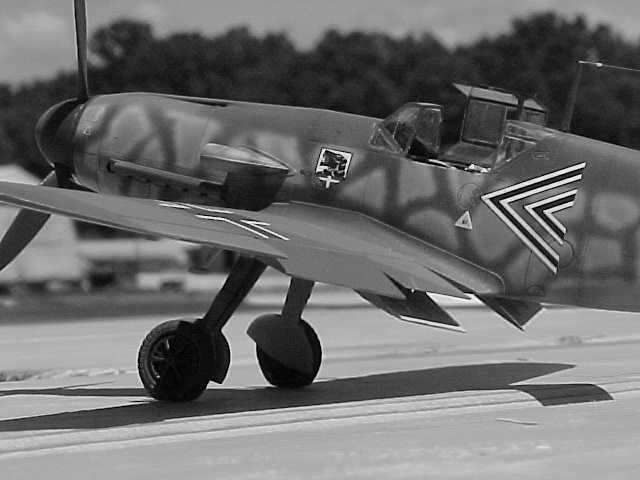
Bf 109F-2
by
Floyd S. Werner, Jr.
|
Messerschmitt Bf 109F-2 |
Four more images in the text plus four thumbnailed at the bottom of the page
I n t r o d u c t i o n |
Rewind: Miami 1990 IPMS Nationals.
I’m the first person there. After all this is the first Nationals that I’m going to enter something. I get my models to the table first and notice that there is a gentleman there immediately looking over my Bf-109G-6. He strikes up a conversation. Introducing himself as Jerry Crandall, he explains that these particular markings of Erich Hartmann’s are his favorite airplane. I explain that I’m just getting into "serious" modeling and that I didn’t have any pictures but followed the decal sheet from War Eagle. He said that I was very close and then invited me to his vendor table. There he showed me photos of my model subject. He just happened to have them with him. Thanking me, Jerry took some photos of my model and returned to his table.
Fast forward to Sep 1990: I am preparing to be deployed to Saudi Arabia (I’m always on deployment to somewhere) and my Mom telephones to say that I got mail. She proceeds to tell me what the letter says. It is from Jerry. He mentioned how my model motivated him to finish his painting. He was enclosing a photo of his finished print and just wanted to thank me for the inspiration. Well shortly after that Jerry released his Aces series and featured Harbac’s 109F-2 in a wonderful segmented paint scheme at the start of BARBAROSSA. Needless to say his painting is the inspiration for my model. Interesting how that works out.
Fast forward to 1999: I am preparing to deploy (again) to Bosnia and look for a 109 to take with me. The Hasegawa kit is a natural selection. So with the Aeromaster JG-54 special sheet, Medallion’s Interior, Eduard’s fret and some True Details wheels I head off to the Bos.
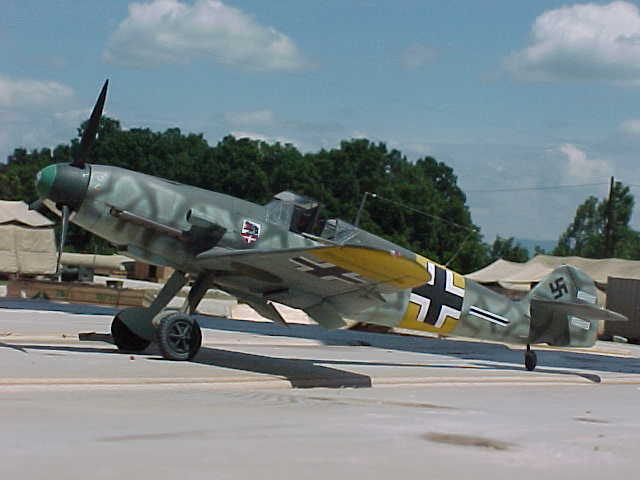
H a s e g a w a ' s M e s s e r s c h m i t t B f 1 0 9 F - 2 |
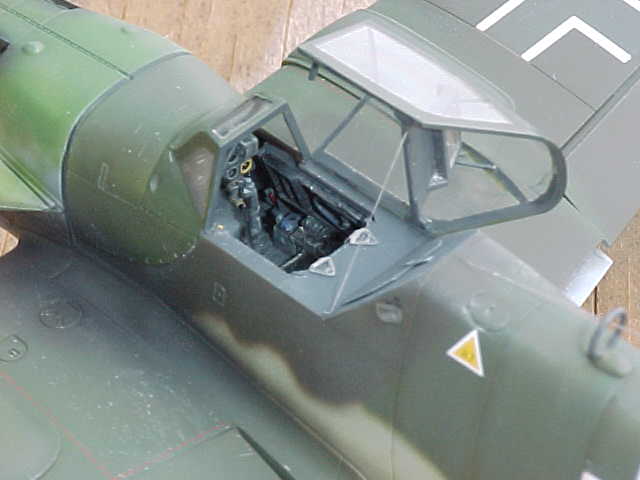
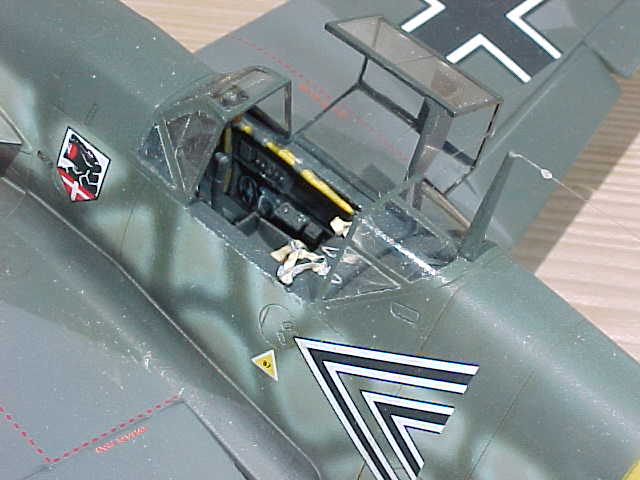
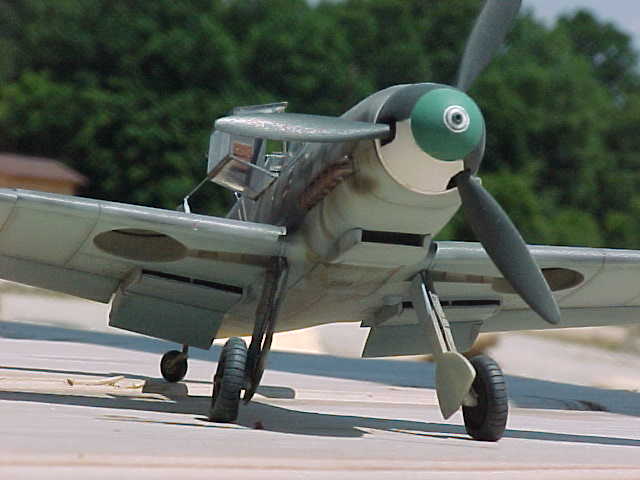
The Hasegawa kit of the Bf-109F-2 has been out for many years. It is very nice with excellent fit and more importantly when built it looks like a 109. The kit construction actually begins with the Medallion interior. I’m not going to compare this to the most recently released interiors but it was one of the early resin after-market releases and it definitely captures the 109 cockpit. It fits in the fuselage as advertised with just a little bit of work. The Medallion set utilizes some of the kit components, like the trim wheels and pedals but I replaced these with the parts from the Eduard set. I painted the whole assembly RLM 66 and washed it with black artist oils. Drybrushing with RLM 02 and silver pencil and pen wear marks added the impression of heavy use. I painted the rudder pedals silver to make them more prominent. One thing that Medallion doesn’t mention is that you have to cut off some of the aft cockpit sill to get a good fit. This is easy to do but be careful as it easy to cut off too much. I set the cockpit aside for now.
The fuselage is in five parts: two halves, two forward cowlings and the oil cooler under the nose.
First affix the fuselage halves. If you are careful and take your time you won't need filler.
Before attaching the engine cowlings make sure you paint the inside of the cowling area with RLM 66 or suitable dark color because the guns are recessed from the panel and this allows you to see inside the cowling. Attach the guns now because they will be impossible later. Then attach the engine cowlings. Again careful alignment and gluing will preclude the need for filler. On the oil cooler attach the Eduard grill and carefully attach it to the model. Mine fit so well that it is not glued on. Don’t attach the supercharger intake now. It only gets in the way when it comes time to attach the wings.
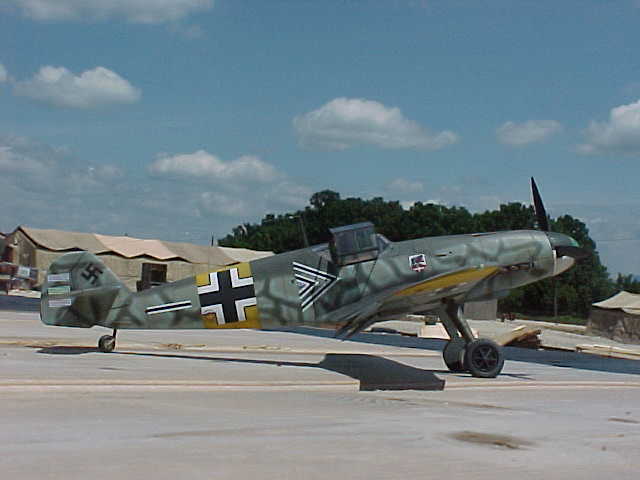
I attached my horizontal stabilizers at this stage. It is easier to align them and fill if necessary - not necessary on this model though. I scratchbuilt the fuselage tailplane stiffeners from .010 styrene strip. The stiffeners were necessary for the early F series aircraft, but check your references carefully, as they weren’t on all of them.
The wings were the next subassembly. They were pretty straight forward, except for the Eduard brass. In my opinion the weakest part of all 109 kits is the wing oil cooler area. The limitation of plastic doesn’t allow the necessary structure for the oil coolers to be constructed. There is always an opening someplace in the flap system. I’ve built this area up on other models but I’ve never liked the end results. This one I opted for dropped flaps which hides most of the area. Before putting the wings together I added an actuator rod to each intake. Now it is a simple matter of putting the wings together. When attaching the wings to the fuselage there is a slight misalignment to the wing root. This was easily corrected with putty. OK now is a time to mention that there is a seam that goes all the way down the fuselage spine and belly. It goes down the belly except for one panel. Be careful that you get the right one filled in. I mention this because there persists to be people who say that the Bf-109 doesn’t have this seam. Well I can tell you that I’ve seen real ones and Spanish variants and they are most certainly built in halves.
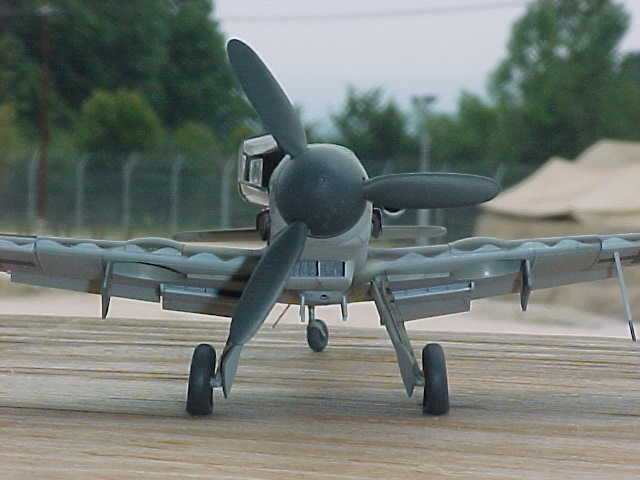
Now you know why not to put the supercharger intake on yet. Once the area is up to your standards attach the supercharger intake. I did use a bur tool to cleanup the inside of the intake and make the inside curve at the back.
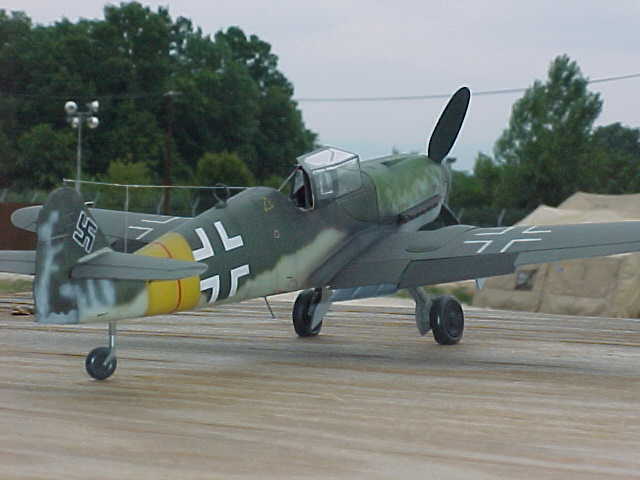
I like to attach the landing gear at this time and paint it later. The cleanup on the landing gear is very easy. I then installed the gear doors following that with the brake line down the front of the strut. This is made out of .010 solder, which bends easily and attaches quickly with super glue. After putting the tail strut on the model is ready for paint.
P a i n t i n g a n d D e c a l s |
I check my seams and prepare for the color coats by pre-shading. After cleaning up some spots I reapplied the pre-shading and let it dry for a day. I sprayed Model Master RLM 65 as the under surface color. I know, I know it’s suppose to be RLM 76, but the RLM 65 is a good match for the Monogram Painting Guide 76. Besides I didn’t have my Eagle Editions Color chips yet. I then painted the wheel wells and landing gear RLM 02.
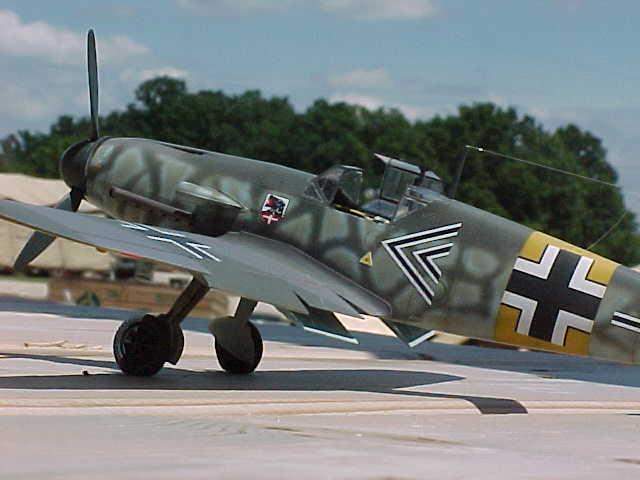
Next I masked off the area to paint yellow on the fuselage and wing tips. Caution must be exercised here because the fuselage crosses are exactly the same size as the paint stripe. The wing tips are exactly the length it takes from the tip to the underwing crosses so measure to be sure. I painted the top colors of Polly-S RLM 74/75. Let me give you a hint for working with Polly-S paints, get Golden’s Acrylic Retarder and add two to three drops to a paint cup. This increases the working time so that it doesn’t dry in the airbrush tip. The Retarder is very thick and you’ll think I’m lying to you but "trust me". For the side segments I used RLM 70 from Polly-S. Inside the segments I used RLM 02 from Model Master. The overall effect is great and captures the essence of Jerry’s painting quite nicely. A couple of coats of Future seals the paint and preps for the decals.
The decals from Aeromaster are typical quality. I left off most of the stenciling because of the over-painted camo pattern. The decals set up nice with Mr. Mark Softener. Another coat of Future seals the decals and a coat of Polly-S flat preps the model for the weathering.
Weathering is very slight as these aircraft were delivered to JG-54 factory fresh. Some silver pencil tapped onto the leading edge works well. I used silver pen and pencil for the wing root scuff areas. Using burnt umber artist oils provided the wash for the panel lines and the old streaks under the belly. The Verlinden Close-Up on the Bf-109G-2 is the best reference for these streaks.
Next come the pastels. I use pastels differently than most modelers and here is how. Most modelers "sand" off the chalk and then take a brush to the model. While this works well for extremely subtle weathering it doesn’t work for the effects I’m after. I use a pipe cleaner and rub it directly on the pastel stick then apply it to the model. This gives the pastels more "bite". First try something close to black and follow this up with a brown by the exhaust stacks themselves. Once applied use a cotton swab to drag the colors over the wings and blend them together. I use this technique for the exhausts and gun troughs. Then you can seal everything with another coat of Polly-S flat.
I attached the canopy and all the little antennas and such to finish off the model. This brings a finish to a model that was inspired by a great researcher and artist. I’m very happy with the results. The model is a quite colorful addition to my growing collection of Bf-109s.
I hope Jerry is as happy with his inspiration for my model as I was with my inspiration for his "White 1" print!
| A d d i t i o n a l I m a g e s |
Click on the thumbnail images below to view the image full sized. Use the "Back" arrow on your browser to return to this page.
Floyd S. Werner, Jr.
IPMS #26266
Back to HyperScale Main Page
Back to Features Page