Home
| What's New |
Features |
Gallery |
Reviews |
Reference |
Forum |
Search
Home
| What's New |
Features |
Gallery |
Reviews |
Reference |
Forum |
Search
|
|
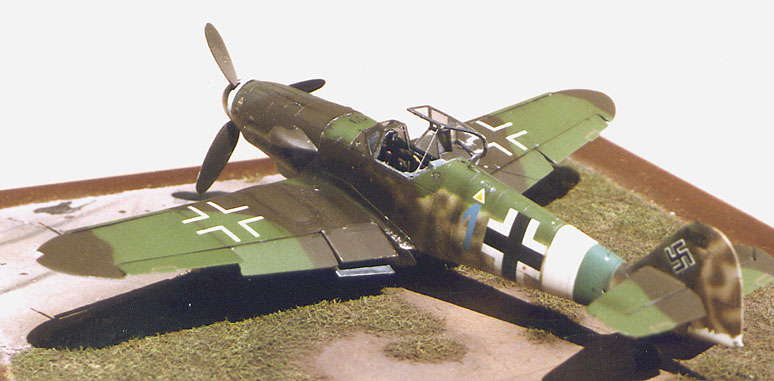
Messerschmitt Bf 109G-10 by Glenn Irvine
Glenn Irvine continues his theme of doing things the hard way by converting Heller's 1/72 scale Messerschmitt Bf 109K-4 back to a G-10. This superdetailed project was undertaken in 1994.
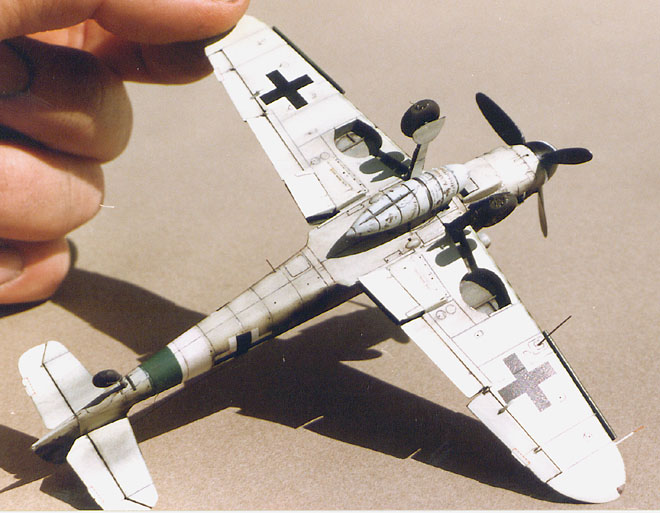
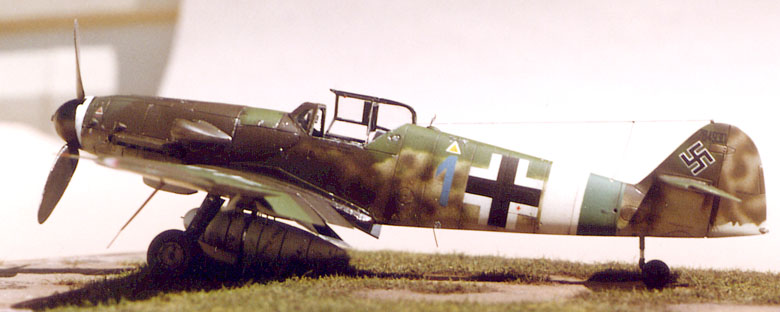
The Messerschmitt Bf 109G-10 was the final development of the Bf 109G series of fighter aircraft. In most respects the Bf 109G-10 was very similar to the K4, featuring the DB 605 D engine with refined engine cowling, Erla canopy, tall tail and wide wheels (with a few interesting exceptions). It was the fastest of the "G " series. This is the Heller 1/72 scale Messerschmitt Bf 109K-4 kit backdated to a Bf 109G-10, detailed and "accurized" using plans in Koku Fan "109 vs. 190" book and photos. The model depicts the artwork in the centre pages of Monogram Close Up 7 on the Bf 109G-10, "Blue 1", one of the two known JG77 aircraft with green/white Reich defence bands.
The model was substantially modified and improved. From front to back, the following text and images describe the journey from K-4 to accurate G-10.
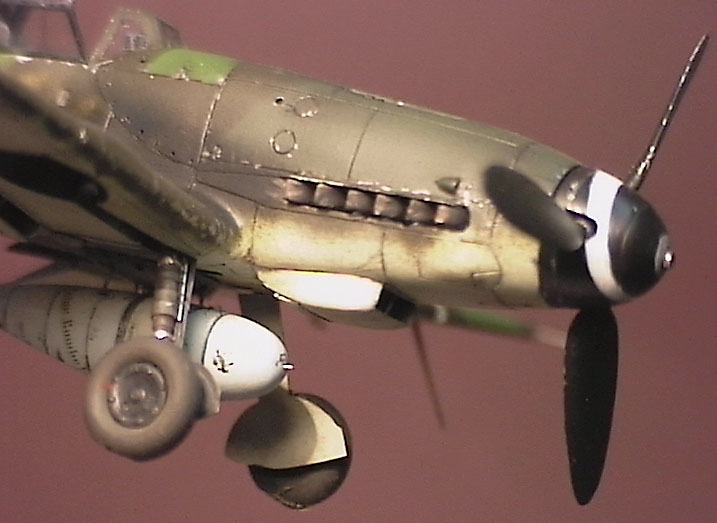
The Spinner The Heller spinner backing plate is slightly smaller in diameter than the spinner cap; although the backing plate is the right size. I temporarily glued the parts together and sanded them to shape using plans and photos to guide me. By sanding the front half to match the rear plate, and blunting the tip slightly to remove the 'pointy' look, an accurate spinner shape was obtained. The hole for the co-axial cannon in the spinner was drilled out and a length of metal tubing was added.
Propeller Blades The Heller propeller blades are too short and slightly too narrow in chord toward the tip. They needed building up with super glue and styrene sheet, followed by reshaping and thinning down in section. The new shape of the propeller blades was based on the plans in the Koku Fan #57 "Bf109 vs. Fw 190". These plans are in 1/72 scale and seem to be very accurate. Photos were another important reference to understand the correct shape. If you study the photographs for long enough you will develop a 3D mental picture of what the propeller blades should look like. I reversed the pitch of the blades as the leading edge is on the 'wrong' side! This means the blade mounting shaft is also on the wrong side. Glue a disc of card to the hub to maintain blade position and remove and reposition the shaft; or drill a hole in the centre of the hub to take a short length of brass tube that will form a new shaft. If carried through the hub, this shaft will help centre the forward half of the spinner and, of course, the backing plate.
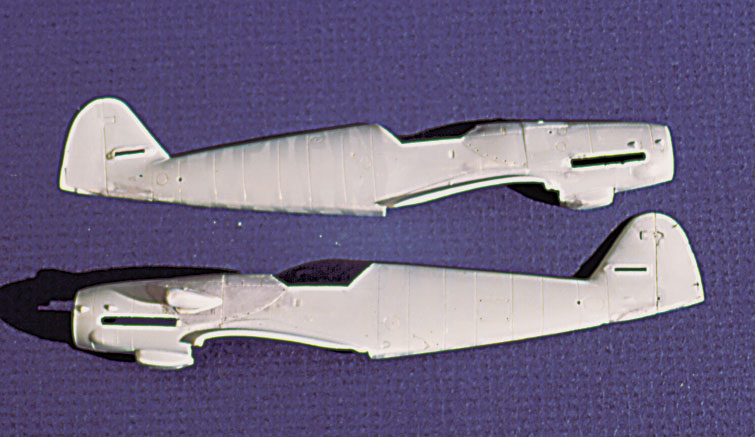
Fuselage The fuselage is reasonably accurate but requires some work. The fuselage decking at the rear of the cockpit is moulded at the wrong angle and is too narrow at the spine compared to plans. This section was built up with putty then detailed. The rudder is not deep enough or broad enough in chord at the base. It was built up with 5 thou card and superglue, then sanded to shape. I removed the trim tabs and rescribed the flettner tab, also adding an actuator linkage.
The gun troughs were deepened and the port engine cowling was built up to correctly show the asymmetric cowling contours. The airframe was rescribed after correction of the basic shape. Once the fuselage was assembled, the spinner was fitted. This kit seems to capture that elusive 'nose shape' better than most. At least I think so!
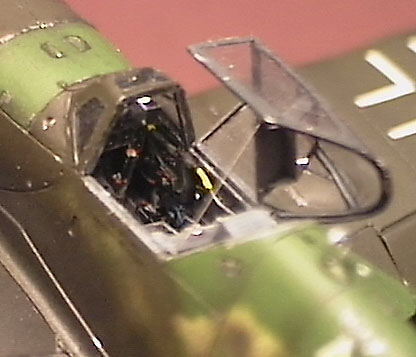
Canopy
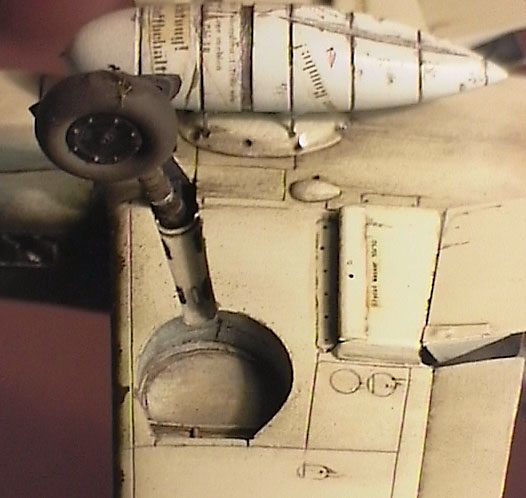
Bomb Rack and Drop Tank
Wings and Control Surfaces Heller's control surfaces are a real mess. The chord of the slats and trailing edge control surfaces has been scribed at a constant width. This is incorrect. They had to be filled and rescribed completely. The wing tips are also not quite pointy enough. Otherwise the shape is quite good except for a lack of backward rake.
The wing is nearly 1.5 mm too far forward at the wing tip. This required the removal of the wings at the root and the fitting of a short mainspar with dihedral. The wings were then refitted with a spacer at the leading edge to sweep the leading edge back to the correct angle. I should point out that this will put all the panel lines, upper wing bulges and radiators slightly out of parallel. However, believe me when I say that you will find it very hard to pick!
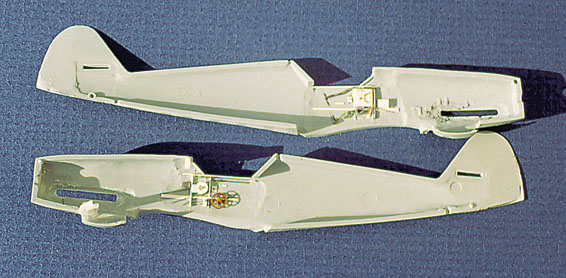
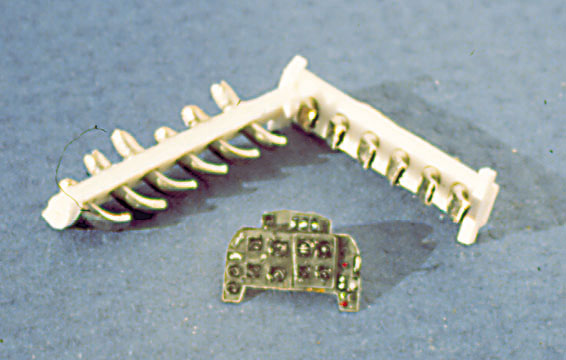
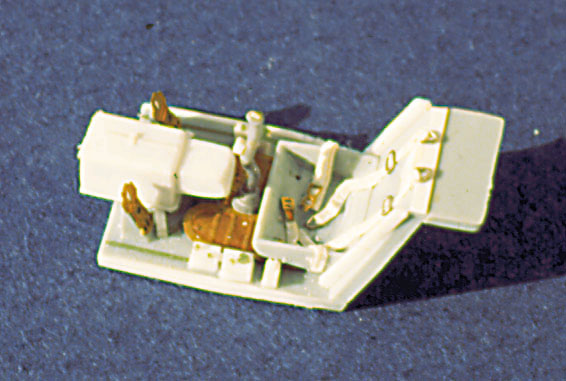
Wheel Wells The wheel wells are too far outboard and too far back from the wing leading edge. The shape of the well is incorrect and it is also too small. I traced a copy of the plans onto tracing paper and transferred it to the lower wing half, then filled and reshaped the wheel wells. The upper wing inner surface was thinned down until nearly transparent, then 5 thou card was cut to the shape of the inner wing skin (actually the original outer wing skin before the bulge is fitted over it) with the relief hole for the larger tyres. After structural detail was added the wheel wells were painted, washed and finally drybrushed.
I fell in love with the artwork in the centre pages of the Monogram Close Up 7, "109 Part 2". It depicts one of only 2 JG 77 Bf 109s with tail bands in green and white. The other is a Bf 109G-14. The model was painted using Tamiya acrylics mixed to match chips in the Model Art book on the Me 262. The colour scheme is RLM 81 Brown Violet and RLM 82 Bright Green over a late war "sky" mix. Other colours were matched to chips in the Monogram Luftwaffe Painting Guide. After priming the airframe the rudder bottom was sprayed 76 then a mask was applied to achieve the unique demarcation line often seen on late Bf 109s. The base colour of RLM 02 was sprayed, over which the RLM 81 pattern was sprayed freehand. Tailbands were sprayed and masked first before any other camouflage painting. The undersurface "sky" colour was a mixture of RLM 02 and white. This seemed to approximate the late war green/blue reasonably well. The uppersurface colours were sprayed using spaced paper masks. Mottling was sprayed freehand. The spinner spiral was brush-painted freehand. The canopy framing was painted RLM 66 Black-Grey inside and out, then washed and drybrushed (inside).
The airframe received one coat of gloss before decals were applied, then another coat to seal the decals. Decals came from several sources including Microscale, Almark, Aeromaster and kit decals from Hasegawa's 1/72 scale Bf 109G-14. The Werknummer was printed from original art onto clear decal film using a photocopier. All panel lines were washed with diluted oil paint in greys and black. The model was then "Dullcoted" and weathering was applied including exhaust stains, oil leaks and chips. The finishing touch was a base created to present and protect the model.
Model, Photographs and Article Text Copyright © 2000
by Glenn Irvine
Back to HyperScale Main Page Back to Features Index
|