Home
| What's New |
Features |
Gallery |
Reviews |
Reference |
Forum |
Search
Home
| What's New |
Features |
Gallery |
Reviews |
Reference |
Forum |
Search
|
|
|
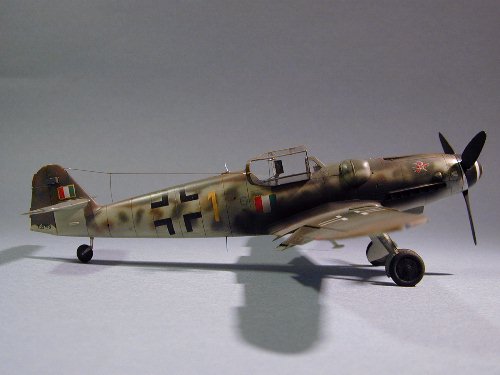
Messerschmitt Bf 109G-14 by Vincent Kermorgant
Here is Hasegawa's 1/48 scale Messerschmitt Bf 109G-14. Fuselage I assumed that the plane I was building was not a Trop version, so I started by removing the parasol holder under the cockpit. At the same time, I removed the rudder in order to display it angled. I also filled the engraved lines of the MW50 hatch with Superglue. Extra detail was now added, including the following:
Once the fuselage was assembled, a line was scribed on the spine and belly from stations 2 to 9 to simulate the all too often missed factory seam. Once the top cowling was in place and blended into the fuselage, the ADECO resin scoops were added in the correct position. These were hollowed by sanding them at a diagonal angle. Wings I worked on the upper wings first. The missing panel line was added as per Hasegawa instruction and the wheels blisters glued in place. No putty was used since these were separate parts on the real 109, leaving a seam. I then glued the upper wings to the fuselage to avoid gaps later. This unorthodox method cures all Hasegawa kits I have assembled before.
The wheel well contour is modified as specified and the bottom is blanked out with plastic card. Plastic strips give the structural pattern and liners are simulated with aluminium foil - when applied, it gets wrinkles, just like cloth. One important notice here - if you use the method of gluing the upper wings first, don't forget to remove the "pins" on the underside to give some freedom for the parts to be adjusted afterward. I added the forward actuator to the wing radiators and the cooling flaps are detailed with plastic card. After finishing the wing-fuselage assembly, slats are glued in a partially open position.
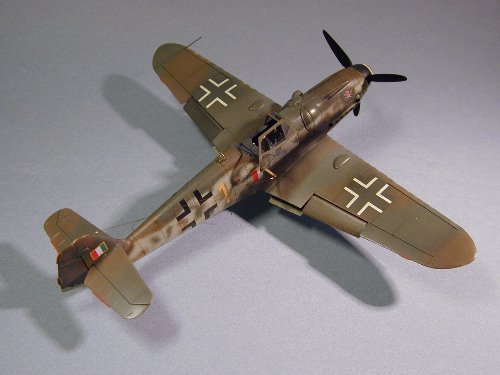
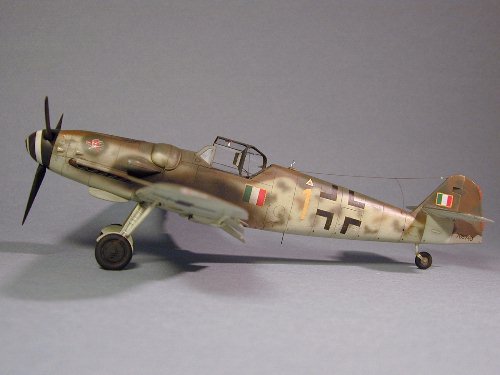
Using the box JT149 "Air War over Italy", I modelled the aircraft of Major Bellagambi, second fighter squadron of the ANR during March 1945 in Osoppo. Decals are superb but Hasegawa's color callouts are unrealistic. After careful research and examination of the only known photo of the plane, I concluded that the scheme could only be 76/81/83 or "sky"/81/83. I chose the latter scheme.
The prepainted tall rudder was painted in a different sequence and method:
Finally, decals were applied and the plane was completed with the usual weathering methods. Happy Messerchmitting!
Click the thumbnails below to
view images full-sized.
Models, Description and Images Copyright © 1999 by
Vincent Kermorgant
|
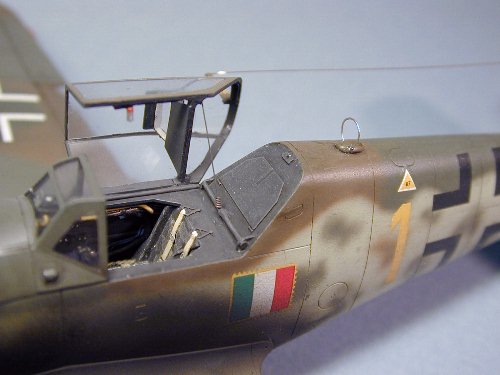
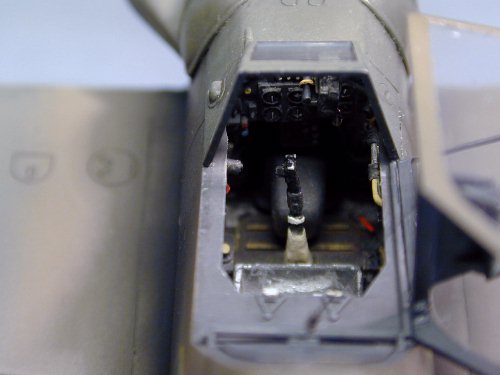
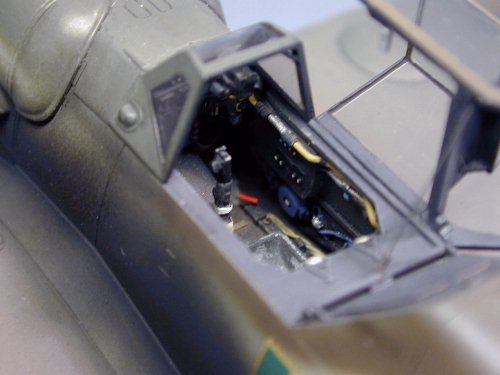
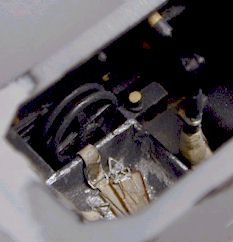 The
cockpit was then assembled and painted. Weathering consisted of washes and
drybrushing. The seat was painted silver prior to cockpit painting and a wood
stick produced the heavy chipping seen on recycled airframes.
The
cockpit was then assembled and painted. Weathering consisted of washes and
drybrushing. The seat was painted silver prior to cockpit painting and a wood
stick produced the heavy chipping seen on recycled airframes.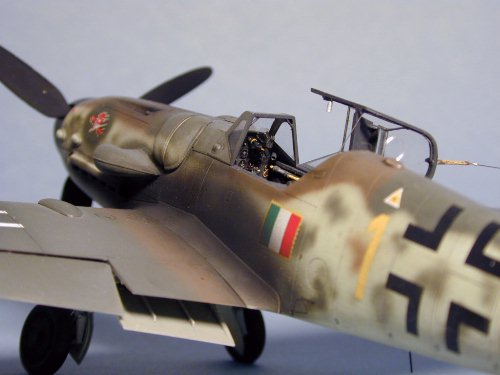 On the
underside, the oleo scissors get their 8 lightning holes opened and the Fug16zy
Morane antenna port is drilled. A rectangular panel is scribed around to
represent the mounting plate.
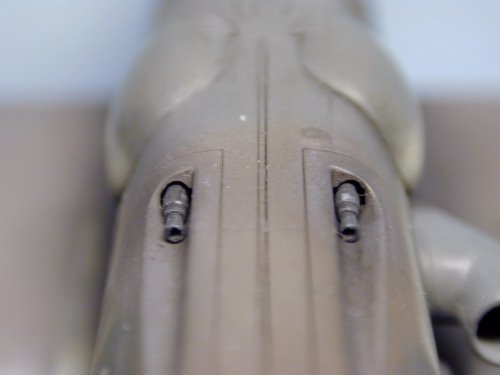
On the
underside, the oleo scissors get their 8 lightning holes opened and the Fug16zy
Morane antenna port is drilled. A rectangular panel is scribed around to
represent the mounting plate.
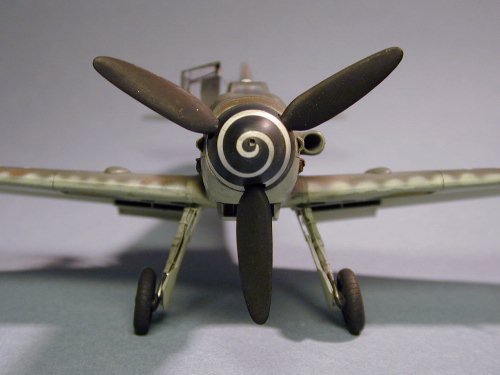
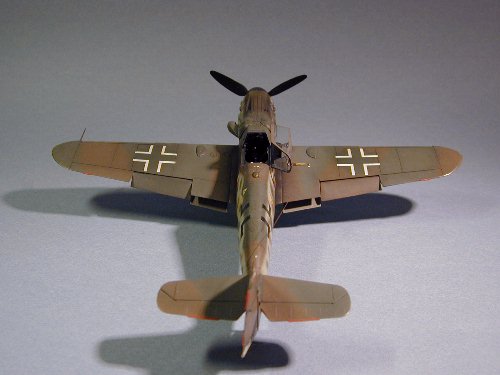
 The
plane was entirely painted with Gunze H74. This was followed by RLM81 (Gunze
H304) and RLM83 (Gunze H309) in line with the usual camouflage schemes seen on
the real 109.
The
plane was entirely painted with Gunze H74. This was followed by RLM81 (Gunze
H304) and RLM83 (Gunze H309) in line with the usual camouflage schemes seen on
the real 109.