|
Messerschmitt
Bf 109G-6
by
Anthony Manzoli
 |
|
Messerschmitt Bf 109G-6 |
The Messerschmitt Bf 109G-5 and G-6 were produced in parallel and were
pressurized and non pressurized versions respectively. Of the two, the G-6 was
the most widely produced and remained in the first line service until the end of
the war.
The only external differences between the Bf 109G-5 and the Bf 109G-6 were
the small fresh air intakes found on either side of the wind screen, the
dessicant capsules embedded in the canopy and the extra bulge on the cowling
that covered the pressurisation gear of the non pressurized G-6.
More than 10,000 Messerschmitt Bf 109G-6 aircraft were produced during the
war, making it the most widely produced of all Bf 109 variants.
Due to the many different versions of the Bf109G, there was much confusion
during production. A special Fighter Production Committee was formed to deal
with the bottlenecks that plagued it's production. The Bf 109G-14 followed the
the G-6 in production and was the first result of the Fighter Committee's
initial attempt to rationalize the many variants of the 109G, inhibiting maximum
production. The G-14 was standardized with the larger, taller wooden fin and
rudder, the Erla Haube canopy and the DB605A engine. The vast majority of the
G-14's produced had the drop tank rack and were designated the Bf109G14/R-3.
Some received the DB605AM engine and (with MW50), and the Galland -type cockpit
canopy.
Hobbycraft's
Messerschmitt Bf 109G-6
|
This is Hobbycraft's kit. The detail in the kit is satisfactory and the fit
is pretty good. The kit offers variations, such as a tropical G-6 with air
filter or you can choose from the 20 mm under wing cannons or the rocket
launchers.
The kit is basically "out of the box" for the exception of the
underwing guns, which were made from drawing up needles.
 I
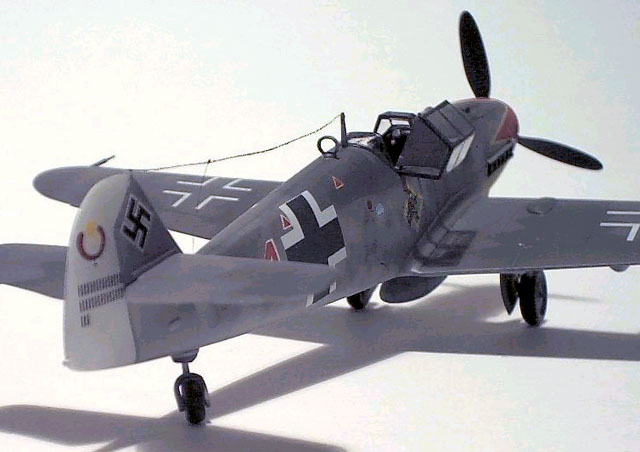
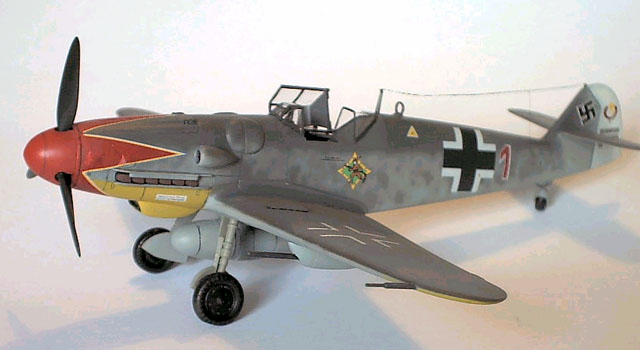
chose to paint my plane in Hermann Graf's colorful 109 G-6 of JG. 50.
Graf's Bf 109G-6 featured an interesting camouflage pattern on the wings,
it had a Christmas tree splinter pattern. I achieved this by cutting out
stencils from post-it note. I then proceeded to do the mottling with my
airbrush set on the fine setting with RLM 74 and RLM 75. The cowling was
painted RLM 04 yellow and the rudder flat white. I
chose to paint my plane in Hermann Graf's colorful 109 G-6 of JG. 50.
Graf's Bf 109G-6 featured an interesting camouflage pattern on the wings,
it had a Christmas tree splinter pattern. I achieved this by cutting out
stencils from post-it note. I then proceeded to do the mottling with my
airbrush set on the fine setting with RLM 74 and RLM 75. The cowling was
painted RLM 04 yellow and the rudder flat white.
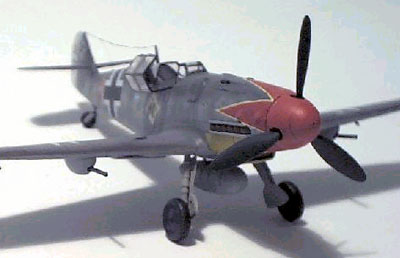
The instructions called for the entire tail being painted white, but
from the reference photo I was using only the rudder was white.
Once finished with the overall paint scheme, I carefully ran a
sharpened pencil down all of the panel lines. This is a clean method of
detailing the panel lines, without the worry of using thinners and
possibly ruining the paint job you just finished. For the finish I applied
two coats of "Shine Magic" which is Australia's version of
"Future". This allowed a smooth surface for the decals. |
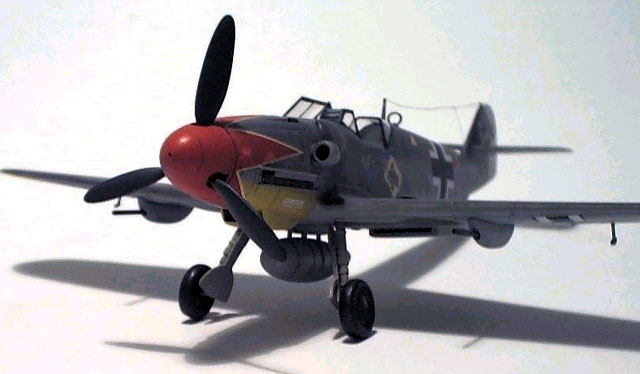
All the decals went on smoothly except for the tulip on the nose.
Unfortunately, even with the use of setting solution, it still had some trouble
completely relaxing around some of the raised details. The tulip does provide an
overall great effect and really makes the model. Once all the decals were
applied, I gave it another coat of the Shine Magic, and allowed it to dry over
night.
Finally the matte coat which was a combination of Magic Shine and Tamiya Flat
Base with an 8:1 mixture. I borrowed a piece of hair from my fiancé and glued
it in place, adding a couple of drops of super glue for the insulators and the
kit was finished.
Not a bad looking plane. It was my first Bf 109 in 1/48 scale.
Model, Images and Text Copyright © 2001 by Anthony
Manzoli
Page Created 05 January, 2001
Last Updated 26 July, 2007
Back to HyperScale
Main Page
Back to Features Index
|
 Home
| What's New |
Features |
Gallery |
Reviews |
Reference |
Forum |
Search
Home
| What's New |
Features |
Gallery |
Reviews |
Reference |
Forum |
Search