Home
| What's New |
Features |
Gallery |
Reviews |
Reference |
Forum |
Search
Home
| What's New |
Features |
Gallery |
Reviews |
Reference |
Forum |
Search
|
|
|
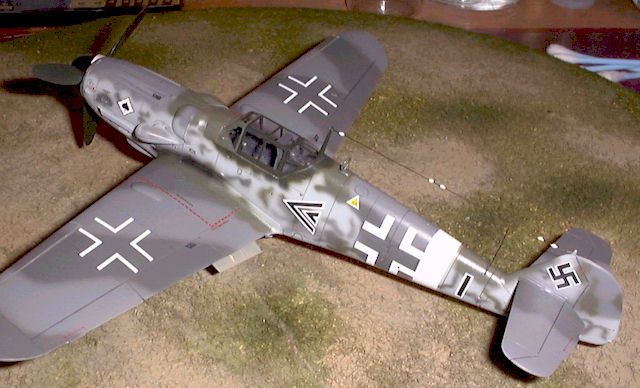
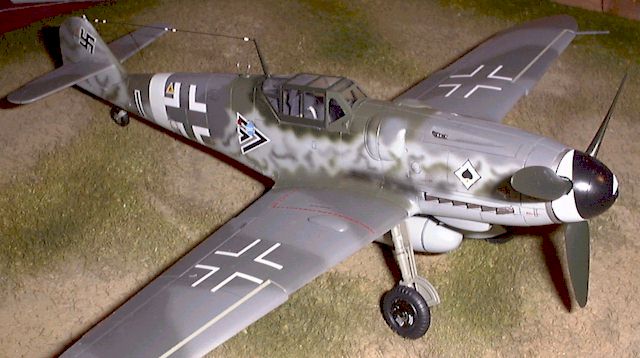
Messerschmitt Bf 109G-6 by Franck Oudin
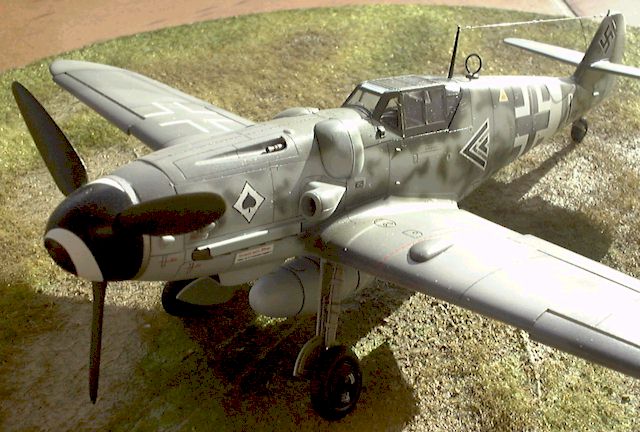
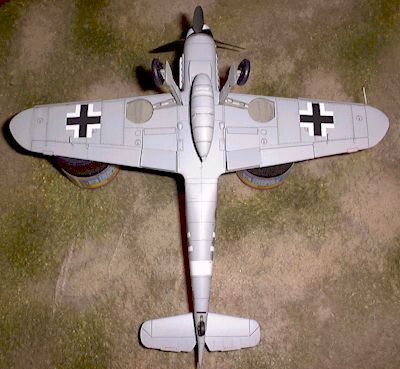
This project was inspired by the Messerschmitt Bf 109G-6 flown by the Kommodore Franz Goetz in Italy in 1944. I used the excellent decal sheet from Kommandeur (Ref KD4807FF). The Bf 109G-6 is finished in the usual camouflage scheme RLM 74/75 for the wings and the fuselage; plus a RLM70/71 mottle on the mid-upper fuselage.
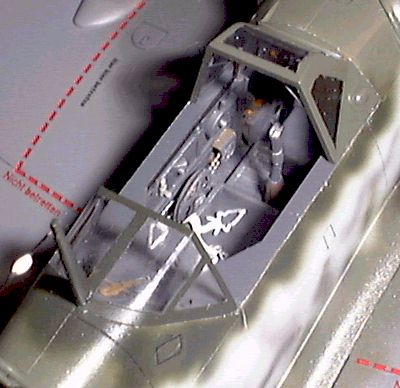
I painted the wheel well and then masked it. The cockpit was masked with Tamiya tape and the complete airframe was sprayed with a base coat of aluminium. After drying for a day the aircraft was sprayed overall RLM 76. Then it was time for the RLM 75 on the wings and when it was dry I painted the RLM74. The next operation was the fuselage. It was again painted 74/75 and then sprayed the RLM 70 and 71. Mottling was done with the same colors but this time I thinned the paint up to 90 % and reduced the air flow on the airbrush to 0.5 bar. This thin mix was sprayed lightly.
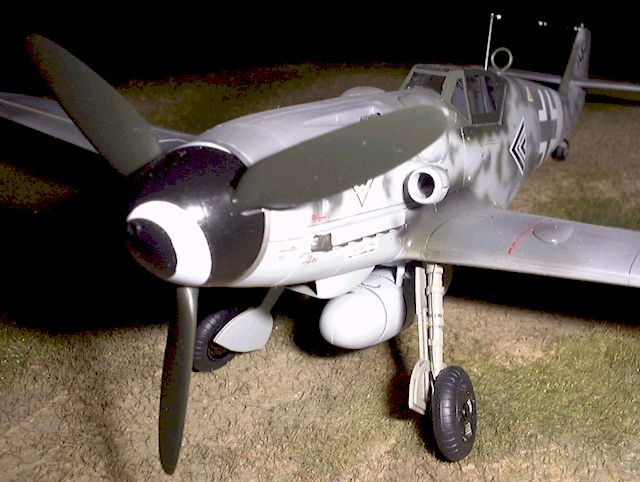
When all this work was finish the entire aircraft received two layers of clear gloss coat before decaling. In the meantime I painted all other details including antennae, drop tank, wells etc. I applied the brilliant Kommandeur decals with the aid of setting solution. I used some stencils from an Aeromaster sheet and some from the kit decals. The aircraft was sprayed with matt clear coat and the details were added. The antenna wire was added using 0,15mm diameter fishing line, and isolators. For the final touch I took some light paint Gunze H-85 to do a post shading all over the aircraft again with some heavily diluted paint sprayed gently.
So here is a nice easy Bf 109. I am very happy with the result. The aircraft was painted free hand with a single action Rotring airbrush with a 0,2 mm nozzle. The paint that I used are all Gunze-Sanyo.
Some of you will say "Oh no, another Bf 109"! Well, I did not have one in my collection, and I believe this was a beautiful aircraft, so I hope that all Hyperscalers will enjoy it. I personally would like to thanks Brown Ryle from Kommandeur for helping me with the color and history of this aircraft,and Vincent Kermorgant for his technical help and his extensive knowledge of the Bf 109. Thank you very much guys!!!
Click the thumbnails below to view
images full-sized.
Model, Text and Photographs Copyright ©
2000 by
Franck Oudin
|
 I
used the very good Hasegawa 1/48 scale Messerschmitt Bf 109 to realise my
project.
I
used the very good Hasegawa 1/48 scale Messerschmitt Bf 109 to realise my
project.