Home
| What's New |
Features |
Gallery |
Reviews |
Reference |
Forum |
Search
Home
| What's New |
Features |
Gallery |
Reviews |
Reference |
Forum |
Search
|
|
|
Messerschmitt Bf 109G-6 by Roy Long
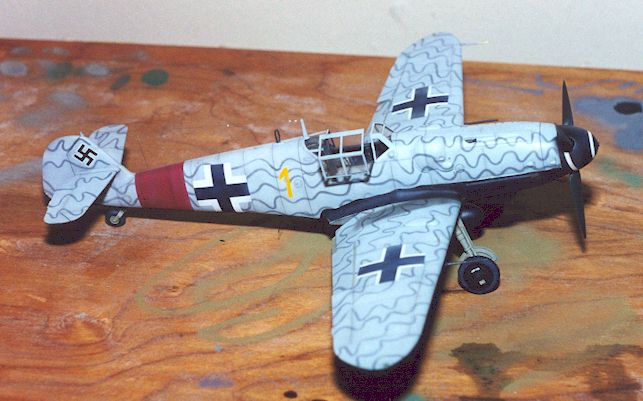
EagleCals' JG300 Me109G-6 sheet covers four different aircraft of JG300 flown in the Wilde Sau role in the spring of 1944. Three of the aircraft are Me109G-6/R6 the fourth is a Bf 109G-6 with a tall tail. All four aircraft depict experimental schemes, which JG 300 tried out for the night fighter role. Interestingly, the same pilot flew three of the four machines. This is Hasegawa's 1/48 scale Messerschmitt Bf 109G-6.
I decided to use the KMC detail set for this Bf 109G. The detail set contains a replacement cockpit; exhaust stacks and flattened, bulged wheels as well as a positionable rudder and elevators. The set appeared to be fairly accurate, however I wasn't entirely pleased. There are several pinholes in the castings and the control surfaces were warped. The cockpit floor, rear bulkhead and seat pan are cast as one, as is the kit part. The weakest areas of this assembly were the area behind the seat pan and the cast-on shoulder belts. The problem behind was that the kit floor/bulkhead appears to be the basis for the resin casting with the (over-large) seat pan cut away. The resulting hole looks as it was covered over with stock card and a more in-scale seat pan glued to the master. This process of providing a new seat pan has left a visible raised panel between the bulkhead and the seat pan. I felt this was a little lazy and would have been a better piece if the hole was filled in and sanded.
The second gripe is a bigger problem but easier to describe. The shoulder belts look as if they were cast with loops and sags. On my sample, only the lower portions of the straps were there, if my guess is correct the looped and sagged portions broke of in the molding process. I was unable to confirm this, as the straps on the piece in the box top photo were the same as the contents. The straps were carefully shaved of and replaced with ones made of lead foil. These small nit picks are not outside the realm of the modeler, just a gauge between really well done aftermarket parts and useable aftermarket parts.
The construction of this kit was pretty straightforward. The Hasegawa Bf 109 family is so similar in construction that they become familiar after a few.
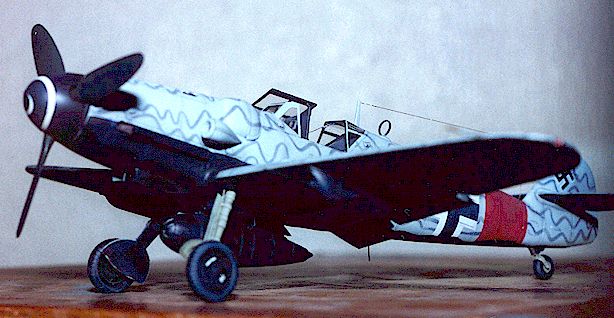
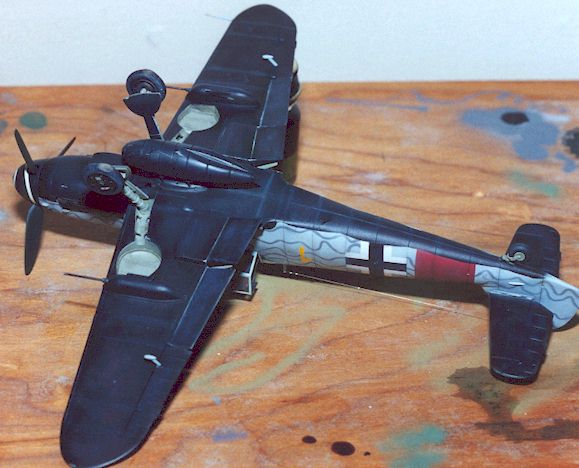
The interior was painted using Aeromaster RLM 66, the wheel wells gear struts and other interior areas were painted using Aeromaster RLM 02. Extracolor RLM 75 and 76 were used on the upper surfaces and ModelMaster flat black was used on the undersides I really like nightfighter colors and yellow "1" appealed to me, plus it looked like an easy paint job. However, this paint job turned out to be one of the more difficult I have tried. After several failed attempts to get the RLM 75 lines to look somewhat like the lines in the photos of the actual plane included in the decals (nice touch Eagle Editions), I decided to try masking the lines. The upper surfaces were repainted in RLM 75. I then masked all the lines.
I'm a big fan of Parafilm, and use it for every thing, canopies, wheel hubs - you name it. I masked the lines using long "ropes" of Parafilm. The ropes were made by preparing the Parafilm in the prescribed manner and then twisting it until it was long and stringy, sort of like rolling clay. These ropes were then stuck on according to the pattern and the RLM 76 sprayed over top. The masking was then removed. I let the paint dry for a day then did the decals and let those dry. The decals are of high quality and went on nicely, the only glitch, apart from a complete set of national markings buried under the final paint job, was the white areas not being entirely opaque. I began weathering by spraying a very thin coat of lightened RLM 76 in random splotches on the upper surfaces to break up the monotone look. The under surfaces were then painted black. I tried to break up the pure black by airbrushing dark gray spots in the centers of panels. I also did some light drybrushing along the panel lines to bring them out. A wash of artist's ink thinned with some environmentally-safe airbrush cleaner was painted on the panel lines and then wiped away.
The model was clear coated with Aeromaster's Flat Clear enamel. I used this same mixture artist's ink after the final clear coat to add oil stains and drips. It was then weathered with a little silver paint and pastels for the exhaust areas.
Model, Images and Article Copyright
© 2000 by Roy Long Back to HyperScale Main Page Back to Features Page |