![]()
Messerschmitt
Bf 109K-4
KommanDeur Decals and
the Monogram Bf-109K-4
by
Floyd S. Werner, Jr.
|
Messerschmitt
Bf 109K-4 |
B a c k g r o u n d - K o m m a n D e u r D e c a l S h e e t |
There is one constant with me and that is my choice of favorite airplanes - the Bf-109. So
when KommanDeur came out with the series of decals on the 109 I just had to build one. The
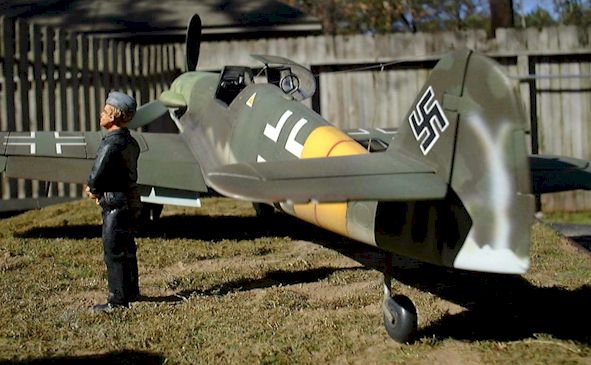
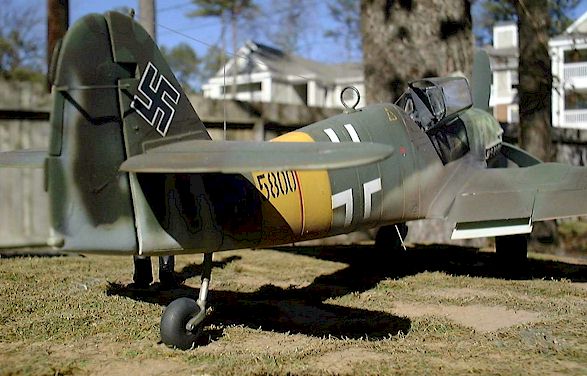
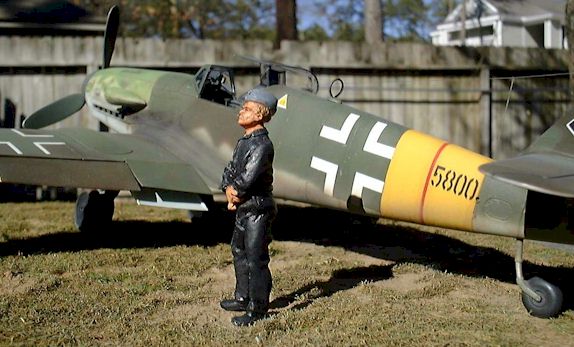
one that caught my eye was the Bf 109K-4 from JG11, "Black 5800". The aircraft
wore a replacement cowling of totally different colors (RLM 76 and 82) to the rest of the
airplane. It was also unique because it had an RLM 81, 83, and 84 (not a politically
correct designation, but easy for reference) over the rest of the fuselage, while the
wings had a RLM 76 bottom. This all makes for an airplane with great character.
The instruction sheet and full color illustration sheet are the heart of this offering. The instruction sheet is very comprehensive and highly researched. Where there are alternative interpretations KommanDeur is not afraid to say what the options are. See the instructions on "Yellow 2" (which is also the subject of a future article).
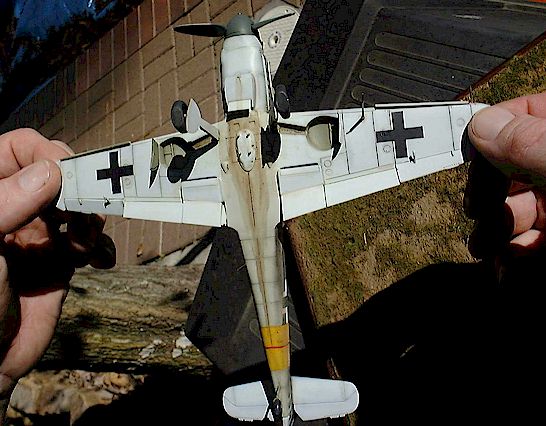
The decals for four aircraft are perfectly in register. The sheet even includes a bunch of stencils not previously available. One thing that struck me as different was the filled-in wing crosses. After a quick e-mail E. Brown Ryle told me that it was done so that you could tell the color he was looking for. Made sense to me after that, but if you don't want to use them then there are plenty of "clear" crosses to use.
B u i l d i n g a B f 1 0 9 K - 4 |
The new Hasegawa Bf-109G-10/K-4s are coming out soon; I can't wait for them of course. But I have a lot of the old Monogram 109s left over, so I decided to use them and all the detail sets that I had for them right away so I wouldn't end up with kits I might never build!
I used High Flight wings, the Medallion interior, Cooper Details exhaust, True Details wheels, Squadron canopy, Eduard detail parts along with some scratchbuilding. I know that sounds like a lot, but this kit is a beauty. It set the standard for the G-10 and in my opinion is still the best available (until the Hasegawa). As it was designed in the 70s it had a limited interior, but the exterior had recessed lines and was highly accurate. The best thing about it is the price, around $5-10 US. A little work and you can have a prizewinner.
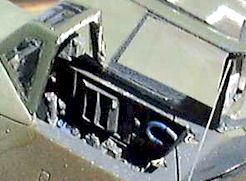
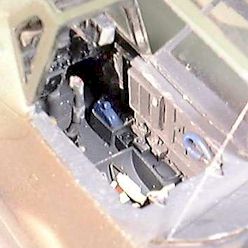 Start with the cockpit and follow the directions exactly. I
painted it RLM 66 and dry brushed with 02 to get the look I wanted. A couple of drops of
Future were painted on the dial faces to give them that glass look. Various details were
picked out with a silver pencil to represent scratches to the interior. I used some
photo etched rudder pedals. I know they are suppose to be painted but they look so much
better unpainted that I always leave them that way. Guess what? There are decals on the
KommanDeur sheet for the rudder pedals. Neat touch to be sure.
Start with the cockpit and follow the directions exactly. I
painted it RLM 66 and dry brushed with 02 to get the look I wanted. A couple of drops of
Future were painted on the dial faces to give them that glass look. Various details were
picked out with a silver pencil to represent scratches to the interior. I used some
photo etched rudder pedals. I know they are suppose to be painted but they look so much
better unpainted that I always leave them that way. Guess what? There are decals on the
KommanDeur sheet for the rudder pedals. Neat touch to be sure.
Before you join the fuselage halves don't forget that the oil cooler needs some work. I cut out the aft portion of the cooler so that the exhaust door could be added later. I built up the area with sheet styrene and some wire screen on the front and back of the cooler. I used the Cooper Detail exhausts at this point because they would be impossible to insert at a later date. They were designed for the kit so they fit exceptionally well and look great. Joining the fuselage is no big problem. Once joined though some things must be cleaned up. First remove the DF loop antenna mount on the fuselage. If you're good you can save it. I wasn't good that day anyway so I had to raid the spare parts box for a Fujimi mount.
Now is a good time to cut out the rudder. The Medallion set includes a great rudder. I hope you didn't forget to move the pedals a little to correspond with the rudder offset. Once the fuselage is primed, insert the cockpit from the bottom. I removed the MW50 bulge from behind the cockpit, as the K-4 didn't have it installed. I built an access panel for the pilot behind the seat and this covered the resulting hole. Don't forget to fill the radio panel and rescribe the proper one for the K. You'll need to scribe the tail gear doors. The compass panel on the left and the oxygen filler port on the right side need to be filled. Add the rudder at this time and add an actuator rod to a styrene horn on the trim tab.
Now came the time I was dreading. The High Flight wings adress a major omission with the Monogram kit - the fixed slats and flaps. Unfortunately, the wings for the conversion are uniquely engineered (i.e. bad). The wings are supplied in two halves, a left and right. The Monogram, like every other 109 kit that I know of is a three-piece wing. Two from three doesn't add up and it didn't add up on the kit either.
You are therefore required to cut the fuselage center section out of the kit lower wing and build it into the bottom of the fuselage. This requires shimming with a little bit of sheet styrene in the front (.010) and back (.005) to get the part to line up. After this comes the real work. Cutting out the resin wings is easy and clean up is no problem. Separating the individual flaps and slats now facilitates painting. However, lining up the wings proved a tedious task. Pin them on the front and back of the wing.
Attach the wings with super glue or epoxy. I used super glue but would now recommend epoxy for the extra working time offered by the this slower-drying adhesive. Learn from my mistakes my friends!
One wing was off and that required lots of sanding and work. One of the radiator housing areas had a lot of build up of excess resin that required cleanup. Nothing too difficult but annoying. I think the weakest spot on any 109 kit is the oil coolers.
 The flaps can be positioned open but the interior of the radiators
makes this almost impossible. This conversion doesn't make it any easier. The bottom of
the radiator housings are separate so you have to build up the faces of the radiators with
wire mesh and plastic. Don't forget the actuator rod at the front of the housings.
The flaps can be positioned open but the interior of the radiators
makes this almost impossible. This conversion doesn't make it any easier. The bottom of
the radiator housings are separate so you have to build up the faces of the radiators with
wire mesh and plastic. Don't forget the actuator rod at the front of the housings.
Cleaning up the wing/fuselage joint was done with super glue and accelerator where I could reach and Tamiya putty where it would be difficult. One place that I built particularly bad was by the oil cooler.
This created the first problem. I couldn't fill the area correctly as the cover for the wing bolts was in the way. Being rather adventurous I decided to remove them and fix the area. After that the area was good, but now I needed to cast the cover. I used Silly Putty to make a mold of the cover and cast the part using Alumilite resin. After that minor problem I checked my seams with Mr. Surfacer 500. Don't sand this off use the thinner or Isopropyl alcohol on a cotton swab and wipe it off. This blends the surfacer and doesn't remove surface detail. This technique works well when trying to fill wing roots and small surface imperfections. This also works with Tamiya putty.
I put the horizontal stabilizer on next. It fitted real well. I decided not to actuate them. Using the Mr. Surfacer to finish the seam as mentioned above made this part painless.
So now everything was put together and it was time to wash the model.
P a i n t i n g a n d D e c a l l i n g |
After drying overnight I pre-shaded the entire model with RLM 66. Pre-shading is just painting the panel lines with a dark color. You don't need to be neat or perfect because you next paint over the color - well most of it anyway.
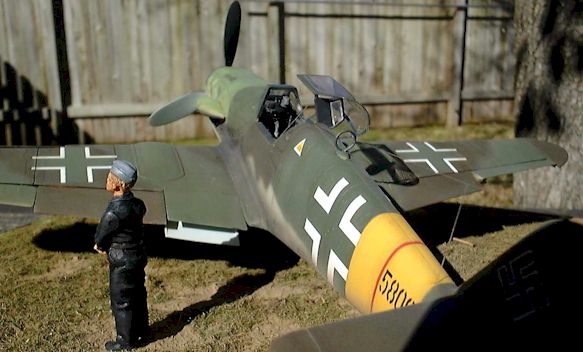
When the panel lines have been pre-shaded. paint the camouflage color from the center of the panel to the outside and lighten up the 66 to give the illusion of depth. I painted the Tamiya mixture of RLM 76 on the wings first - and don't forget the ETC rack under the fuselage. I then painted the RLM 84 (Tamiya JA Grey, XF-14) on the fuselage sides and this looked really weird. The beauty was starting to come alive. Masking the tail area followed the Dark Green 83. Spraying Polly-S RLM 81 over the 83 on the tail completed the overall painting. Pay particular attention to the area around the cross on the right side as the 81 merges with the cross. If your mix matches the KommanDeur color no problem. I opted not to take the chance and masked the area prior to painting. This allowed me to control the placement of the colors. A coat of Future made the model ready to decal.

I usually trim my decals as close to the edge as possible, but didn't this time. I was glad I did too. The KommanDeur decals fit like a glove with Mr. Mark Softener. I was particularly impressed by the fit of the red band around the fuselage. It fit with no overlap whatsoever. The decals fit great and were very opaque. Another nice touch was the decals on the landing gear. These markings have not been available before. Even when having to layer the decals they were thin enough so that when the Future was put over them they looked painted on.
Putting the other small details on prepares the aircraft for the flat coat. I prefer Polly-S flat. I weathered with the silver pen and pencil to simulate the well-used areas. After that I washed the model with burnt umber in the panel lines. A drybrush of white was used on the upper surfaces. Sealing this with another flat coat allowed me to paint the exhaust stains with dark tan and black thinned heavily. Then I tried Polly-S Dust but applied too much so I had to repaint some of the colors. At first I thought this was a bad time to ruin the finish but liked the results when I was done. I reasoned that this aircraft would have been well used so the belly received a heavy weathering.
I put the canopy on at this time. I liked the front canopy from the kit. Although thick it does look bullet proof. The Erla Haube canopy in the kit is great but it has an antenna mount on it. This aircraft has the antenna lead in aft of the canopy, so I used the Squadron canopy.
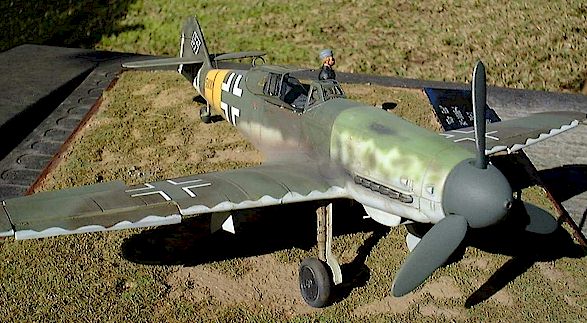
The finished model was positioned on a base with a New Hope Design figure. While the new Hasegawa Bf109Ks will probably be beautiful don't hesitate to build this gem from the past. Good model and interior, difficult conversion set, and great decals.
C o n c l u s i o n |
I highly recommend the decals. They should fit the new kits and the other 109s currently available. They are well researched, highly colorful, thin and opaque. I can't wait to try some more and have already started a G-6/AS, "Yellow 2" from the same sheet - but that will be another story…
KommanDeur Decals are available from leading hobby retailers of contact KommanDeur direct at KmanDeur@aol.com
| A d d i t i o n a l I m a g e s |
Click on the thumbnail images below to view the image full sized. Use the "Back" arrow on your browser to return to this page.

Floyd S. Werner, Jr.
IPMS #26266
 Article, Images and Model
 KommanDeur Decals
KmanDeur@aol.com
Back to HyperScale Main Page
Back to Features Page