![]()
Messerschmitt Bf 109K-4
by
Floyd S. Werner, Jr.
|
Messerschmitt
Bf 109K-4 |
Introduction |
When I first opened the box of the early 1/48 scale Hasegawa
Bf-109F and G kits I was ecstatic that the sprue was also marked for the K
version. I thought to myself that
it can’t take them forever to get them out. In the meantime Fujimi came out with their K - big
disappointment followed by the Hobbycraft release and another disappointment.
How hard can it be to get this right?
There are G-10 and K-4 airframes coming out of Russia and the rest of
eastern Europe, it can’t be that difficult to get the cowling shape and
dimensions of the airplane correct.
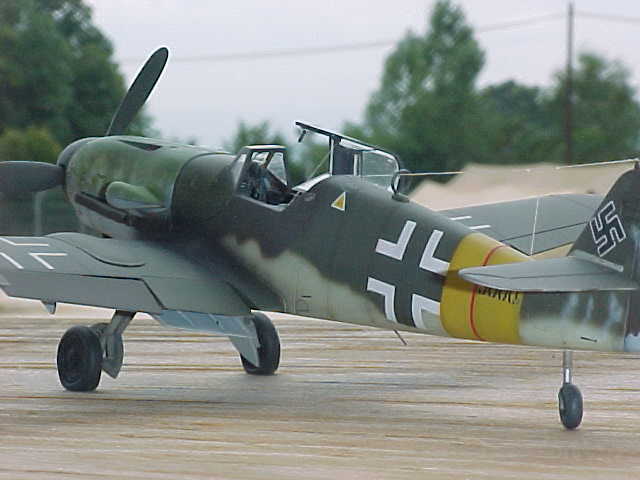
It looks like the answer is finally here. The newest release from Hasegawa is beautiful and priced
right. The look of this airplane in
the box is quite breathtaking. A
brand new fuselage is just the beginning.
It is typical Hasegawa quality. The fit of all the parts was tight. I used very little filler on the model and I think even that was more my fault than the kit’s engineering.
Aires Interior |
I used the Aries interior for this model. It is a very finely engineered resin casting that fit like a champ. I couldn’t wait for the kit to arrive so I started the interior before it arrived. It goes together real well with very little clean up. The Aires set has the typical Eduard style photo-etch instrument panel and rudder pedals.
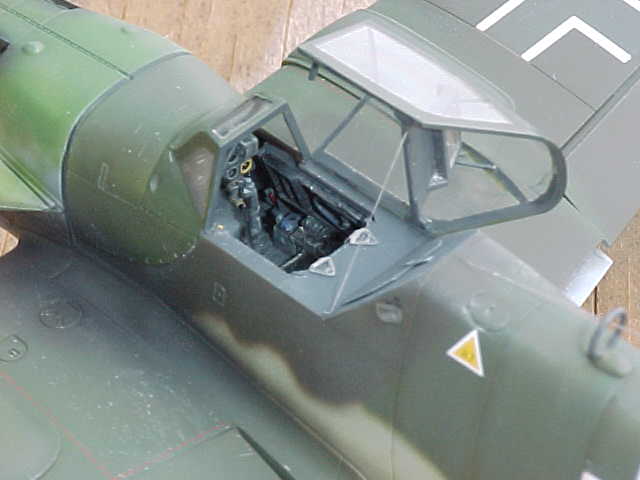
A tip for the instrument panel - use some backing plates made of styrene to support it. I used .080 channel from Evergreen. There is very little to add to acheive a convincing interior. The one thing Aires’ instructions don’t tell you is how to put it in the fuselage. This is easy though. You have to decide whether or not you want to cut the cockpit set or the kit cockpit sill. I opted for the cockpit set. It was pretty easy to just cut vertically the distance I needed and then horizontally to the cut. This has the benefit of providing a ledge to glue the cockpit set to. It also provides support to the cockpit sill aft of the cockpit. I assembled the left side of the cockpit and attached it to the floor. I painted the interior RLM 66 and dry-brushed with RLM 02. Highlights were picked out with silver pencil and pen. Bending the seatbelts is easily accomplished now. I paint my belts with Polly-S Dirty White and then I scrape the paint off the buckles. This works real well since the set is a silver color and not the brass sheet.
Hasegawa's Bf 109K-4 in 1/48 Scale |
By now the model arrived from the States. I have friends who took real good care of me.
The first thing that you have to do is decide whether you want the tail
wheel doors open or closed. I chose to make mine closed.
After talking to Frank Crenshaw on the Internet we hypotheised that the
tail wheel could be locked down and frequently was. This allowed the doors to be closed at all times.
This is the most frequent option and the tail wheels that were free to
retract would explain why some K models had the doors open. The retraction
mechanism is a very simple operation that the strut actuated when it retracted.
If your wheel doesn’t retract no need to have the extra drag on the
airframe by leaving the doors open. Drag
means loss of speed. So I removed
the doors and cleaned up the area. I
followed this up by using some .010 styrene wrapped around a toothpick to get
the basic shape. This was then
glued into place with superglue and rescribed.
The results were very nice.
Next step is to attach the upper cowling. It is asymmetrical as it should be and looks very much the part of a K. If you use care you will not need any filler anywhere on the model. I wasn’t that good and reguired just a tad of filler for the upper cowling. Word of caution - don’t worry about putting the supercharger intake on at this time. It gets in the way of the wings. Attach the horizontal stabilizers now. These are unique assemblies to the K. They were made of wood with leading edge guards. Hasegawa nicely represented this, not like the exaggerated ones from Fujimi. No filler was required here either.
The wings were easy enough to build.
They were spruced up with styrene and Eduard photo-etch.
Besides scribing a panel line on the wings they go together very easily.
Remember to open up the appropriate hole for the drop tank (if equipped),
FuG 25 antenna and wheel well positioning holes.
A reminder here: you must scribe the FuG 25 mount panel in the bottom of
the wing this is not mentioned in the instructions.
The wheel well bulges are nicely defined and adequately thin on the
edges. I suggest not installing
them until after the leading edge is primed and checked for flaws.
This allows you to sand the leading edge to your heart’s content
without rising damage to the bulge.
I assembled the wings and fuselage at this time.
The fit is near perfect and only the slightest of filler was required.
I put a shim of .005 styrene on the back of the wing assembly to help the
alignment of the wing to fuselage joint. After
checking the wing to fuselage joint, it is time to install the oil cooler.
Mine fits so well I still have not glued it on.
Once all of that is ready, go ahead and add the supercharger intake.
There is a noticeable weld line on the intake.
If you build it like the kit shows there is no weld.
While that is good normally, here it is bad.
Here is how I fix that. Use
.005 Red Rod (I don’t know the correct name of it but it is red styrene).
Cut it to the length of the supercharger prior to putting it on the
model. Then use a very small amount
of superglue to tack it down at the front and back.
Then attach it with some Testor’s Liquid Glue, next flow the liquid
glue over the rod. Do this about 4
times and the rod breaks down forming a beautiful weld line. You just let it dry and paint.
It works real well for tank weld lines and the Red Rod comes in different
sizes too.
I attached my landing gear and added the assorted details including the
brake lines. Here is another tip:
Go to a fly fishing store and get some fly fishing solder. It comes in sizes from .010 to .035. It comes in rolls that are about $2.00 each and they are more
than enough to do hundreds of models. It
is very malleable and glues real well with superglue.
Some True Detail wheels were added because the kit wheels have a sink
mark on one of the hubs that would be very difficult to fix properly.
The propeller spinner has been the center of many debates about being
too bulbous and I agree. Medallion
has a replacement that looks correct to me, but on the bigger nose of the K the
spinner doesn’t look too bad. The
other thing that Frank and I discussed was the width of the prop blades.
He found out that they were 2/50th” too narrow at the center.
While I know that is nit picking on our part, it was just something we
noticed. Can you notice it? Probably not. Should
you care? Probably not.
It didn’t matter to me but a simple solution is to use those from the
over priced Fujimi kits that you bought. You’ll
have to get some use out of them because you won’t build them now that the
Hasegawas are out.
I have learned a lot of things on this model. I knew there were different types of superglues available but thought to myself, “why bother?”. Well now I know. The super thin stuff is great for filling minor seams and attaching pieces but be careful the stuff will flow everywhere if you aren’t careful. The super thick stuff is great for sinkholes and filling panel lines. For attaching normal things I prefer the original Krazy Glue. For attaching landing gear I like the regular Testor’s tube glue so that I have lots of working time. Of course, for canopies I like Elmer’s white glue, but I do attach the windows with the original Krazy Glues first and then fill the gaps with the white glue. As long as you are careful and only using a dab of the super glue it works just fine. It must have a way to vent as it sets. The fumes from the reaction will fog canopies if you are not careful.
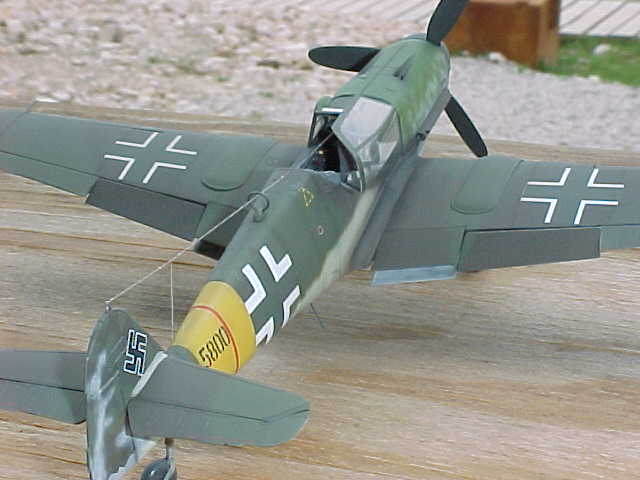
Painting and Finishing |
Speaking of canopies, you will notice that I did not mention putting the canopy on before now. Well there is a good reason for that: it fits like a glove and doesn’t require glue. I left it off until after the decaling was done. I also used EZ Masks. Wow! What a find these things are. If you have never used them, they are great. The vinyl masks are pre-cut for a certain model. I know this for a fact because I tried to put a Monogram canopy mask only to discover that the two canopies are different. Once getting the right set, they laid down exceptionally well. Be careful and take the time to do it right. The other good thing about the EZ Mask is that there is plenty left over to aid in other masking applications like on the tail. Don’t throw this stuff away until it is all gone. The window masks are nice, but the entire sheet is usable. It can only be a short time before someone releases the material as a masking material for camouflage. With the proliferation of masking products out there I would like to see someone do the typical tail camo pattern on G-10 and K-4s. There was only one glitch with the set and it was easily fixed. One of the panels for the front windscreen was a little too long, but a quick cut with an X-acto and it was off to the paint booth.
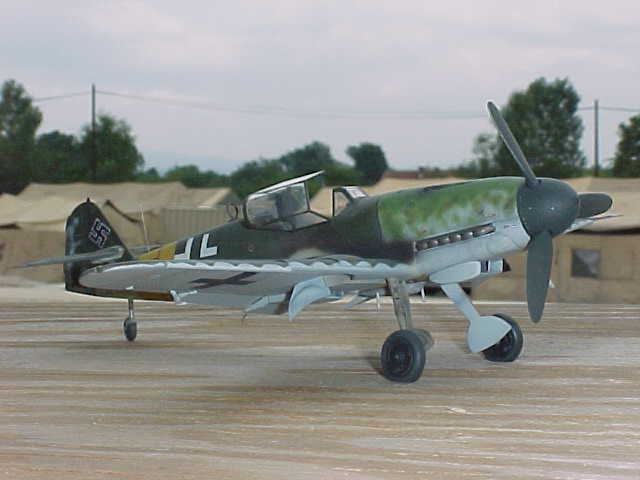
You’ve probably asked yourself, “didn’t Floyd build this paint job
before?” Well I built that kit
for a friend and I liked it so much that I had to have one myself.
I decided to use Polly-S colors for the entire aircraft.
The Polly-S matched the wing crosses that Kommandeur supplies.
This is exactly what E Brown Ryle had in mind by doing it.
He was able to show me the exact color he was looking for in RLM 83 by
printing the decal with the crosses filled in.
Check my article on the Monogram 109K that I did for the masking
procedures. I used the Kommandeur
Decals just like last time, but for some reason this time they refused to work
with my setting solution. Multiple
applications finally got them to sit down though.
I think it is a problem with the humidity here in Bosnia because I’ve
had many products not work as well here.
The decals fit and look great, as expected from Kommandeur.
Just a quick finish to the canopy and some slight weathering as per the Kommandeur instructions and the model is finished.
Conclusion |
What can I say about this kit? I’ve already bought five more for future projects. It builds up rapidly. Mine took longer to paint than to build. The total time was between 15-20 hours from arrival to finish. Was it fun? You bet and I’ve already made plans for future projects, including a super detailed engine compartment - something I swore I wouldn’t do again.
The Aries interior, EZ Masks and the Kommandeur decals come highly
recommended.
Buy this kit and build it. You will have fun doing it and won’t regret a single modeling mintue.
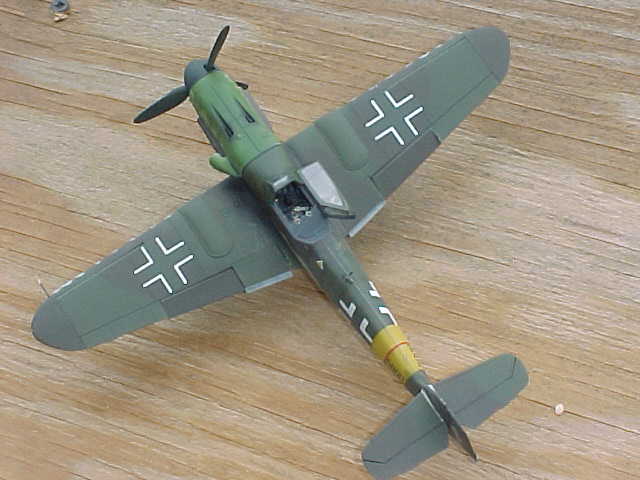
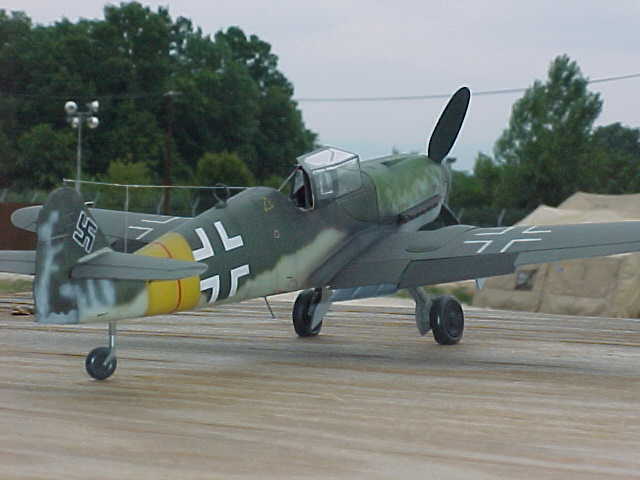
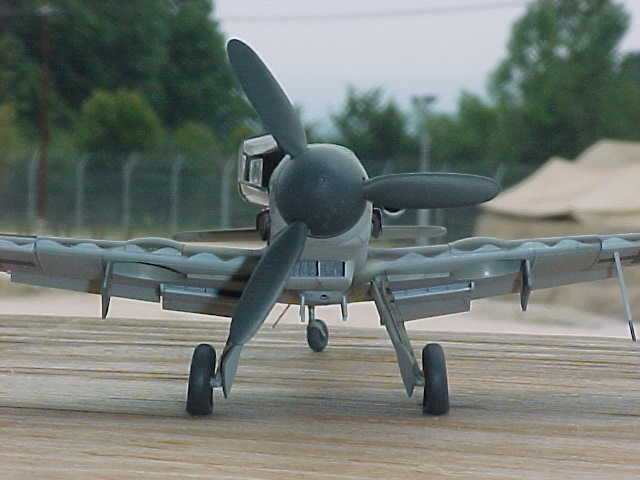
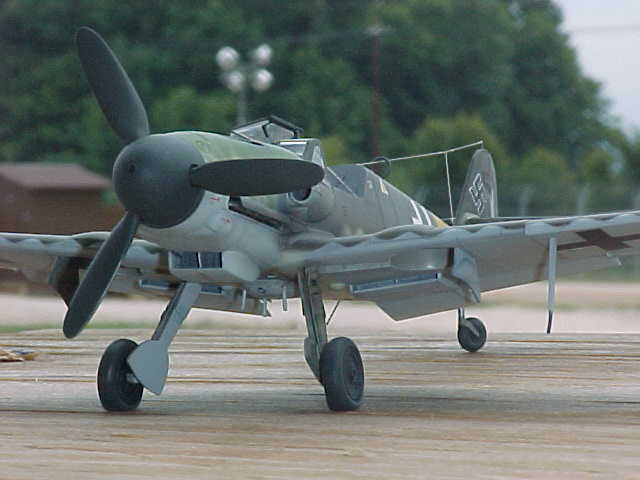
Additional Images |
Click on the thumbnail images below to view the image full sized. Use the "Back" arrow on your browser to return to this page.

Floyd S. Werner, Jr.
IPMS #26266
KommanDeur Decals
KmanDeur@aol.com
Back to HyperScale Main Page
Back to Features Page