Home
| What's New |
Features |
Gallery |
Reviews |
Reference |
Forum |
Search
Home
| What's New |
Features |
Gallery |
Reviews |
Reference |
Forum |
Search
|
|
|
Douglas
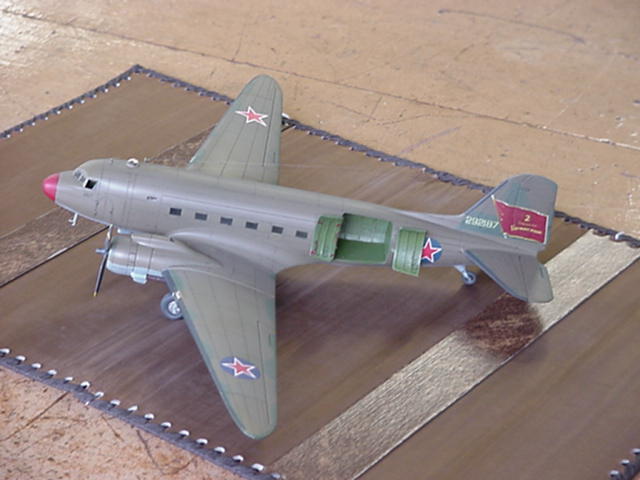
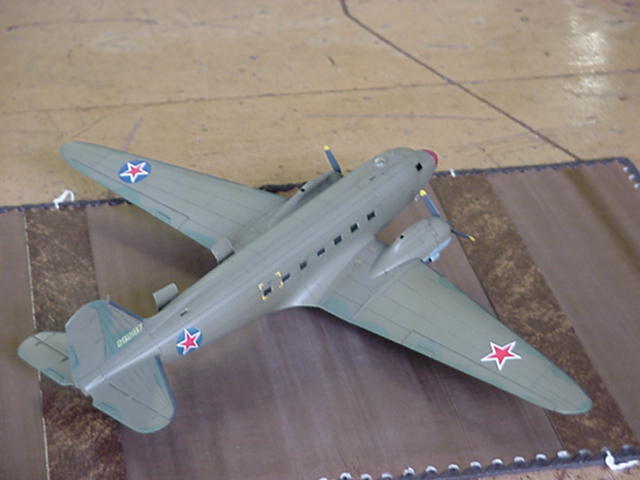
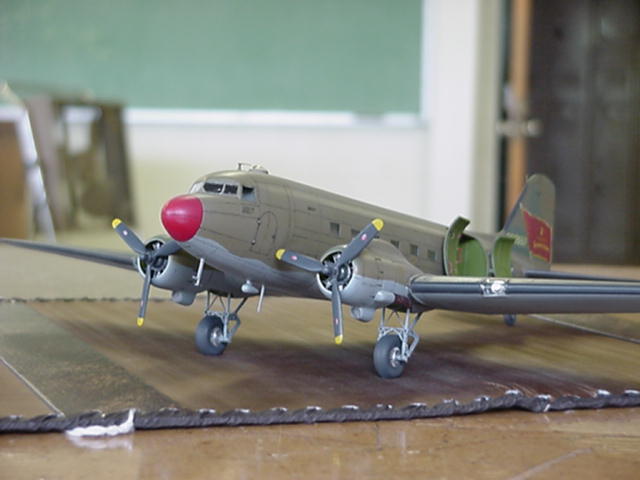
C-47 by Ilya Grinberg
During WWII, the Soviet Union received 707 C-47s as a part of the Lend-Lease program. They were widely used alongside their Soviet license-built cousins Li-2 for cargo hauling, although never used for bombing missions. Unlike its Soviet counterpart, C-47 had powerful and reliable engines, better navigational and radio equipment, and better performance and maintainability. The two-part cargo door was more convenient than the single upward opening piece of the Li-2.
All these factors prompted the Soviets to use the American version for VIP transportation and other special assignments, such as parachuting agents behind the front line, long-range reconnaissance missions, and even antisubmarine operations among others. Stalin took a ride on C-47 to Teheran for the Big Three meeting in 1943, even though a specially equipped Li-2 was prepared for this occasion.
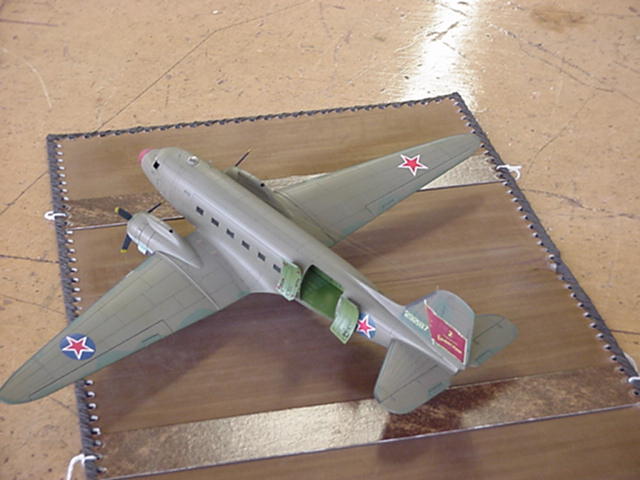
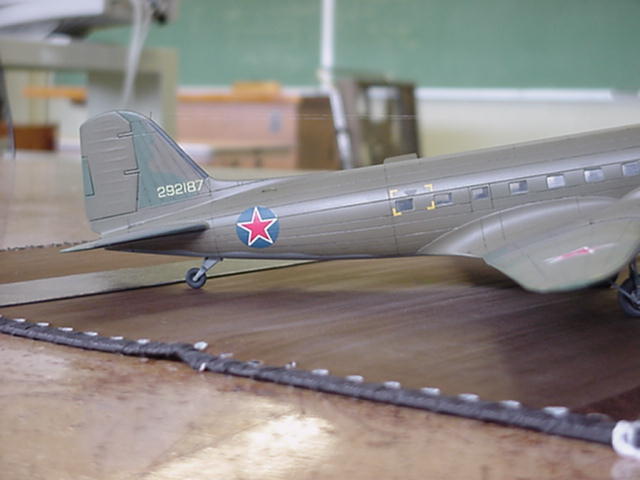
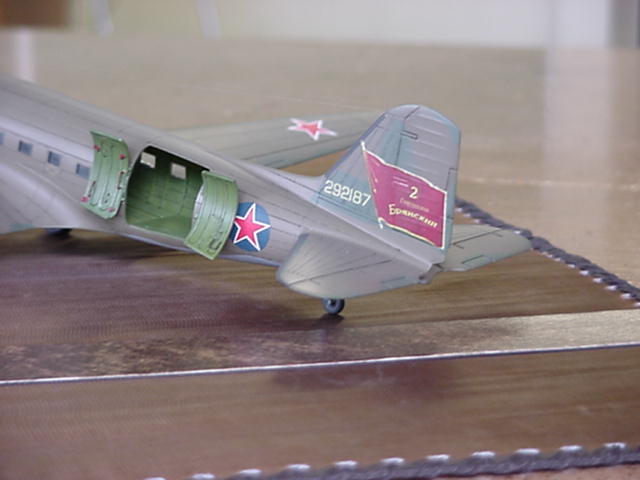
Two kits of the famous plane are most popular in 72nd scale: Esci and Italeri. I decided to use Italeri kit because it is generally more accurate. My kit came in dark green plastic. The plastic was pleasant to work with, which is typical to Italeri products. I also bought Revell's offering to make a model to my friend, who flew C-47 during the war as a navigator. To my surprise it contained the same plastic but a better decal sheet. From the beginning my choice of the prototype was clear: I decided to model the staff plane of the 2nd Guards Aviation Corps of the Long Range Aviation, Soviet Air Force, as it was shown in the article published by the excellent Ukrainian magazine Aviatsiya I Vremya (Aviation and Time) (www.angelfire.com/ky/avntime). The unit was equipped with IL-4 bombers but it was the usual practice to have one or two C-47s in a unit for staff or cargo duties. The inscription on the flag says: "2nd Guards Bryanskiy" Bryanskiy was a title assigned to the unit in honor of their exceptional performance in liberation of the city of Bryansk.
I decided to superdetail my model with all available aftermarket details: Eduard photoetch set, True Details resin wheels, and Moskit exhaust pipes. All these products are excellent and highly recommended.
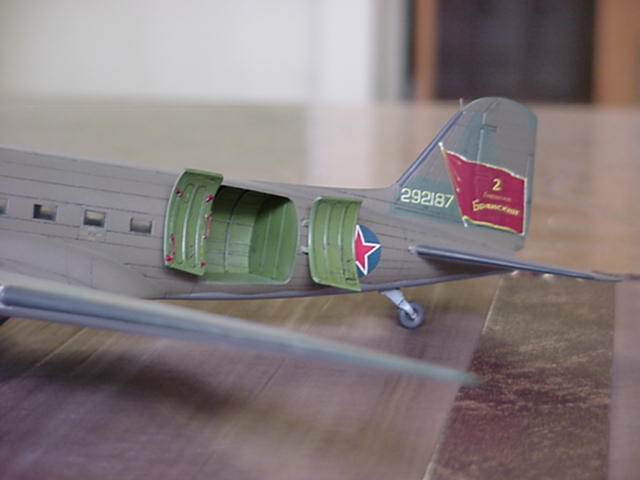
Fuselage I opted for the open cargo door, therefore the ribbing of the interior had to be added. I used Evergreen plastic rods of corresponding sizes to do the job. Photoetched parts from the Eduard set, such as the instrument panel, throttle control unit, overhead and side panels, and seat belts comprise the cockpit interior. I did not use the kit's cockpit side windows. Instead I installed peaces of acetate film to make these windows in opened position. Inside of the fuselage was painted Interior Green, washed and dry brushed.. The floor and the bulkheads were added and the fuselage halves were glued together. There were no problems with the fit. I drilled a hole for the astrodome to be place over it later. At this moment I realized that I missed three small windows. So they were cut in the fuselage in appropriate places.
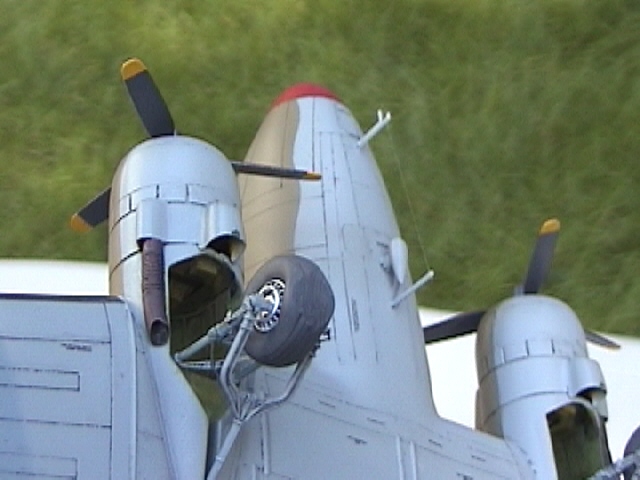
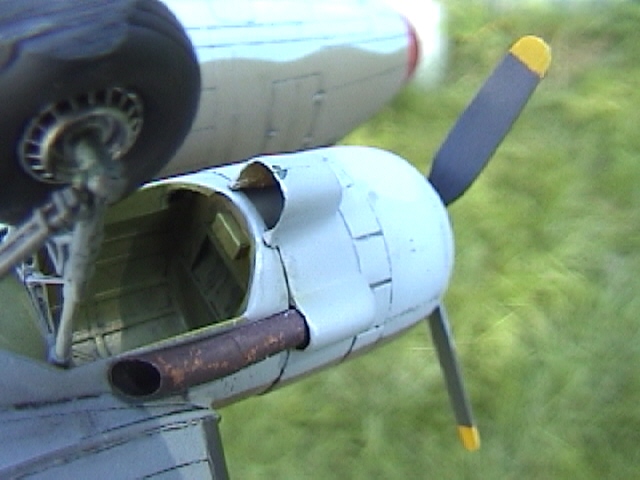
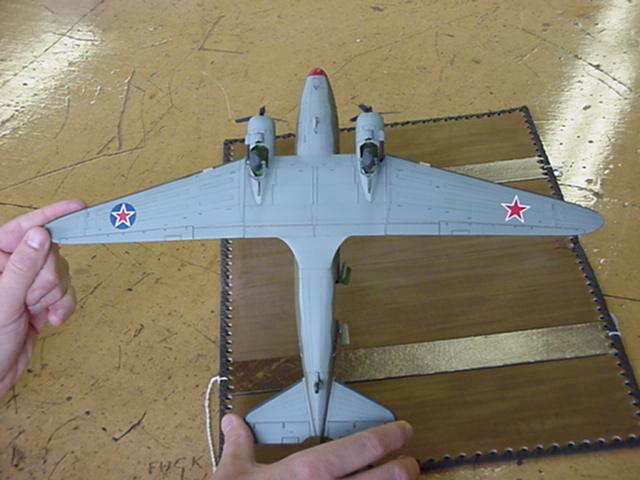
Wings and Centerplane I used Eduard PE parts to make very convincing wheel wells. This assembly is well documented in the Eduard's instruction sheet and the fit was near perfect! The lower centerplane was next glued to the upper wings and the lower wings were added. The entire wing assembly was attached to the fuselage. A rather wide gap between the centerplane and the fuselage was filled with a plastic rod, filler, and sealed with super glue. Initially I planned to use aftermarket resin engines for my model but the kit's offering provided an adequate result after painting, washing, and drybrushing. The engines were installed and the cowlings were attached to the nacelles. Oil filters from the kit were substituted by their photoetched counterparts. The horizontal stabilizer was added and the seams treated with Zap-a Gap.
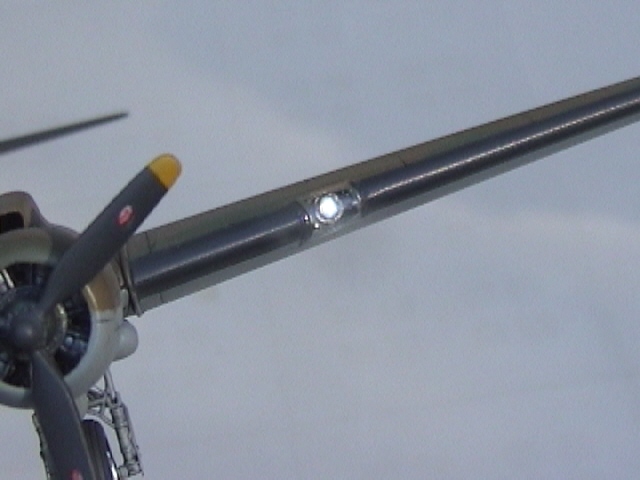
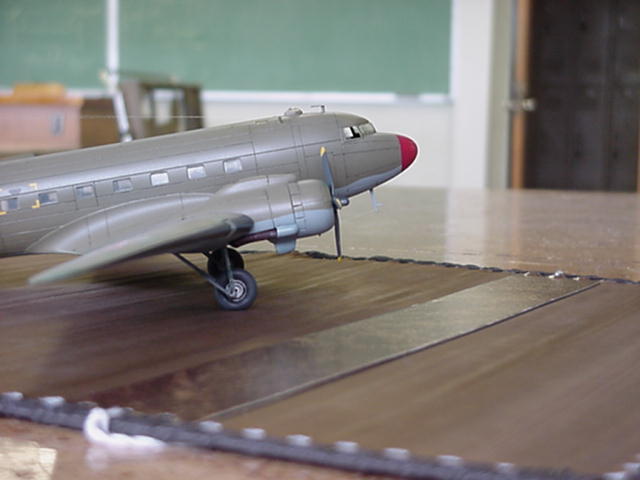
The air filters were added to the engine nacelles. I robbed my Esci kit for them since these details are crispier and more convincing there. The only aspect that I did not like in the kit were the landing lights. I decided to make my own.
I attached 3mm rein stones to replicate lenses. The glass cover was made from the thin sheet of clear plastic, which was cut to the shape with the help of a template and than bended over the hot lamp. The lights were masked with bare metal foil, which was later cut to shape.
I masked all windows and painted the model with Neutral Gray. Than I masked the lower part and painted the upper and side surfaces with faded Olive Drab. I used Aeromaster paints from their acrylic Warbirds line. I have to report that I was extremely satisfied with them. The reference photograph indicated medium green splotches over the OD livery. I posted a question on the HyperScale forum regarding the form and position of the splotches on upper surfaces. Curtis Knowles provided me with the technical order illustrating required operation. Thanks, Curt!
I masked the model again and sprayed the splotches with Aeromaster Medium Green. Another masking and deicing boots were painted black. According to my references the nose cone of the plane I opted for was red. Painting this part of the model greatly enhanced its appearance. The model received several coats of Future after which the panel lines were oil-washed. Another coat of Future was applied as the base for decals and to protect nice panel lines.
My friend Erik Pilavskii of the VVS modeling site (www.kithobbyist.com/VVS/) kindly custom-made serial numbers and the flag on his wonderful ALPS printer. National insignia were found in my spare box. I used extensive stenciling from the Revell decal sheet. The model received a flat coat. Small additional windows were treated with Testors window maker.
Very nice photoetched handles were added to the cargo doors and the doors were placed in the open position. The props were painted yellow, and, after masking the tips, in black. The landing gear were installed and photoetched parts by Eduard again saved the day by offering fine detailing in this area. I used the tail wheel assembly from the Esci kit, again for its more convincing appearance.
Moskit fantastic exhaust pipes were added, which immediately gave an extremely realistic appearance to the model. Various antennas and the astrodome were added to complete the project.
The result is very pleasing to me. The model is a highly detailed replica of an important aircraft in Russian service and represents a great addition to my collection of aircraft with Red Stars.
Click the thumbnails below to view
the images full-sized.
Model, Text and Images Copyright © 2000 by Ilya
Grinberg
|