Home
| What's New |
Features |
Gallery |
Reviews |
Reference |
Forum |
Search
Home
| What's New |
Features |
Gallery |
Reviews |
Reference |
Forum |
Search
|
|
|
Douglas DC-6B by Danny Luey
Based on the DC-4 (C-54) design, the DC-6 was the first Douglas aircraft to be pressurized in response to the demands of American Airlines and other airlines. Cabin pressure was maintained at 5,000 feet while flying at 20,000 feet. With greater power than the “A” version, the “B” version’s passenger capacity increased from 58 to 89 and top speed from 350 mph to 380 mph. The DC-6B was a great money maker for airlines with its economical operation and durability. Its maximum payload range of over 3,100 miles made the DC-6B an intercontinental carrier.
The kit has three sprues with 63 injection molded plastic parts in light gray. The sprues are very bulky but the parts are well molded; be careful removing tiny parts like the antennas. The recessed engraving for control surfaces on the wings are deeper than the engraving for the rudder, tail wings, and passenger/cargo doors. A clear “windscreen” part is used for the cockpit area. Two decal options are provided: PanAm and Scandanavian Airways System (SAS).
Construction
is straight forward but modeling experience is necessary to achieve a reasonable
result. The kit instructions are
pictorial with minimal text. Tweezers
are necessary for the small parts. Some
deviations from the instructions include: ·
Passenger windows are shown as black squares on the decals so there are
no fuselage openings. To make the
cockpit windows look like the decals, I painted the inside of the clear
part with flat black. There is
little detail inside the cockpit and can’t be seen through the tiny windows. ·
The instructions call for a half-ounce weight in the nose.
Two half-once fishing weights were used just in case. ·
Wings and tailplanes were assembled and painted, and not attached to the
fuselage was painted. ·
The locations of optional antennas are very vaguely shown in
instructions. ·
Propellers are rather crudely shaped. · Assemble landing gear and propellers after final painting and decaling.
The fuselage assembly requires sanding to smooth out the seam between fuselage halves. The clear windscreen will not fit perfectly atop the fuselage, filler will ease the transition. The wing assembly will not fit perfectly into the fusealge assembly. There is a 1/16 inch gap atop the wing and fuselage requiring filler. I couldn’t cover the seam line below the fuselage even with sanding and filler.
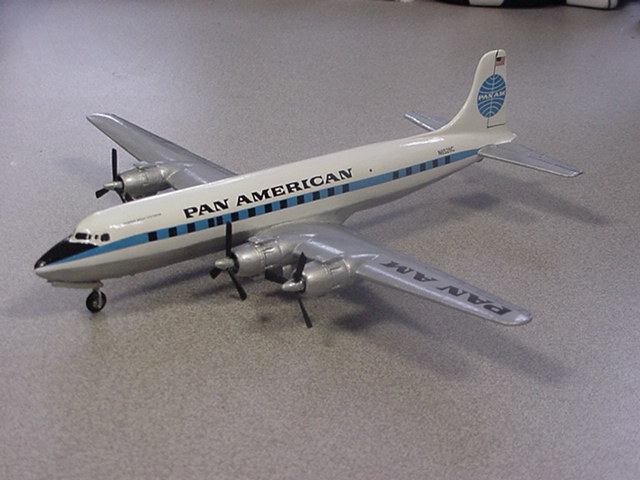
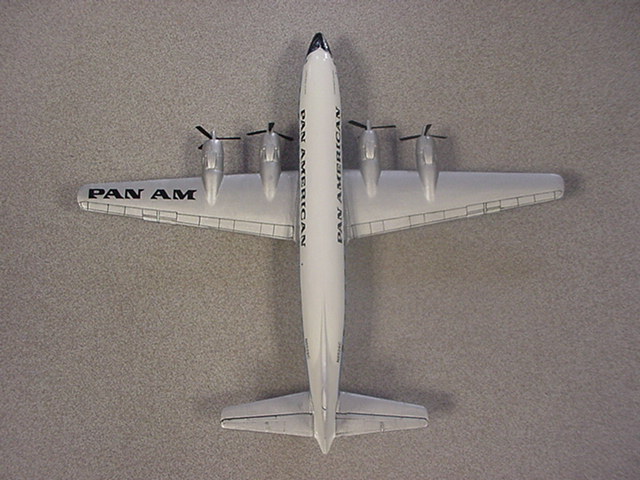
There are no panel lines on the fuselage to help locate the demarcation between the top white and bottom natural metal. To make the demarcation, place a pencil on a paper pad tall enough to mark the correct height when the assembled fuselage is on the table. Keep the pencil fixed and move the airplane. Then mask along the pencil line. Gunze silver was brush painted on the bottom of the fuselage, wings, and tailplanes. The light gray panels on the wings for the PanAm were not painted: its very difficult to mask parallel panels on the curved wings and the sample model on the box did not show them. Many, many coats of Pactra flat white were painted to the top side of the fuselage. The faintly engraved fuselage doors and rudder are mostly lost under the white paint.
Multiple
coats of floor polish provide a glossy finish for the decals.
The instructions call for black propellers but the sample model on the
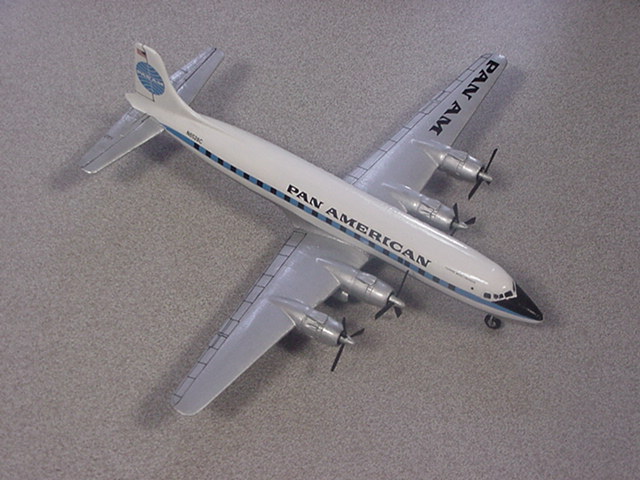
box were silver. Two complete sets of decals are provided: PanAm and Scandanavian Airways System (SAS). The decals are very thin and go on well. The fuselage decals are long and thin; use a wet toothpick to uncurl the decals as necessary. Multiple coats of floor polish provide a glossy overcoat over the decals. Note that the instructions show the PanAm logo on top of both wings; it makes more sense to show one on upper right and lower left as shown/implied on sample model on the box.
It looks like a DC-6B. At 1/144 scale, that is sufficient for me and the friend who asked me to build the kit for him. A model builder with sharp eyes for details may find the propellers crude enough to replace them.
Box
art and kit instructions. Models, Text, Photography and Composition Copyright © 2000 by
Danny Luey
|