Home
| What's New |
Features |
Gallery |
Reviews |
Reference |
Forum |
Search
Home
| What's New |
Features |
Gallery |
Reviews |
Reference |
Forum |
Search
|
|
|
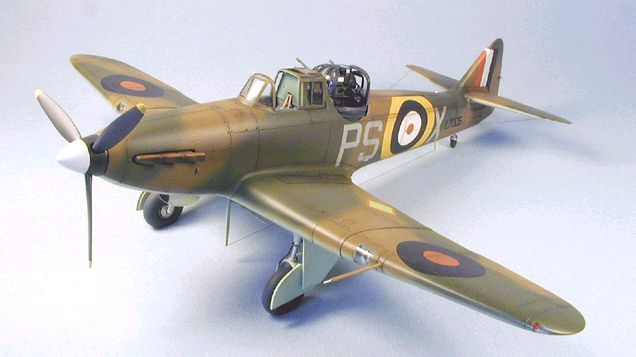
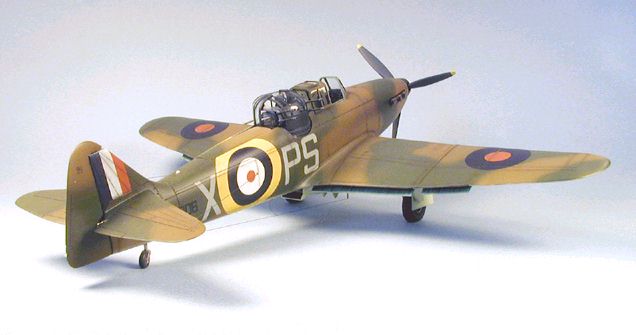
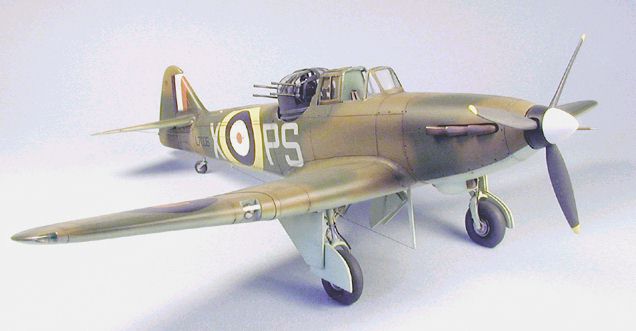
Boulton Paul Defiant by John C. Valo
'And now for something completely different!' The Boulton Paul Defiant was one of Classic Airframes' earliest efforts, which unfortunately suffered from some accuracy and fit problems. However, the Defiant has always been one of my favorite aircraft and a 'must-have' for my collection, so I had no choice but to take on the challenge.
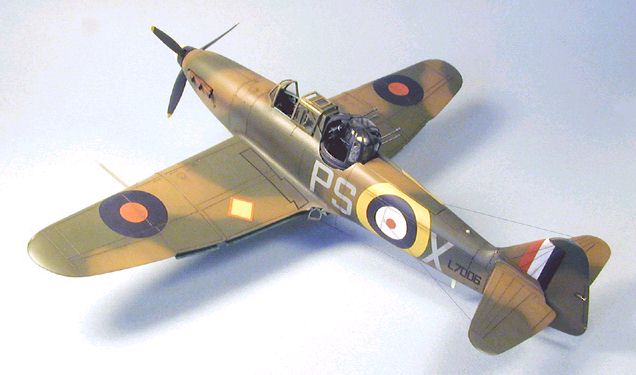
Major structural changes involved correcting the dihedral break on the wing (too shallow on the kit), narrowing the rear fuselage and nose contours, and scratchbuilding the turret, turret fairings, landing gear, wheel wells and dropped flaps. Minor outline problems that were corrected included revising the sweep of the stabilizers, adding the extended ailerons and reshaping the spinner.
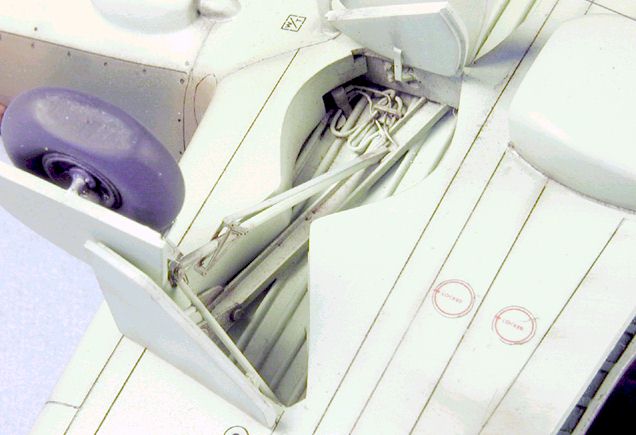
Luckily, CA kits are molded in a very workable plastic which takes well to reshaping and rescribing. I usually don't get too hung up on making corrections, but this model provided me with very valuable experience in major surgery. I worked from numerous plans (none of which agreed, of course!), and corrected things only to the extent that my patience and enthusiasm would allow. By the end, I had adopted the philosophy of 'If it looks like a Defiant, then it's a Defiant!' The Defiant's wings have a distinct dihedral break just outboard of the landing gear, which was not reproduced in the kit. Both wings were sawn off at the break, and placed at the proper angle. Fortunately, the actual aircraft had a very distinct reinforcement strip at the break, so the joint didn't have to be perfectly smooth, as it would be covered anyway. The wheel wells were simply boxed in with sheet styrene, with various little details added as necessary. I used the yokes from the kit landing gear struts, and made new struts from aluminum tubing.
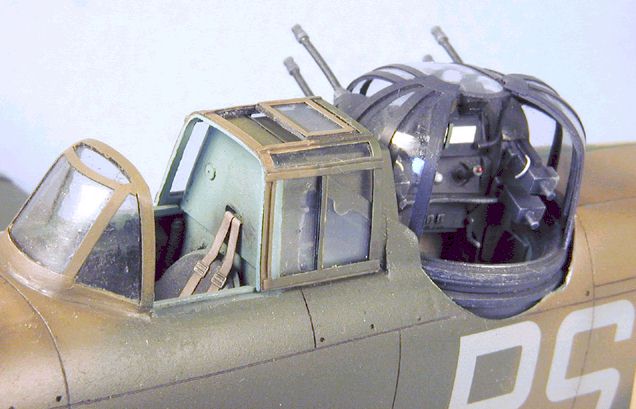
Dropping the simple split flaps was an easy task. The characteristic flared ailerons were reproduced by sandwiching pieces of .010 styrene between the wing halves during assembly, then trimming them to shape. Wing tip lights were replaced with clear plastic, and scratchbuilt landing lights were added to the leading edges of the wings. I completely removed the molded-on turret fairings, and opened up the aft fairing slot in the fuselage. At this point in time I also narrowed the rear fuselage and removed the rudder to be repositioned later. I used the kit turret ring and machine guns, but the rest of the turret was scratchbuilt. I used the turret clear part to mold an epoxy putty master, then sanded off all the framing. Using this new master, I vacuformed two new clear parts, one of which was cut apart to make the doors, the other being the main turret clear part. Electrical tape was used to create the framework of the turret. As the kit windscreen looked a little suspect to me, I carved a new plug for the windscreen and pilot's canopy, then vacuformed new parts. Once again, the frames were made from electrical tape, and I opened up the little sliding hatch on top of the pilot's canopy. A new forward turret fairing was constructed of sheet styrene. The balance of assembly was relatively straightforward, aside from the minor corrections alluded to above.
A well-known photograph shows 264 Squadron's Defiants all lined up neatly, and toward the back of the row, there is an aircraft with a huge roundel on the side, Number L7006, PS€X. Apparently, this anomaly can be chalked up to variations in the change from the type 'A' roundel to the type 'A1' (which added the yellow outer ring). Instead of repainting the new roundel to the same size as the old style, the squadron painter simply added the yellow ring, which actually overlapped the aft turret fairing. Too weird to resist!
I used Polly-Scale paints for the Dark Earth/Dark Green/Sky camouflage, and painted the yellow fuselage roundel before applying decals. I used various AeroMaster decals for the roundels and fuselage codes. The serials were printed on decal paper from my laser printer. I only used the stencils from the kit decals.
Was it worth it? Unequivocally, yes. There are only a few select aircraft that I would invest this much time and effort into, and the Defiant is one.
One could certainly build a reasonable model straight from the box, or even add a few corrections and details without going completely nuts. And once again, if it looks like a Defiant, then it's a Defiant! At least nobody has confused it with a Spitfire yet.
Click the thumbnails to view the
images full-size
Model, Images and
Text Copyright
© 2000 by John C. Valo Back to HyperScale Main Page Back to Features Index |