Home
| What's New |
Features |
Gallery |
Reviews |
Reference |
Forum |
Search
Home
| What's New |
Features |
Gallery |
Reviews |
Reference |
Forum |
Search
|
|
|
Saab J35F Draken by Lukasz Kedzierski
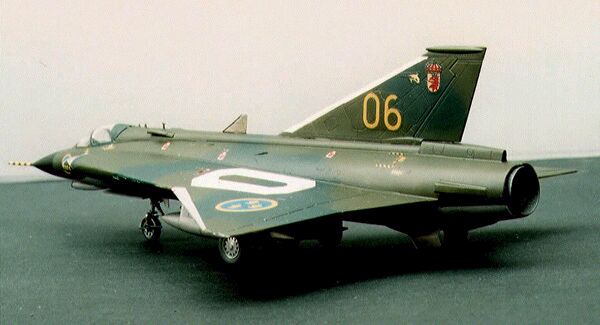
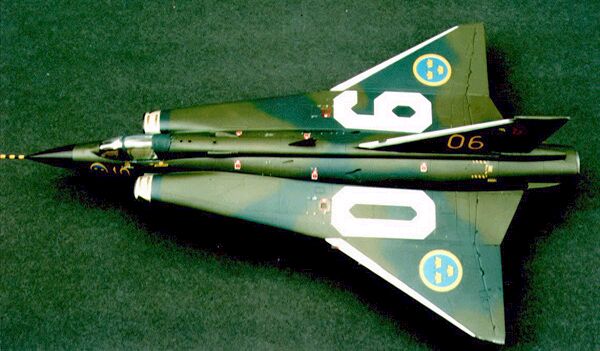
I have been a quiet admirer of Swedish aircrafts for quite some time, but I have never made a model of any flying machine wearing Swedish markings. Until now. Finally, there is a decent model kit of Saab J35 Draken!! This aircraft can only be loved by modellers. Why? Not only it looks beautiful, but it also offers variety of colour schemes and some fantastic markings (check out those large numbers on the wings!!). When Hasegawa released their Draken I went to a hobby shop to buy one, but the price put me a bit off. Definitely it’s too expensive for what you getting in the box. However, some time later I got it for a ridiculous price during some kind of a sale.
This was the F version (catalogue number BP1). What you get in a box is one big sprue plus 5 small ones and clear two part canopy. All parts are moulded in a light grey plastic with very fine engraved panel lines (as we would expect from Hasegawa) and transparent parts are crystal clear. The surface and landing gear detail is very good, but cockpit is rather basic.
One major flaw of this kit is a complete lack of any underwing stores (there are only two fuel tanks). There are some pylons, but two of them are not used on the F version. This does not seem to be a big problem, since Rb24J (Sidewinder) missiles can be obtained from everyone’s spare box, but I think that Hasegawa’s policy of not including underwing stores and recommending purchasing an additional set is wrong. For the price we have to pay everything should be included in a single kit (just my opinion on the subject).
I decided to make my Draken out-of-box although there are some good publications about the type (eg. Polish monograph PKL 30), which allow for some scratchbuilding and extra detailing. Construction commenced with the cockpit, as tradition requires. This consists of a cockpit tube, ejection seat, control stick and instrument panel. Side consoles and instrument panel are provided as decals. The completed cockpit fits without any problems into a lower fuselage half, which is split horizontally. A few holes had to be opened before joining the fuselage halves. The breakdown of parts on the upper half of fuselage suggests possibility of two-seater version being released later, but it has not been done yet (and is probably it is just my wishful thinking). The next step was to glue the wings, vertical fin, engine nozzle, nose cone and air intakes (I inserted backplates cut from styrene sheet into intakes, otherwise the unpainted interior of the fuselage was visible). The fit of all there parts was excellent and I only used a bit of a gap filling superglue on the fuselage-wing joint.
After that there were only few parts left - infrared sensor under the nose section (only for the F-2 variant, not for F-1), little emergency generator, auxiliary tail wheel and various antennae. Landing gear and fuel tanks were left aside for assembly after painting and canopy was masked off and glued in place. Again the fit was excellent.
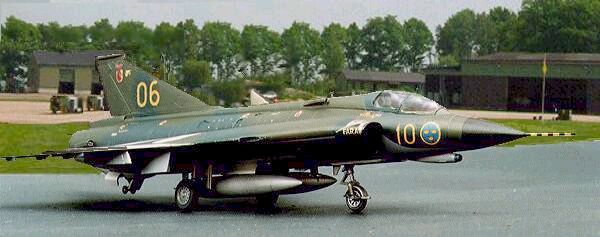
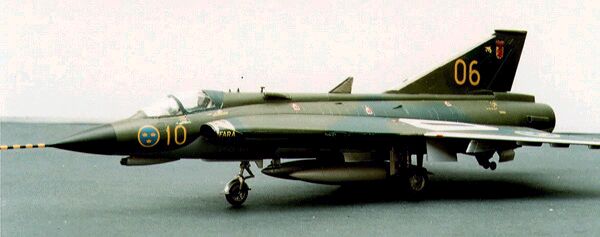
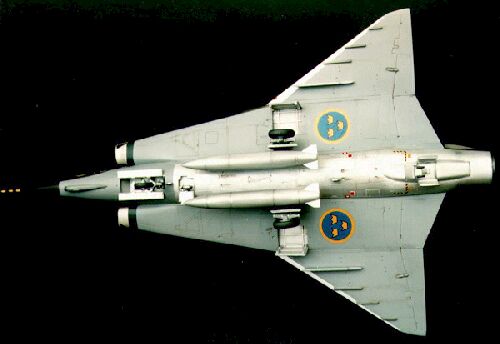
The decal sheet offers markings for two Swedish aircrafts: J-35F-2 of Jagdflygdivision 3 of Flygflottilj 10 from Angelholm and J-35F-1 of Jagdflygdivision 2 of Flygflottilj 16 from Uppsala (instruction incorrectly identifies this machine as belonging to Flygflottilj 10, but it wears number 16 on the nose which is a Flygflottilj designation).
Both aircraft sport a camouflage consisting of dark blue-grey (FS35042) and olive green (FS24086) on upper surfaces and blue-grey (FS36152) on the undersurfaces. However, a substantial part of the fuselage remains in natural metal. I used Humbrol 155 (olive drab) and Model Master 1718 (dark sea blue) as well as slightly darkened Tamiya neutral grey. These seemed to be a perfect match, when compared with colour photos of the real aircraft. The central part of the fuselage, leading edges of wings and vertical fin as well as fuel tanks were painted Humbrol polished aluminium, air intakes were painted steel and nose cone black. Discrete weathering was achieved using a wash of raw umber and raw sienna plus some smoke stains. The kit decal sheet contains all the markings and numbers for each aircraft and some stencilling. All images were in register with very good colour density, but they were rather thick. I used Aeromaster Set and Sol solutions to soften them a bit and there was no adverse reaction.
Finally I could put my first aircraft with Swedish crowns into the display cabinet. Now it is time for Viggen and that little Gripen (which unfortunately has low vis markings!!). And another Draken? Yes, in Austrian markings.
R. Jaxa-Malachowski, E.F. Rybak "Draken" PKL 30, Altair 1996, Poland Article, Images and Model Copyright © 1999 by Lukasz Kedzierski
|