Home
| What's New |
Features |
Gallery |
Reviews |
Reference |
Forum |
Search
Home
| What's New |
Features |
Gallery |
Reviews |
Reference |
Forum |
Search
|
|
|
E-2C Hawkeye by David W. Aungst
Do you ever like to fool around with your hobby and really test just how far you can take a modeling project? This is one such endeavor of mine. I have the 1/350th scale USS Enterprise from Tamiya squirreled away in the attic (next to the USS New Jersey and USS Missouri). I wanted to test my ability to make a super-detailed model out of the kit and see just how far I could take the detailing. I decided to build one of the carrier's aircraft, the E-2C Hawkeye, as my proof-of-concept test for seeing how far the detailing could be taken.
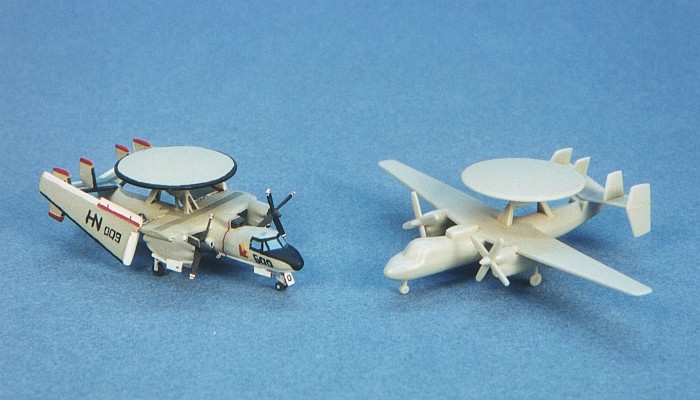
The E-2C Hawkeye is provided in Aircraft Set#2 from Tamiya. This set provides all the aircraft that were originally missed when Tamiya first released the USS Enterprise model. Using the aircraft from this set, you can now create a complete carrier air wing. I chose the Hawkeye as the test case for my personal challenge because it provided several unique attributes (like propellers) that would give me a good idea of what could be done in scale. I made the following modifications to the stock model kit.
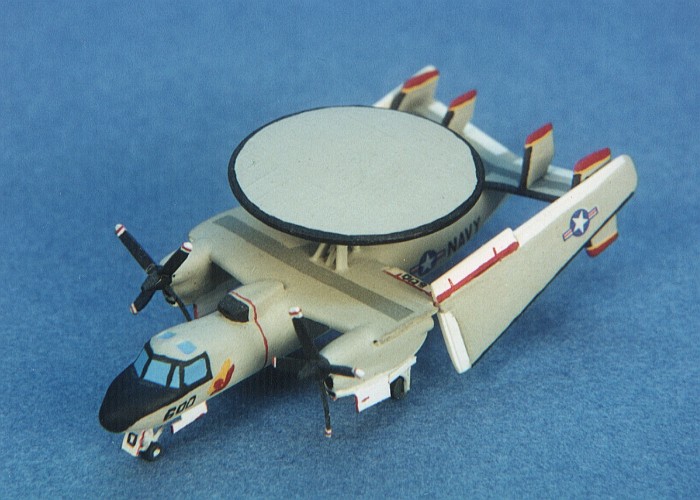
Bear in mind that the completed model is a mere two inches in length. The pictures in this posting are done with a macro lens set on my camera. Depending on the screen resloution of your PC, the model pictures show the model at about three times the actual size of the model.
The paints I used for the project are all Testors Model Master enamels. They were applied with a paint brush. Using the air brush seemed like overkill on such a small model. Although, a lesson was learned that an airbrush with appropriate masking would have provided a nicer finish. The aircraft is finished in the standard L.Gull Gray (F.S.36440) over a white bottom. All the walkways are painted in D.Gull Gray (F.S.36231). When I built this model, Gold Medal had not yet released their 1/350th scale decals for the carrier air wing aircraft. I also had not progresed far enough in my skills to be printing my own decals, yet. Tamiya only provided the national insignia and NAVY writing on the fuselage, so I hand painted most all of the markings. The aircraft is from VAW-117 which was embarked on the USS Enterprise during the middle 1980s. I did no weathering to the model, this time. The test did not require it.
I actually enjoyed testing myself on this tiny model. With a carrier air wing strength of about 85 aircraft, I only have about 84 more tests to go. When I get to doing the rest of the air wing, some lessons I learned will be applied to them.
I guess that somewhere along the way I should also build the ship model, too...
Click the thumbnails below to
view images full-sized.
Models, Description and Images Copyright ©
2000 by David Aungst
| |||||||||||||||||||||||||