The 1/48th scale F-18 from Hasegawa was one of
those models that I just could not wait to get my hands on.
When it was finally released and retailed for
nearly $80, I pitched a fit over the price but eventually paid the bill to acquire a copy
of the kit for myself. Anyone that bad-mouths this kit for any reason other than its
whopping price did not give the kit the time it deserved.
I built the kit nearly out-of-the-box. The only changes I made to the kit
were to substitute a Verlinden resin ejection seat and add weapons from the Hasegawa
weapons sets. Even building out-of-the-box, note my construction time at the bottom of
this write-up. Normally my construction time is only about half of the time I take
painting. Here the times are almost even, and this was a complex painting project. Because
of all the kit options, this is a complex model to build. The following lists all the
out-of-the-box options that Hasegawa provides with the kit.
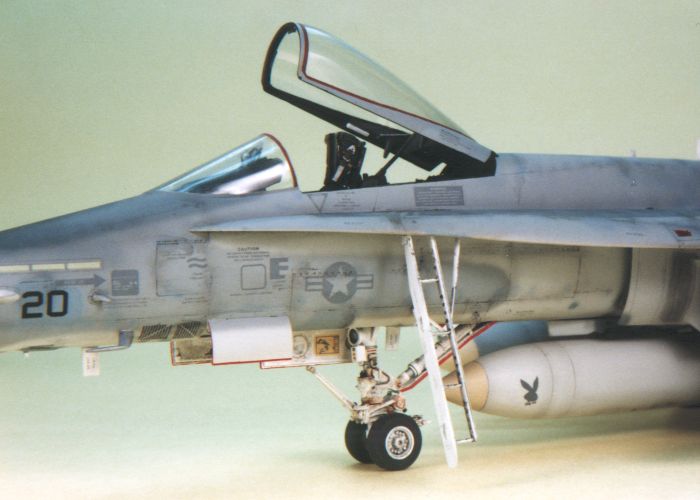
Raised Cockpit Detail with Photo Etched Portions for the Main Instrument
Panel
Cockpit Canopy (Up/Down)
Landing Gear (Up/Down) with White Metal Landing Gear Struts
Catapult Launch Bar (Up/Down)
Variable Position Wing Leading Edge Flaps
Wing Trailing Edge Flaps (Up/Down)
Variable Position Horizontal Tails
Variable Position Rudders
Speed Brake (Up/Down)
Optional Engine Exhaust Cones
Optional FLIR and LASER Guidance Pods
In spite of all the building options, the fit on my kit was nearly
flawless, even in places I would have expected problems (like around the intakes). I
needed no filler to build this kit. The wing trail edge flaps gave me the most trouble as
the hinge points are quite delicate, but with a little extra attention, even they worked
as advertised.
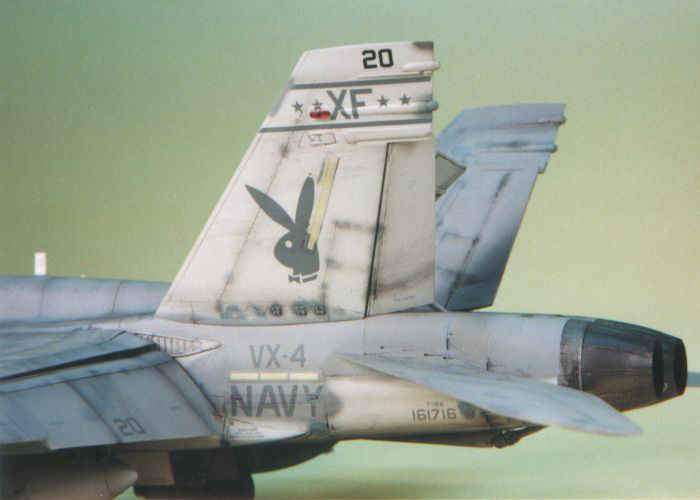
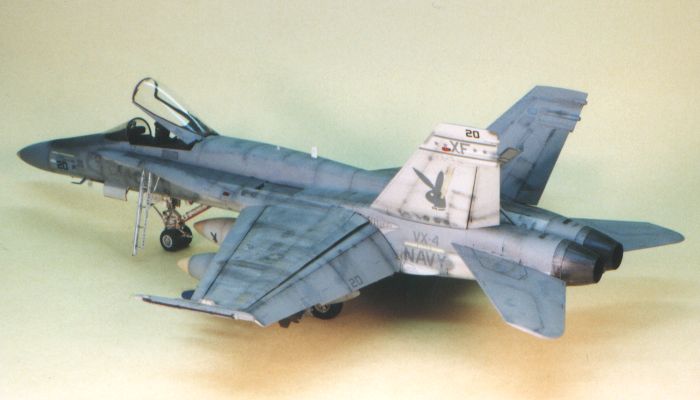
I wanted something different for markings on the model. SuperScale has
about a hundred different F-18 decal options, but most all of them in my opinion were
"ordinary". After looking through several books and magazines, I came across a
couple pictures of some VX-4 aircraft that had gotten the "Playboy Bunny" motif
added to their tails. Having always liked that marking, I decided that was the one to
build. What really made the decision (besides the bunny) was the camouflage on the VX-4
aircraft. They were still in the original Light Ghost Gray (F.S.36375) over Light Gray
(F.S.36495) with really beat up finishes and touch ups in various non-matching colors. I
like a painting challenge, and this was definitely that.
Project Statistics |
Completion Date: |
26 August 1992 |
Total Building Time: |
72.0 |
Research: |
4.9 |
Construction: |
28.9 |
Painting: |
31.2 |
Decals / Markings: |
7.0 |
Extra Detailing / Conversion: |
0.0 |
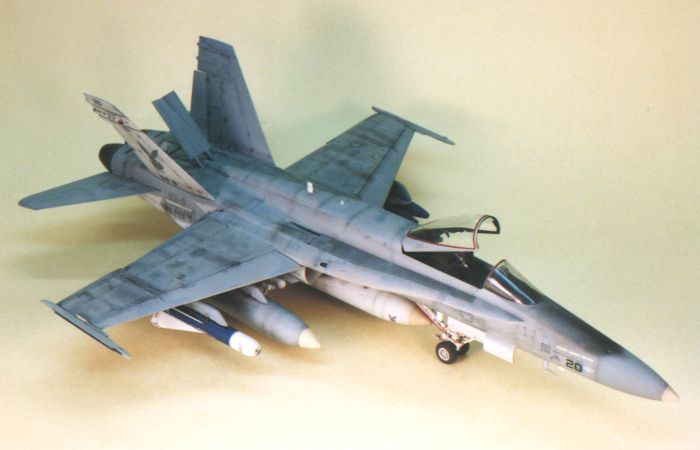
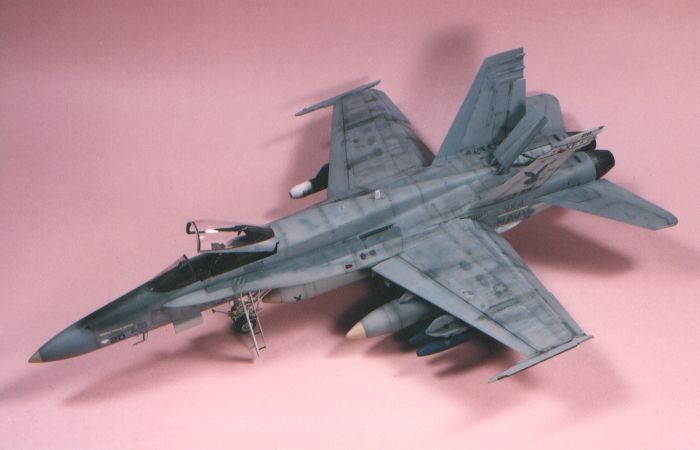
For the camouflage, I used all Testors Model Master enamel paints. I
painted the basic camouflage of Light Ghost Gray over Light Gray. Then I started making
small "touch-up" paint splotches using varied shades of grays and blue. I used
the following colors for this - Graish Blue (F.S.35237), Neutral Gray (F.S.36270), Dark
Ghost Gray (F.S.36320), and a custom mixed light blue color that I frequently see in
photographs of US Naval aircraft from the period. The process of painting all the little
paint spots was time consuming, but the results were very worth the effort.
The decal markings all did come from SuperScale. I used
various decal sheets looking specifically for decals printed in the gray colors that
matched the paints I was using. The majority of the decals came from SuperScale sheets
#48-191 and #48-246. The bunny motif on the tail was taken from a VX-4 F-14 sheet
(#48-422).
I weathered the model using thinned down enamel paint
washes to highlight the panel lines and add streaks from fluid leaks. Then I air brushed
the same thinned down paint to add shading and show general wear and tear on the airframe.
A final pass with silver dry-brushing rounded out the weathering.
 Home
| What's New |
Features |
Gallery |
Reviews |
Reference |
Forum |
Search
Home
| What's New |
Features |
Gallery |
Reviews |
Reference |
Forum |
Search