Home
| What's New |
Features |
Gallery |
Reviews |
Reference |
Forum |
Search
Home
| What's New |
Features |
Gallery |
Reviews |
Reference |
Forum |
Search
|
|
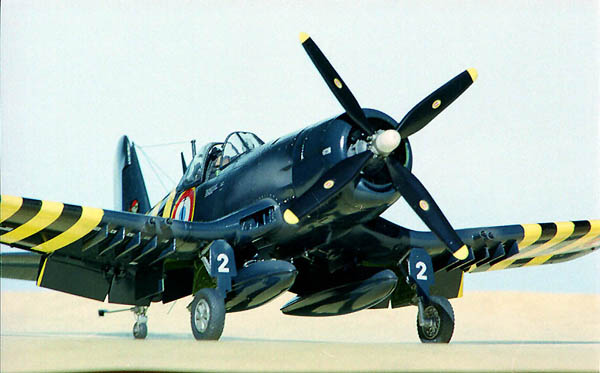
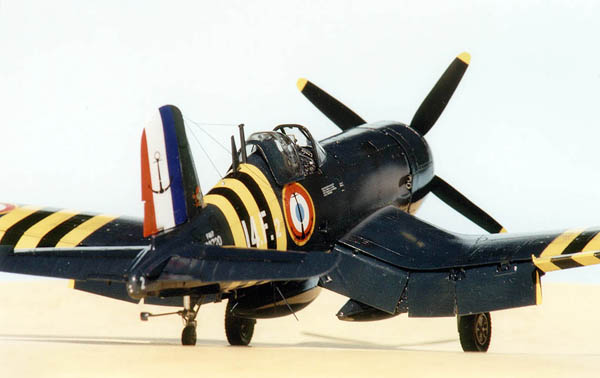
Vought F4U-7 Corsair by Darren Mottram
"The Department for Modeller's Mental Health wishes to advise that the following article contains details of an inaccurate model. People who may be offended by such material are advised not to read this article." All kidding aside (although it may not be kidding to some people), immediately after I had finished this kit and submitted the article, I became aware of some information about the F4U-7 that highlighted a serious flaw in my model. It appears that the F4U-7 retained the vestigial cowl cheeks of the AU-1 (similar to covered over intakes on the F4U-5) in addition to the chin intake of the -4. I had no idea of this when I built my model (I found it rather hard to find good info on the -7 anywhere) and indeed even since discovering this information and going back to photos, I still find it very difficult to see. In light of this, I asked Brett not to publish the article. After encouragement from Brett and others I have decided to go ahead with it anyway. I hope you will understand my error and find the article of interest anyway.
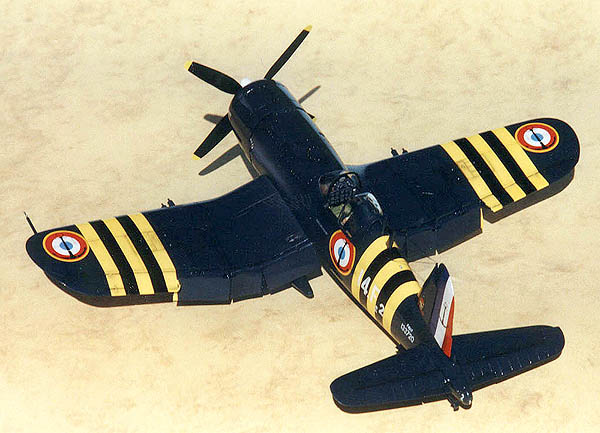
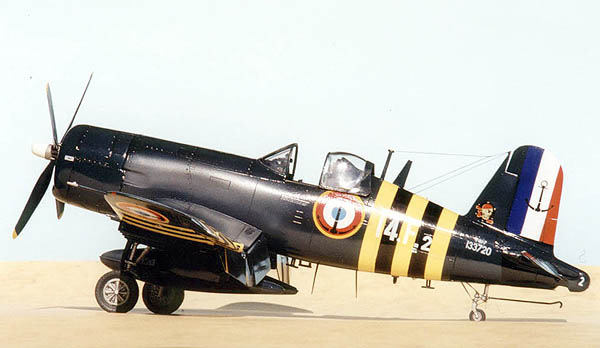
Boy is there a story behind the creation of this kit! It has been under construction for the best part of three years, although, of those, it has been "on hold" for about one-and-a-half years. I really like the -7 version of the Corsair. It combines the best bits of the -4 with the longer fuselage and raised cockpit of the -5's. Combine this with French Navy markings and Suez identification markings and drool... well, you get the picture.
So, naturally, when Heller released their kit of the -7 some years ago I went straight out and bought one. I assumed that it would probably be of the same quality as the (then) recently released Airfix Buccaneer and Jaguar as these two companies are closely associated. What a disappointment! The kindest thing I could say about it was that it might have made an average "snap-tight" kit! I had, in preparation, also bought an Aviation USK detail/conversion for a F4U-5N to use as a detail set for this kit. Needless to say, without a decent kit on which to use the detail set, both were consigned to the back of the cupboard for the foreseeable future. A couple of years later, after my confidence in my skills had improved a bit, I started to toy with the idea of combining the Heller kit with an Academy -4 that I had lying around. Now I know there will be many of you who will decry the Academy kit as rubbish (and it was many of these comments which I came across after I had "found" the internet which were responsible, in part, for my "giving up" on the project half way through). My defences are as follows,
Anyhow, on to the construction:
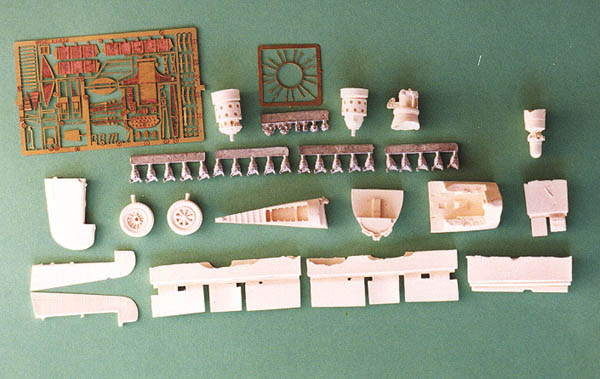
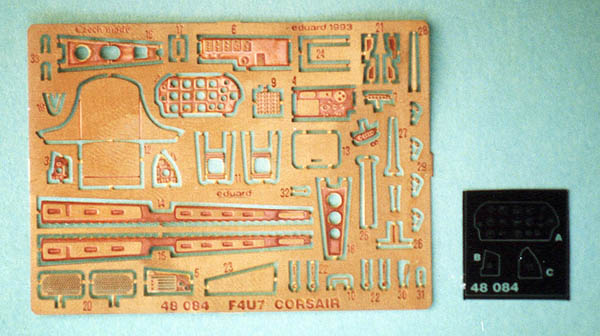
Photos 1 and 2 (click on the thumbnails below for full-sized images) show the main parts of the Aviation USK (Av'USK) and Eduard detail sets which were used for this kit. In the end, I didn't use the Av' USK elevators, prop hub, and some of the etched details.
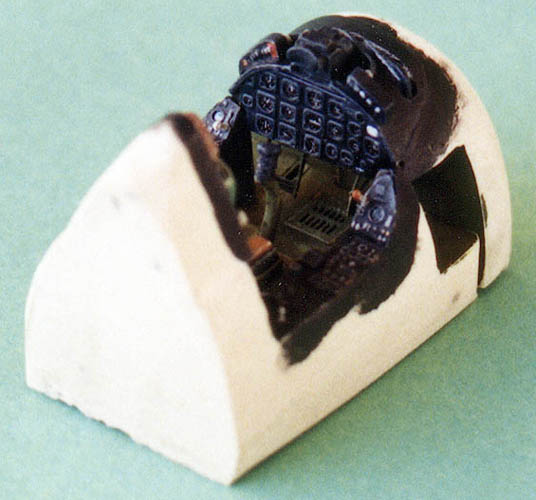
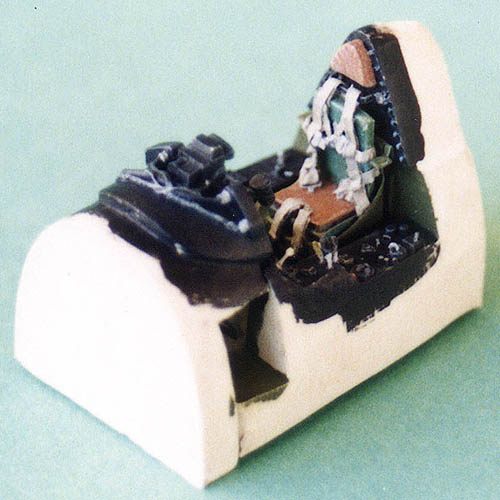
Photos 3 and 4 show the completed cockpit tub. This was the first time I had used an etched instrument panel with a film behind it. I must say that I was *very* impressed with the effect it creates!
The seat straps were made by threading paper belts through a set of Reheat etched brass buckles.
The various levers and details are a combination of the best bits from the Av' USK and Eduard sets.
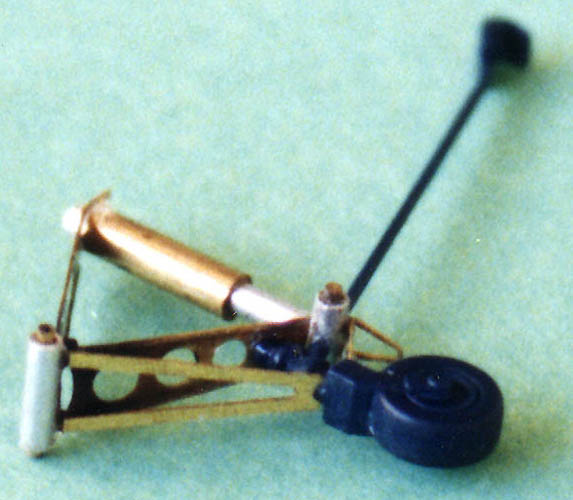
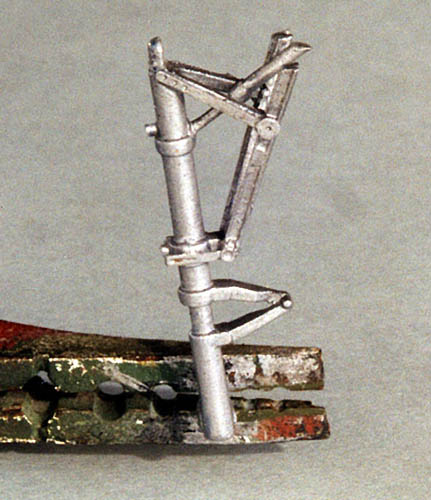
Photos 5 and 6 (click thumbnails below) show the detail added to the undercarriage units. The Heller parts were used for the main gear whilst tail wheel was a *very* delicate little unit. It was made using kit parts (dark blue) brass details from the two etched sets and scratchbuilt parts from metal tubing.
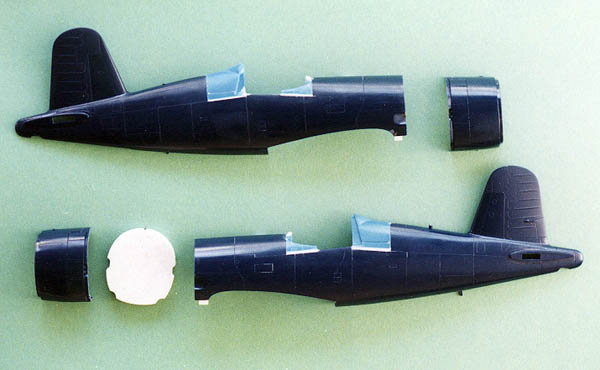
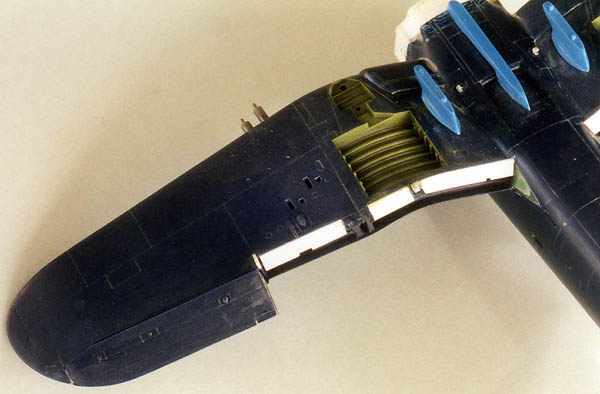
Photo 7 shows the start of the main surgery done on the fuselage. Originally I had planned to cut the extra fuselage length, as a plug, from the Heller kit and add it to the front of the Academy kit, but when I went to mate them up, I found that the exhaust "cut-outs" around the fuselage didn't line up fully. In the end I decided that it would be easiest to make the fuselage plug from laminated plasticard using the Heller "plug" as a guide (not having any 1/48 F4U-7 plans to go by).
You can also see where I have grafted the Heller cockpit area onto the Academy kit. I used the forward portion as well so that the Heller canopy would fit on.
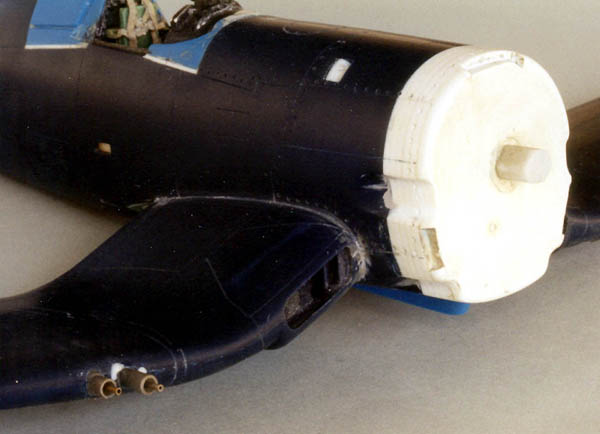
Photo 8 shows the fuselage plug installed. The cut-outs around the edge were to take the modified cowling. The stub of plastic in the middle was the mounting point for the engine. A suitably sized piece of plastic tube was attached to the rear of the engine and slid onto the stub. This allowed easy and frequent trial fitting of the engine assembly to help set up the correct positioning of the cowling. The wing-root radiators were also built up using parts from both the Heller kit (inboard guide vanes) and the Academy kit (radiator faces).
The cannon were made up of plastic tubing outer covers and metal tubing barrels (you can see the repairs to the wing where I go it wrong the first time). Scoops were added to the upper fuselage and the footstep can be seen below the cockpit. Most of the panelling around the forward fuselage / engine area had to be re-scribed for the -7 version and I added fastener detail around these panels as it seemed to stand out on the French aircraft.
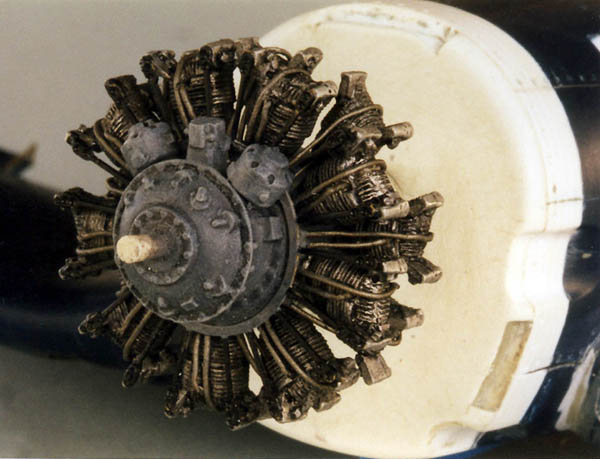
Photo 9 shows the new engine mounted (temporarily) onto the fuselage. It was made from the parts supplied in the Av' USK set with the addition of fine solder for the ignition wires. The crank case was painted Grey, the etched pushrods gloss black and the cylinders were left bare metal then the whole thing was given a wash of black acrylic. I was very impressed with the look of the finished assembly.
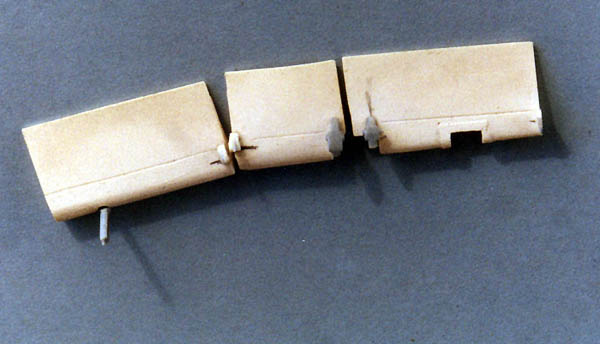
Photos 11 and 12 (click the thumbnails below for the full-sized images) show the modifications and detailing to the wing / flap area as well as the details added to the Av'Usk resin flaps. I had a devil of a time trying to get a good set of photos to work out "what was going on" in this area, so some of it is "educated guesswork".
Also visible in photo 11 are the Heller pylons (the centre one later had etched details and sway-braces added), the repositioned aileron, the painted wheel well (I know they're too shallow but they're good enough for me) and the filled in shell ejector port. Some details which aren't quite so obvious are the cut-outs for the boarding ladder just aft of the wing trailing edge, the hollowed out areas under the wing-root radiator outlet flaps, the etched brass trim tab actuator on the inboard end of the aileron and the catapult hooks. These last items were made by using the hooks from a Hasegawa FGR2 Phantom (supplied for the FG1 version but not required for the FGR2).
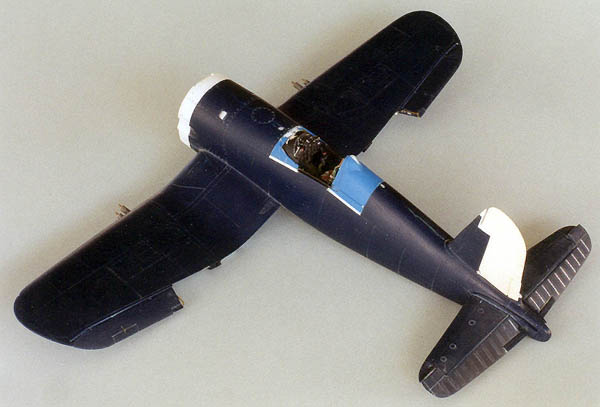
Photo 13 gives an overall view of the kit and shows some of the scratchbuilding and detailing which has been done. The elevators and ailerons have been repositioned as have their trim tabs and the resin rudder has been added (deflected). All of the trim tabs on the control surfaces each have an attached brass actuator fitted (the ones for the elevators are underneath). The outer wings have been sanded smooth to remove the fabric effect of the -4's earlier wings.
It was at this stage that the kit was nearly never finished. One summer afternoon, a strong wind came up and was blowing for a while. I went into the modelling room to check if everything was OK when, as I was walking across the room, I felt something roll along the floor under my foot. I looked down and saw a rather squashed Corsair canopy! Although it didn't break (it gives you an idea how hot it was that the canopy bent and squashed rather than breaking) there were stress lines in the top which had sent it almost white (not to mention the "stress lines" in me!) I looked through all the magazines and asked around but I couldn't find a vac-form canopy to replace it. This, combined with some very unfavorable comments I was just beginning to hear concerning the base kit's accuracy (or lack thereof), made me decide to just give up on the kit and shove it to the back of a cupboard. I moved into my new house 18 months later at the beginning of this year and, in a fit of enthusiasm, posted a request for a new canopy here on HyperScale. I was rewarded almost immediately with a response from Kieran in Melbourne who sent me his. Despite this "save" I still couldn't get really interested in continuing. I had been in my house for about 6 months and was suffering a severe "modeller's block". In fact I realized that, despite having pretty much the perfect modelling set-up, I hadn't finished anything for about 12 months! (the P-47N and F6F-5K shown elsewhere here on HyperScale were my last completed kits). So, recently, I decided to just "jump back in" and try to finish this kit. I had to decide to ignore the comments about the Academy kit as there was nothing I could do about it at this stage (besides, I wasn't convinced that I could see the problem myself). I also felt that the work I had done up to this stage would be wasted if I just left it and I was quite proud of what I had achieved so-far. As a result, after a hiatus of nearly two years, I "hooked in" and got the kit finished in about four weeks. Because I was keen to keep going once I had started, I didn't take any more photos of the construction phase so there's just the finished kit.
Other things done during the kit's renewed progress included separating the sway braces from the Heller external tanks, grafting the Heller underwing pylons onto the Academy wings.
Heller kit items were also used for the upper mast and blade antennas and undercarriage gear doors, the etched tailwheel doors from the Eduard set were used, the prop was the Academy item (it's hub was just as detailed as the resin item in the Av' USK set). Etched items were used for the lower antennas, stretched sprue for the upper cable antennas and upper, lower and tail lights made from crystal clear. The kit still wasn't without it's problems at this stage however, it very nearly became "airborne" across the room whilst fitting the flaps!
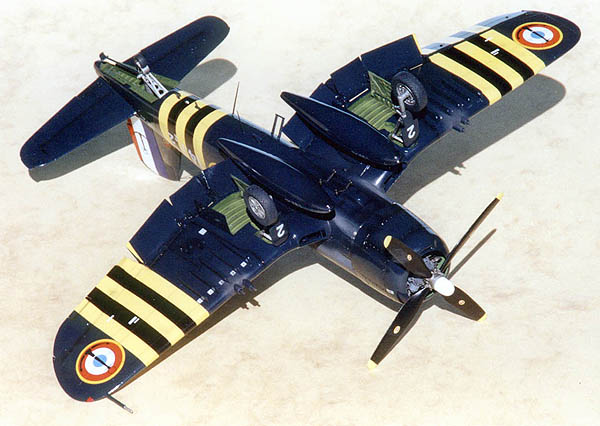
The model was undercoated with Humbrol Matt White. Humbrol Gloss Yellow was applied to the areas for the Suez stripes which was then masked and painted gloss Black.
The stripes were then completely masked off and Humbrol matt Black applied to the canopy area. Once all this was finished, the kit was painted overall with Testors gloss Sea Blue.
Markings were a combination of Heller kit items and Model Art sheet 48/006. I was apprehensive about the transfers as the Model Art items looked thick and I had had trouble using them (from the same sheet) on my D520 previously, and the Heller markings looked very matt (usually a bad sign). I tested Polly Scale Decal Softener on both types and found no troubles. The decals all reacted well to the softener and ended up settling down quite well. The only real hassle was that the yellow ring around the Heller national insignia (Heller's white was more opaque so I wanted to use them). I used a set of Aeromaster white circles with yellow surrounds meant for RAF type C1 roundels. I then cut the yellow from the Heller decals and applied them over the Aeromaster items. I also added a white decal stripe to the tail insignia.
The combination of the dark blue on the rudder stripe and the light blue of the roundels (normally they'd all be the same, light or dark) is from the one, fuzzy, photo I found of this aircraft. Once the decals had dried any residue was cleaned off and a coat of Floquil Crystal Cote varnish was applied which gave a beautiful gloss finish.
An acrylic wash was applied to selected areas (around the engine panels, control surfaces, access panels and (very lightly) over the yellow and white areas of the scheme) using thinned down "Black Wash" from Citadel Miniatures fantasy paints. Tamiya enamel Smoke was applied to represent grease, oil and grime around the engine, gun bays, control surfaces , cockpit and walkways. A second, sealing, coat of gloss was applied before the remaining masking was removed and fiddly bits such as antennae and lights were added. Exhaust and gun blast staining was added using mixtures of Humbrol Black and White and some areas such as around the gunbays and wingroot walkways had matt varnish applied sparingly. A few touches of silver were added to panel fasteners and a few panels to indicate replacement fasteners and light wear.
The engine and cowling were glued on, wheels added, canopy and external tanks attached and the cable antennae fitted.
So there you go. I've probably committed several "howling errors" in the production of this kit .After all, most of it was done by the "T.L.A.R" method (that looks about right) but it looks like an F4U-7 to my eyes (and those modellers who have seen it.) I've also learned a few tricks and discovered a bit more about what I can do along the way. Now, this must mean that Hasegawa's just about to release one doesn't it? Model, Text and Images Copyright © 2000 by Darren
Mottram
|