Home
| What's New |
Features |
Gallery |
Reviews |
Reference |
Forum |
Search
Home
| What's New |
Features |
Gallery |
Reviews |
Reference |
Forum |
Search
|
|
Lockheed F-5A-1-LO Lightning by Werner Scheibling
Back in the mid-sixties I just had to spend all my pocket- money on a model kit of Monogram's famous 1/48th scale Lightning. The boxtop art was extremely impressive and the extravagant lines of that remarkable aircraft really grabbed my attention. Kelly Johnson's timeless design has stayed my favourite aeroplane ever since. I would have loved - then - to build the photo- reconnaissance version provided with the kit, but that was far beyond my modelling abilities (imagine cutting sections of plastic off and gluing on different parts!)
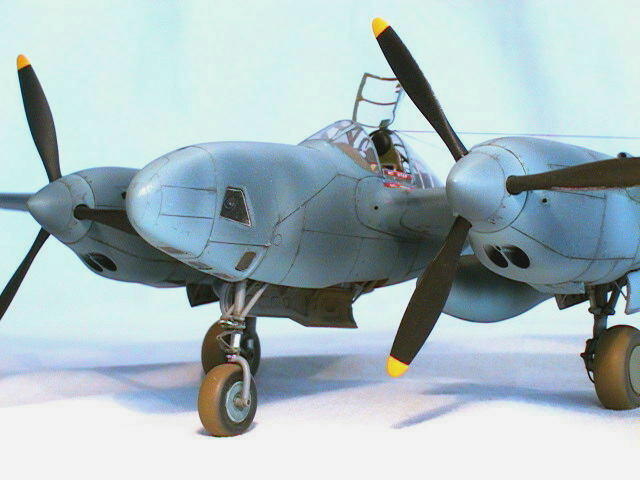
Since then I've built three more Monogram and one Hasegawa 'Lightning' which unfortunately all fell victim to the breaker's yard or tragic accidents. My most recent Lightning was a photo-reconnaissance version. It was destined to be as sleek and fast-looking as possible, in blue 'haze' trim and boosted with a lot of goodies from the aftermarket manufacturers.
Technical Description From June 1942 onwards the improved 'G'- mark of Lockheed's P-38 (model 222) came off the production lines. Parallel to the fighter versions altogether 180 photo-recon ships were produced as F-5A-1-LO, -3-LO and -10-LO. The F-5As incorporated all the uprated equipment, that boosted the performance of the fighter versions: improved radio and oxygen installations, automatic coolant radiator shutter control, and, mainly two Allison V-1710-51/55 (right/left turn respectively) 12 cylinder V-engines equipped with General Electric B-13 turbo-superchargers, which offered 1325 hp for take-off.
Output was restricted to 1150 hp at 27,000 feet because of insufficient intercooling of the intake air. The sleek and optically pleasing lines of the early type engine-nacelles could only house two circular air-intakes for the oil-coolers, but no intercooler. The supercharged hot intake-air was ducted through the hollow wing leading-edge section between wing-root and engine- nacelle where it would have been cooled down. A brilliant idea- it just didn't work well enough. Max. speed was 400 mph at 25.000 feet, service ceiling was reached at 39.000 feet. As the F-5 A/B was unarmed, the pilots had to rely completely on speed and their flying skills to escape from enemy fighter attacks.
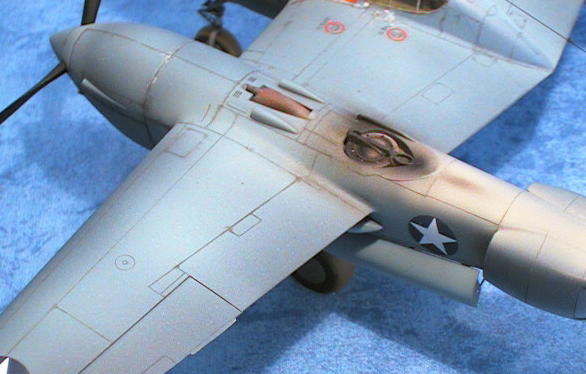
Camera Equipment The F-5A and B could be equipped with a multitude of different camera installations. The most widely used and standard installation was two 24-inch focal length K-17 or K-22 cameras in vertical camera ports Nos.2 and 3 (viewed from the front). The two cameras were angled at 9 ˝ degrees each to the vertical (front camera: right, second camera: left). Flying at 24.000 feet, the pilot would take pictures in exactly 1:10.000 scale. The evaluation of the two simultaneously shot black-and white photos with special optical equipment created a perfect three-dimensional effect where the two matching sectors overlapped. This process was called 'split vertical photography'.
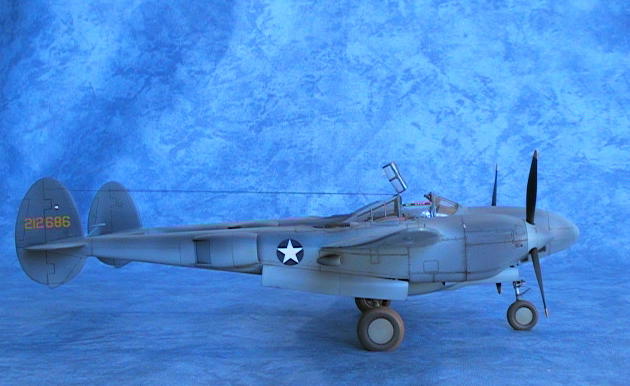
Camouflage Between March and October 1942 all Lockheed F-4s an F-5s were painted with a newly developed system that should have rendered the high flying reconnaissance aircraft nearly invisible against the blue sky. Dubbed 'haze', the new camouflage consisted of two coats of different shades of paint. First, the aircraft was sprayed overall with a very dark base lacquer. Varying sources speak of either black or very dark blue. Then multiple thin coats of a special whitish paint were irregularly applied over the dark base coat - heavier on the undersides, the shadow areas and certain panel lines, lighter on the upper areas. The white lacquer contained a very fine pigment of zinc oxide. According to it's inventor- the Boston paint manufacturer Samuel Cabot - the combination of the two paints should have reflected only the wavelength of blue and violet light and absorbed the other parts of the light spectrum: the perfect camouflage in a deep blue sky. In practice this system didn't work all that well. The paint weathered quickly and lost its special qualities all too soon. So the USAAF ordered Lockheed in October 1942 to stop the time consuming process of 'haze' application and instead to use the well-proven olive drab/ neutral grey scheme as on the fighter versions.
By January 1943 Lockheed and the Sherwin- Williams Paint Company had developed a suitable replacement paint scheme for high-altitude reconnaissance aircraft. The new scheme was called 'synthetic haze' and consisted of an overall sky blue base coat and a lighter tint of blue that was thinly oversprayed in multiple layers, similar to the original 'haze' scheme. From a distance of a few hundred yards the aeroplane looked uniform blue and blended into the sky blue background very well. All reconnaissance 'Lightnings' were camouflaged 'synthetic haze' from March 1943 onwards.
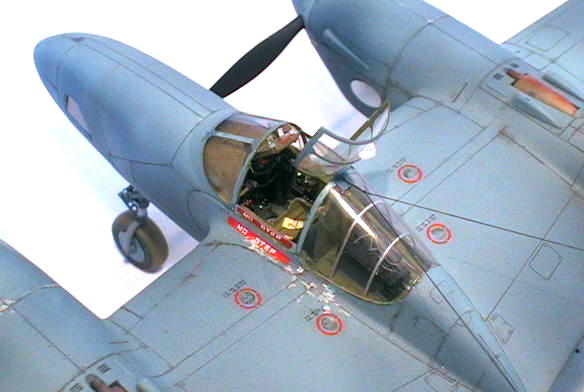
I won't give you a detailed summary on the high and low points of the Hasegawa kit. I'd rather suggest you read Lee Kolosnas inspiring feature article on his P-38 F from the 30th of July 1999 here on Hyperscale. I've had exactly the same experiences with my sample of the kit - especially the warped right boom. By the way - I've never done such a lot of filling and sanding on a Hasegawa kit before and since. The wing/boom joints, the radiator intake lips and the engine nacelle oil-cooler insets were a rather lousy fit and needed a lot of filling and blending-in along the contact surfaces. Let's hope that Hasegawa use the time until the re-issue of that kit later this year to correct the moulds. Paragon's conversion set comes as two precisely shaped and beautifully cast parts of a light cream resin that reacts very well to cyanoacrylate (superglue); the lower nose section from the front wheel-bay forwards, and the nose cone. Additionally you get a little section of clear acetate to reproduce the glazing of the camera bay windows. All panel lines are finely engraved to match the Hasegawa kit. The lower nose section of the kit had to be cut away along the panel lines. After a lot of very careful sanding (your sanding tool has to be perfectly level!) and even more dry fitting, the two resin parts were clamped into position and thin superglue was flowed from the cutting edge of a scalpel blade into the contact surfaces. The capillary effect virtually sucks the glue in and with a bit of care no mess is created at all. The remaining empty space in the nose was filled with little lead balls (air rifle ammo), sealed in with a generous amount of white glue. That was just about enough weight to prevent the model from tail-sitting. To be on the safe side you could put a bit of additional weight into the front ends of the engine nacelles. Paragon have mastered their parts perfectly and only a tiny bit of sanding with #1000 wet-and-dry along the joint-lines is necessary to obtain a completely smooth fit. A fine reproduction of a camera lens is moulded into every single camera bay. It is up to you to choose your preferred camera installation and delete all the other 'lenses'. I worked with a Dremel-like power tool, equipped with a very fine diamond ball grinder and removed the surplus lenses (my dentist would be proud of me). The void was painted matt black. After glazing with cut to measure acetate panels the result was convincing. The cockpit was built up with the True Details resin update kit and Eduard's brass and acetate instrument panel using all the well known techniques of painting, dry-brushing and weathering.
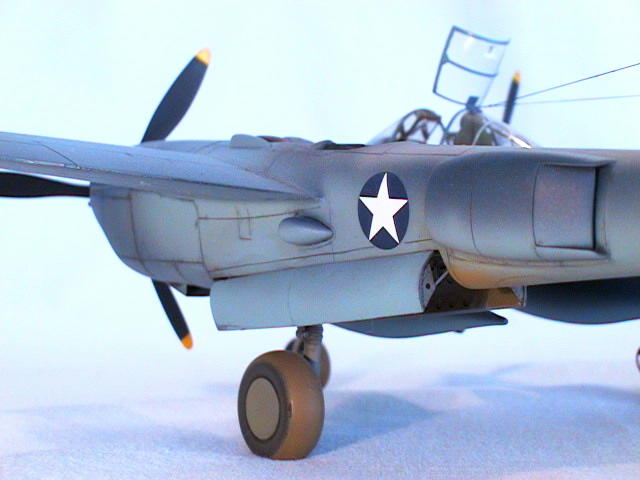
The cockpit set was mastered for the 'Academy' kit - which I found out only after opening the sealed bag. With a bit of sandpaper- treatment it fits very well, though. Apart from the front windshield the clear parts were thermoformed, using the originals as moulds. The two strengthening braces of the rear cockpit glazing were made from silverplated copperwire and glued into place with superglue. On close-up pictures of the real plane I saw that these braces supported the curved Plexiglas from the inside, so I didn't want to paint them on. The main wheel-well doors are the only real pain-in-the-neck of this kit. In reality the doors opened via rather tricky pantograph-like hinges (sorry, I couldn't find a better word), that lifted the doors slightly out and up of the wheel well. Hasegawa took the straight and easy path with their kit.
Try to glue the doors on via the five straight location pins that Hasegawa offers and you'll loose your marbles! The only remedy is to cut off the middle three pins. This allows the curved door to sit slightly higher on the outside of the wheel well which looks very much more like the original. This F-5A did not carry the typical radio mast on top of the nose cone.
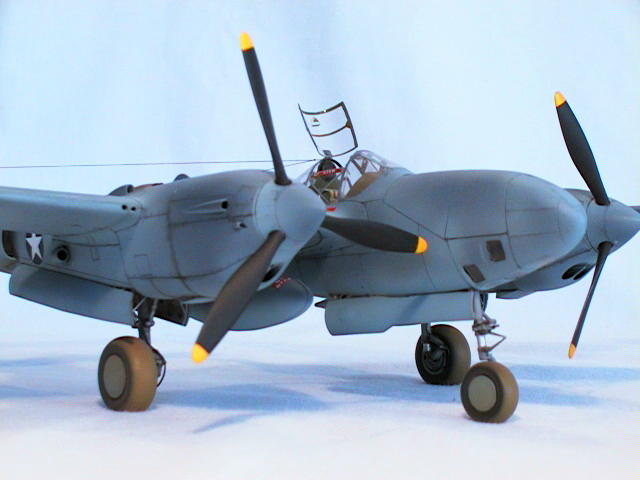
The camouflage for the plane I chose to model was most likely painted in the 'haze' finish. Unfortunately I've seen only very few black and white pictures of these early recon planes (amongst them one of 'my' plane in Squadron/Signal). I didn't feel convinced enough to try the 'black and white' described earlier because that might have turned out like some kind of strange winter camouflage. So I tried to create an effect similar to the numerous colour photographs that I found in my books (see References) - even though I have to admit, that these planes were mostly later models painted 'synthetic haze'. The shades of blue in these pictures range from very dark purplish blue to very light sky blue.
For the base coat I mixed Aeromaster acrylic 1044 (US Sea Blue Flat) with a good dose of Aeromaster acrylic 1015 (RLM 24 Blue). The overspray was done with a transparent light blue-grey that I mixed from three different shades of paint. This stage of airbrushing was the only real experiment. Our local airbrush shop here in my little town in Southern Germany produces artist acrylics in licence of the US 'Aqua Flow' company under the brand name 'IllumaAir'. The paint is very pleasant to work with, but is removable with a special chemical eraser fluid (in case you shouldn't like the raging Viking on your 4WD's bonnet any more...). That means, 'IllumaAir' can't be oversprayed with any of the common modelling acrylics - it would crinkle immediately. It worked as a top coat after the Aeromaster coat had cured for three days and lost all it's solvents. So the final top coat of flat clear had to be 'IllumaAir' as well. The decals are all by Aeromaster. The national insignias are from the 'Neutrality Patrol' sheet and were originally intended for Wildcats and Kingfishers in pre-war outfit. They match the 'Lightning' perfecly. I have never used Future or gloss clear before decalling with Aeromaster decals. They always went on without a trace of silvering using Aeromaster 'Set' and 'Sol' solutions. A few more little details, like brake lines, and my F-5A was ready for the camera.
Text and Images Copyright © 2000 by Werner
Scheibling
|