Home
| What's New |
Features |
Gallery |
Reviews |
Reference |
Forum |
Search
Home
| What's New |
Features |
Gallery |
Reviews |
Reference |
Forum |
Search
|
|
|
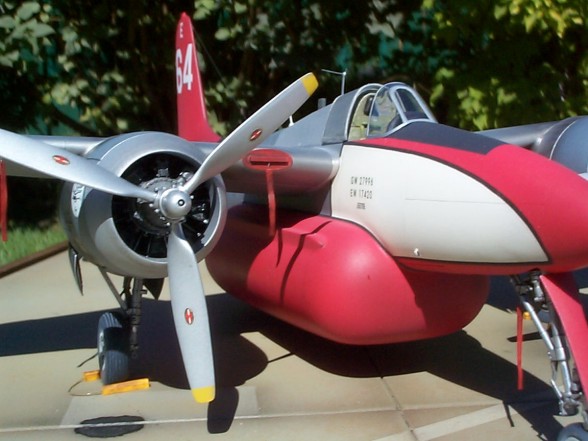
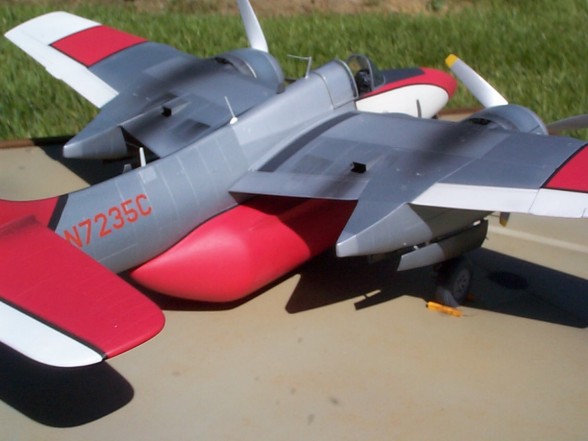
F7F Tigercat Firebomber by Jimmy Cancino
This project began with an inspiring photograph found in a book titled "Workhorse Props" by Gerry Manning. It depicted a F7F converted to a fire bomber based Ryan Field, Hemet, California in 1973.
The project began with AMT's 1/48th scale F3F-7. Not a bad kit actually with nice recessed panel lines and separate vinyl tires. It is molded in an easy to carve light gray styrene and the clear parts are very nice. Also part of the project were HiTech's resin cockpit set, Ventura Hobbies resin belly tank, Eduard's F7F photoetched set as well as Aeromaster's excellent "Tigercat firefighters" decal sheet.
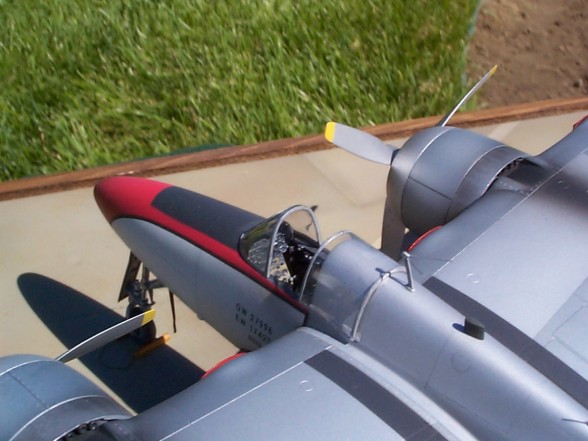
After much carving-out of excess resin the cockpit went together easily and locating tabs made from Evergreen styrene rods were fitted to properly locate the cockpit assembly within the fuselage halves. The instrument panel from the Eduard fret was used and additional detailing was fabricated at this time. The cockpit area was painted Interior Green (medium shade then faded) .
A note on what is known as "Zinc Chromate Primer Green" This is merely a chemical composition of the actual primer as this was the primer of choice back in those days. Proven highly carcinogen, it has been faded out of use in most of the aviation industry since the early nineties in favor of the more health friendly (!) epoxy based primers. Both Zinc Chromate and Epoxy based primers are known to be available in various shades from yellow to olive green or even gray. Knowing that "Zinc Chromate" means many things for many people (like Khaki), the best way to know exactly what color to use for a given project is to access actual photographs and/or Federal Standard color numbers, and remember that actual aircraft interior colors often varied from model to model and sometimes depending on primer availability especially during war years. Ample nose weight was then installed using lead shot held with five minute epoxy glue. A note of caution: This aircraft will be somewhat tail heavy when completed especially due to the resin tank and the nose gear will be stressed in tension. Therefore a good dry fit on the nose gear strut is recommended as well as re-inforcement of the strut to fuselage joint. Ideally the aircraft should be hard-mounted to the display base by all three wheels. After closing-up the fuselage halves the wings were next to be tackled. The nacelle to wing fit needed a lot of filler to blend together properly. A 0.015" thick bulkhead was fabricated from styrene sheet and embossed with rivet pattern and installed to close-off the fwd & aft ends of the nacelle in the wheel well.. Miscellaneous scratchbuilt details such as door hinges and actuating arms, hydraulic lines, filters and valves along with assorted wiring harnesses and junction boxes were the added to dress-up the wheel well area per reference photographs.
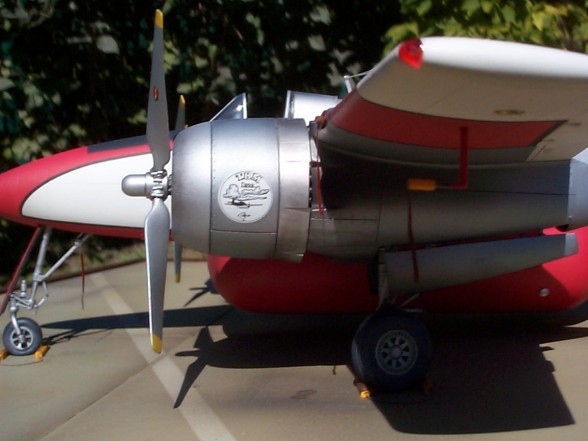
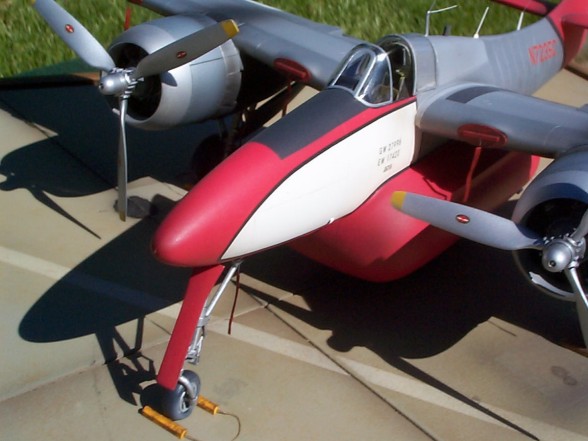
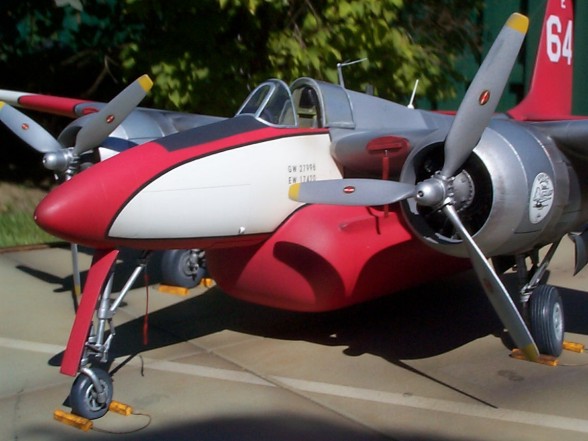
Next up was fitting the Ventura tank to the fuselage. This is best accomplished with the wings not yet installed, as the area between the wings and the top edge of the tanks would be very hard to access otherwise. At this point I may suggest to hollow-out the inside of the tank by carving or grinding out as much resin as possible to reduce weight. From the outset the fit of the tank was not very good and a lot of filler putty was required to fill the gap between it and the fuselage. I used two-part epoxy automotive finishing putty because it cures by catalization process and therefore avoids the shrinkage problem. Once the basic tank was installed two outer shoulder ribs were fabricated using triangular shaped Plastruct channels and faired in with filler. Under tank drop doors were then made out of 0.005" Evergreen sheet and installed as were the fill port (turned aluminum) and vent tubes (brass). The wings were then installed using CA Glue and the kit engines fitted with Verlinden prop governors and magneto's were painted engine gray with steel heads, washed, dry-brushed and slipped into place.
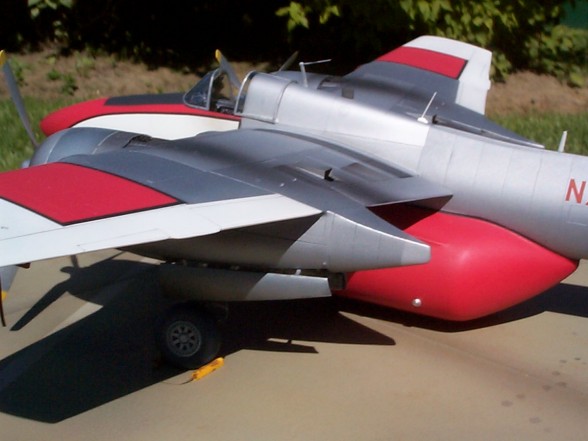
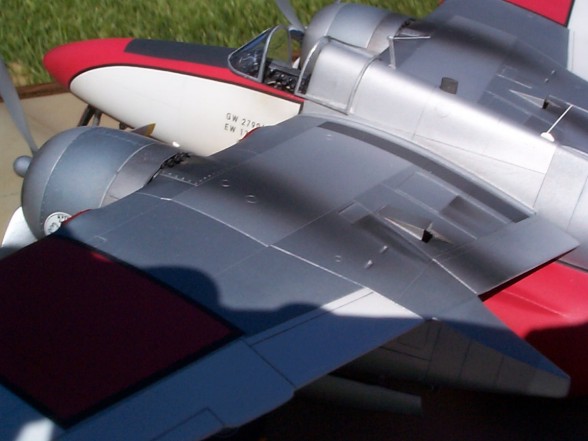
Several shades of Modelmaster Metalizer metalics were used to replicate the different skin panels and a coat of Aeromaster satin clear coat was sprayed overall to give that oxidized finish seen on the actual aircraft. Modelmaster Enamel Insignia Red and Insignia white top off the color scheme. Exhaust streaks were airbrushed on using an 8 to 1 ratio of Isopropyl alcohol and Tamiya Acrylic flat black. The Aeromaster decals went on beautifully and settled down nicely with Micro-Set and Micro-Sol.
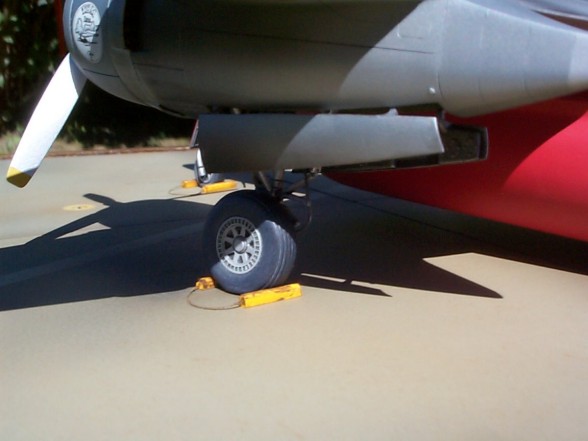
Civilian VHF, transponder and ELT antennas were fabricated from styrene and the completed landing gear sub-assemblies were added at this point. The Hi-Tech detail set supplied the weighted main wheels in resin. The nose wheel is a spoked T-33 resin unit from True Details to replicate the actual aircraft whose front wheel covers were not installed when the aircraft was operated as a firefighter.
A custom 15" x 15" Maple base showcase was purchased giving about an inch clearance all around the aircraft. The tarmac surface itself is made from 0.080" white styrene. I engraved the concrete slab lines using a Squadron scriber. A few crack lines were added at this point. In order to add a bit of texture I then spread fine sand to cover the entire styrene sheet and proceeded to lightly hammer the sand in order to imprint the styrene sheet with microscopic dimples to replicate an older concrete texture. The sheet was then thoroughly cleaned and dried in preparation for painting.
A basic Light Sea Gray (FS36307) coat of Model Master enamel was airbrushed and several clouds of varying shades of the base color were the worked in. A white line was masked across the base and faintly airbrushed diluted white Tamiya acrylic, giving it that worn look. Next, a grounding point was added. Grounding points can be found on almost every airfield tarmac. It is standard practice to ground the aircraft when refueling or replenishing oxygen systems. The object of this procedure is to unload any static electricity buildup, which could generate a spark, which in turn could have disastrous consequences. They consist of a conical depression in the concrete at the bottom of which protrudes steel pin. The airplanes are then grounded to these pins via a steel wire with alligator clips at each end. One clipped to the steel rod tip and the other end clipped to a designated point on the airframe or landing gear. This was created by counter-sinking (100 deg.) an area approx. 3/16 in. in diameter. A # 75 hole was then drilled in the center. A piece of stretched sprue was painted "rust" then washed in black and finally rubbed with graphite powder. This piece of sprue was then inserted into the grounding hole simulating the steel pin. The grounding hole was then painted yellow to help ground crews to spot it easily on the tarmac. Next a set of wheel chocks were fabricated from evergreen styrene stock and painted Insignia yellow. All that was left at that point was to fabricate the miscellaneous safety covers and warning flags from styrene and lead foil. These covers are essential on aircraft that are stored or parked outside as they prevent foreign objects, from entering critical ports and air intakes. Birds and bugs are a special threat, as they tend to build nests in cowlings, NACA scoops, pitot tubes, static ports, etc.
Overall a very satisfying and colorful project that stands out amongst the crowd of military aircraft. Please do not hesitate to e-mail me for any questions regarding this project.
Jimmy Cancino St-Constant, Quebec, Canada jimmy.cancino@videotron.ca
Click the thumbnail to view the
image full size.
Model, Images
and Article Copyright © 2000 by Jimmy
Cancino
|